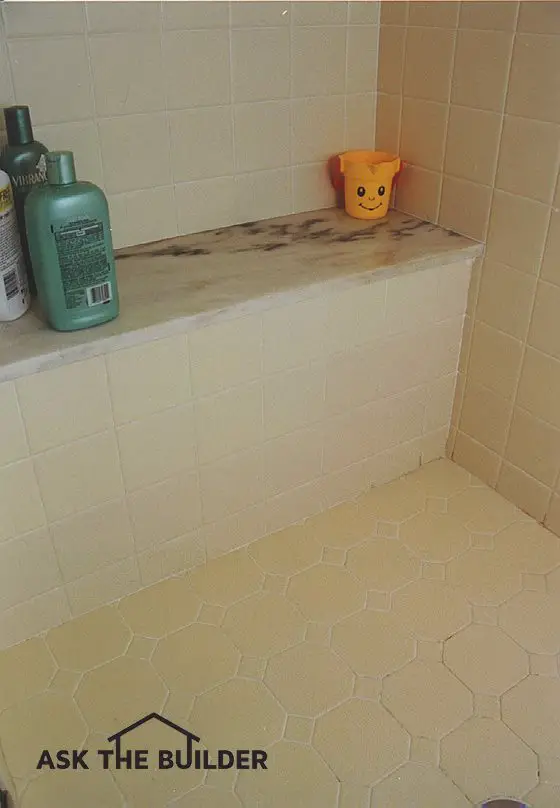
Ceramic Shower Seat
©2017 Tim Carter
DEAR TIM: I am planning a ceramic tile shower for my new bathroom. I would really like a seat in the shower.
What is a good size and height for such a seat? How do you install one to eliminate leaking? Are there options other than ceramic tile for the seat surface? Sarah - Chicago, IL
DEAR SARAH: You are going to really enjoy your planned shower seat. I have installed many of them over the years.
My customers and my wife find them extremely convenient and attractive. Every ceiling below my jobs is bone dry. Yours will be too.
The first thing you need to consider is the overall size of your ceramic shower. Showers with seats work best if they are rectangular. A width of 36 inches will provide excellent elbow room.
The minimum width should be 30 inches. A length of 48 to 54 inches will allow you to comfortably install a 12 inch wide seat.
CLICK HERE to get FREE & FAST BIDS from local ceramic tile contractors.
You can survive with a 42 inch long shower, however, it may be fairly cramped. I have found that a shower seat height of 14 inches off the shower floor provides the greatest versatility.
The rough framing for the seat is completed after you frame the walls for the overall size of the shower. Be sure that you leave a one quarter to one half inch gap where the wood studs would meet at each corner.
This space will allow you to hide the waterproofing membrane within the wall framing. The extra space also makes it easier to nail the cement board. The nails will be farther away from the edge.
The platform for the shower seat can be a scrap piece of half inch or three quarter inch plywood. Construct a small 2x4 wall 13 and one half inches high. This small wall should be built 11 inches out from the back wall of the shower.
A scrap 2x4 nailed horizontally to the back shower wall at the same height of the mini-wall will support the plywood base for the finished seat. Nail the plywood securely to the mini-wall and the horizontal 2x4 cleat.
Waterproofing the seat and the shower floor is accomplished with a PVC membrane. This membrane must be installed on the floor of the shower, up the face of the mini-wall and on top of the seat platform.
In addition, the membrane must lap up onto all adjacent walls a minimum of 6 inches. This membrane should, if possible be installed in one continuous sheet. There is a solvent which can be used to chemically weld one piece to another if it becomes necessary.
Water can and does leak through horizontal surfaces in a ceramic shower. The water is captured by the membrane and directed into the shower drain.
If you want to learn how to work with these special waterproof membranes, you should consider buying my Shower Pan Liner eBook. I go into great detail in this neat instant download book describing the tips and tricks I have learned over the years. The book comes with a 100 percent money-back guarantee.
The membrane is not cut at inside corners. Fold the excess material and slide it through the gap in the framing. Nail it high on the fold to the back of one of the corner 2x4s. Failure to nail in this manner may cause a leak to develop at a later date.
Full Tile Tool List
Here's a list of tools that I've used for years to successfully install thousands of square feet of ceramic tile.
- tape measure
- pencil
- tile cutter
- nippers
- a 1/4 by 1/4 inch v-notched trowel
- a hammer
- some 6d finish nails
- 8 lineal feet of straight 1/4 inch wood lattice strip
- putty knife
- 3-inch wide-bladed scraper
- grout sponge
- rubber grout float
- several buckets
- accurate 4 foot level
Click the image below to BUY all, or some, of the tools in the above list.
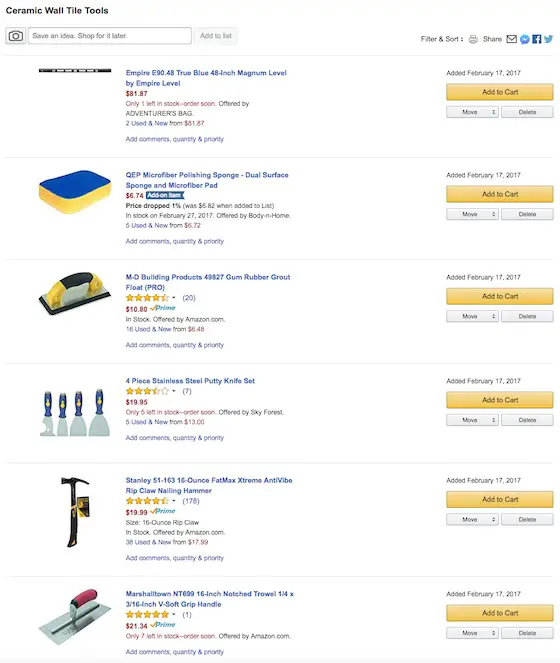
CLICK THIS IMAGE NOW TO ORDER ALL THE TOOLS YOU NEED TO DO CERAMIC TILE.
Picking Materials
There are numerous options for your seat material. You can use ceramic tile, marble, granite, cultured marble, or solid surface countertop material. If you use ceramic tile, you must first install a piece of cementitious board over the membrane.
Do not nail the board through the membrane! Simply mix one part cement and one part sand. Make the mixture fairly wet. Apply a one quarter to one half inch thick layer of this cement paste on top of the membrane.
Set the cut piece of cement board directly in the mixture. Use a level to check the seat for level left to right as you face the seat. A slight pitch towards the center of the shower will allow water to drain off the seat.
If you use one of the other materials for the seat, you can eliminate the cement board. The finish seat material is set in the same mixture of sand and cement. Be sure that you install the seat before you install any ceramic tile.
The wall tile should sit on top of your seat just as it would sit on the top edge of a bathtub. Make sure the seat projects one half inch beyond the ceramic tile on the face of the mini-wall.
CLICK HERE to get FREE & FAST BIDS from local ceramic tile contractors.
Column 168
Tim built custom homes and did ultra-custom remodeling for 20+ years before launching his Ask the Builder media presence. He was selected as one of the Big 50 by Remodeling magazine in 1993. This award gave birth to Ask the Builder in October 1993. Tim also operates https://DrawPlumbingPlans.com. His @askthebuilder YouTube channel was the first home improvement channel on YouTube.
Is it possible to add a corner bench and tile it, to a tile shower that is already finished?
Linda,
Walter, this is what my 500-Second Consult is all about. Click the Shop icon at the top of the page!