Deadbolt Installation Tips
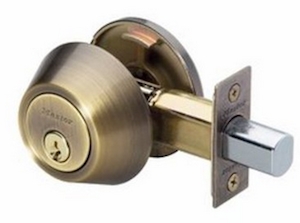
Here's what a deadbolt looks like outside of the door.
Deadbolt Installation Tips
The installation of a deadbolt lock requires a certain level of skill. You need to have good hand - eye coordination, the ability to measure accurately and patience. Add to this a good assortment of tools. The final fit and finish of deadbolt locks depends upon precise alignment of the 3 different holes that must be drilled in the face of the door, the edge of the door and the door jamb. Make a mistake in any of these areas and the lock will probably not work smoothly, if it works at all.
Necessary Tools
You are going to need the following items to professionally install a deadbolt lockset:
- power drill
- assorted drill bits / hole saws - up to 1 and 1/4 inch
- sharp 1/2 inch wide wood chisel
- Phillips and flathead screwdrivers
- razor knife
- small square
- measuring tape
- wood putty for mistakes
The larger sized drill bits or hole saws are necessary to make the large bore holes for the lock mechanism, the latch and the hole the latch fits into in the door jamb. The directions that come with the lock will indicate the size holes you will be drilling.
Getting Started
The instructions will generally tell you how high to place the lockset off the floor. A reader of my column in Colorado suggested in a letter to me that the standard height suggested by most companies might be too low. He indicated that the average person can kick a door at that height - which is usually around 36 inches off the floor. He suggested installing deadbolts at 54 or even 60 inches off the floor. This is above the height that a solid kick can be executed against a door. The only problem with this is that some doors do not have a lock block within the door at this height. If it is a solid wood door, you will be OK. If the door has no lock block, when you drill the large hole on the face of the door, you might encounter a hollow spot!
Pre-Drilling Marks
Once you have decided on a lock height, you drill the door first. The instructions will talk about a backset dimension. This is a critical dimension from the edge of the door to the center of the deadbolt lock hole. You MUST measure this backset dimension from the longest edge of the door bevel. What is a door bevel? Most beginners don't realize that the edge of a door where locksets are placed is beveled. The bevel is necessary so that the thick door will close snuggly against the jamb. Without a bevel the gap between the door and the jamb might be 1/4 inch or larger. The long edge of a properly beveled door is always on the hinge side of the door. The hinge side is the side of the door where you can see the hinge pins when the door is closed.
Measure the backset center mark and use a hole saw to begin drilling the hole. Watch closely as the hole saw pilot drill bit starts to pop through the other side of the door. Stop drilling, remove the drill bit from the partially drilled hole and now complete the hole from the other side. This method prevents splintering of the door finish.
It is now time to drill the latch hole. This hole must be drilled level and at a 90 degree angle to the large lockset hole. A mistake here will create binding as the dead bolt tries to exist the edge of the door. Take your time! You will need to carefully chisel the mortise area to accept the bolt plate in the edge of the door. Use the razor knife to trace the pattern - a pencil is too inaccurate.
The Door Jamb
Once the door holes are drilled, assemble the deadbolt lock in the door. Operate the mechanism and check to see if it is smooth. If not, you need to modify the holes to get them in proper alignment. Once you are satisfied with the lock's operation, you need to mark where the latch contacts the door jamb. Simply measuring doesn't always work because the floor can be out of level! I close the door and then turn the deadbolt lock so that the bolt comes out and strikes the jamb. I mark the top and bottom limits of the bolt onto the jamb with a light pencil mark. These marks allow me to get the proper height for the bolt hole in the jamb. The next challenge is to get the side to side measurement so that the bolt operates smoothly when the door is closed.
Close the door and see if the door face is flush with the door jamb. If so, then the door jamb bolt hole centerline is the same as what you used for the edge of the door. If it isn't make the necessary measurement adjustments. Drill the hole, chisel for the latch keeper and you are done!
Column B244
One Response to Deadbolt Installation Tips