Door Hanging Instructions with Photos
Step By Step Door Hanging Instructions
Here is a very quick tutorial on some of the major steps you must undertake when hanging an interior door. It isn't that hard. The best thing you can do to help is to make sure the rough opening is square, plumb and in the same plane! If the rough frame is twisted, you will definitely have problems hanging and trimming the door.
| Before you start, make sure the rough opening is slightly bigger than the overall width/height of the door in its frame. I like to have a minimum of 3/8 inch extra. Use a level and check the floor to see if it is out of level from side to side. If it is out of level, you must cut off the bottom of one of the jamb legs to insure that the door frame will be plumb. If you don't cut off a leg, you will end up with a gap at the top or one leg will lift off the floor. |  |
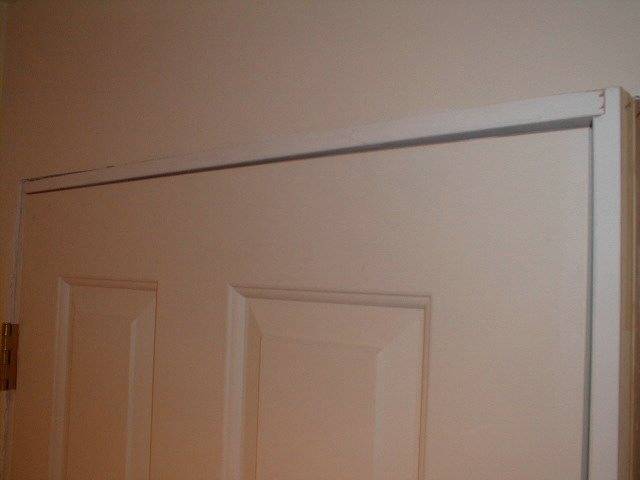 |
This is what happens if you don't adjust the jamb legs in case the floor is out of level. Note the huge gap along the top of the door on the right side of the photo. The hinge jamb is plumb in this photo and both jamb legs are touching the floor. I must cut off the right side jamb in this photo. You cut off the difference between the gap at the left and the right gap. In this case, I had to cut 1/4 inch off the bottom of the right jamb. |
| You don't need a helper to hang a door. I always secure the hinge jamb first to the rough opening. After I have made sure it is plumb and before I drive the first nail, I open the door and slide a few shims under the far end of the open door to keep the door from tipping out of the opening. Once open like this, the door and frame are highly stable. To test the door operation, drive one nail in on the other side of the door stop opposite the top hinge. Be sure you leave enough of the nail exposed so you can pull it out if necessary. Do the same opposite the bottom hinge and carefully close the door to check the backside gaps. The door MUST be attached to the rough frame at or behind the hinges for the best results. Do this after you check the gaps. |  |
 |
Shims are used to fill the gap between the door frame and the rough opening. You should always use two shims at the same time. They must be inserted so that the thin end of one is overlapping the thick end of the other shim. Adjust them both to close the gap. Be sure no drywall overhangs the rough opening. It will create a false gap reading. As you nail the frame tight, it will compress the drywall and the gap will be bigger than you desired. |
| The lockset side of the door must be shimmed in at least four locations. You can see the top three in this photo. The hinge side needs to have shims at each hinge if there is a gap at these locations. I always try to frame the rough opening of doors in such a way that the hinge side is always perfectly plumb. If you can attach a door to the hinge side without shims, it is ideal. | 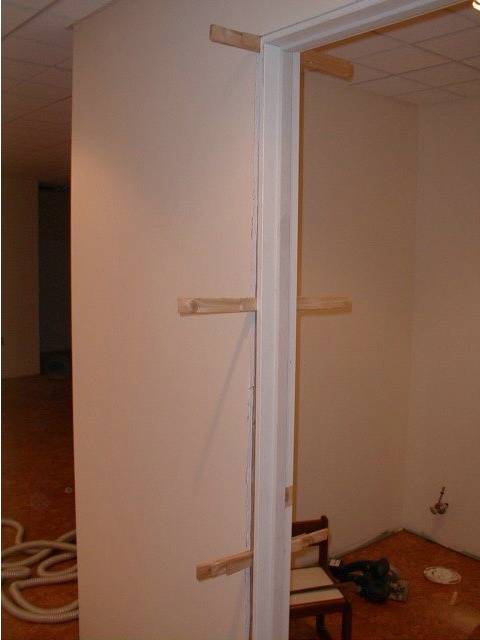 |
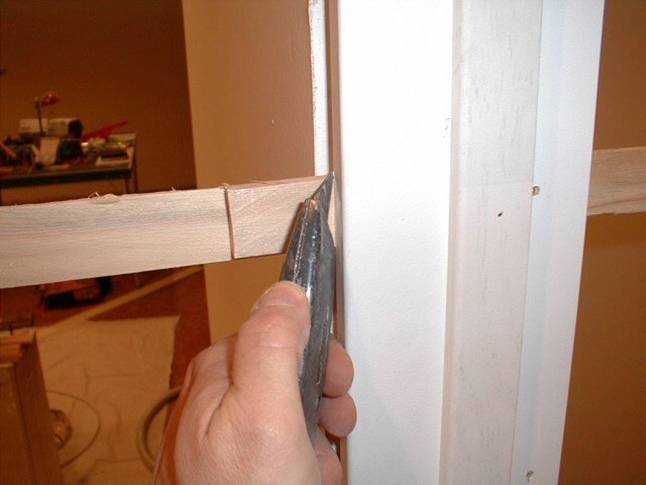 |
Once the door has been nailed in all locations and you are delighted with the fit, it is time to cut off the excess shims. It is important to use a sharp razor knife and to angle the blade in slightly as shown so that no part of the shims extends beyond the face of the door jamb. If this happens, the door casing will not fit tight against the door frame. Cut slowly and carefully because razor knives can cut to the bone. The voice of experience talking! |
Column B375
SPONSORS /