French Doors
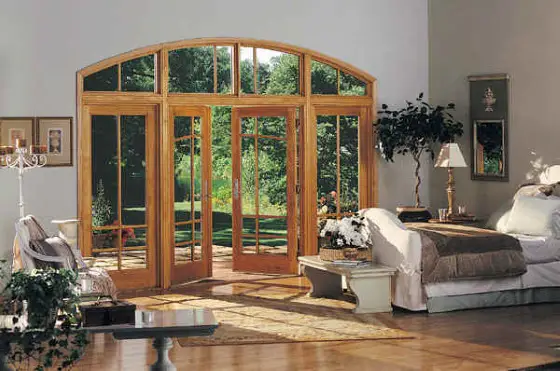
This is a deluxe french door that requires a different installation skill set than a standard french door. But notice how much light a french door can introduce into a room. PHOTO CREDIT: Marvin Windows and Doors
DEAR TIM: My husband and I think we can tackle installing a set of basic French doors in the interior of our 1939 house. These new doors will bring light and a feeling of openness to a small dark bedroom/media room. Our main concern is that the walls are plaster. Can you guide us through the project or is the plaster wall scenario a red flag to have a plaster pro do the installation? We are budget conscious since we will be selling the house in about eight months but think the improvement will be dramatic and pleasing. Angela B. Reed, Portland, OR
DEAR ANGELA: The fact that the interior wall surface is plaster instead of drywall would not stop me for an instant. I can see though, why it might be slightly intimidating for a person who has never worked with plaster. My advice to you is to start this project and not let the presence of the plaster hinder you in any way.
Check the door jamb depth before installing French Doors
The first thing you need to make sure is that the jamb depth of your new French door matches the conditions in your home. The standard jamb depths we use today in most new construction match the framing lumber and the combined thickness of the interior wall finish and the exterior wall sheathing. But I would lay odds that your 1939 home with plaster walls undoubtedly will require a special custom jamb or at the very least modifications to a standard factory jamb.
For example, a new French door might come from the factory with a 4 and 9/16ths inch jamb. This jamb works perfectly in a wall made from standard 2x4s, covered with 1/2 inch drywall and a 1/2 inch thick exterior sheathing board. It is very prudent to have the jamb extend about 1/32nd or 1/16th inch past the interior finished wall surface. Your jamb depth will most likely end up somewhere between 4 and 9/16ths and 6 and 9/16ths inch. Several high-quality door manufacturers can make the exact custom jamb you need.
How do you create the rough door opening?
The next task, once you have the correct door in your possession, is to create the rough opening in the wall. Take a tape measure and determine the unit dimensions of the new door. These dimensions are the actual outer width and height of the door including the jambs but not any brick mold or other trim nailed to the jamb. The unit dimension height is the distance from the bottom of the threshold to the top of the jamb. The unit dimension width is the distance from the outside edge of one side of the door to the other outer edge of the other jamb.
The rough opening you create for the new door should be one inch wider than the unit dimension width of the new door and 5/8 inch higher than the unit dimension height of the door. This extra space gives you the needed wiggle room to shim the door as you make the necessary adjustments that allow the door to operate perfectly. This spacing also allows you to insert insulation that cuts down on air infiltration around the new door.
Will you need a new structural header?
Undoubtedly, a new structural header will need to be installed as part of the creation of the rough opening. Large dimensional lumber such as 2x10's or 2x12's are often used. These in turn rest upon vertical 2x4s or 2x6s that act as columns supporting this wood header beam. These vertical framing members must transfer the weight of the structure above the beam directly to the foundation of the house. You may have to insert solid blocking immediately below the vertical studs and under the floor to create this load pathway to the foundation. If your home is built on a slab, this is of no concern since the outer edges of the slab often are directly connected to the foundation. It is wise to have a structural plan created by a residential structural engineer if you are unsure exactly what to do.
Should a flashing pan be installed?
Before you get ready to position the door, make sure you install a flashing pan. These ingenious devices collect any water that might run down the sides of the door and any water that tries to pass through or roll under the threshold. If the pan is installed correctly, it captures any water and redirects it to the exterior of the house. Believe me, thousands of people suffer mysterious leaks adjacent to their exterior doors during wind-blown rainstorms. These leaks often manifest themselves as puddles inside their home at the corners or the center of the door units. In almost every case a properly installed flashing pan would have prevented this misery.
How do you refinish around the door?
Once the door is in place and secure, it is time to re-plaster. You can buy some blue board drywall that will help you fill the gap between the rough wall studs and the finished wall surface. This blue board drywall has a special paper that inhibits the water from the plaster from softening and harming the gypsum core of the drywall. Do not use regular drywall under plaster.
This blue board drywall can be covered with a coat of rough base plaster that contains some sand and vermiculite. Build this layer up to within 1/8 inch of the finish surface of the adjacent plaster. The following day add the final coat of plaster or dry setting joint compound to make the wall surface match your existing walls. The dry-setting type joint compounds mix easily with water and have the workability of traditional drywall compounds. Once dry, they can be sanded. Traditional white-coat plaster can't be sanded and is not a product to use if you are a plaster rookie!