How to Install a Toilet Seat
You offered to host a party or family gathering at your house didn't you? All of a sudden that Honey-Do list has become the Aaaaaccckkkkk-Get-It-Done-NOW list.
You've been putting off installing that gorgeous toilet seat for months now. It's been hiding in the linen closet for months. There's nothing to fear. Let's grab a few tools and transform your toilet with a new attractive seat.
Degree of Difficulty: 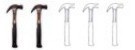
Step One: Gather the following tools. You usually only need one tool to change a toilet seat, but depending on the age of the seat and what hardware is with your new seat, I'd like to see you get a hacksaw, an adjustable pliers, an adjustable open-ended wrench and a flexible putty knife. You should be all set with these tools.
Step Two: You're not going to like this step, but just do it. You need to really clean the toilet. Not only the inside of the bowl, but the entire outside of the bowl and the floor around it. When you start to disassemble the old toilet seat, you'll be thanking your lucky stars you took the time to do this.
Your other option is to don a germ-free moon suit, booties, rubber gloves, hood with visor, etc. to protect you from all of the stuff you'll encounter as you hug the bowl and your face is inches from its surface.
Step Three: Bend over and look under the flat portion of the toilet bowl where the hinge of your toilet seat is located. You'll see bolts, a washer and a nut that secures the existing toilet seat to the toilet bowl. Your job is to remove the nut that's on each bolt, there are two, so the old toilet seat lifts off the bowl.
Step Four: If the existing seat is old, there's a possibility the bolts and nuts could be rusted and you'll never get the nuts off using pliers, a wrench and any magical solvents made to loosen rusted hardware. You'll have to cut the old bolts and nuts off with a hacksaw.
Be sure the hacksaw has a fine-toothed blade and start to saw. If you're laying on your back on the floor doing this, be sure to wear goggles. Do NOT wear safety glasses as pieces of metal can still fall into your eyes.
Step Five: If the nuts and bolts under the lip of the toilet seat are not rusted, use the pliers or wrench to loosen the nuts. Remember as you look at the nut head on laying on your back on the floor, you turn the pliers or wrench counterclockwise. Once again, if you do this, wear goggles as something could fall into your eye.
Step Six: With both nuts off the two bolts, the old toilet seat should lift up. There's a small chance that old rubber or plastic gaskets that are in contact with the flat toilet bowl surface are stuck to the porcelain. If this is the case, use a thin flexible putty knife to pry these up from the surface of the toilet.
Be very gentle doing this as the metal blade can scratch the toilet if you're too rough or aggressive.
Step Seven: Once the old toilet seat is off, take the time to clean the top surface of the toilet bowl before installing the new seat. If there are rust stains on the china, you may be able to remove those using an oxalic acid solution. Be careful using oxalic acid as it's toxic and a powerful acid. It does an exceptional job of removing rust stains.
Step Eight: Unpack your new seat and take stock of the parts. Most modern toilet seats have larger plastic bolts and a large plastic nut that will not corrode nor rust. These are very simple to install.
The key is to hand tighten the plastic nut and then use your adjustable pliers to tighten them one-half to three-quarters additional turn. Don't overtighten the plastic nuts. If you discover they become loose in the future and the toilet seat wiggles around, then tighten them more than you did the first time.
Summary: You'll have success installing your new toilet seat and it will be a very pleasant job, if you take the time to clean the outside of the toilet bowl well.
Column HT030
One Response to How to Install a Toilet Seat