Wet Bar Photos
Wet Bar Photos
The two photos on this page pretty much tell the tale. Basically, my wet bar consists of two work surfaces. The actual wet bar is behind the serving bar where guests will sit and enjoy a drink or two. The serving bar is basically L shaped, but it has a small return leg that you can clearly see in the first photo. This leg is vitally important to the overall stability of the bar. Without this short wall a person standing or leaning at the end of the bar could easily push/pull the end of the bar to the floor. The little wall is covered with 3/4 inch plywood just below the cherry wainscoting. The plywood is screwed to the 2x4 framing. The bottom plate of the little wall as well as all others, are anchored to the floor with 1/2 inch diameter stud bolts. These things are enormously strong. They have a nut and washer and the tighter you crank the nut, the tighter the plate is pressed to the floor.
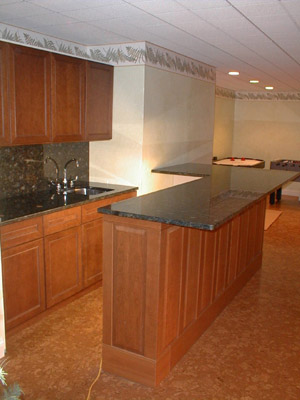
The end wall is important, as it supports the bar.
The actual dimensions of the bar walls were determined by the cherry wainscoting. I wanted the vertical stiles at the ends of the walls to be the exact width of the stiles in the field that you see between each raised panel. So I ordered the wainscoting and took delivery of it before I built the walls. I dry fit the wainscoting on the floor to see just how it went together and what the true dimensions of the system would be once assembled. As you might imagine, it looks superb since the pieces of wood are perfectly balanced. You can do the same thing with many other building materials.
The wet bar has an undermount stainless steel sink. The tops are Brazilian granite - Verde Peacock.
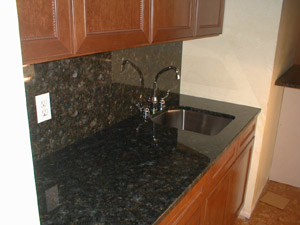
Granite backsplach and counter add a gorgeous touch.
Column B410