February 2, 2019 AsktheBuilder Newsletter

Welcome if you're a new subscriber. I hope to exceed your expectations. All others, you know what's in store. Let's get started.

This past week I was energized. I created lots of new pages at both AsktheBuilder.com and StainSolver.com. I'll be sharing a few with you down below.

BIG FUN in Two Weeks

Two weeks from today is the annual LE Johnson game. Who is LE Johnson?

LE Johnson is the biggest sponsor of the AsktheBuilder.com newsletter.

You might want to CLICK HERE and thank them for supporting the newsletter so you get countless free tips week in and week out. Seriously, CLICK HERE and send them a short thank you note. I would sincerely appreciate it if you'd do this.

In two weeks, you're going to see some unbelievable photos of how homeowners like you transformed their rooms using LE Johnson products and technology.

I GUARANTEE you'll be blown away. You'll also witness what happens when I drink three cups of coffee in a very short amount of time. I think you'll get a very big kick out of that! Stay tuned!

Do You Have a Bad/Lazy Cat or Dog?

Kathy, my wife, has two stunning cats - Finn and Nala. They're both Savannahs. What's a Savannah? You'll be able to see Finn just below. I think you're going to be amazed.

Finn, the oldest of our two, has a very bad habit of not using the litter box. He's a male and territorial. So he sprays and he's lazy.

Cat spray and urine are pungent. Yuck!

Guess what? Stain Solver removes all of the cat urine and spray odor and gets rid of stains too! Kathy and I own the Stain Solver company. It's a certified organic SAFE non-toxic oxygen bleach.

Oxygen Bleach

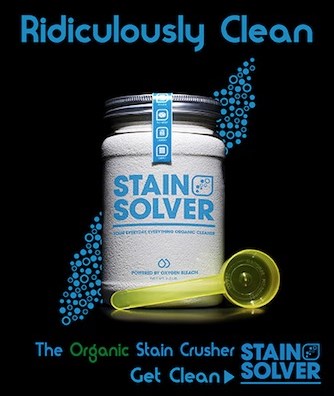
Stain Solver is MADE in the USA with USA ingredients that are food-grade quality. CLICK THE IMAGE to order some NOW.

CLICK HERE NOW to see a photo of the bad boy Finn.

There's a SECRET promo code just under his photo that you can use right now. It works on even our affordable sample size.

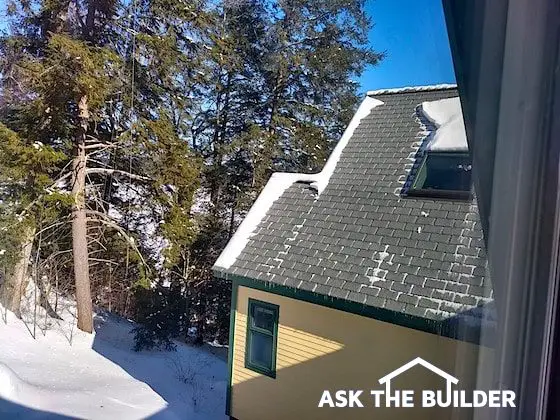
Do You HEAR Your Roof CRACKING?

roof cracking sound

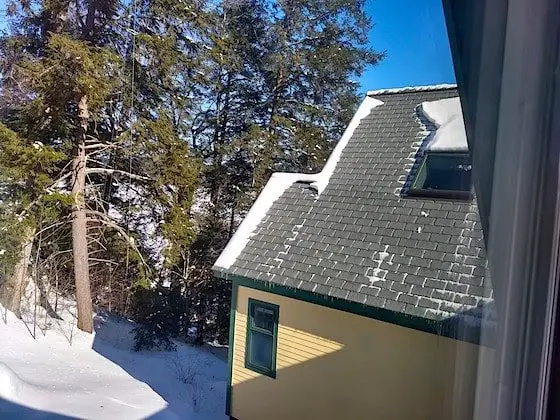
There are at least THREE REASONS why your roof might be making random CRACKING NOISES.

CLICK HERE to see if you know what they are and which ones are DANGEROUS!

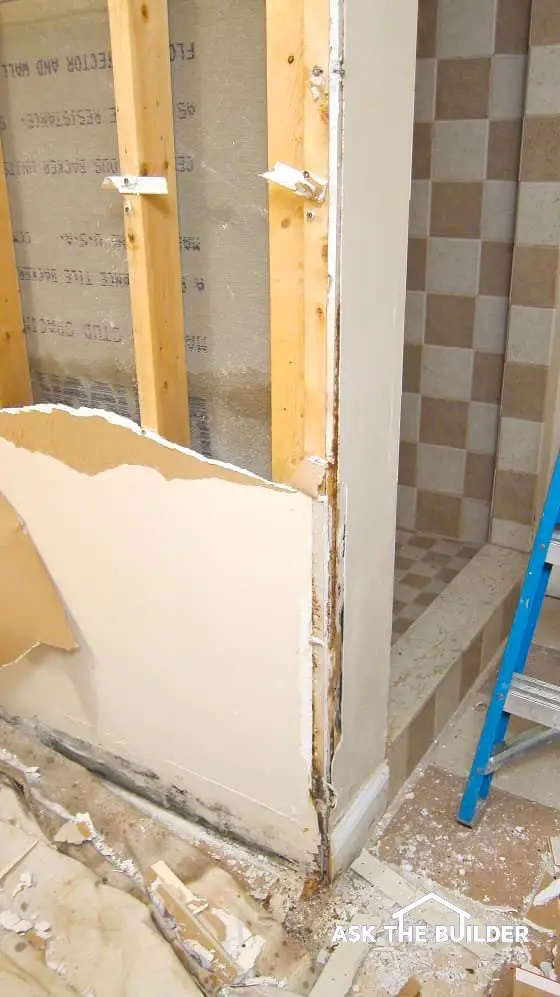
Making an Old Bathroom NEW with Old/New Things

That doesn't make sense unless you read what Russ and Ann did. You're going to be BLOWN AWAY by all the photos.

Great great eye candy! CLICK the photo just below or the link below the photo.

DXV Fitzgerald Sink Remodel

What would you say if I told you a person who NEVER plastered before produced results BETTER THAN the average plasterer?

What would you say if I told you that YOU can do it too?

CLICK HERE to see all the bathroom photos and to see what Ann did in a few HOURS!

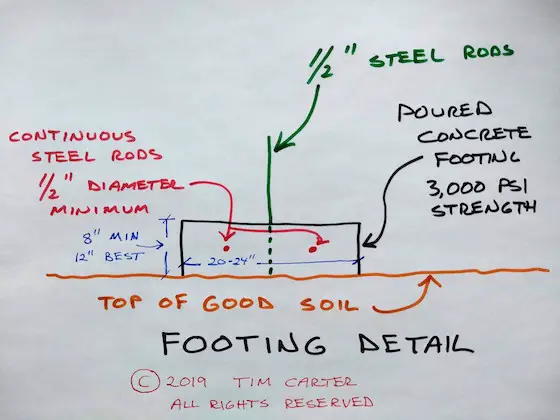
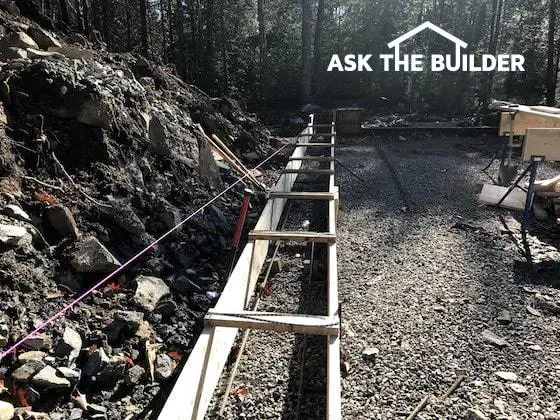
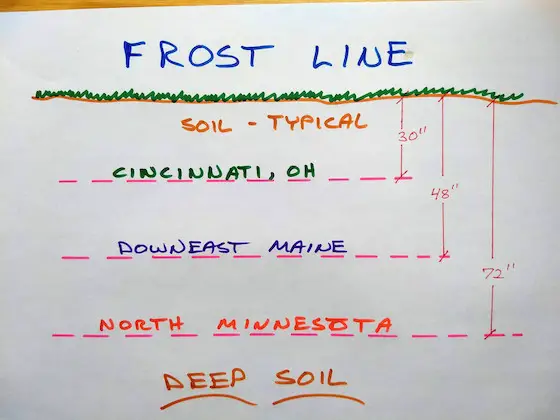
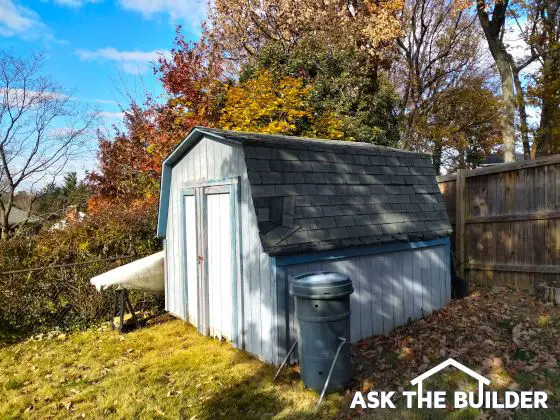
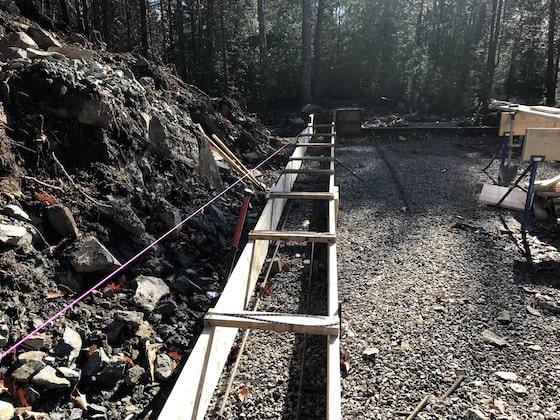
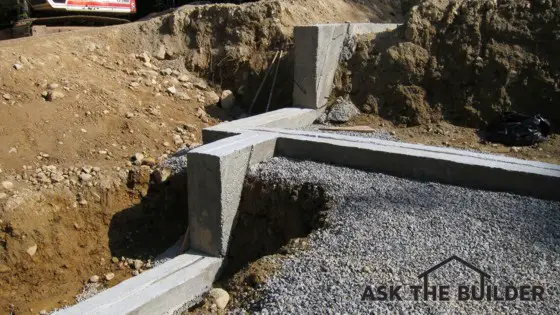
Small Shed and Greenhouse Foundations

What should you do with those small sheds you can buy at a home center or retailer? How about a hobby greenhouse? How should they be anchored to the ground?

fiberglass greenhouse

This small fiberglass greenhouse really doesn’t require a foundation, but always read the installation instructions to make sure. (C) Copyright 2018 Tim Carter

CLICK HERE NOW to prevent your shed from blowing away like that small house did two weeks ago in Cripple Creek, CO. You didn't see that in the news? The lady is lucky to be alive.

Quick Tip of the Week

Do you need extra desk space but can't afford a desk?

plywood desk

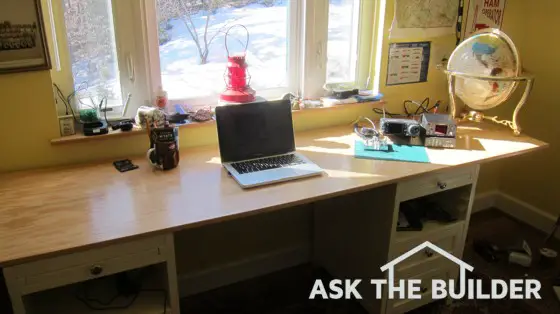
CLICK HERE to see how I created the above desk in less than an hour.

Treat Me to a Cheese Coney? Seriously?

Did you find something helpful and useful in this issue?

Maybe a past newsletter has helped you. If you're inclined to reciprocate, you may find this page pretty funny. You'll also discover a few of my favorite foods and treats. Buy Tim a Cheese Coney!

Be SURE to look at the FAQs on the page.

That's enough for a Sunday.

Questions, comments, suggestions? Just REPLY to this newsletter and lay it on me.

P.S. I did one of my phone consults this week with a wonderful woman in London, England! Jennifer had a sewer odor in a new bathroom and I solved the issue from 3,000 miles away using Skype. Pretty cool!

Tim Carter
Founder - www.AsktheBuilder.com
Mr. Clean Man - www.StainSolver.com
Morse is ALIVE! - www.W3ATB.com

Do It Right, Not Over!

Roof Cracking Sounds Winter


Roof Cracking Sounds Winter

Roof Cracking Sounds Winter | This roof can crack and creak in the winter with wind and snow loads on it. This column was SO GOOD that I shared with the 31,000 subscribers who read my February 2, 2019 AsktheBuilder Newsletter. Copyright 2019 Tim Carter

Roof Cracking Sounds Winter | Snow Loads, Ice Weight & Wind

"Roof cracking sounds in the winter are common. Some sounds are caused by heavy snow and ice, some are caused by high winds, and the sun might cause cracking sounds on bluebird days."

Tim Carter - Founder | AsktheBuilder.com

Roof cracking sounds are somewhat common in the winter. The most dangerous situations are when the roof is about to collapse because of too much snow and ice.

The timbers and framing lumber will crack before the collapse, but sometimes there's not a lot of warning.

Can Wind Cause Cracking Sounds?

Yes, strong winds can cause cracking sounds in your roof. The force of wind on a large flat surface like a roof can produce thousands of pounds of force.

The lumber can move in the roof and this creates the cracking or creaking sounds.

How Can I Stop the Cracking Sound?

The best way to stop the cracking sound is to remove snow from the roof. You want to reduce the load on the roof as much as possible. Use a roof rake with a long aluminum handle to achieve this.

Related Links

How Much Does Snow and Ice Weigh?

What are Ice Dams and How Do You STOP Them?

What Else Can Cause Cracking Noise?

The sun heating up an attic in moderate climates can create cracking sounds. An attic that is cold overnight can heat up fast on a sunny morning. This heating creates uneven expansion forces in the roof framing.

The result is cracking much like your tendons and bones crack as you stretch in the morning.

There's not much you can do to stop cracking sounds caused by thermal expansion. It's pretty normal.

Why Doesn’t My Shower Work?


rainhead shower head

Why Doesn't My Shower Work? | Is it bitter cold outside? Did your shower work yesterday? Odds are the water in the vertical pipe from the valve to the shower head is frozen solid. Copyright 2019 Tim Carter


Why Doesn't My Shower Work? | Frozen Riser Pipe Probably!

"A shower can stop working if the water pipes in the wall freeze solid. A polar vortex causes bitter cold air to drop down into the wall."

Tim Carter - Founder, askthebuilder.com

Did your shower work yesterday? Are you experiencing a polar vortex shot of bitter cold air in your city or town?

Your shower is not working because the vertical pipe that leads from the valve up to the shower head is frozen. The water lines feeding the valve could be frozen too.

Related Links

Preventing Freezing Water Pipes - Easy When New

Why is My House COLD?

How Can Water Freeze in the Riser Pipe?

When you turn off your shower, there is water still in the riser pipe between the shower valve and the shower head. This water can't drain back through the valve.

When it gets cold outside, your attic gets as cold as the outside and bitter cold air can drop down through holes in the top plate of the frame walls behind the shower.

How Can I Thaw the Pipes?

You need to get heat into the wall. This is not easy. Often your only hope is to wait for warmer weather and heat from the bathroom will naturally thaw the frozen pipes.

Can the Pipes Burst?

The riser pipe between the valve and the shower head will not burst. The expanding water in the pipe forces water to drip out of the shower head.

The water lines feeding the valve can burst. Now is the time to discover how to shut off the water in your home should a pipe burst and water start to flood out of a wall or ceiling.

CLICK HERE to get FREE BIDS from local plumbers to fix your frozen shower.

plumbing vent pipes in wall

Most of the pipes you see in this photo are plumbing vent pipes believe it or not! When plumbers install them they drill an oversized hole in the top plate of the wall that is up in your attic. (C) Copyright 2019 Tim Carter

Can Electric Wire Holes Be the Problem?

Yes, electricians drill holes in wall studs and wall plates to run their cables. If those holes are open to the attic and were never caulked closed, then cold air can pour down into the wall and freeze any water in the pipes.

What Can Be Done to Prevent the Freezing?

The holes and gaps in the top plates must be caulked tight so no air can flow down into the wall cavity. You'll have to wait for warmer weather to do this.

Footing Width and Depth

footing width and depth

Footing Width and Depth | This footing is 20 inches wide and the depth will be over 42 inches once the backfill is placed against the finished foundation. The footer is extra thick where painted orange because of the sloping ground at the building site. Copyright 2019 Tim Carter

"A footing is just like the foot on your leg. It spreads out the weight of the building onto the soil. Bigger is better!"

Tim Carter - Founder | AsktheBuilder.com

Footing Width and Depth - Do Both Right to Avoid #FAILURE

Footing width and depth are very important. A footing spreads out the weight of the entire building onto the soil. It works just like the foot on your leg.

Related Links:

Footing Detail - Great Drawing Showing Steel

Poured Concrete or Block Foundation on Footing?

How Wide Should a House Footing Be?

A house footing should be no less than 12 inches wide. Twenty inches would be a better width. It's important to realize that the little bit of concrete will be a wise investment as you only get one chance to install the footing.

CLICK HERE to get FREE & FAST bids from local footing and foundation contractors.

What is the Best Depth for a Footing?

Footing depth can be confused with the thickness of a footing. Eight inches is the minimum thickness for a footing. Ten inches is better and twelve inches is highly desirable.

The depth of the footing in the ground depends on:

  • the local frost depth
  • how deep you need to go to be in solid strong soil
footing footer in rain

Footing detail | This footing has just been poured in the pouring rain. Note the vertical steel rods that will help connect the footing to the poured foundation. Copyright 2019 Tim Carter

What Type of Steel Should be in the Footing?

You should put two continuous steel rods in the footing. The diameter should be no less than 1/2 inch. When you get to the end of one rod, overlap the next rod onto the first one at least 16 inches. Use baling wire to tie the two pieces of steel together.

footing detail sketch

The black lines are the footing. The red dots are the continuous steel rods. This is a cross section of a typical footing. Make sure you order the concrete at least 3,000 PSI. Questions? I can call you on the phone if you like. CLICK HERE to have me call you up.

January 29, 2019 AsktheBuilder Newsletter

Welcome if you're a brand-new subscriber. It's my hope you get lots of tips in upcoming issues.  

Hello again dear friend if you've been here for a week, month or since 1996 when this newsletter started!  

You Reply - I Listen!  

I know this may shock you, but I read every single incoming email you may send to me. As often as possible, I respond back to you.  

I don't know of any other home improvement website owner that does this. Do you?  

Why do I read your messages?  

In almost all cases, your input is fantastic. Take for example a message I received from Bob this past Sunday. I've met Bob before as he invited my son and I up to IL a few years back to watch a WW II reenactment.  

Bob told me he was dealing with some wretched ice dams on his roof because his snow-melting wires malfunctioned.

He wrote, "I think you have explained how ice dams and freezing/melting weather backs water up under the shingles, resulting in water entering inside the exterior house walls, but maybe you should repeat this information as part of your thoughtful winter warnings."

Bob's right. I often fail to provide you with the Easy Button. I fail to give you relevant links to past columns and videos that might help you at a critical time.  

You may live south of the Equator or down below the 30th parallel where it doesn't get too cold at all. Realize I've got plenty of hot-weather columns for you if you need help now. Just use the search engine at my website now to stay cool! Try it!  

If you can't locate what you need, reach out to me.

Cold Weather HELP Columns

Please check out these columns right now if you need help figuring out how to solve a cold-weather problem:

Ice Dams - You Hate Them, Don't You?

WHY Ice Dams Form - Not Always Heat Leaking From Your Attic

Ice Dam VIDEO By Tim Carter - Yes Me!

My House is FREEZING COLD - Why?????

Cold House VIDEO by Tim Carter - Scroll Down To See It

Basement and Crawlspace Flooding

Last week we had 2.5 inches of rain here at my house in New Hampshire. My own garage started to flood because of an ice buildup on my driveway. I caught it in time before any damage happened. I was able to quickly create a channel for the rushing water to get to the lake instead of my tools!  

But what about you? Are you going to have to deal with water in your basement or crawlspace with the Spring rain just around the corner? If you live where the ground is not frozen, NOW IS THE TIME to install one of my linear french drains.  

Did you know I created an informative DVD to show you how to STOP water from entering your basement or crawlspace? Yeah, I know, I do a poor job of promoting my products that will help you.

CLICK HERE to discover what's in this cool DVD. It's professionally produced and it's mailed to you usually within 24 hours.  

Here's what my buddy Fred has to say about how well my linear french drains STOP WATER infiltration:

Dear Tim,

I would like to take a moment to thank you for your advice on how to handle the significant water problem I had in the basement of my 1820's house (now serving as a B&B Inn). The chronic water influx that resulted from the new residential construction uphill from my place literally jeopardized both the safety and value of the Inn and its function.

Moisture damage and mold were making it an unhealthy to place to live - not to mention operate as a B&B. Your instructions as to how to install the linear french drain around the periphery, the depth and the appropriate slope requirements turned out to be the "Magic Bullet" which totally solved the problem.

The outflow from that trench drain actually became a small stream through all of the severely wet spring weather we have had this year. Being cautious, I had also installed a sump pump inside as a backup. That pump never even came on!

A really terrific aspect of the trench system is that it operates completely on its own without any energy input. Thanks to gravity and Ask the Builder, I have actually been able to paint the floor and now have additional workspace that was completely uninhabitable before the drain was installed. Your assistance was greatly appreciated.

Best regards,
Fred Hoffmeister

Maria Atwood Inn B&B
Franklin, NH

That's enough for a Tuesday.  

Please read all those columns above if you live where it's cold. You'll discover how to PROTECT your home and how to stay warm.

Tim Carter
Founder - www.AsktheBuilder.com
Certified Organic Clean Man - www.StainSolver.com
Morse Code LIVES! - www.W3ATB.com

Do It Right, Not Over!

Footing Depth Below Grade

footing footer form

Footing depth below grade | Look how high the ground is to the left of the footing form. The bottom of the footing will be 48 inches below grade. The footing forms are set and it's ready to pour the concrete. Note the continuous steel bars and how they are raised up above the soil. Copyright 2019 Tim Carter

"The footing depth below grade is determined by two things: when you encounter strong soil and making sure you're below the local frost depth in your area."

Tim Carter - Founder | AsktheBuilder.com

Footing Depth Below Grade - Two Factors Control the Depth

The footing depth of your garage, house, or building depends on where you're building and how strong the soil is on your lot.

Cold climates create frozen soil in the winter. Water expands in the soil creating ice lenses. These layers of frost will lift a building out of the ground. Structural failure is guaranteed if the lifting is not equal around all sides of the building. It rarely is.

Related Links:

Deck Pier Footing Depth - It May Surprise You

Footing Detail - What Does a Footing Look Like?

footer footing form straps

This footing is on solid ground and it's going to be below the local frost line. Check with your building inspector to see how far down you need to dig. Copyright 2019 Tim Carter

How Far Down Will Frost Penetrate?

Frost can penetrate as deep as 6 feet or deeper. It's hard to believe, but it's true.

The depth depends on how severe the winter cold is in the area you're building. Look at the following drawing to get an idea of different frost levels in different parts of the USA:

footing depth below grade

The frost depth can be as shallow as 6 or 12 inches if you live in the deep South in the USA. Extreme northern Minnesota and Michigan's upper peninsula can have frost depths approaching 8 feet. Copyright 2019 Tim Carter


What is Strong Soil?

Strong soil is that which will support the weight of the building being placed on it. Topsoil is not strong. Any soil with organic waste or debris in it is not strong.

Dense clay soils that are red, brown and light brown are usually very strong. Your local building inspector or a soil engineer will gladly inspect the soil to ensure it will not sink under the weight of the building.

Should the Footing Be Level?

All sections of the footing should be level. A building constructed on a sloped lot will have a stepped footing so all sections of the footing are below the frost line. Look at the following photo to see a stepped footing.

footing depth below grade

This is a great example of a stepped footing. Note how all horizontal sections are level and the vertical faces are plumb. This makes setting the foundation forms very easy. Copyright 2019 Tim Carter

Shed Repair Tips

shed repair tips

This shed has seen better days but it can be restored and improved with moderate skills. (C) Copyright 2019 Tim Carter

DEAR TIM: I’ve got a quaint outdoor shed that I’ve neglected. The wood at the bottom is rotting and the shingles must be replaced. I need it more than ever and recently discovered it’s not to code in my county. I want to repair it and improve it but I’m told the shed has to be moved and enlarged. This makes me sad because it’s a perfect size and I like where it is on my lot. What are my options? Meghan C., Alexandria, VA?

DEAR MEGHAN: I’ve seen my fair share of neglected sheds that’s for sure. When I peered at the photos you sent me, I immediately saw one problem that led to the wood rot. The shed was placed or built too close to the soil. The rear of the shed has soil piled up against the wood.

You’ve come to the right place for help because not only was I a builder/remodeler for 30+ years, but I also served on my village’s planning and zoning board for eight years. I’ve got a fairly good grasp of zoning codes that restrict sheds and similar accessory structures.

It’s important to realize you may have received some bad advice. I discovered long ago to rarely trust the spoken word when it comes to zoning issues. I always get a copy of the zoning code and read it. I want to see exactly where it says such and such is not allowed. Ask the person who told you to move and enlarge it to point this out in the local current zoning documents.

First and foremost, your shed may not be in violation of the zoning code. I don’t have a copy of your zoning code, but it very likely has a grandfather clause. Simply put if something that was fine to do years ago has become illegal because of new regulations, the offending *thing* normally can stay in place.

However, some codes do have restrictions about the amount of improvement that can be done to a grandfathered shed or structure. You have to read your code and see what it says. If there’s an upper limit percentage of repair, you can sometimes jump through a loophole and make the repairs over a period of time so at no given time do you bump up against the upper limit of the allowable repairs.

Let’s assume you discover you can repair the shed and it can stay in its current location. Here’s the laundry list of how I’d proceed with the repairs.

I would strongly urge you to raise the shed up into the air so the bottom of the wood siding is at least 6 inches away from the soil. Since sheds don’t weigh much, three smaller hydraulic car jacks may be all you need. Perhaps a few neighbors have these.

You’ll have to probably slide a new 4x4 under the existing floor beams on each side of the shed to lift it. The hydraulic jacks will be set under this 4x4, two under one 4x4 and the third one in the middle of the other 4x4. You’ll pump all three jack handles so the shed pops up out of the ground, is level front to back and side to side, and is at the right height. Place a solid concrete block under the 4x4s or the floor beams to provide solid support between the shed and the soil.

Most homeowners don’t think about wind, but it can be a major concern with outdoor sheds like yours. Strong winds can cause a shed, or even a small house, to tumble across your yard. Investigate using hold-down anchors to make sure your shed stays put when the next fierce thunderstorm, or worse, blasts through your backyard.

The rotted portions of the wood siding can be replaced with new siding. You can go back with wood, but you may want to choose fiber cement as it will last longer. You just have to cut away the rotten wood by coming up a foot or so and cut a nice straight line.

You’ll have to slide a piece of z-flashing up under the remaining siding after you make this cut. But before you do that, paint the fresh cut edge of the existing siding with two or three coats of paint. This will help prevent wood rot in the future. The top of the z-flashing slides up behind the existing siding and the front edge laps over the top of the replacement siding.

The roof shingles are perhaps the easiest part of the project. Use a flat garden spade to remove the shingles and inspect the sheathing to ensure there’s no rot. If you detect rotten roof sheathing, replace it.

There are countless decent videos on YouTube that show you how to install simple asphalt shingles. It’s key to have a metal drip edge on the sides and bottom edge. Some shingle manufacturers have installation videos that show what to do. You’ll be amazed at how easy it is to install shingles and since you’re not that high up, it’s relatively safe.

Keep in mind that if you install a thin piece of copper 6 to 12 inches wide at the top of the shingles on both sides of the roof, you’ll never have to install new shingles again in your lifetime. I discovered three years ago that copper that washes down onto shingles prevents asphalt from becoming brittle. This means your new shingles can last for 40 or 50 years!

Column 1286

Footing Detail

footing detail

Footing detail | This footing has just been poured in the pouring rain. Note the vertical steel rods that will help connect the footing to the poured foundation. Copyright 2019 Tim Carter

Footing Detail - Concrete + Steel + Great Soil

A footing is quite possibly the most important detail in construction. A footing is what contacts the earth or soil and it distributes the total load, or weight of the building, so it doesn't sink into the ground.

What are the Details of a Footing?

A typical footing detail consists of:

  • poured concrete a minimum of 8 inches thick - and often up to 12 inches thick
  • continuous reinforcing steel rods - a minimum of 1/2-inch in diameter
  • drainage sleeves to allow ground water to pass under the structure on its way to the ocean or sea
footing detail
footing detail

The footing forms are set and it's ready to pour the concrete. Note the continuous steel bars and how they are raised up above the soil. Copyright 2019 Tim Carter

How Important is Good Soil?

Good soil is very important. Never pour a footing on:

  • compressible top soil
  • smelly clay soil that contains organic rotting debris
  • uncompacted fill dirt

Bad, or poor, soil will sink and the result is a structural failure of the house or the structure. If you're in doubt about the quality of the soil, hire an independent inspector. Most cities and towns require the building inspector to visit the job site before the concrete is poured to ensure the soil is strong.

stepped foundation wall

Here's a foundation footing that's making a transition from one level to another. It's poured continuously for extra strength. Photo Credit: Tim Carter

How Strong Should the Concrete Be?

The poured concrete should have a PSI (pounds per square inch) compressive strength of at least 3,000 PSI. A builder may say that 2,500 PSI is fine, but pay the extra money for the 3,000 PSI mix.

My Footing Width and Depth column has addition information regarding footers.


January 26, 2019 AsktheBuilder Emergency Alert

If you're new, I do these alerts in certain situations.  

A severe Arctic blast of frigid air is starting to invade the central and eastern USA. If you live in northern Michigan or Minnesota, it's already at your doorstep.  

I know WX people tend to overhype the weather, but this could create historic cold temperatures in certain cities.

TODAY is the day to start to prepare.

Do the following NOW:  

Locate all extra clothing, hats, gloves, long underwear, etc. and have them ready to put on to stay warm in your home. Your furnace or boiler will NOT BE ABLE to keep your home at 70 F.  

Go out and purchase a portable electric heater if necessary to help ward off the cold and prevent frozen pipes.  

Locate and know how to turn off your main water supply in case pipes freeze.  

CLICK HERE to read how to PREVENT water pipes from freezing.  

Turn off water to unused bathrooms/fixtures and OPEN the faucet valve to relieve pressure. If the pipes freeze the open valve will prevent pipes from bursting as the ice will force water out of the valve.  

BEWARE of extension cords! CLICK HERE NOW to prevent burning your home to the ground!!! Use the correct size!!  

The bottom line is to GO OUT TODAY and get what you need to protect yourself or your home.  

Use common sense. Think about what you're going to do IF you lose power, or your furnace dies, or ???? Don't try to make those decisions under pressure in two or three days.  

Good luck.  

Tim Carter

Founder - www.AsktheBuilder.com  

Do It Right, Not Over!

Water Damaged Drywall

drywall damage

Water Damaged Drywall Doesn't Always Have to be Ripped Out

"Test the ceiling with your fingers. Poke at it. If it seems as hard as drywall that has not gotten wet, you may have dodged the bullet."

DEAR TIM: A water line burst in our home and created a significant leak. We were home and able to contain most of the water, but quite a bit got through the floor ruining the drywall ceiling in the basement. Is there an easy way to deal with water-damaged drywall? Can we just wait for it to dry and then repaint it? How do you make the determination as to whether or not you have to cut out the ceiling and start over? Susie W., Baltimore, MD

DEAR SUSIE: For over three decades I’ve been dealing with drywall that’s suffered the indignity of getting wet. Sometimes we’ve saturated the drywall with water on purpose at the job site to get it to bend, but most times a roof leak, foundation leak, plumbing misfortune or chronic condensation causes drywall to fail.

Water damaged this ceiling and the ruined drywall was cut out so that new drywall can be installed and finished. PHOTO CREDIT: Tim Carter

Water damaged this ceiling and the ruined drywall was cut out so that new drywall can be installed and finished. PHOTO CREDIT: Tim Carter

I can clearly remember past calls from shocked customers who’ve lost entire ceilings where, without notice, the drywall crashes to the floor. The weight of the water and loss of structural integrity of the gypsum core causes the drywall panels to tear away from the fasteners. It usually happens at the worst possible moment.


How Much Water Needs to Leak?

You may not feel much water leaked, but it doesn’t take too much to create a disaster. The first signs to look for with respect to the ceiling falling are depressions around the fasteners. You’ll see small dimples form as the drywall surrounding the nails or screws succumbs to gravity and starts to droop leaving an upside down crater. If you see this happening, move all valuables and furniture from the room in anticipation of a ceiling collapse.

What Does a Bubble in the Paint Mean?

If you see a bubble or droop start to happen in the drywall there could be ponding water on the other side. Use a nail or other punch to create a drain hole allowing the water to escape. Capture it with a bucket.

How Can I Test For Damage?

Test the ceiling with your fingers. Poke at it. If it seems as hard as drywall that has not gotten wet, you may have dodged the bullet. But if the drywall seems soft or spongy, you’re going to be best served by cutting out the damaged section before it sags and possibly falls. Cut carefully as all sorts of wires, cables, water lines, radiant heating pipes, etc. can be just on the other side of the drywall.

Is it Hard to Repair the Drywall?

Repairing water-damaged drywall is not too hard. Ceilings are absolutely the hardest if you’re not a professional. Working over your head is not easy, and getting the repair to blend in with the rest of the ceiling will be tough to achieve if you’re not highly experienced at finishing drywall.

What is the First Step to Repair the Drywall?

It’s best to try to cut out the wet drywall as soon as possible so that you minimize any mold growth. Mold spores are absolutely hidden in the ceiling, the temperature is perfect, and they have food. The only ingredient missing was water, and now it’s present. Mold can bloom within days if you don’t act.

Be sure to wear goggles or other eye protection as you remove the damaged drywall. The last thing you need right now is a scratched cornea from a nugget of gypsum that falls into your eye.

How Do You Cut Out the Old Drywall?

One of the biggest challenges in getting the ceiling ready for a new piece of drywall is cutting back the water-soaked drywall to the center of one of the ceiling joists. This is accomplished with any number of tools from a sharp razor knife to a reciprocating saw held at a low angle so the blade just cuts into the drywall and not the wood joist.

Here's a new drywall cutting blade that fits in an electric reciprocating saw. It's perfect for cutting holes in drywall on walls and ceilings but not the things hidden behind the drywall! CLICK HERE or photo to have these special blades delivered to your home.

You can also cut to the side of a joist and then nail on a scab or sister 2x2 that will be the lath catcher for the new drywall. Just be sure the bottom of the framing material is flush with the bottom of the existing joist. If it’s lower, you’ll end up with an unsightly hump in the ceiling.

What Should I Do With a Large Blister?

The leaking water can sometimes create a massive water blister in latex paint on a ceiling. You may mistake this for ruined drywall that has a bulge when in fact the drywall may not have to be replaced. Prick the large blister and let all water drain out.

The day after the leak, do the test with your finger to see how stiff the drywall is. If it’s solid, you may just have to repaint and not replace drywall. The key is to minimize the amount of water that saturates the drywall. I’ve seen many a drywall ceiling that dries out and survives. It’s not unusual at all.

If you’re worried that the drywall might fall from the ceiling at a later date, you can always install additional screws. If you’ve got one-half-inch-thick drywall, then use 1 and 1/4-inch coarse thread screws. Be sure the drywall screw is countersunk about 1/16th of an inch. If you go any further, you’ll tear the paper around the bugle-head screw rendering it ineffective.

Column 873