DEAR TIM: What can you tell me about tub faucets? I am remodeling my own bathroom, and my friend is building a new home. Are bath tub faucets all the same or are there big differences in quality? I also need to know how to install a shower faucet that will be in the same bathroom. What tips can you share that will guarantee years of leak-free performance? Maura K, Windsor, CT
DEAR MAURA: Talk about open-ended questions. I could write for days and days about tub and shower faucets. In fact, I have seen books about the subject that don't cover each detail you might need to know about. But that said, let's roll up our sleeves and get to work so you have some great faucets that will perform perfectly for many years.
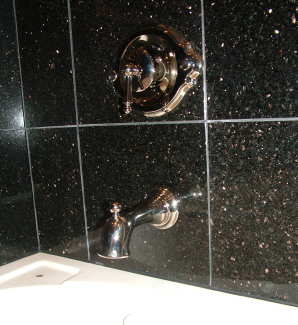
This tub faucet looks great with its polished nickel finish. Follow a few simple steps and it can last for 30 or more years. PHOTO CREDIT: Tim Carter
Tub faucets come in a wide variety of styles and types. Almost all modern tub and shower faucets are made without old-fashioned washers. The new faucets have cartridges that control the flow of both hot and cold water. Many of the faucets are singe handle where the inner cartridge allows for the flow of just hot or cold water or an infinite amount of either so you get warm water. Tub faucets with a separate handle for hot or cold water are still made if you want the classic look of old.
Some people confuse regular tub faucets with roman tub faucets. A roman tub faucet is one that often sits on the flat deck adjacent to a large soaking tub. Many people have standard bathtubs and the faucet and filler spout are on the wall just above the tub drain. Since this is the most common tub faucet, I suggest we focus on that type of plumbing fixture.
I have been a master plumber for many years, and one thing I have learned is that you can't spend too much money on tub faucets. These plumbing fixtures are frequently overlooked workhorses that are used daily, and often several times a day. To get years of trouble-free performance, you should buy a high-quality faucet. Quality comes with a price tag, so look for a tub faucet that is above-average in price. You do not have to buy the most expensive faucet to get great quality.
The steps to install either a tub or shower faucet are nearly identical. The first thing you need to do is read the written instructions that come with the faucet. All too often this is not done, and afterwards when the faucet malfunctions, weekend warriors and rookie plumbers wonder why things don't work right. Once the job is complete, do not throw them away. Place the instructions and any parts list in a plastic bag that is taped to the inside of the bathroom vanity cabinet. A future plumber or homeowner will thank you, as this written information will contain valuable model and part numbers.
Make sure you know the exact centerline of the tub drain and the shower. The drain hole in tubs is not always the halfway point of the tub's overall width. You want the tub faucet centered over the drain hole of the tub.
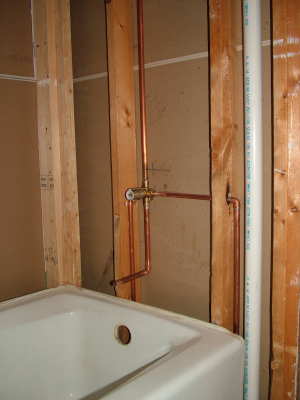
This is what a tub and shower faucet looks like undressed. Not much to it behind the walls! PHOTO CREDIT: Tim Carter
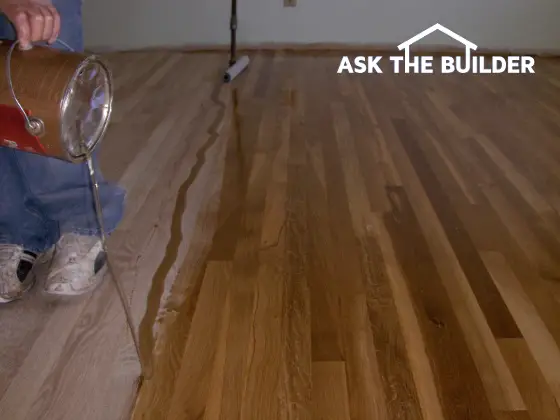
Many tub faucets are made to accept copper pipe. The pipe size is almost always one-half inch. You need to be very careful when soldering, so that you do not apply too much heat to the faucet body. If you leave the cartridge in the faucet while soldering and you overheat the faucet body, you can cause permanent damage to the inner parts of the tub or shower faucet.
Be sure you have a small pail of water in the bathroom with some old rags. Keep a wet rag piled on the opposite side of the faucet while you are soldering. This rag will help keep the faucet body cool but still allow you to get a leaf-free solder joint where the copper pipe enters the faucet. Once the soldering is complete, wipe the joint with a clean wet rag to remove all traces of soldering flux.
Pay attention to the finished-wall thickness. Many tub faucets come with a disposable plastic plate that is supposed to be flush with the finished wall surface. If you install the faucet too close or too far away from the rough wall stud face, the tub faucet trim plate will not seal properly. This can create serious leak problems.
Try to do what the architects of old did. Install an access panel on the opposite side of the wall behind the tub or shower faucet. This was very common years ago, and access panels can still be found inside closets of many an older home. The access panel should extend one foot above the top of the faucet and all the way to the floor. It will prove invaluable if you have to replace the faucet or work on the drain trap at the base of the tub.
Be sure to remove the cartridge from the faucet to flush the water lines. Small balls of solder and other debris can clog the ports inside the cartridges. If this happens, you may end up buying a new cartridge before you take your first soothing bath or shower. It only takes a few moments to remove the cartridge. Be sure you buy a faucet that has built-in shut off controls so you can flush the lines by yourself. If you don't have shut off controls, a helper is needed to operate the main water valve while you stand in the tub with a bucket to catch the debris-filled water.
Companion Articles: Low Water Pressure in Faucets, Low Shower Head Water Pressure
Column 669