Deck Cleaning and Sealing

! ! ! See Author's Notes at Bottom of Column ! ! !

DEAR TIM: My wood deck needs to be cleaned and sealed. Actually, I have two wood decks; one is made from traditional treated lumber and the other one is cedar. Several contractors want to pressure wash the decks, but I am leery of this. In your opinion, what is the best way to clean a wood deck? Once clean, what is the best sealer? Is there a sealer that will really work well on cedar? Patricia R., Farmington Hills, MI

DEAR PATRICIA: Wood decks, like anything else left outdoors, get dirty and covered with algae and sometimes mildew. Several years ago, I had this happen to a car that sat in my driveway for months, as I was too busy to sell it. Who would think algae and mildew would grow on a painted steel car? Cleaning your wood decks will require a little extra work, if you want to treat them with care.

I do own a pressure washer, but I never use it to clean wood surfaces. High-pressure streams of water wreak havoc on sun-damaged wood decks. The ultraviolet (UV) rays of the sun break down sealers, and then they start to blast apart the actual wood fibers of the decking. These weakened fibers are easily removed by pressure washers.

EB015 Cleaning & Sealing Deck eBoo CoverThe light-colored wood grain is the wood most susceptible to damage from the pressure washers. This is the spring wood or tree growth that happens between the end of winter and the beginning of summer. Trees grow rapidly at this time, as there is often an abundance of water from spring rains. This rapid growth creates an open cellular structure in the wood that is quite weak in some respects. As summer wears on, and there is less moisture in the soil for the tree, the growth process slows. This summer wood is darker, and is very dense. As you might expect, this dark summer wood grain is more resistant to damage from both UV rays and high-pressure streams of water.

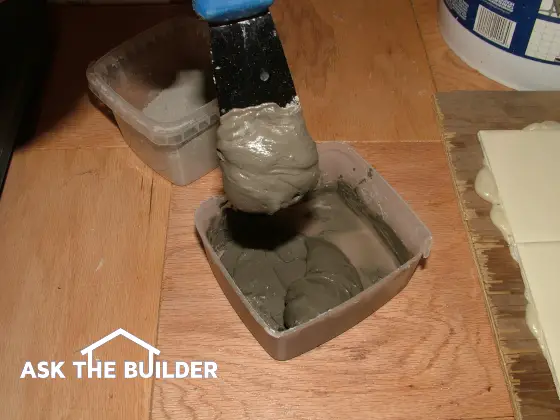
I prefer to use a solution of oxygen bleach to clean outdoor wood surfaces. Do not confuse oxygen bleach with bottles of liquid bleach you find in grocery stores or home centers. These often contain chlorine bleach. Always check the label. If you see the words sodium hypochlorite on a product label, you are looking at a bottle of chlorine bleach.

Oxygen bleach is a powder that is mixed with water. Not all oxygen bleaches are the same. Some have low-quality ingredients that are manufactured offshore. Some have low amounts of active ingredient in them. The best oxygen bleaches have ingredients that are made in the USA, and have the highest amount of active ingredient as allowed by law. As you might expect, these products are typically higher-priced. High-quality ingredients and more of them simply cost more.

Once you mix the oxygen bleach with water, it creates a solution with billions of oxygen ions. These powerhouse ions are non-toxic, and they rapidly clean algae, mildew and oxidized deck sealers. The oxygen-bleach solution does not hurt plants or trees, and it does not hurt the natural color of the wood. Chlorine bleach, on the other hand, is highly toxic to plants and vegetation. It also is such a strong oxidizer, it can and does remove the natural color from the wood. The chlorine bleach can also accelerate the corrosion of deck nails, bolts and framing connectors.

I have had great luck with new synthetic-resin sealers that have an epoxy component. These epoxy deck sealers are UV-stable, and last for years on the flat surfaces of decks. But cedar has always been a problem in the past. The dense summer wood of cedar has often prevented sealers from penetrating into the wood. It was not uncommon for the sealers to peel off of cedar decking.

A new water-based epoxy sealer with a brand-new synthetic resin has been developed for cedar decks. This resin has a smaller molecular structure that can penetrate the dense summer wood on cedar decks. The field tests I have seen are impressive, and I would absolutely give this new sealer a try on your cedar decking. To purchase this sealer, look on the label for the words "water-based" and "epoxy".

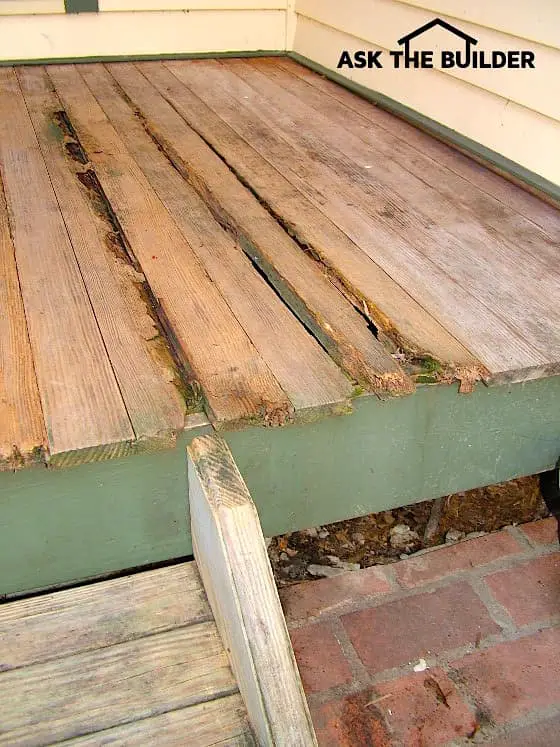
Each year, I receive countless e-mails from people who ruin their wood decks with pressure washers. After the cleaning process, the wood decking dries and the people are left with wood that looks like a fuzzy pipe cleaner. Some areas of the wood are so damaged by the pressure washers, they resemble fishing piers that have been exposed to the sun for decades.

If this happens to you, your only choice is to let the wood dry well, and rent power-sanding machines. Be sure to countersink all nails, and then start to sand the wood using coarse sandpaper, and then medium. Always use aluminum oxide sandpaper, as it is self-sharpening. Remove all dust before you apply the sealer. Read the sealer label carefully. The epoxy resin sealers need to be applied very thin, and they always need two coats, with a small amount of drying time between each coat.


Author's Notes:

Read Sheryl's comments about using a pressure washer on her deck.

"Tim,

I am going to order some of your oxygen bleach to clean my wooden deck that is on "the list" this summer. I sure wish I had known about this product before I power washed it two years ago - as I wondered why the wood looked messed up afterwards."

- Sheryl W., State Park, SC


Message from Tim:

Years ago while researching a column about cleaning decks, I discovered the wonders of Oxygen Bleach. It is perhaps the 'greenest' cleaner I know of as it uses oxygen ions to break apart stains, dirt and odor molecules. There are no harsh chemicals, and it works on just about anything that is water washable.

I decided to create my own special blend using ingredients made in the USA. In fact, the raw materials in the active ingredient are food-grade quality registered with the FDA. I call my product Stain Solver. I urge you to use it to help with cleaning your deck or wood. You will be amazed at the results!

Related Column:

Deck Cleaning Dilemma - Cleaning a CCA lumber deck

Column 617

Advertising Partnership Inquiry Form

Thank you for your interest in AsktheBuilder.com! To discover more about our new advertising opportunities, please provide us with some information. Click the Submit Form button at the bottom of the page and one of our Sales Representatives will contact you shortly.

Remember - the more information you give us, the better we can serve you.


Name:
Email Address:
Company Name:
Enter your Company website URL:
Phone Number:
Job Function
Estimated Campaign Start Date:
Planned Campaign Spending:
Tell us what you want to advertise:

How to Grout Tile

Mixing Grout

Grout needs to be mixed so it sticks readily to a putty knife and does not droop or fall off. PHOTO CREDIT: Tim Carter

How to Grout Tile

DEAR TIM: The new tile grout in my bathroom is a disaster. The grout is crumbling, and I can scrape it out of the grooves with my fingernail. The installer said the grout was bad.

The grout manufacturer said the grout was fine, and the installer ruined it. Who is telling the truth? I have extra grout. Is it hard to grout tile so it lasts for years? Becky G., Pueblo, CO

DEAR BECKY: Both parties can be telling the truth. It is possible the grout is bad, but the odds of that being true are as long as Interstate Highway 90. The better bet, in my opinion, is the installer made one or more mistakes. Fortunately, you can determine who is telling the truth, since you have leftover powdered grout.

The most common reasons grout crumbles and disintegrates with minimal force are water - too much water. Virtually all powdered wall and sanded floor grouts are made from Portland cement. Some grouts have extra additives such as powdered latex or acrylic modifiers that make them bond even better. You can also purchase liquid acrylic modifiers to mix with grout that makes them more durable, but I have had nothing but problems with these liquids when working with colored grouts.

Portland cement is an unstable chemical compound in the grout bag. It becomes stable once it unites with water molecules. It can get those from water vapor in the air or from liquid water that is mixed with the powder. This is why bags of Portland cement or grout are often placed in special bags with plastic liners. The plastic blocks the movement of water toward the dry unstable powder.

If you inspect the leftover grout in your possession, it should be a fine powder with no lumps or clumps. The presence of small, hard lumps or clumping means the grout may have started to mix with water vapor. Clumps or lumps mean the grout is bad or is going bad. But if the grout appears like a bag of fresh baking flour, then it is my opinion the grout is perfect.

When you mix grout with water, it is important to add just the right amount. This is no different than making cake or pancake batter. Add too much cooking oil and water to cake and pancake mix and you get a runny batter that will not produce the desired foodstuff. The same is true with grout. Add too much water as you mix and the grout will never get as hard as grout mixed properly.

The proper consistency for grout is like that of a thick cake batter. The grout, once mixed, should readily stick to the end of a putty knife. When you grab a glob of grout from the mixing bucket, it should not droop off of the putty knife. If the grout is runny and can be poured like a milkshake, too much water has been added. You can fix the problem by adding more powdered grout and blending the mixture until the grout thickens.

This is why I always only mix part of a bag of grout at one time. I always want to have extra powdered grout in case I add too much water to the original batch. Furthermore, you only want to mix as much grout as you can apply to the tile in 30 minutes.

The installer could have also ruined the grout after it was mixed perfectly. He could have re-tempered the grout by adding water to it as it was getting hard in the bucket. This, in my opinion, should never be done. The added water breaks apart the crystalline chemical bonds that are forming as the grout transforms from a plastic substance to man-made rock.

Finally, the installer could have issued a death sentence to your grout as he was finishing the joints. If he used a sponge that contained too much water, the water could have diluted the grout while it was hardening between the individual pieces of tile. The sponge used to strike and finish the grout joints must have all excess water squeezed from it before it touches the grout between the tile.

It helps to cure grout in places that have low humidity. Parts of the West and Southwest have very low relative humidity, and the water in wet grout can evaporate too quickly. When this happens, the grout can lose strength. The best way to cure grout if the humidity is low, is to cover the freshly-grouted tiles with damp white-paper towels. The paper towels will readily stick to the wall tile. The next step is to mist the paper towels with clean water every hour or so to ensure they stay damp.

It also helps to run a humidifier in the tiled area for 48 hours. This water vapor helps the grout gain every bit of strength possible. It takes days for the grout to achieve its final strength and the first few days of the process are critical. If you keep the grout slightly damp for 48 hours after it is installed, it should last a lifetime.

Column 616

Cathedral Ceiling Framing

cathedral ceiling

Cathedral ceilings can be a dramatic look. The ceiling can be covered with wood or drywall. PHOTO CREDIT: Tim Carter

DEAR TIM: My ranch-style home was built in 1968. It has dreary low ceilings. I would love to create a cathedral ceiling. This past weekend, I poked my head into the attic to see how the roof was built. The roof was not framed with modern prefabricated trusses. All I could see were 2 x 6 rafters that meet at the top where they rest against a center-ridge board. Can I take out my flat ceilings and attach a finished ceiling to the underside of the rafters? Is it possible to install skylights at the same time? Stacy J., Tulsa, OK

DEAR STACY: The simple answer is you absolutely can create cathedral ceilings in your home and install any number of skylights. But before you start tearing out the flat ceiling and cutting away the flat-ceiling joists, we need to talk. The modifications you want to do are structural in nature, and if you don't adequately brace the roof, you can cause serious structural damage. In the worst case, your roof will collapse on top of you.

Traditional roof framing consists of two slanted rafters that are connected at their base with a horizontal piece of lumber. When fastened together, these three pieces of framing lumber create a very simple triangle that can be exceedingly strong. But the strength of the triangle relies on each and every one of the three pieces of lumber. Your existing roof consists of a series of these triangles spaced at either 16 or 24 inches on center.

You didn't mention seeing a bottom piece of lumber, but it is there. You didn't see it, because it is either covered by attic flooring or buried in insulation. The existing ceilings in your home are nailed to this flat lumber that forms the base of each triangle.

If you cut this horizontal piece of lumber, the force of gravity, along with the combined weight of the roof rafters, roof sheathing and roofing materials, immediately starts to push the roof structure down. The result is that your slanted roof starts to transform into a flat roof. This process can happen over a period of years, months or even seconds, depending upon how the house is built.

There are any number of satisfactory structural solutions that will allow you to create the cathedral ceiling. One solution is to install a properly sized beam just under the peak of the roof, where the top of the rafters connect to the ridge board. This beam will carry all of the roof load, but the ends of the beam must be supported by columns that rest on a solid surface. This surface might be a concrete footer in a floor, a steel I-beam that is used to support the floor of the home, or even the top of the foundation. A residential structural engineer can help you determine how to properly size and support this beam.

You can also install smaller, horizontal-framing members, called collar ties, that can be exposed as part of your cathedral ceiling. These collar ties are installed higher up than your current flat-ceiling joists, and they create a new bottom base of the triangle. Once again, the engineer can offer suggestions as to where to install these and how to properly fasten them to the slanted roof rafters.

Plywood gusset plates can also be installed high up in the rafters near the peak of the roof. These plywood pieces are cut in a triangular shape to match the slope of your roof. They are glued and nailed to the sides of the roof rafters. You would be surprised how small these gusset plates can be, yet they provide sufficient strength to prevent a roof collapse. If you use these gusset plates, you will end up with a small, flat ceiling area near the peak of the cathedral ceiling.

cathedral ceiling

The slanted pieces of wood are actual roof rafters. The horizontal piece of wood is a collar tie. You can see how combined, all three pieces of wood make a strong triangle. This collar tie is not at the base of the rafters, yet it still imparts great strength. PHOTO CREDIT: Tim Carter

Whichever structural solution you choose, you must install it before you cut away all of the existing ceiling joists. If this is not feasible, then you will have to install temporary supports or collar ties that will provide support until such time as you install the permanent engineered solution. The engineer can assist you with advice about how to safely support the roof as you proceed with the work.

Once the new cathedral ceiling supports are in place, and the flat ceilings have been removed, you need to think about how you are going to insulate the ceiling. Do not fill the entire cavity with insulation, unless you happen to use newer breathable open-cell spray-foam insulation. If you use traditional fiberglass or cellulose, you need to create a 2-inch air space between the insulation and the roof sheathing. If you do not have ridge ventilation in place, you will need it after the job is complete.

Remember that the skylights need to be installed before any insulation work is performed. The engineer needs to know about the skylights, because you may have to strengthen the existing roof framing along each side of the new skylights depending upon their overall width.

Column 615

Deck Flashing

EB015 Cleaning & Sealing Deck eBoo Cover

DEAR TIM: I want to add a deck to the back of a house. With the increased use of HEAVY metals in wood to increase rot resistance, I would like to find a source for both the flashing that goes behind the house siding, over the rim joist and down its side, thus protecting rain from getting behind the house siding and the joist connectors from corrosion. What do you recommend to achieve this goal and where would you go to purchase such items? Thanks. David, Federal Way, WA

DEAR DAVID: The best thing to use is pure copper. You can buy rolls of sheet copper at wholesalers that sell roofing supplies. Real roofers use copper to make all sorts of flashings and window pans.

The copper will perform flawlessly as it is completely compatible with the chemical in the new treated lumber. The liquid chemicals used in the treated lumber contain large amounts of copper. Copper is also easy to work with, and it is easy to solder if you need to create inside or outside corners or lap joints.

Column EM0027

Front Porch Wood Flooring

DEAR TIM: I need to repair some rotten porch flooring boards. These are tongue and groove and interlock with one another. How in the world do I remove the boards that are in the middle of the floor without ruining the ones next to it? What can I do to treat the new lumber so it does not rot in the future? The existing floor is painted, and I love that look, so how do I make sure the new paint will not peel? Robert M., Baltimore, MD

DEAR ROBERT: Tongue and groove wood porch flooring is a classic look. You know this is true when a modern company copies the tongue and groove pattern and wood-grain texture, but makes the product using a mixture of plastic and wood fibers. The modern composite tongue and groove material looks like and installs like traditional porch flooring, but upon close inspection the trained eye can tell it is not real wood.

Before we discuss removing the rotten wood, let's talk about what caused the wood to fall apart. The cellulose component of wood is an excellent food source for any number of fungi that start to grow within the wood once water is introduced to the wood on a regular basis. The wood would be as good as new if you could have kept it dry or treated it with chemicals that are poisonous to the fungi.

This tongue and groove porch flooring is exposed to the weather. It suffered serious rot because it was not treated with a preservative. ©2017 Tim Carter

Tongue and groove lumber is a very interesting building material. One edge of the piece of lumber has a u-shaped groove cut into it. While the shaping machine is cutting this edge, another blade is shaping the opposite edge so that it has a tongue profile. These tongue and groove edges are cut along the longest edges of a piece of lumber. When you tap a piece of lumber's tongue edge into the groove edge of another piece of lumber, the two pieces of lumber interlock as if they were one piece of lumber. This method of assembly keeps a wood floor very smooth, since each piece of flooring has to move up or down in unison with the piece of wood next to it.

Removing a damaged or rotten piece of tongue and groove flooring is not too hard, but you must take your time. The biggest mistake you can make is randomly prying up the flooring. If you do this, you will very likely crack off the top half of one of the groove edges.

The first step in the removal process is using a circular saw to make two cuts down the length of the rotten piece of lumber. These two saw-cut lines should be parallel with the tongue and groove edges, and be spaced approximately three-quarter inch away from these profiled edges. Set the saw blade depth one-sixteenth inch deeper than the thickness of the piece of lumber. Since the only place the lumber is nailed is through the tongue, this strip of wood you cut will immediately come out.

Once this center strip of wood is taken out, the groove portion of the rotten piece can be removed by tapping it sideways so it unlocks from the tongue next to it. The remaining piece of lumber requires a little bit of finesse or brute strength, whichever you choose to use.

Using a locking pliers, grab onto the remaining piece of lumber at one end and pull firmly. You will pull part of the tongue off the piece of lumber where it crosses over each floor joist below the porch flooring. After this piece of lumber is removed, the only remaining step is to remove the slivers of the tongue that are pinned in place by the nails used to fasten the original tongue and groove strip of lumber to the porch floor joists. Remove the nails carefully and the tongue slivers will pop out with ease.

Before you install the new porch flooring, soak it in a borate solution for several minutes and then let the wood dry. You make a borate solution by mixing powders that contain boron-based chemicals with water. This chemical is harmless to humans and mammals, but is poisonous to many wood-destroying fungi.

Once the wood is perfectly dry, then completely pre-paint it on all surfaces, edges and cut ends before installing it. Be sure to avoid putting excess paint in the groove and tongue edges of the lumber. Too much paint will cause a hardship as you try to slide the last piece of lumber into position. Allow the paint to dry at least one week so it cures well, and can stand the abuse of being handled during installation.

The easiest way to treat the lumber with a borate solution is to make a trough using heavy 6 mil thickness vapor-barrier plastic. Use some scrap lumber that is 1 foot longer than the lumber you are treating to make a frame to support the plastic. Set each end of the frame on a concrete block. Drape the plastic into the frame allowing it to flow onto the ground, and secure the plastic sheeting to the top of the frame using roofing nails and small strips of wood.

Add enough solution into the trough so that it is deep enough to cover as many pieces of lumber you want to treat at one time. Follow the directions on the borate-chemical package for the amount of time you need to soak the lumber. Once you remove the lumber from the solution, allow it to dry in an area where the lumber will not get wet from rainfall or any other water. Let the lumber sit for several days until it is completely dry. Failure to do this will cause the paint to peel.

Column 614

Medical Billing Services

Medical billing services are companies that take the pain of collecting money out of the doctor's office. A good service will maximize a doctor's receivables, while keeping their cash flow consistent. The key is choosing the right medical billing service.

A great service will submit insurance claims timely (preferably electronically), track the payments, follow up on unpaid claims and deal with all denials. They will not let any claim go unpaid.

Representatives of the service will attend insurance company seminars, advise the doctor of changes in their field and provide them with regular financial reports. They should not only handle the billing needs, but should act as consultants for the doctor, advising of fee structure, coding practices, and other ways to improve the office.

An obvious way a doctor can save money by outsourcing his billing is in the savings he will generate through payroll, equipment, software support, updates, postage, forms, etc.

Outsourcing medical billing produces more than cash savings. A good service can maximize what the doctor actually brings in by collecting more money than an in-house staff can.  In most offices, the in-house staff does not have the time or the knowledge to handle the problem claims, and the doctor ends up not getting reimbursed anything for those services.  

By outsourcing, a doctor is hiring a professional.  Medical billing services have the expertise to submit claims accurately, collect on all claims, even those that have been denied by the insurance carrier. This helps the doctor's patients by avoiding billing the patient for a claim that should have been paid by the insurance carrier.  

Column EM0028

Ceramic Tile Mural Problem

ALOHA TIM: I had a mural painted (and fired) on eight 8" ceramic tiles for a 16" x 36" backsplash in back of my stove. It is surrounded by 1/2" x 6" border tiles.

This ceramic tile mural is meticulously placed, glued up on drywall with Q-set Mastic 6500, an acrylic-based mastic. It is not yet grouted. Unfortunately, our tile installer was a friend here on vacation from the mainland who house-sat while we were on the mainland. We returned Monday. He installed the mural wrong, and I am not sure how it happened. I had laid it out for him before we left.

I'm trying to figure out what to do. Here are the options I have at this time:

1) The artist is willing to come here and paint three tiles to look like they go together and she uses a good paint. She says it won't last forever. I'm not sure she can create the balanced effect she originally had (whales, turtles, dolphins, coral) with a patch job.

2) Remove the tiles and whatever does break, she can do new tiles and have someone else install them.

I don't know if we will end up with having to do some sheetrock work or not. I have very few of the original backsplash 2-1/4" white tiles (original backsplash was two rows of these tiles) in case removal of the mural causes tile damage to the adjoining backsplash. The original backsplash continues on the back wall on both sides of the stove. I do have more border tiles. Do you have any suggestions? Mahalo, Gail Jackson, Lanai, HI

DEAR GAIL: You are in great luck since the tile was not yet been grouted. You can salvage each tile without breaking them, if you take your time in the removal process.

You are going to ruin the drywall in the process, but it is a small price to pay. Since the tiles are larger 8 x 8-inch ones, I assume the grout joint lines are large probably between 1/8 and 1/4 inch. The first thing to do is to take a razor knife and cut through the paper facing of the drywall around each individual tile.

Once you have done this, take a hand-drywall saw or a rotary-powered-drywall-cutting tool and cut through the drywall around each tile. You will need to cut carefully so that you do not cut into any wires or plumbing pipes behind the drywall. Have someone help you as you finish the final cuts around each piece, so that the tile and drywall does not fall into the wall cavity or onto the countertop.

Once all tiles are cut out of the wall with the drywall attached to each one, place them in a bucket or several buckets of water and allow them to soak overnight. This soaking period should soften the drywall so that it can be easily removed from the back of the tile.

Once you have scraped the softened drywall off the back of the tile, apply an adhesive remover to the tile to soften the mastic. Scrape as much mastic off as possible, but don't worry if some remains on the tile.

Repair the drywall and start again, but this time, stay in the house and assist with the installation to ensure each tile is put in the right spot.

Column EM0027

Pouring Concrete Sidewalks

DEAR TIM: This summer I want to install a concrete sidewalk. Is it possible to do this job completely by myself? What are the most important steps I need to follow? What are the biggest pitfalls to avoid? I am industrious, so I am convinced this job is not too hard to do. Mary Ann L., St. Helen, MI

DEAR MARY ANN: Do not underestimate the skill set, nor the amount of hard, physical labor this job will require. If the total area of the sidewalk is not over 150 square feet, and the concrete delivery truck can be parked adjacent to the forms, I feel you can do this job.

You need to realize that concrete is very heavy, and once water is added to the sand, gravel and Portland cement at the ready-mix concrete plant, a chemical reaction starts whereby the concrete begins to get hard. You have a limited amount of time to place and finish the concrete once the ready-mix truck arrives at your home. To make matters worse, the amount of time to work with the concrete decreases as the air temperature increases. So try to do this job when air temperatures are in the 50 - 59 F range.

Don't put too much concrete into a wheelbarrow. See how much you can comfortably handle. PHOTO CREDIT: Tim Carter

The soil upon which you will pour the concrete must be well-drained and compact. You can use a hand-tamping tool for this task. If the soil is a thick clay, add 2 inches of small, rounded gravel to the area where you will pour the concrete. This gravel will help improve drainage.

The sidewalk should be poured at least 4 inches thick. If you increase the thickness to 5 inches, it will dramatically increase the durability of the sidewalk. Installing reinforcing steel will also significantly strengthen the concrete. Use 1/2-inch-diameter steel bars placed 2 foot on center in both directions, just like the grid in a crossword puzzle. The steel bars need to be in the center of the wet concrete. Do not allow the steel to lay on the soil or gravel and be covered with the wet concrete. It is best to suspend the gridwork of steel on small pieces of flat rock or some other solid material that allows the concrete to flow under and over the steel as you place the concrete in the forms.

Be sure to assemble all of the tools you need and check that they are in great condition. You will need a wheelbarrow, a round-point shovel, a concrete rake or traditional, hard gardening rake, several straight 2x4s, a magnesium finishing trowel, a wood hand float, a push broom with medium bristles and a jointing tool.

It is vitally important that you order the right concrete mixture. The absolute minimum standard is 4,000 pounds per square inch (psi) strength. I would recommend you consider 4,500 psi concrete delivered at a 4.5-inch slump and be sure it is air-entrained. Slump is a measurement of the amount of water added to the concrete at the ready-mix plant. The higher the slump number, the easier it is to place the concrete as it flows more like water. A 4.5-inch slump will be like working with a slightly stiff cake batter.

Do not add water to the concrete once it arrives at your home. This added water weakens the concrete because the Portland cement particles get diluted in the mix. Do not sprinkle water on the concrete as you work with it. It is a good idea to slightly dampen the soil and the gravel just before you pour the concrete. This prevents suction from pulling the water out of the concrete mix and into the soil, making it hard to place and finish the concrete.


concrete slab specs drawing

As you place the concrete in the forms, use the concrete rake and 2x4s to smooth out the concrete, so it is flush with the top of the forms. I would start the pour at the far end of the sidewalk, away from the truck. At some point, the truck driver may be able to use his long chute to drop the concrete right into the forms. This saves back-breaking work and lots of time. Be sure you do not fill a wheelbarrow full of concrete. It can weigh hundreds of pounds, and you might drop the load or hurt yourself.

Once the concrete is poured, you must work the top of the concrete with a wood float or the magnesium float. You swirl these tools on the partially stiff concrete; this motion drives the stone aggregates down into the slab and brings the sand and cement component to the top. Ideally, you would like to have the stones about 1/4 inch below the finished surface of the concrete. You can use the push broom to create a nice, finished texture. Pull the broom lightly across the smooth concrete to get the desired look.

Concrete shrinks as it cures and hardens. It shrinks 1/16th inch for every 10 linear feet. You must create control joints at even intervals so that you do not get random cracks across the new sidewalk. These control-joint lines are installed with a tool that cuts a crisp line in the wet concrete. Run the tool along a board that crosses the forms at a 90-degree angle to keep the line straight. The depth of the cut is critical. It must be a minimum of 1/4 the thickness of the slab. At the bare minimum, your cut line should be 1-1/4-inch deep. Space these lines no more than 4 feet apart.

As soon as you are satisfied with the finish, you must apply a curing compound to the fresh concrete. This product locks in the water that was used to mix the concrete. The concrete uses this water to complete the chemical reaction that continues for many months. This hydration reaction is what allows the concrete to reach its final design strength.

Column 613

Extreme Makeover Home Edition Sunrise Kentucky

DEAR TIM: Have you ever watched one of those shows where they tear down the house of a deserving family and build them a new house in an extremely short period of time? When I say short I mean four or five days.

It's great theater, and when we see the video of the beautiful and well-appointed new home, I am very impressed. But really, how to they do that?

Sure, they have a huge crew of knowledgeable and dedicated professionals, but my experience would tell me that these folks would be stepping on one another, interfering with one another, and aggravating one another until the whole thing would erupt into a construction catastrophe. Even if they work with modular stuff (I do not know if they do), how does this stuff get done?

Also, the finished product looks great on television. Have you ever heard whether it looks as good close up? Craig M.., Dayton, OH

DEAR CRAIG: The Extreme Makeover: Home Edition television show is doing this exact thing right now 50 miles south of Cincinnati, OH. The show's host Ty Pennington, a professional home builder, numerous subcontractors, building material manufacturers and suppliers and an army of 250 volunteers are doing a blitzkrieg building project by tearing down a house and rebuilding it in just one week.

This extreme home makeover is indeed television theater at its best. It whips people such as you into a frenzy of excitement, wonder and amazement because of the speed of the project. I can tell you the concept is not new by any means and I have done it myself on a smaller scale on two separate occasions.

Years ago, I was challenged by an oral surgeon to do an extreme office makeover. I was given just one week to completely remodel his interior offices. It was a daunting task, but I accomplished it with detailed planning, fantastic support from my suppliers and subcontractors and precisely timed inspections.

I was the lead builder for one of the first Habitat for Humanity houses built in Cincinnati, OH years ago. My interest in the project was fueled by what I could do with 30 eager volunteers each Saturday. It was absolutely amazing to see how much work could be accomplished in just eight hours.

Members of the Jehovah's Witnesses have done the same thing for years. It is not uncommon for them to build a church in a matter of days. They have hundreds of talented building construction members from other cities swoop down onto a location and work non-stop for days to complete a new church for a grateful congregation.

The methodology employed by the Extreme Makeover: Home Edition television show is no different. They plan far ahead, pre-order all materials and stage these materials in a warehouse. Countless pre-construction meetings are held that outline exactly what will happen when. The entire job is broken down into small parts where perhaps a crew of three people is assigned a highly specific task. Each crew knows what to do and how to avoid confusion and overlap with adjacent crews.

A certain amount of the work may also be done in advance. Walls can be prefabricated at a factory and simply set in place at the jobsite. With enough planning, the walls can even have all holes predrilled in them for electrical cables and plumbing pipes.

You would be amazed at what can happen in advance. Sinks can have faucets attached and water supply lines dangling form them before they are dropped into a countertop. This work can happen days in advance of the start of the project. Woodwork, doors and other trim can be pre-painted or pre-finished before it is installed. Some trim can already be precut before it is installed. This is possible as carpenters already know the needed measurements based upon the frame size of the doors and windows.

Then imagine what happens if you place 15 or 20 qualified electricians in a house at the same time, with each one assigned just two or three things to do in distinct locations. Doing this, you can see it is possible to have a house completely wired in just a few hours. The same is true for each and every task.

Think about the drywall for just a moment. Can you see how fast you could hang every sheet of drywall in a house if a separate crew was working in each room? In fact, two crews could be working in a room at the same time and not interfere with each other if it was planned properly.

The local newspaper, The Cincinnati Enquirer, published a special story the Sunday after the house was completed. In this behind-the-scenes look, they produced a comparison of the normal amount of time certain tasks take in new construction vs. the compressed time frame in the Extreme Makeover method of construction. Here are the comparisons as shown in the Enquirer:


Normal Construction

Extreme Method

Total Time 120-130 days in good weather 106 hours non-stop
Framing 8 days - 6 workers 20 hours - 30 workers
Roofing 8 days - 4 workers 14 hours - 15 workers
Heating/AC 3 days - 2 workers 6 hours - 12 workers
Plumbing 7-8 days : 2-3 workers 20 hours - 20 workers
Electrical 3 days for rough wiring
1 day for finish wiring
1-2 workers
3 hours for rough
3 hours for finish
15 workers
Insulation 2 days - 2 workers 4 hours - 10 workers
Drywall 15 days - 4 workers 13 hours - 20 workers
Flooring 1 day for carpet
4 days for hardwood
2-3 workers
2 hours for carpet
10 hours for hardwood
6-8 workers

As for overall quality, I can't make a judgment, as I have never seen one of these projects up close and personal. But I can tell you from working in the television industry myself for the past eight years that a slightly out-of-focus camera lens and the resolution of traditional television sets are very forgiving. New high-definition television sets can show far greater detail, and you might find that cameramen will not zoom too closely if the quality is low, or they may adjust the focus ring on a lens to disguise a blemish.

The recent project in Sunrise, Kentucky could be fraught with all sorts of hidden problems. The framing of the house happened during two days of intense rainy weather. Although I was not there, I have to believe the lumber absorbed lots of water, and it is possible insulation was placed in damp wall cavities and then immediately covered with a plastic vapor retarder. If this happened, mold and mildew could be growing like wildfire hidden behind the drywall in this brand-new home. As they say in Hollywood, the show must go on.

The magic that happens during post-production in the editing suite is also something to behold. Mistakes, problems and defects may be there on the digital recording tapes or discs, but for some odd reason they just don't seem to make it onto the final cut of the show. For those who think these jobs are mistake-free, well, I have several bridges and an airport I would like to sell to them.

Column EM0026