DEAR TIM: I am tired of working on projects on my hands and knees in my garage. I really need a sturdy workbench. Surely you have one. Can I build a simple one in an afternoon? If so, what are the most useful dimensions and materials to use? Cathy B., Toledo, OH
DEAR CATHY: Garage and basement floors are not the best work surfaces by any means. There is no substitute for a solid workbench. I prefer to build them so they look and feel rough. That way you don't feel bad denting them with a hammer, nicking them with a saw, or by drilling a hole into them. This is exactly why I always put a small dent in my brand new vehicles. I get rid of that "new" feeling in a hurry! You can build a sturdy workbench, but I feel it will be a long afternoon.
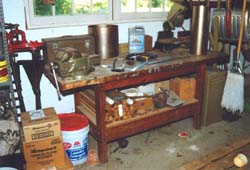
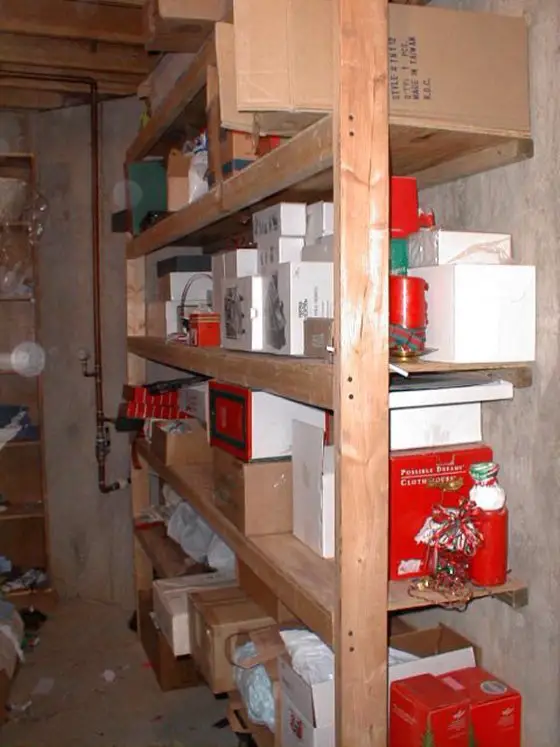
You are looking at my garage workbench. It is so strong, I think it could possibly support 2,000 pounds or more. The shelf below helps make it very stable.
My garage workbench measures 33 inches high, 29 inches deep, and 72 inches long. There is a modest three inch overhang on the front and back. The left and right overhang is 9 inches. The frame upon which the top sits is made from 2x4 leg stock and 2x4 top and bottom braces. Be sure to purchase 2x4s that are as straight as possible. Warped, bowed or twisted material will create problems during assembly. All wood pieces are connected using screws or bolts. Nails have a tendency to loosen over time.
You start building the workbench by building two identical 2x4 frames. These stabilize the legs of the workbench. Each frame has two 54 inch long 2x4 pieces and two 20 inch pieces. The 20 inch long pieces fit in between the 54 inch pieces so that the final outside dimensions of each frame are 54 inches long and 23 inches deep and three and one half inches high.
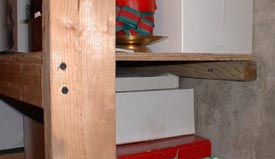
The workbench only needs 4 legs. You can use 2x4s or 4x4s, whichever you prefer. Each leg is 31 and one half inches long. The legs are attached to the inside corner of one of the frames. Lay a frame on your garage floor and assemble the legs so they stick up into the air. Use three inch long screws or one quarter inch lag bolts to attach the legs. Use a minimum of 4 screws or bolts at each corner - two to a side. Once all four legs are attached, lay the other assembled frame on the garage floor. Have someone help you lift the first frame with the legs attached. Rotate the legs 180 degrees and set the legs inside the second frame.
Slide the second frame up the legs 11 and one quarter inches. Attach this frame exactly as you did the first one to the legs. This frame keeps the legs from spreading and will also act as a handy shelf once you install a piece of 3/4 inch plywood on it. You will need to notch the corners of the plywood so they fit around the legs. It is an easy task and you can get accurate measurements once you have attached the frame to the legs. Your workbench base is now complete.
The top is simple to build. Begin with a piece of 3/4 inch plywood that measures 70 and one half inches long and 27 and one half inches wide. Center this on the workbench base and attach it using L brackets and temporary short screws.
The finishing touch of the workbench top is standard 3/4 inch thick tongue and groove hardwood flooring. Purchase #1 common flooring for economy. Cut the hardwood so it fits flush on all sides of the plywood. Use regular flooring nails to blind nail the hardwood through the tongues. Cut the tongues off the last four pieces to create a 2 inch wide trim band that is applied to the edges of the top. This band hides the plywood and the ends of the hardwood strips on each side edge. Glue and screw these band pieces to the hardwood for a nice fit and finish. Remove the temporary screws from the L brackets and replace them with one and one quarter inch long screws.
Author's Notes:
February, 1999
Wow, did I get mail as a result of this column. Everyone wanted the hard copy plans for the workbench. I also got some great letters from people who built the workbench. Here is one I felt you should see, as the writer included a great feature in his workbench you should know about. I'll let Ron tell you all about it,
"....I did four coats of polyurethane, with a full two days of drying between coats and a light sanding. It looks great.
One other thing that I did was to put a tape measure on the tabletop before coating it. I wanted to find one that was self sticking and was finally able to find it at a sewing/craft store.
On the front of the table, I put the tape measure from left to right and about 4 inches in. I ran one both directions. So that no matter which end of the table I'm working from, I have a correct tape. I also put a tape measure on the endcaps, once again before coating with urethane...."
Ron in North Carolina
Related Articles: Materials List & Illustrations, Build Simple, Safe & Sturdy Workbench
Column 245


 Get a
Get a