DIY Plumbing
DEAR TIM: Do you know how to solder copper water pipes? I plan to install some new copper tubing which will replace old galvanized steel water lines. How do you successfully solder copper water lines? I'm afraid of burning my house down while using the torch. What can I do to minimize fire risks? A.M.
DEAR A.M.: Soldering copper pipe intimidates many homeowners. With a little knowledge and practice, you will get leak free joints just about every time. Not only that, if you follow some simple steps, we can keep the mileage low on your local fire department pumper trucks.
For you to solder copper tubing successfully, you will need the following tools and supplies: a tubing cutter, round wire fitting brushes, plumbers sand cloth, flux, flux brush, an acetylene or propane torch, lead free solder, and a few 5 gallon buckets. All of these items can be found at your local plumbing supply house.
Tubing cutters are simple tools that cleanly cut copper tubing to specific lengths. Use the plumber's sand cloth to clean each end of the pipe. You need to shine only about 1 inch at each end. The fitting brushes are rotated inside of the copper fittings to remove oxidation.
 Open the flux container. You will see a gelatin like substance that usually contains zinc chloride, ammonium chloride, and paraffin. Stir the flux well to mix it, especially if it has been sitting in a hot area. Use a small flux brush to apply a coating to the areas of both the pipe and fitting you have cleaned. Don't get the flux in your eyes or mouth!
The pipes and fittings must be dry for soldering to take place. If water or steam is in the pipes, you can't get the copper hot enough to melt and draw the liquid solder into the fitting. You can temporarily stop the flow of water if you roll up some bread and stick it in the pipe where water is flowing. The bread will eventually dissolve and not cause a problem within the water lines.
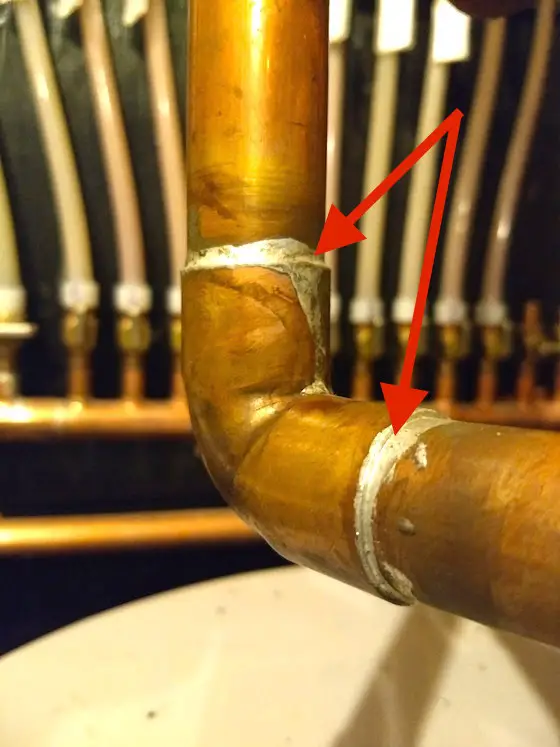
Once you have joined the pipe to the fitting, it is time to solder. Light the torch using a match or a flint striker. You should see a flame within a flame if your torch is adjusted correctly. The tip of the inner flame produces the hottest temperatures. Apply the torch to the pipe/fitting area so that the tip of the inner flame just touches the copper. The flux will immediately begin to boil.
Within about 10 - 20 seconds, the boiling flux will disappear. At this time, touch the solder to the intersection point of the pipe and fitting. Within 1 second, the solder should begin to melt. Immediately remove the torch. If the pipe and fitting are sufficiently hot, the solder will continue to melt and be drawn completely into the fitting. The pipe will usually retain enough heat to melt the solder for 10 to 15 seconds. However, you usually need to only apply solder for 3 - 5 seconds.
Using a propane or acetylene torch around wood framed houses is a recipe for disaster. Wood chips, paper insulation backing, etc. can ignite easily. Prior to starting this project fill your 5 gallon buckets with water. Better yet, purchase a portable fire extinguisher that is made to extinguish wood and paper fires.
You can also buy at the plumbing supply house non combustible flameproof fire shields. You can place these between the copper and any combustible product as you solder. If you can't locate this product, a piece of sheet metal will do a fine job to absorb and deflect the torch's heat. Always look behind or past what you are soldering. Be sure you do not melt an electrical wire or telephone wire. You may need to dial 911!
Tim built custom homes and did ultra-custom remodeling for 20+ years before launching his Ask the Builder media presence. He was selected as one of the Big 50 by Remodeling magazine in 1993. This award gave birth to Ask the Builder in October 1993. Tim also operates https://DrawPlumbingPlans.com. His @askthebuilder YouTube channel was the first home improvement channel on YouTube.