How to Build a Temporary Wall
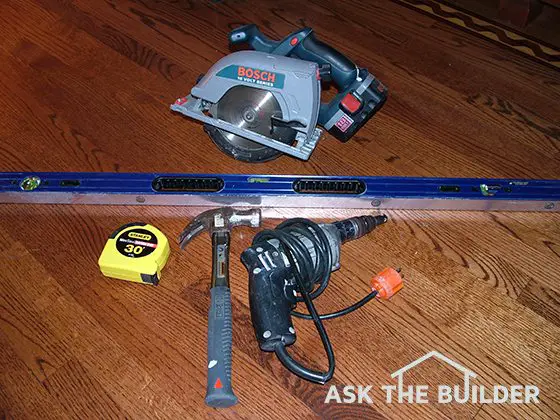
These simple tools are all that is required to build temporary walls. ©2017 Tim Carter
How to Build Temporary Walls TIPS
- Minimal tools and skills required
- Tack studs to plates
- Use foam sill sealer for dust control
- Noise batts help for sound control
- CLICK HERE to Get Tim's FREE & FUNNY Newsletter!
DEAR TIM: I'm moving into a rental house, and need a few temporary walls to partition off a portion of the living room to create an office. My idea is to put in an L-shaped wall in the corner of the room to create a 6 x 9-foot office.
Is it possible to put in a temporary partition wall that I can take down without any damage when I move out?
Ideally, I'd like the small office to be as noise proof as possible, since I have small children. I plan to work from home. Brian M., Lafayette, CA
DEAR BRIAN: It's indeed possible to build one or more temporary walls in this new apartment that can be removed at a later date. If done properly and with care, there will be little or no evidence any walls were ever installed.
Temporary Walls Require Minimal Tools & Skills
The skills and tools required to do this are minimal. You will need several helpers at various parts of this job. The hardest part will be holding the top plate of the wall up against the ceiling as you tap a few of the vertical studs in place.
It's probably a great idea to enlist a helper and have two step ladders handy.
Don't Try Friction Fit - Walls Can Tip Over
The temporary wall partitions can be friction fit between the floor and ceiling, but I'd not recommend this. Seasonal changes in humidity and even moisture loss from the studs you use can cause the wall to come tumbling down.
You'll want to toenail the studs to the top and bottom plates. Twelve-penny common nails will be fine for this. Be sure the nails don't penetrate the finished floor beneath the bottom plate.
Secure To Ceiling
All you have to do to keep the walls from tipping over is make them fit tightly and use an occasional fastener through the top plate into the ceiling. These small holes, if you decide to make them, will need to be spackled and painted when you take down the wall.
Remodelers Build Temporary Walls
Temporary wall partitions are built on a regular basis by many remodeling contractors. The walls are needed to temporarily support loads as bearing walls are removed and replaced with beams.
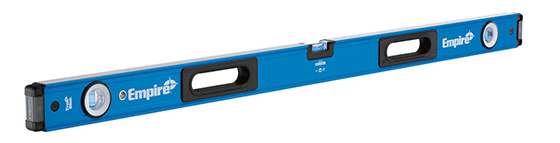
This is a durable extremely accurate level that will last a lifetime. CLICK THE IMAGE TO order one today.
Magic Builder Tricks - Sill Sealer
Homeowners don't want to see where the temporary wall was installed just as your landlord doesn't want to see you damage his building. I discovered many cool tricks over the years that helped me eliminate damage to finished ceilings and floors.
To protect the ceilings and walls from damage and help soundproof at the same time, I installed a one-quarter inch thick piece of foam between the rough lumber top and bottom plate faces and the surfaces they contact.
This product is sold in rolls and called sill-plate sealer. It is used to stop air infiltration between the top of a house foundation and the first piece of lumber installed on top of a foundation.

This is foam sill sealer. It matches the width of either 2x4s or 2x6s. It will seal out dust and noise. CLICK THE IMAGE NOW TO BUY IT.
Foam Stops Dust & Noise
Before any cuts are made to the vertical wall studs, determine where the wall will go and take precise measurements between the floor and ceiling. Check the measurements in many locations as the floor and ceilings can be out of level.

This is a wonderful corded saw. It will last generations if you care for it. It cuts very accurately. CLICK THE IMAGE NOW TO BUY THIS SAW.
The foam will help you achieve a tight fit if you cut the vertical wall studs three inches less than the exact distance between the floor and ceiling. This assumes the bottom and top plates you install are each 1.5 inches thick.
Build Long Wall First
Start with your longest wall, and cut the two end vertical studs first. Have your helpers hold the top plate in position as you tap the end studs in place. If they are loose, you can close the gaps with tapered wood shims.
Drill Toenails
Once the studs fit snugly, use a drill to create angled holes at the ends of the studs that allow you to drive three-inch long drywall screws through the studs and into the top and bottom plates. The screws will lock the studs into the plates. Screws can be removed easily when it is time to remove the wall.
IMPORTANT TIP: Once you have all wall studs in place, it is time to get ready to drywall. Don't even think about installing electric in these walls as that would be a significant safety hazard. The power for your office equipment will need to come from existing wall outlets on the permanent walls.

This is the great tape measure I have that has the fractions marked on it if you need help. It's VERY EASY on the eyes. CLICK THE IMAGE NOW TO ORDER ONE.
Sound Batts Keep Things Quiet
Before you drywall, install sound-batt insulation in the stud cavities. This will not eliminate noise, but it will surely help you.

Add these batts to keep sound transmission down between the two rooms. CLICK THE IMAGE NOW TO ORDER IT.
You can also help reduce noise by installing different thickness drywall on each side of the wall. Use ½ inch on one side and 5/8 inch on the other. This eliminates noise caused by sympathetic vibrations.
Do not bother taping the drywall where it contacts the walls and ceilings. Use a simple wood trim nailed to the new wall surface to hide the unsightly gap between the new drywall and finished wall and ceiling surfaces.
If you plan to install a door, consider using an exterior door that has complete weatherstripping. Noise travels through air. Regular interior doors have all sorts of air gaps between the door and the door stops on the jambs.
Be careful about hanging any cabinets on the temporary walls. This weight can make them top heavy and more likely to tip over. The L-shape of the walls gives the system a certain amount of stability, but only if the two walls are joined tightly together in the corner where they meet.
Column 685
Tim built custom homes and did ultra-custom remodeling for 20+ years before launching his Ask the Builder media presence. He was selected as one of the Big 50 by Remodeling magazine in 1993. This award gave birth to Ask the Builder in October 1993. Tim also operates https://DrawPlumbingPlans.com. His @askthebuilder YouTube channel was the first home improvement channel on YouTube.
Hi, this page is very helpful. However, I was wondering whether the same framing can be applied to metal studs? Or would metal studs not be as sturdy as wooden studs? Moreover, once the friction fit frame is set up, its it necessary to fasten the side studs onto permanent side walls? (not L shaped wall, but a partition wall between 2 walls). Thank you very much!
Jack, you need to schedule a 15-Minute call with me. There's simply too much to talk about and type.
Dear Tim,
My wife and I are expecting are first child and need to either find or make a 2 bedroom apartment.
We have a spacious apartment in downtown Seattle and love our current location. We are also getting an amazing deal on rent. A two bedrooms apartment in a vintage building around here (that also allows dogs) can be pretty pricey; and finances are definitely a concern with a newborn on the way. I've thought about creating a room with a 3 temporary walls in a "U" shape with the two ends being screwed into the studs of a large existing wall.
My concerns are:
Knowing that this will be a nursery, will these walls be safe/sturdy enough without screwing the bottom plate into the 100+ year-old hardwood floors? And would it be possible (or even advised) to install a pocket door to save space, time, and resources?
Thanks for the help!
Matt, you should consider investing in a 15-Minute Consult with me. Look at my cart for that. Lot's to discuss. I just do short pithy answers here.
I see that the original question/post came from Lafayette, CA, and I'm in this area as well.
There seem to be a lot of prefab/temporary wall options in the NYC/Manhatten area--but I can't find anyone in the SF Bay area/East Bay to do this.
Tim, are you by any chance located here??? Do you tackle projects like this personally?
-Jen
Jen, I'm in NH. I do phone consulting and people frequently send me photos / videos to look at before the consult. You can purchase a phone consult by clicking the SHOP icon at the top of any page.
Great advice, I run a small business out of my house where two dogs and two cats call it home. Because I need to create a clean space this will be perfect to create a room of my own in our dining room that is VERY long.
instead of drywall, could you use some other kind of wall panel made from wood or plastic?
Hi, I am trying to convert my garage into an office and a dressing room with a small budget and by myself. Can you tell me the pros and cons of adding a partition wall in front of the garage door vs. insulating the garage door itself? I don't need the wall for any purpose other than insulation. Thanks! Amy
Hi Tim! I want to build a wall in our garage for a "hall tree" to sit up against, and block the sight line from the walk-through door into the usually messy garage :). It would be less than 6' wide and run perpendicular to an exterior wall.
Two things about it... 1. obviously it's on concrete being that's the garage, but I'd like to refrain from drilling to the floor in case we decided to remove the wall. and 2. Our garage ceilings are 11' high.
Can I still do this? What are your recommendations? Appreciate it! Mac
Follow what I say to do in the column. Use construction adhesive on the bottom plate to secure it to the concrete. Not too much. A few dobs of it.
Instead of drywall, could you use plywood? Pros and cons?
Yes you can.
Pro: reuseable, easy to paint
Con: not fireproof, splinters