Shower Soap Dish
DEAR TIM: You helped me a week ago when I decided to replace my shower head. Believe it or not, the shower head slipped from my hand and broke the shower soap dish. This small weekend project has turned into a nightmare. How do I replace the ceramic soap dish? What else can go wrong? Alan L., Jackson, TN
DEAR ALAN: Oh my friend are you in a world of hurt now! You are not the first person with good intentions to cause a cascade of home-repair events. Replacing your ceramic soap dish is not going to be easy. It may be time to call in a professional tile setter. No matter who does the job, be sure to finish installing the new shower head before the soap dish is repaired.
Your wall soap dish may be easy to replace, and then again it could be extremely hard to remove. It all depends on how old the tile job is, the substrate behind the tile and the level of skill of the installer.
The first thing to do is to locate a new ceramic soap dish that matches the broken one. This may be difficult, especially if your tile has been up for over ten years. You are trying to get a soap dish that will cover over the field tile just as the broken one does. Many ceramic soap dishes have a flange that allows them to cover over the adjacent tile by about one-quarter inch.
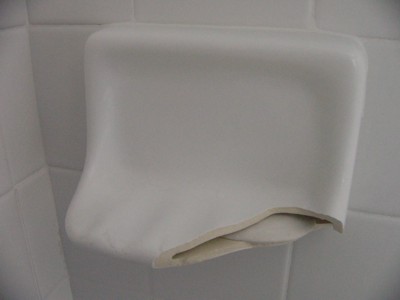
Falling shower heads will break shower soap dishes. It takes great skills and patience to repair the wall soap dish. PHOTO CREDIT: Donn Ross
When you get the new tile soap dish, look at the back of it. You may discover one or two holes in the fixture. These are not defects. The holes are there by design to help lock the soap dish into position.
The hardest part of your task will be to take the existing tile soap dish out without damaging any of the surrounding tile. The first thing you need to do to have the best chance of success is to remove the grout that is between the soap dish and the tile. You can attempt this with a small rotary grinder that resembles a dentist's drill, or you can try to very carefully chisel it out with the corner of a stiff putty knife. No matter how you do it, go slowly and tap the grout with care.
When the grout is removed, you can try to carefully break the remainder of the soap dish making sure you do no damage to the substrate behind the soap dish. If you have access to a small hammer drill, try drilling a series of holes down the middle of the soap dish from top to bottom and side to side. The holes may act as stress-relief points and the dish will fracture along the holes. Once you get one corner of the soap dish out, try to break the remainder away chunking the ceramic fixture towards the vacant corner. Break out small pieces at a time. Wear gloves and goggles as the ceramic chunks are very sharp.
Once the old soap dish is gone, you need to ensure the substrate is in good shape. If it is cement board or a true cement base set in metal lath, you should be in great shape. If the substrate is gypsum based, inspect it to make sure it is sound.
The holes you might see on the back of your soap dish need companion holes in the same spot on the substrate. The holes allow for thinset or grout to droop into the holes and sag just like mortar oozes from under a brick. This u-shaped drooping compound, once hard and dry, is what locks a ceramic soap dish into position. The mastic you spread onto a wall for the tile is generally not intended to hold a soap dish in place.
Mix grout or thinset so it is fairly thick. It needs to be plastic so that it will droop, but not so plastic that it flows. Cut two pieces of duct tape and just lightly stick them on the tile near where you are working. You will need these to hold the new soap dish in position as soon as you set it into place.
Make sure the substrate and the new soap dish are dust free and slightly damp. Apply a generous amount of the grout or thinset to the back of the soap dish making sure it is pushed into the holes. Push some into the substrate holes. Add just a little more to the back of the soap dish and push it into position. Immediately tape it along the top edge to ensure it will not move or fall away from the wall. Wait 48 hours before removing the tape so you can grout the soap dish to finish the job.
The back of most ceramic soap dishes has a square or rectangular raised area that is the same thickness as the tile that is adjacent to the soap dish. This raised area is what creates the gap where the soap dish is grouted to the tile.
It is important that the gap between the new soap dish flange and the tile is no more than one eighth inch. If it is more, there may be some old mastic or thinset on the substrate. This needs to be removed to achieve professional repair results.
Column 738
Tim built custom homes and did ultra-custom remodeling for 20+ years before launching his Ask the Builder media presence. He was selected as one of the Big 50 by Remodeling magazine in 1993. This award gave birth to Ask the Builder in October 1993. Tim also operates https://DrawPlumbingPlans.com. His @askthebuilder YouTube channel was the first home improvement channel on YouTube.
Tim. I need your help. Just like the picture you have of the broken ceramic soap dish, is exactly what happened to me my shower head hit it and it broke.
Unfortunately, I don't have the time or the skill to replace the soap dish per your detailed instructions...so my question to you is- do you know of any tile company that will fix a broken soap dish? I live in the suburbs of Philadelphia, PA, Delaware County and every tile company I have contacted says that they need to redo the entire shower! I am in the process of about to put my home on the market and I need to have the cracked/broken shower soap dish repaired. Please advise, I am desperate. Thank you
Rhoda,
I want you to click the following link to get FREE BIDS from local handymen that can do this simple repair:
http://www.homeadvisor.com/ext/32181851