Wood Fencing
DEAR TIM: Wood fencing is my next project. My wife loves wood fences and I feel they are attractive. What are the top things I need to know to ensure this project is a success? What is a good wood fence post? Should I prebuild wood fence panels or construct the fence in place? Is it necessary to embed the fence posts in concrete? Barry L., Columbia, SC
DEAR BARRY: My wife and I are suckers for a wood fence as well. I've had wood fencing at every house I've ever owned, and the fence at my existing home still gets compliments to this day. This fence has a gentle convex curve between each of the fence posts. Each wood fence panel is made from two horizontal treated-pine 2x4s and vertical pickets made from rough-sawn cedar. Each picket has an arrow point to match the distinctive points on each of the treated-pine 4x4 fence posts.
There are many things you need to consider as you start this project, not the least of which is are you even allowed to build the fence in the first place? Many cities and towns have strict zoning laws that control wood fencing, it's location, height, design, etc. just to name a few. I used to live in a village that prohibited fences in front yards and strictly controlled the height of fences so that the vista across multiple properties was not blocked.
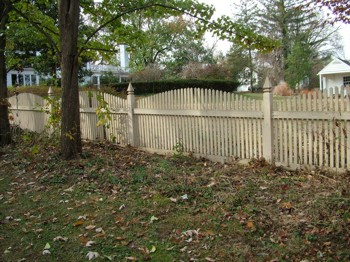
This wood fence is made from durable cedar lumber and treated pine posts. PHOTO CREDIT: Tim Carter
If you get the approval and necessary permits to build your wood fence, then you need to be concerned with underground utilities. Electric, gas, water, phone, cable television lines can be lurking just below the surface of the soil where you intend to ram your post-hole digger. Call 811 from your phone to schedule an appointment from the service that marks the location of underground utilities.
To conserve natural resources, your time and money, I would recommend wood-fence designs that allow you to build your fence in a modular fashion. This means using wood materials in such a way that you have minimal or no waste. I did this with my own wood fence many years ago.
I've had fantastic success over the years with treated pine fence posts. My current fence has treated-pine 4x4 posts that are six-feet long. I was able to get two posts from each 12-foot-long 4x4 that I purchased. These posts are buried 2 feet in the ground so that the top of the fence is 4 feet out of the ground. This 2:1 above/below ground ratio is a good one to adopt to ensure your fence withstands strong wind gusts.
It's not a bad idea to pre-build your wood fence panels, but keep in mind the total weight of each panel and how you will connect each panel to your wood posts. If you intend to stain or paint your wood fence, you'll get the best long-term results if you pre-paint or stain each individual piece on all surfaces and cut edges before you assemble the parts. Paint that peels from wood fences often starts at locations where one piece of unpainted or unstained wood overlaps another one. Rain gets into this confined space and soaks into the wood.
There are two schools of thought on placing fence posts in concrete. Each argument is strong and has good points. In my own personal experience, I've never placed a fence post in concrete. I couldn't see any advantages, just disadvantages. The primary issue is that if the fence post needs to be replaced because of damage or rot, it's a major ordeal. With no concrete to deal with, the old post comes out in a jiffy.
An alternative to concrete is crushed gravel. The sharp edges of the stone interlock and the stone mass mimics that of concrete, especially if the crushed stone comes with rock dust that fills all of the voids in between the stone.
Clay soil does a magnificent job of holding fence posts. That's what I have had at my past homes, and the dense clay provides plenty of lateral support to my wood fences. My father-in-law grew up on a farm with livestock that used to bump the fences and he said that they never used concrete to set fence posts.
If you do feel the need to surround your fence posts with concrete and live in a cold climate where the soil freezes, you must dig your fence-post hole carefully. To prevent the frost from heaving the fence post and concrete out of the ground, you must ensure that the hole you dig is similar to an upside down ice-cream cone. The bottom of the hole needs to be larger than the top of the hole.
The final piece of advice is to pay for a site survey if you intend to build your fence on your property line. Many a homeowner has had to pay twice for a wood fence installation because the fence was erected on a neighbor's property. Wood fences make for great neighbors, but only if the fence is on the right parcel of land.
Dan sent Tim an email about the materials to be used in a wood fence. Read the column by CLICKING HERE.
Column 755
Tim built custom homes and did ultra-custom remodeling for 20+ years before launching his Ask the Builder media presence. He was selected as one of the Big 50 by Remodeling magazine in 1993. This award gave birth to Ask the Builder in October 1993. Tim also operates https://DrawPlumbingPlans.com. His @askthebuilder YouTube channel was the first home improvement channel on YouTube.
Hi Tim, my house is a 90 year old river rock house. I want to put in a privacy piece with lattice and 4x4's. How close can I cement in the 4x4's by the stone? I would like no more than 4 inches open between stone and 4x4 all the way up. Is that possible to do and still keep 4x4 sturdy? My husband says no that it needs equal amount of cement around post but I feel it doesn't since one side will already be stone and with cement we will pour, it will aid in keeping that side sturdy. I hope this makes sense to you.
You need to READ all of my Fence POST columns..... Now....
Fences make bad neighbors. Just sayin'
Here's one for you. My fence was stick built just as yours, Tim. I have 8' 4x4 treated posts and 2x4 framing with 6" wide rough sawn treated pickets. Over the years, although I have had to power wash ti several times and reseal, everything is still sound except for the 4x4's. They have been almost totally destroyed my carpenter bees, but only the posts that face on the front and right side. They haven't even touched the ones on the back side. The fence is attached to the house on the back so there's no left side. Any ideas on that one. The posts are set in concrete so I have a real problem