Shower Faucets
DEAR TIM: Can you help clear up some confusion I have about shower faucets? Is there a big difference between a shower faucet and a tub shower faucet? I don’t want to have to struggle to repair my faucet in the future. What steps can I take now to streamline repairs? What can I do to make sure the faucet doesn’t leak and is as quiet as possible? Do you have any other tips about installing a shower faucet? Leah H., Rochester, NY
DEAR LEAH: Whew! I could talk about faucets for hours. I’ve installed many, and remember clearly years ago when I was flummoxed as you seem to be about shower faucets. The basics are pretty much the same as they were years ago, however there seem to be far more faucets to choose from than there were 40 years ago.
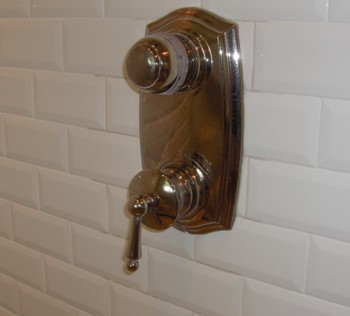
This polished nickel shower faucet can easily last 50 years or more because of its excellent engineering. PHOTO CREDIT: Tim Carter
The biggest difference between a dedicated bath shower faucet and a tub and shower faucet is that a true shower faucet doesn’t come from the factory with an outlet for both a shower head and a tub spigot. A tub and shower faucet comes with hot and cold-water inlets and a separate outlet for the shower head and the tub spigot.
To further confuse you, it’s absolutely possible to make a tub and shower faucet work exclusively as just a shower faucet. This is especially true if the diverter to make the water go to the shower head is in the actual tub spigot. All your plumber has to do is stub a dead end pipe with a cap on the outlet in the faucet that’s supposed to feed the tub spigot. I’ve had to do this on occasion when the faucet model and trim that a customer wanted didn’t come as a dedicated shower-only faucet.
Advancements in faucet technology have made most shower faucet repairs very easy. Years ago, it could be a major struggle to successfully repair a faucet washer and a valve seat. Most modern faucets have valve cartridges that can be replaced fairly easily by just taking apart the faucet from the finished wall side of the bathroom.
If you’re in the market now for new faucets, be sure to keep the written instructions that come with the faucet. These frequently have a parts list and exploded diagrams showing you how to access the faucet cartridge. I always take these instructions and place them in a clear plastic bag that I attach to the inside of the bath vanity cabinet.
To make repairs really easy down the road, I’ll often purchase the replacement cartridge(s) at the same time as I get the new faucet. I’ll place these parts in the same plastic bag with the instructions so I don’t have to hunt them down years later. These parts rarely go bad if left in their original packaging.
To prevent leaks, you need to follow the instructions that come with the faucet. Some faucets want you to remove the cartridge before you solder. Excessive heat from a torch can melt the plastic components of a faucet cartridge. Don’t try to outsmart the faucet manufacturer thinking you can control the heat flow to the body of the faucet.
Noise can be an issue with certain faucets. If you have high water pressure, say anything above 70 pounds per square inch, then it may behoove you to run larger diameter pipe to the faucet to minimize noise. The water moves more slowly through a 3/4-inch pipe than a 1/2-inch pipe when the faucet is turned on. This slower flow creates less noise. You can also wrap the water supply pipes with insulation and add sound batts in the wall where the faucet resides to keep down noise.
If possible, consider installing an access panel on the other side of the wall from the faucet body. Years ago this was a very common practice. In fact, just this past weekend I stayed at a private home as a guest. In my bedroom there was an access panel to the tub and shower faucet for the original bathroom in the house. You could remove this panel and immediately be able to service the faucet from behind the tiled wall.
Be sure to place the fitting for the shower head arm high enough so that tall people don’t have to duck to much to rinse off. But be careful about placing it so high that you can’t attach the shower arm. Some faucets come with highly decorative shower heads and arms that require quite a bit of clearance to screw the arm into the shower lug fitting.
Be sure you have roughed in the shower body at the correct distance from the finished wall surface. This is very critical. Many modern faucets come with a template or guide that helps you ensure you don’t make a mistake with this critical aspect of the installation.
Column 834
Tim built custom homes and did ultra-custom remodeling for 20+ years before launching his Ask the Builder media presence. He was selected as one of the Big 50 by Remodeling magazine in 1993. This award gave birth to Ask the Builder in October 1993. Tim also operates https://DrawPlumbingPlans.com. His @askthebuilder YouTube channel was the first home improvement channel on YouTube.