Retaining Walls Construction Tips & Suggestions
Retaining Walls - Construction Tips & Suggestions
Planning
Before you even begin to build or design your retaining wall you need to get a handle on the site, soil conditions, water drainage patterns and final grading. These elements play a critical role in the actual design of the wall system. Make a drawing or sketch of what you have and take it with you to the local company that sells your block system. Numerous 'before' photos of your yard would be of great value as well. Take them from multiple angles so that you can communicate just how your yard looks.
Design
Now is the time to plan exactly where your wall(s) will go. This will allow you to determine the height and the wall's batter as well. Quite possibly you will need to develop terraces to make your plan work.
Most of the manufacturers have great design guides. However, I found Allan Block's to be one of the best. It is available on their web site for free downloading in a PDF file. Most of the other manufacturers also have some type of design guide on their site. Perhaps you will find that the diagrams of one are easier for you to understand. All of the guides offer fine color diagrams and cross sections.
Construction
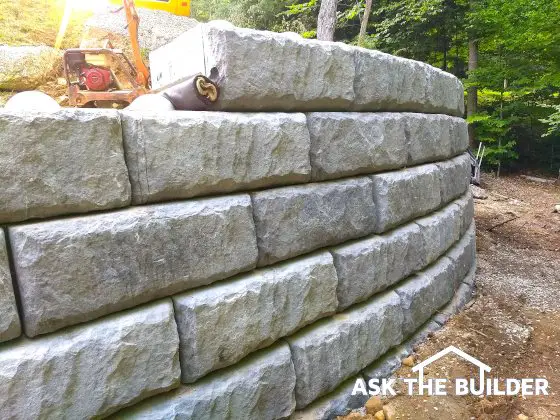
Segmental retaining walls begin at the lowest part of your lot. A trench is required in order to install the gravel base to a sufficient depth. The gravel also is the leveling medium. You install and compact the gravel in a level fashion so that the wall will be level side to side. If the courses of the wall begin to bury themselves into a rising slope, that is no problem. You simply begin a new trench as soon as the first row disappears below grade.
As each course of the wall is installed, you install the gravel backfill and compacted earth. An old mason taught me how to keep the gravel and dirt separated. Simply use a piece of plywood that acts as a form. Position gravel on one side and dirt on the other. After you install the materials level with the top of the block course, lift the plywood up. Compact the materials and start with your next course.
This popular column was shared in the March 29, 2011 AsktheBuilder Newsletter.
Column B128
Tim built custom homes and did ultra-custom remodeling for 20+ years before launching his Ask the Builder media presence. He was selected as one of the Big 50 by Remodeling magazine in 1993. This award gave birth to Ask the Builder in October 1993. Tim also operates https://DrawPlumbingPlans.com. His @askthebuilder YouTube channel was the first home improvement channel on YouTube.