watch video

Drywall Finishing Techniques
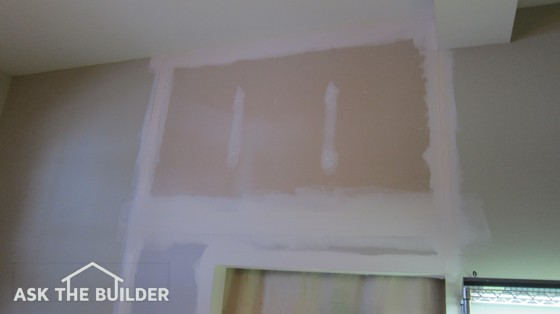
By Tim Carter
©1993-2009 Tim Carter

Summary: Drywall finishing is not as simple as it is shown on TV. Drywall finishing techniques can help you get a professional finish. Working with joint compound and drywall taping requires hand-eye coordination and practice.

Related Articles: drywall finishing tips, finishing skills, install drywall

Surely you have seen a miserable drywall finishing job. One of the first places to look is in a corner. Typically you will see holes and lift marks where the finishing blade was pulled away from the wall. For some reason, finishers seem to get tired as they sand in or near the corners!

I have seen home improvement television shows that tell people how easy it is to finish drywall. Well, it is easy if you know all of the tricks and have had considerable practice. If you don't, you struggle. Drywall finishing is not as simple as driving a nail or cutting a piece of wood. It takes lots of skill to get professional results.

Wipe It Off

One of the neat things about finishing drywall is that if you goof up applying the mud you can immediately erase your mistake and start over. All you do is wipe off the mud from the seam. The only aspect of the process that is critical is the actual taping. Too much or too little mud under the tape can cause all sorts of finishing problems later in the job.

Think Snowplow

Have you ever seen how a bulldozer or a snow plow works? The blade is angled to throw the dirt or snow to one side. This is an efficient way to work. Removing the excess mud from beneath drywall tape uses the same technique. The trick is to make several repeated passes with the taping knife instead of trying to do it all at once.


Learn the secrets to a great drywall finishing job in this Drywall / Plaster Installation Checklist. I offer a 100% Money Back Guarantee.

Professionals tape drywall in any number of ways. They can use a device called a banjo that applies mud to the underside of the tape as it is pulled from the simple hand held machine. Even more complex machines can apply tape and a coat of mud to a wall in one operation. But if a pro is doing it like you will be, they apply the mud smoothly and at a thickness of approximately 1/4 inch. The tape is then pressed lightly to the wet mud. When you glide your knife over this relatively smooth assembly, the excess mud flows easily out from beneath the tape.

Drying Time

The joint compound or mud you use to finish drywall is water based. It dries fairly quickly if the humidity is low and the temperature is high. Keep in mind that this compound is simply a glue with lots of filler. The color of the compound tells you, to some degree, if it is dry. When wet, the compound is a light gray. As it dries it turns white. You can see this transformation very clearly halfway through the drying process as the edges of the joint will be snow white while the center of the seam is still gray. Do not attempt to sand if you see any gray coloration.

Patching a Hole

Let's say you have a hole in a piece of drywall that is about the size of a golf ball. It is too small to cut a patch yet too big just to fill with joint compound. There is a cool trick that really works well. All you do is take a piece of paper drywall tape and coat the underside of it with a 1/8th inch coating of wet compound. You then flip the tape over and center it over the hole. Gently scrape a little of the mud out from the tape. Once the mud dries in a day, the area over the hole is very stiff. If you want to make it even better, apply a second layer of tape over the first one. Align the second piece of tape at a 90 degree angle to the first one.

Nails and Screws

Professionals do not apply a little dab of mud to each and every screw or nail. They coat three or four at a time with one quick motion. The end result is a stripe of mud on the surface of the drywall. If you see dried polka dots of white on a sheet of drywall, you know a rookie is finishing it!


Comments:

Perry Speelman
03 Jan 2008, 18:03
I'm remodeling the basement and just boxed out the ceiling to cover the heater duct work. Due to the shortened height of 81.5 inches in the hallway I'm having trouble fitting the new doors.If I use normal wood casing of 2.25 inches wide I will be forced to cut 3 plus inches off the doors to clear the carpet. Due to the doors being hollow that means I will have to rebuild the doors in order to support the bottoms. I saw a picture which shows some type of dry wall step molding instead of wood casing however I can't seem to find any how to info on this type is finish. Any ideas?
AsktheBuilder
05 Jan 2008, 07:11
Perry,
Sorry, I can't help on this one. This is why all the houses I built had 9' 4" foundation walls.... not the 7' 10" most other builders pour......
chris
21 Jan 2008, 08:54
hello perry,

i am a finsh carpenter by trade.....what i think you are looking for, you probably find in the paneling section of your local home improvement department.its a u shaped plastic strip that goes over the edge of the drywall, around each door jamb.....as far as your doors are concerned, if they are flat doors (meaning no panels in them) the rebuilding them is simple........however you dont want to take it all from the bottom, unless the doors havent been bored for the knob.....if they are bored, you might want to concider shorting it from the top and bottom.....but keep in mind what ever you remove from the top, you also have to remove the same amount from the top of each jamb leg as well...no so for the bottom... first measure to where your going to cut it then before marking any lines, use 2 or 3 rows of masking tape side by side over lapping each just alittle, having the center strip of tape where your going to cut. all the way across the door, then draw your cut line on top of the tape. before cutting it with a circular saw,score your line with a utility knife,make a couple of passes with the knife.....the masking tape and the scoring of the line will (should prevent or reduce any flaking of venneer), unless of course its made of mdf. cut it using a circular saw, clamp a straight edge to door as a guide for the saw.....after you cut it then you can take the cut off piece(s) and pull the sides off it and reuse the original filler piece(s)coat intire sides with wood glue and clamp it together for 3 hours or so.....i use 3 spring clamps spaced out evenly with a stripe of angled allumium on each side of doors...this spreads out the the pressure evenly across the door..hope this helps ya
James
20 Mar 2008, 10:11
How do i get the oragne peel look on my ceilings. thanks
AsktheBuilder
21 Mar 2008, 13:59
James,

You should get the Gypsum Construction Handbook. It is covered in it.
IT
22 Mar 2008, 02:31
I damaged the drywall in several places while removing old wallpaper. Relatively large pieces of cardboard came off. One advice I got is to apply shellac-based primer to these places before putting the mud.
AsktheBuilder
22 Mar 2008, 08:23
IT,
I have a column about this in my Wallpaper section. Did you read it?
Brian
28 Mar 2008, 17:07
Great site, Tim! Is there an article that covers finishing a joint where new drywall meets existing plaster? I've removed an interior door and now need to blend the drywall into both a plaster wall and a plaster ceiling. Thanks!
AsktheBuilder
30 Mar 2008, 12:28
Brian,
Sort of. Read my past columns about Dry-Setting Joint Compounds.
robert
23 Jun 2008, 12:58
Just wanted to make comment about nail spotting. Most profesionals do coat several nails at one time, but after 30 years in finishing trade i have found that you get a better job if you spot the nails, or screws one at a time. Especially on smooth serfices, keeping first two coats as small as possible, putting third coat on a little bigger than first two. This is especially true with semi,or high gloss paints. if you ever walk down a hallway, and can see every row of screws, its because of mud build up. the smaller the spots, the less noticable they will be

     View all comments
*Name:
Email:
Notify me about new comments on this page
Hide my email
*Text:
Security Image:

Visual CAPTCHA


Contact us to Advertise on this site.
Have a Suggestion?

Ask the Builder Comment Help

Helpful Comment Tips: If you need help with a problem, please try these things now before you type in a comment. You could discover your answer in just minutes.
Don't show this alert again.