Causes of Ice Dams

DEAR TIM: This past fall we had a new roof installed. It has rained many times and never leaked. However, after some recent heavy snowfall and very cold weather, water began leaking into my house in many locations. What did the roofer do wrong? Why would it leak now, but not during a heavy rainfall? N. C.

DEAR N. C.: You should let your roofer off the hook. The leaks in your house were caused by ice dams. These "dams" form under the conditions you described, as well as during periods of heavy freezing rain. To understand why ice dams would cause leaks, you have to understand how a vast majority of roofs work.

Roofs depend almost exclusively on gravity to keep water from entering your house. I'll bet that you would never have guessed that physics and roofing were related! Here is how it works.

For the most part, shingles, slate, tile, etc. are installed in a similar fashion. They are individual pieces which overlap so as to shed water. Generally, roofers begin installing these materials at the bottom of your roof near your overhangs. They continue up the roof putting the next piece of roofing material on top of the one below. The steeper your roof, the better this system works.

However, if water flows backwards up your roof and gets underneath and behind the individual roofing pieces, you will have leaks. Ice dams cause this to happen. They generally form under the conditions you described. Heat from the sun or heat leaking from your house causes the snow to begin to melt. This melt water travels beneath the snow to the gutter. The temperature of the gutter is below freezing. The water hits the cold metal and instantly freezes.

CLICK HERE to get FREE & FAST BIDS from local Roofers who can install Ice Dam Membrane.

Within a short period of time, the gutter is solid ice and the ice is beginning to grow up the roof. Eventually, the water hits this ice dam and before it can freeze, it flows underneath the pieces of roofing and leaks into your house.

WATCH ICE DAM VIDEOS


You cannot easily stop ice dams from forming. However, you can do several things to minimize the possibility of leaking. Consider building large roof overhangs if you are building a new home. Have your framing carpenter or builder use trusses or roof rafters with high heel cuts. This allows insulation to be placed at full depth where the roof passes over exterior walls. Standard trusses or framing can reduce ceiling insulation in these areas to as little as three inches.

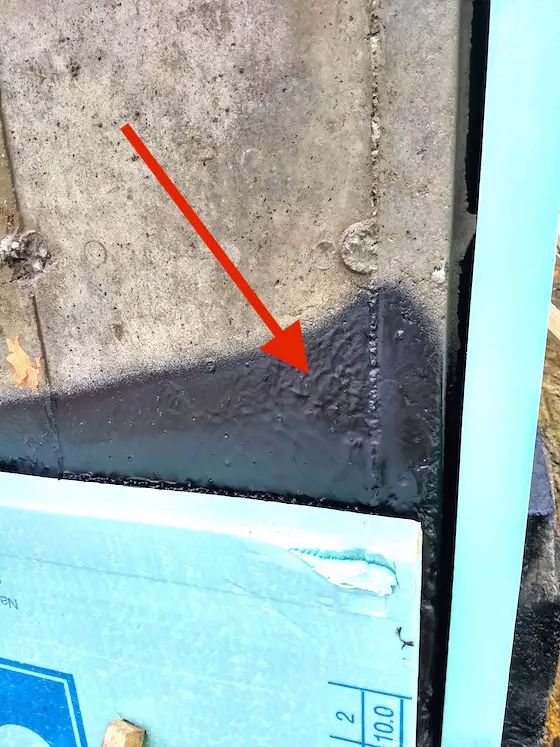
If you have an existing home, consider installing specialized roofing products designed specifically to combat water buildup from ice dams. These products are manufactured using modified asphalt. They are applied directly to the wood sheathing just above your gutter line. Your regular roofing material is then applied directly over these products.

Grace Ice Water Shield

I covered the ENTIRE roof of my New Hampshire house with Grace Ice and Water Shield. I never have to worry about a roof leak - EVER. (C) Copyright 2017 Tim Carter

These specialized roof membranes form a barrier which resists water infiltration. The modified asphalt contains rubber which seals around the nails which hold the roofing material to the wood sheathing. If this material is used at the edges of roofs, in valleys, at roof slope changes, skylights, chimneys, etc., your roof should resist all but the worst ice dam.

CLICK HERE to get FREE & FAST BIDS from local Roofers who can install Ice Dam Membrane.

Column 011

Heating Ductwork

hvac round duct damper control

The lever you see on the side of the round metal duct is a damper control. It is connected to a round metal disk inside the duct pipe. If I rotated the lever so that it was straight up and down, the disk would block 90 percent of the air flow in the duct.

Heating Ductwork

DEAR TIM: Very little air comes out of the heating duct in the bedroom at the far end of my house. However, a tremendous amount of air comes out of the same size duct in the dining room, which is located in the center of my house. It doesn't appear that there is anything blocking the pipe. What could be wrong? P. J.

DEAR P. J.: There are several things that could be causing your problem. They are somewhat easy to check. However, if the first two ideas don't help your situation, your problem is much more serious.

First, check to see if the vent cover in each room is adjustable and in the wide open position. Next, go to the basement and locate the supply pipes that feed each room. There should be a damper control lever on each pipe that goes to each room. If you find such a lever, it could possibly be in the closed position. You can check for this by noting the direction in which the lever is pointing. The damper will be wide open when the lever is pointing in same direction as the air is flowing in the pipe.

If your system does not have damper controls, or when wide open your problem still persists, you possibly have a major duct work design problem. Several things are necessary for the air flow to be equal in each room of your house. Equalized static pressure in your duct system is one of them. This is generally achieved by downsizing the main supply duct as room supply pipes are branched off from the system.

The duct system in your house acts similar to the blood vessels in your body. The size of the artery in you ankle is much smaller than the size of the artery leaving your heart. However, even though your blood vessels are different sizes and there are no obstructions, the blood pressure is nearly the same throughout your entire body. This is accomplished by the downsizing of the main arteries as they travel farther away from your heart.

Each room in your house requires a certain amount of air to enter it per minute to properly heat or cool it. The amount of air required is dependent upon many factors. Some of these factors are room size, type and square footage of window glass, presence and thickness of exterior wall insulation, etc. This quantity of air can only enter each room if the duct work supplying each room is sized properly and the static pressure is equalized throughout the entire system.

If your duct work is visible, you can inspect it to see if it was designed properly. Measure the width and height of the main supply duct after it leaves the top of your furnace. Check to see if this main supply duct becomes slightly smaller in width after a few room supply pipes have branched off this main line. As more room supply branch pipes branch off, the main duct should become smaller and smaller.

If your main supply duct is the same size from one end to the other, you will experience significant static pressure readings at different locations within your system. These differences in static pressure will make it very difficult, if not impossible, to comfortably heat and cool your home.

Exterior Peeling Paint

DEAR TIM: The exterior of my 50 year old house was repainted just one year ago. I have many spots that are peeling. I am convinced that I do not have a moisture problem. The painter scraped the house very thoroughly before he started to paint. What went wrong? L. D.

DEAR L. D.: Your description of the 'prep' work which was performed prior to painting left out one of the most important steps. Read the paragraph labeled "Surface Preparation" on the side of your paint can. Generally, the first sentence will state that you should remove all dirt from the surface. Your painter forgot to wash your house prior to applying the paint.

Failure to properly wash the surface is probably one of the most common causes of premature paint failure. Frequently, people think they clean the surface, when in fact they merely rinse it off. Rinsing and cleaning are not the same thing.

Most manufacturers recommend the use of a 'powdered commercial cleanser.' There are many acceptable soaps which meet this specification. The point is, you must use soap AND water to properly clean the surface. The cleaning process removes more than dirt. It also removes chalk, airborne oils, tree sap, and bacteria produced oils.

Oxygen Bleach

Stain Solver is MADE in the USA with USA ingredients that are food-grade quality. CLICK THE IMAGE to order some NOW.

The best organic cleaner to use outdoors on your paint is Stain Solver.

Stain solver is a certified organic product made in the USA with US ingredients. You just mix the pure powder with hot tap water, stir, and put the solution into a garden hand-pump sprayer. 

Spray the painted surfaces with the solution allow to sit for 15 minutes and scrub with a brush used to clean RVs.

CLICK HERE to get FREE & FAST BIDS from local Painters who can clean and prepare your house exterior.

Chalk is produced by the natural breakdown of paint. Rub your finger across some paint which has been exposed to sunlight and the weather. Generally, your finger will pick up this 'chalk' from the painted surface. This chalk will be the same color as the paint. If you understand how paint is made, you will better understand why it chalks.


Is the exterior of your house looking drab? Find the professional painters by using my Exterior Painting & Staining Checklist. I offer a 100% Money Back Guarantee.


Paint is usually made from three primary groups of materials: resin, pigments, and vehicle. The resin is the product which enables paint to stick to things and it also holds the pigment together. The pigment is the part that gives paint its color. The vehicle is the part that makes paint a liquid. When paint dries, the greater part of the vehicle evaporates into the air.

Ultraviolet light from the sun and natural weather processes break down the resin. This breakdown then releases pigment at the surface. These pigment particles are just barely hanging on at this point. Rain water can easily remove them. You generally see the end result on stained brickwork or masonry foundations immediately below painted surfaces. Some paints chalk more readily than others.

The use of soap in the cleaning process also is beneficial in another way. A large majority of latex exterior house paints are alkaline. Most soaps are also alkaline. When you wash a surface and rinse it off, often the surface that you washed remains slightly alkaline. This enables the paint to stick or bond much more readily to the surface.

Do not underestimate the value of properly cleaning your house before painting it. A properly cleaned surface can add years to an exterior paint job. This translates to dollars which you can either save or spend on some other home improvement. Insist on the use of soap, water, a soft bristle scrub brush, and elbow grease the next time you hire a painter. If you follow the instructions on the paint can label, your efforts will usually be rewarded with a long lasting paint job.

CLICK HERE to get FREE & FAST BIDS from local Painters who can clean and prepare your house exterior.

Column 013

Exterior Foundation Wall Waterproofing

foundation waterproofing

The black goo is foundation waterproofing. The red arrow points to the thick coating where it's sagged. Dampproofing is much thinner like a simple coat of paint. Copyright 2021 Tim Carter

DEAR TIM: I'm about to begin the construction of a very large room addition. This room addition will have a finished basement. I've seen a black compound sprayed on new house foundations. Is this the product I should use to 'waterproof' my new room addition? Is there anything else I should do to make sure that my basement will not develop a leak? H. H.

DEAR H. H.: Both of your questions are excellent. I hope I don't run out of room! Let's start with the first one.

The product that you described to me in your letter was an unmodified asphalt-based "dampproofing" product. It is commonly mistaken for "waterproofing." Many, many consumers think they have waterproofed basements, when in fact they simply have been dampproofed. Dampproofing is a low-cost method of retarding water infiltration. It is by no means a true waterproofing membrane.

Dampproofing products are generally asphalt or tar-based compounds. They are sprayed onto foundations prior to backfilling. Because concrete and other masonry products will easily transmit water vapor, these products are designed to block water vapor transmission. This, basically, is the extent of their capabilities.

CLICK HERE to get FREE & FAST BIDS from local builders who can waterproof your new basement or foundation.

Dampproofing compounds generally become brittle after they dry. They also do not have the ability to bridge cracks which may develop at a later time. Groundwater can actually dissolve them over a period of time.

Water-proofing compounds, on the other hand, are much different. There are a wide variety of products on the market. Some are urethanes, modified asphalts, clay-based, or rubber-based. These products can either be spray applied or are available in sheets.

Water-proofing membranes have several distinct characteristics. Groundwater has little or no long-term effects on most of the products. They can bridge small foundation cracks. Usually, these products retain their elasticity and some actually have self-sealing properties.

If you’re interested in learning more about estimates for foundation waterproofing I have an article here.

Waterproofing compounds are able to resist a hydrostatic head. A hydrostatic head develops when water builds up against the side of your foundation. The pressure can be enormous. I have personally witnessed a stream of water squirt two feet out onto a basement floor.

Now, let's talk about your second question. There are many things that you can do to help insure that your basement stays dry. First, be sure that your foundation is constructed to be as strong as possible.

Install as much reinforcing steel as practical to insure that in the event a crack occurs, it will not widen or displace. Consider increasing the thickness of your foundation walls. Remember, no waterproofing compound can bridge a major structural crack. Your first line of defense is a strong crack-free foundation.


Prevent a wet basement by using this Basement Waterproofing Checklist to hire a great professional. I offer a 100% Money Back Guarantee.


Install an excellent foundation drainage system. Use plenty (three feet minimum cover) of large washed gravel over the drain tile. Make sure that you cover the gravel with 4" of straw or tar paper before backfilling! This is a commonly overlooked step.

These materials prevent silt from the 'fluffed' backfill dirt from clogging the gravel and the drain tile system. Be sure that the ground slopes away from all points of the foundation at least 1/2" per foot for a distance of 10 feet minimum. Pipe downspouts and sump discharge pipes away from the house.

Do not let this water collect or discharge at the base of the foundation. If you follow all of these steps you probably will have a dry and enjoyable basement for many years to come.

CLICK HERE to get FREE & FAST BIDS from local builders who can waterproof your new basement or foundation.

Column 015

Sizing Decks or Patio

deck over water

Sizing Decks & Patios | You can see there's plenty of room around that table for six. How big is that lower deck? It's 24 feet wide and 16 feet out from the upper deck. Copyright 2017 Tim Carter

DEAR TIM: My husband and I are getting ready to add a patio onto our house. We can't seem to agree on its size. We intend to have a table and chair set and 4 - 6 other chairs for additional seating. He says that a 10 foot x 16 foot patio will be large enough. I disagree. Will you settle this argument so that we can begin construction? L. A.

DEAR L. A.: As you can imagine, I hate being put in the middle. Call the concrete company and order more materials. You are going to need them! Your husband, in my opinion, is dead wrong. Fortunately, you caught the mistake before it happened. Many, many homeowners have discovered, after it was too late, that the patio or deck they constructed was inadequate for their needs. I have seen hundreds of decks and patios that are too small.

It is actually quite simple to plan a deck or patio. Most homeowners don't realize that they already have the plan. It is three dimensions right inside their own home. Step into your dining room and living room and look at what you see. The first thing you should realize is that a deck or patio in nothing more than a room without walls or a ceiling.

Here's my finished paver patio. It's going to last decades so long as no one pressure washes it. Pressure washing removes the colored cement paste that's coating the sand and gravel in the concrete. Copyright 2017 Tim Carter

Since you told me that you were going to have a table and chair set, let's start in the dining room. Patio and deck furniture is very similar in size to regular interior furniture. Many dining room tables are approximately 4 feet wide by 6 feet long.

CLICK HERE to get FREE & FAST BIDS from local contractors to install your patio.

Most chairs are basically 2 feet square. In order to sit at the table, you generally have to pull the chair away from the table approximately 1 foot. To walk around a chair that is pulled away from the table you need a minimum of 2 feet. So, the minimum width of this portion of the patio or deck would be the following calculation: 2+2+1+4+1+2+2 = 14 feet. Since the length of the table was 6 feet, the minimum length of the patio or deck would be: 2+2+1+6+1+2+2= 16 feet. Try this in your own dining room.

The area required for the additional 4-6 chairs is a little harder to calculate. This is due, in part, to the numerous combinations of seating arrangements. However, a simple way to solve it is to go into your living room. Frequently, people have a couch, coffee table, and side chairs in their living room.

Take a few minutes and rearrange these elements into a realistic and comfortable grouping. Allow plenty of room to get in and out of the furniture. Make sure that you include the coffee table or side tables. You will probably need these on your deck or patio to place food, drinks, books, etc.

After you are happy with the arrangement, measure the width and length of the arrangement. Be sure to include the extra 2 feet' behind the furniture pieces. More often than not, your measurements will probably be in the range of 16 feet x 18 feet.

Often you will find that you need a space bigger than your existing rooms. The reason for this is quite simple. Most people push couches and chairs up against a wall in a living room. This works fine in a room with walls, because you can't walk through a wall.

However, it generally is not a good idea to place furniture at the edge of a patio or deck. If you do, you will find yourself walking in the grass or landscaping to get around the furniture.

These planning principles can also be performed with simple 1/4 inch graph paper available at most office supply stores. Make simple scale colored cutouts of the furniture you intend to use.

Remember, 1/4 inch equals 1 foot. Place these pieces on a piece of the 1/4 inch graph paper making sure that the proper space is allowed for between each piece. Don't place furniture in the pathways between the doors to the house and the lawn.

Now, draw lines around your layout. Presto! You have a plan. Check and recheck your measurements, get out the shovels, and get to work!

CLICK HERE to get FREE & FAST BIDS from local contractors to install your patio.

Column 016

Homeowner Sweat Equity Jobs

DEAR TIM: I'm quite resourceful and handy. I have the ability to install the electric and plumbing in my room addition project. I feel that this will help me save money and allow me to invest some 'sweat equity' into my project. However, the contractors who I have contacted are not interested in working with me. Why am I encountering so much resistance? V. N.

DEAR V. N.: If you put yourself in the shoes of the contractor, you will quickly realize why. The contractors are afraid that you possibly will not complete your work on schedule, and / or will not pass the required inspections. Either of these situations will cause delays in the project.

Professional contractors tightly schedule their project. Projects that run smoothly are beneficial for many reasons. They allow the contractor to maximize his profit. Projects without delays allow the contractor to show up on time for the next job. Remember, you are probably only interested in your job. I doubt that you have much interest in the contractors' other commitments.

The business of contracting is very difficult. There are many, many variables that are beyond the direct control of the contractor. Delays can be catastrophic. They have a ripple effect, much like throwing a rock in a pond. A delay that you cause by not meeting a deadline will not cost you a thing. However, the delay will cost your contractor money.

Delays have a dramatic effect on the pocketbook of a contractor. Most contractors and homeowners fail to realize this. Contractors basically have only one commodity that they can sell. That commodity is time. Contracting is a service industry based upon time.

CLICK HERE to get FREE & FAST BIDS from local contractors who can build your new addition or remodeling projects.

Employees are paid by the hour, even sub-contractors calculate their payroll by the hour. Because of this axiom, a contractor can realistically only work so many hours in his or her lifetime. Delays cause future work to be pushed farther into the future. This means less income over a lifetime.

Delays often hurt the credibility of a contractor. Try to realize that builders and contractors are constantly negotiating for the job that starts after the current one is complete. The next customer is anxious to know when his or her job will start. Everyone is generally excited about the beginning of a remodeling or building project.

Surely you have heard stories of builders or remodelers who did not start a job on time. Few homeowners are sympathetic. They don't care to hear about someone else's problems. Any delay that you cause will make the next customer upset with your contractor. No contractor that I know of wants to start a job with an unhappy customer.

There possibly is a compromise to this problem. Consider investing your 'sweat equity' at the beginning or end of the project. This allows the contractor to control his or her destiny.

In fact, most contractors will negotiate for you to perform tasks at the end of a project. That way they can start the job, run it as smoothly as possible, and then turn it over to you to complete. The contractor can then go on to the next job, while you finish the job at your own pace.

However, keep in mind several things before you attempt this. Be sure to allow enough time to adequately complete tasks. Homeowners often vastly underestimate the amount of time it takes to perform finishing tasks.

Also, be sure that you have accurately estimated the cost of what you need to purchase. Frequently, homeowners run out of money at the end of a project. Beware, those last few weeks of work can often stretch into months or years.

A great book that is loaded with sweat equity jobs that the average to serious do-it-yourselfer can handle is Adding Value To Your Home. In this book you'll learn do-it-yourself projects that add value to your house and yard while saving you money.


Adding Value To Your Home

This book gives a clear idea about what type of home - improvement projects will give the highest yield on investments. CLICK THE IMAGE to order the book now. 

It is also written for those homeowners who need the basic skills instruction, clearly explaining step-by-step what to do as well as how to do it. The illustrations and photos in this book are just fabulous. 

CLICK HERE to get FREE & FAST BIDS from local contractors who can build your new addition or remodeling projects.

Column 017

Change Orders – What’s Fair / What’s Not

DEAR TIM: My builder has presented me with a "change order." He wants to charge me additional money to cover the cost of enlarging the opening for the medicine cabinet I selected. Plumbing pipes and wires also have to be relocated. I picked out this cabinet at the beginning of the project. Do you think it is fair for me to have to pay? How could this have been avoided? R. P.

DEAR R. P. : Based upon your detailed description of the circumstances, I feel that you should not have to pay for this mistake. Because you selected the cabinet prior to the start of construction and made your builder aware of this selection, you are not responsible for the mistake.

Change orders are a very sensitive issue in construction. Frequently, relationships between owners and builders deteriorate because of change orders. It is not uncommon for both parties to be at fault for this dilemma. Many homeowners feel that they are often overcharged for changes in a project.

Most professional builders try to avoid change orders. They are disruptive to scheduling. Also, it is very difficult to charge the homeowner for the true cost of initiating the change order. A simple change order can devour 4 - 6 hours of time.

The builder has to meet with you concerning the change, calculate the cost of the change, obtain your approval, prepare the paper work for the change order, and then administer the change order. This all should happen before any work begins!

CLICK HERE to get FREE & FAST BIDS from local builders who can finish your addition and remodeling projects.

One of the most common causes of change orders is poor planning. During the planning stage of a project, all options should be discussed. This pertains to virtually every aspect of the project.


How would you like me to build your new home? It's probably impossible for me to fit your job into my schedule, but I will gladly share hundreds of my tricks and building secrets with you and your builder. Check out my New House Specifications.


Architects, builders, and contractors often forget that some homeowners have a tough time visualizing the finished project. This inability to visualize, on the part of the homeowner, can become a builder's worst nightmare.

Change orders that result from a homeowner who modifies the plan during the course of construction cannot be blamed on the builder. It is not uncommon for people to change their mind. However, individuals who do this should be prepared to pay for this process.

Remember, the builder and his subs based their original prices on specific tasks and materials. Any extra work resulting in a change should be paid for by the homeowner. Changes in work that delete work or materials should result in a credit for the homeowner.

There are various things that you can do to minimize or eliminate change orders in a project. Many of them are very simple to do. Try to think through all aspects of your project. If you are unsure of how something will look, ask the architect or builder to draw a quick sketch of the area in question.

When selecting fixtures or other items, spend as much time as possible at the showrooms. Ask as many questions as possible. Look at as many brochures as you can. Study the photographs in the brochures and try to imagine a particular item in your house.

Your specific problem could have been avoided very easily. After you make specific selections regarding the fixtures you intend to use, suggest to your builder that he obtain copies of all technical literature pertaining to each product. This literature provides very important dimensions and mechanical specifications that your builder needs.

Various subcontractors need this information as well. Since you notified your builder as to the exact model of medicine cabinet, he should have obtained the exact dimensions of the cabinet before the carpenters framed the opening. Kindly tell your builder to open his checkbook to pay the plumber, electrician, carpenter, and plasterer for the mistake.

CLICK HERE to get FREE & FAST BIDS from local builders who can finish your addition and remodeling projects.

Column 018

Drywall Nail Pops

DEAR TIM: My builder has advised me to delay the installation of the drywall in my new home for as long as possible. He says that I will get a better finishing job with fewer defects. He also says that fewer 'nail pops' will develop. I think that he is trying to stall because his drywall contractor is stuck on another job. Is he telling me the truth? J. V.

DEAR J. V.: It is quite possible that both of you are right. As long as the delay is not substantial, you will benefit from the delay. Your builder is telling the truth with respect to overall quality of the finish job. He appears to be well informed on the subject of drywall installation.

Drywall Nail Pops

A primary cause of many drywall related call back repairs is rough framing lumber shrinkage. Framing lumber used in new construction often shrinks after it is installed. Kiln dried lumber often has a moisture content that ranges between 15 - 20 percent. The moisture content can drop to 10 percent after installation.

This loss of moisture is the result of normal drying and accelerated drying which occurs if your house requires heating during winter months. Lumber moisture content can be checked with a moisture meter.


This shrinkage is not uniform. Lumber experiences very little shrinkage along its length. It experiences moderate shrinkage in a direction perpendicular to the growth rings. This dimension in most framing lumber is generally referred to as its thickness.

CLICK HERE to get FREE & FAST BIDS from local contractors who can repair your damaged drywall.

The shrinkage is most pronounced along the direction of the growth rings or the board's width. For example, a 2x4 wall stud will experience its greatest shrinkage along the 4 inch face.

Drywall Screws

Because lumber, at this point in time, is the most common framing member used in residential construction, you should be concerned with shrinkage. If your framing lumber has not dried out, or was subject to excessive amounts of rainfall prior to the installation of your roof, you very possibly could experience many drywall failures. The most common being "nail pops."

Nail pops can occur for a variety of reasons. One common cause of nail pops is 'operator error'. The installer fails to push the drywall firmly against the framing lumber as it is being fastened. This failure results in a void space between the back of the drywall and the framing lumber. If someone or something pushes against the drywall, the drywall goes in and the nail pushes to the surface.


Nail pops can be avoided! Learn the secrets to great drywall installation in this Drywall / Plaster Installation Checklist. I offer a 100% Money Back Guarantee.


tape knives

However, lumber shrinkage can create the same identical effect, even if the drywall was properly installed. Because shrinkage causes the greatest dimensional change along the lumber's width, a void area can develop between the drywall and framing members.

Lumber shrinkage can not be avoided. In fact, just as your builder recommends, you should plan for it to occur. Try to plan your construction so that the rough framing occurs during the driest time of the year. Do whatever is necessary to get the structure 'under roof' as quickly as possible.

putty knife

After the house is under roof, try to keep the structure as open as possible. Keep doors and windows open during dry weather. Randomly sample the moisture content of your framing lumber. Avoid installing the drywall if you get consistently high moisture level readings. The wait will be worth it in the long run.

Besides, you really don't want the drywall contractor patching, sanding, and tracking dust through your house 9 months after you have moved in, do you?


CLICK HERE to get FREE & FAST BIDS from local contractors who can repair your damaged drywall.

Column 019

How To Find A Professional Contractor

DEAR TIM: The last two times that I have had work done I have been very dissatisfied with the performance of the contractors. They broke promises, abandoned the jobsite for days at a time, didn't complete the work, etc. I know that there are professional contractors out there, what should I look for? C. P.

DEAR C. P.: You are right. There are professional contractors who work in the industry. However, just as with milk, only the cream rises to the top. The qualities which are common to many professionals are subjective and somewhat hard to define. I will do my best to list as many as I can.

Professional contractors are both craftpeople and business people. They should be able to produce satisfactory and prompt results, whether they are cutting a piece of wood or administering a change order. Phone calls should be returned within 24 - 36 hours. Scheduled appointments should be kept. A professional will arrive on time or slightly ahead of schedule.

Professional contractors will, in most cases, not hesitate to offer a detailed breakdown of job costs. This breakdown allows homeowners to develop a fair payment schedule for completed work. Lending institutions in many parts of the country use this system in new home construction. Professional contractors work under these conditions on a regular basis.

A professional will provide you with a copy of his or her current workman's compensation certificate. They will also offer to you with a copy of their certificate of insurance indicating the limits of their general liability policy. Generally speaking, both of these policies are paid in advance. Make sure that the policies will not expire prior to the completion of your job.

CLICK HERE to get FREE & FAST BIDS from local professional contractors who can build your new home.

Some states require contractors to be licensed. A professional will produce a copy of his or her current registration without hesitation.

In the event that the job does not have detailed plans and specifications, a professional will produce a detailed list of work to be done. Where applicable, specific materials will be spelled out in this listing.

Professional contractors will indicate specific starting dates and provide you with a schedule of how the job will progress. This schedule will indicate a completion date. In the event the job is delayed, or changes orders occur which add or delete work, the professional will adjust the schedule and notify you of the new anticipated completion date.


How would you like me to build your new home? It's probably impossible for me to fit your job into my schedule, but I will gladly share hundreds of my tricks and building secrets with you and your builder. Check out my New House Specifications.


A professional contractor will not employ high pressure sales tactics. He or she will produce a clear and concise contract which is fair to both parties. Often this contract will include a method by which disputes can be settled.

Professional contractors are sometimes members of a trade association. They also possess a broad knowledge of the trade and keep current with new technology. They should be able to produce current copies of trade publications addressed to them. Professional contractors have many repeat customers. They should be able to produce a long list of these individuals.

Finally, consult your local Better Business Bureau. Ask how long the contractor has been in business. Ask if there are any unresolved disputes pending regarding the contractor in question.

Adding to a House is the ideal book for designers and builders who understand basic construction but have not had access to a single source of information that covers the entire process of planning, designing and building an addition.

Adding To A House

No builder or designer's library should be without Adding to a House written by Philip Wenz. CLICK the image above to get the book now.

Adding to a House is also perfect for home owners who intend to contract the work out and want to understand the process so they can make intelligent decisions and work effectively with people they hire. This book will help you avoid costly mistakes, make sure no potential problems are overlooked and handle tricky construction details.

By following the advice in this book designers, builders and home owners will be able to create an addition that solves space problems and increase the value of a house. This book is published by Taunton Press, one of my favorite book publishers, and has wonderful color photographs and easily understood illustrations.

CLICK HERE to get FREE & FAST BIDS from local professional contractors who can build your new home.

Column 020

Air Conditioning Getting The Correct Size

DEAR TIM: Help! We recently had a replacement air conditioning unit installed. It can't seem to get the house cool enough and it always seems humid as well. The factory representative came out with the installer and verified that there were no coolant leaks and that the unit is functioning properly. I'm really "hot" under the collar about this. What could be wrong? J. K.

DEAR J.K.: Believe it or not, it is quite possible that you may have had the wrong sized unit installed. Based upon everything that you sent to me, I feel that this is the only explanation.

Most homeowners are unaware that air-conditioning units come in a wide variety of sizes. They can range in size anywhere from 1 ton to 7 tons, often in half ton increments. Don't confuse these tons with weight.

One ton of cooling is equivalent to 12,000 BTU's (British Thermal Unit). It takes roughly 12,000 BTU's to melt a ton of ice in a 24 hour period. Bear with me, I'm about to explain all of this.

Air conditioning equipment removes heat and humidity from your home. The size requirements of this equipment depend upon how much heat is in your home and how quickly it is generated. This heat generation is commonly referred to as "Heat Gain" and is measured in BTU's.

There are two types of heat gain, external and internal. External heat gain is that heat which comes from sources outside of the house (sunlight, hot air). Internal heat gain is that heat which comes from sources inside of the house (people, lights, cooking, appliances, etc.).

CLICK HERE to get FREE & FAST BIDS from local AC Technicians who can install the right sized AC Unit for your home.

These sources of heat must be measured accurately. Tables have been developed for these specific purposes. These tables are based upon many variables, all of which must be taken into consideration. The proper use of these tables, in almost all cases, requires that the heating contractor gather specific data concerning your house.

The data which must be gathered includes, but is not limited to, many of the following variables: thickness of wall and ceiling insulation, square foot area of insulated ceilings and floors, square foot area of exterior walls and the compass direction they face, square foot area of windows in each of these wall and efficiency of these windows, shading of windows, average number of people occupying the house, and geographic location of the house.

When all of these measurements are made and the mathematics completed, the heating contractor will have arrived at a figure for "Heat Gain" for your particular home. The calculations are so specific, that two identical houses on the same street may have two different heat gain calculations. For example, the house with the greater number of windows facing west will have a larger heat gain.

The importance of performing the calculations should not be underestimated. An air conditioner that is too small will be unable to remove all of the heat and humidity. An air conditioner which is too large will "short cycle."

It will not run long enough to adequately remove excess humidity. Air conditioning units should be sized for the exact heat gain or slightly larger. Properly sized equipment runs at peak efficiency.

I suggest that you call your heating contractor and ask him or her to produce the complete set of calculations. Make the individual prove to you that in fact the proper sized equipment was installed. The air conditioning unit outside of your house will have a factory applied sticker or plate indicating how many BTU's it is rated for. Check it yourself!

CLICK HERE to get FREE & FAST BIDS from local AC Technicians who can install the right sized AC Unit for your home.

Column 022