Paint Stucco – or Not?

cement stucco

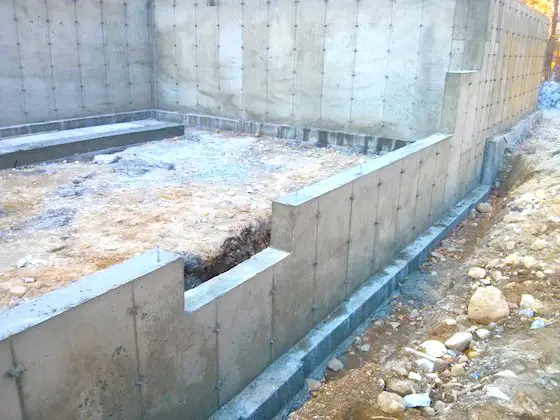
Painting stucco is not necessary. This cement stucco has never been painted. It's decades old and is in great shape. You can extend its life by applying a clear silane-siloxane water repellent. CLICK HERE to have this repellent delivered to your home in days

"Untreated concrete and stucco will readily absorb water. Both will allow water vapor to freely pass through them. You want water to evaporate from concrete and stucco as fast as possible to avoid damage."

Is Painting Stucco Bad? - Well, It's Not What I'd Do!

DEAR TIM: The stucco on my house has been painted many times. There are large areas which are peeling. Concrete, which is virtually maintenance free, seems very similar to stucco. If this is so, does stucco require painting? Are there alternatives to using paint? G. F.

DEAR G. F.: Your observation concerning the similarities of stucco and concrete is right on target. The two materials, for the most part, have very much in common. Concrete usually consists of cement, sand, and varying sizes of aggregate (gravel).

What is Stucco?

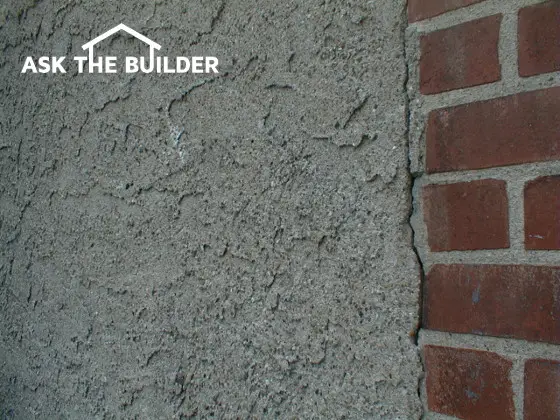
Stucco, on the other hand, usually consists of cement, hydrated lime, and sand. When concrete is finished, its surface and that of stucco are virtually the same.

However, there is a big difference. In a majority of residential applications, concrete is applied in contact with the ground. Stucco is applied to the sides of many houses in lieu of brick, stone, siding, or similar weather shielding material.

Related Links

Stucco Repair Products - Get the Super Epoxy - DO NOT SHARE - SECRET PROCESS!

Apply Stucco Like a Pro - You Can Do It!

Does Stucco Absorb Water?

Untreated concrete and stucco will readily absorb water. Both will allow water vapor to freely pass through them. You want water to evaporate from concrete and stucco as fast as possible to avoid damage.

Do you see where I am headed with this one?

Free & Fast Bids

CLICK HERE to get FREE & FAST BIDS from local painters who can paint or stain your exterior walls.

What Happens If Stucco Stays Wet?

If a concrete sidewalk or driveway gets wet, it's no big deal. However, if stucco gets wet for extended periods of time, this moisture can cause problems. Water may eventually wick through the stucco and begin to rot the wood sheathing or wood framing members. Water vapor may be pulled into the house.

What Happens if Water Leaks Through Stucco?

This may cause the insulation to become wet, drywall or plaster to crumble, and interior paint to peel. Stucco should have a protective coating of some type to prevent interior or structural problems to your home. 50 years ago, the only material available to readily protect the stucco was paint.

Why is Painting Stucco a Bad Idea?

Paint is a coating. Because of its viscosity, it does not readily penetrate things that it covers.

Paint will peel over time. That's why you are experiencing the peeling problems. Water vapor from the inside of your house may be pushing the paint off of the stucco. This is a very common problem on thousands of houses.

Can You Add Color to Stucco?

Yes, you can add dry pigments to cement stucco just like pigment is added to paint. You can tint stucco any color you want.


Can You Spray a Clear Water Repellent on Stucco?

Yes, there are great clear silane-siloxane water repellents for cement stucco. These are the same products recommended for concrete slabs on grade.

silane - siloxane water repellent

This is a magnificent silane-siloxane water repellent that soaks into concrete or stucco. CLICK HERE to have it delivered to your home in days.

Are There Great Products That Don't Peel?

Fortunately, advancements in coatings technology have produced products which will enable you to avoid peeling in the future. If you're able to remove the paint from your stucco completely, or had it never been painted before, you would have two alternatives. The choices available to you are either penetrating masonry stains or clear penetrating finishes.

penetrating concrete stain

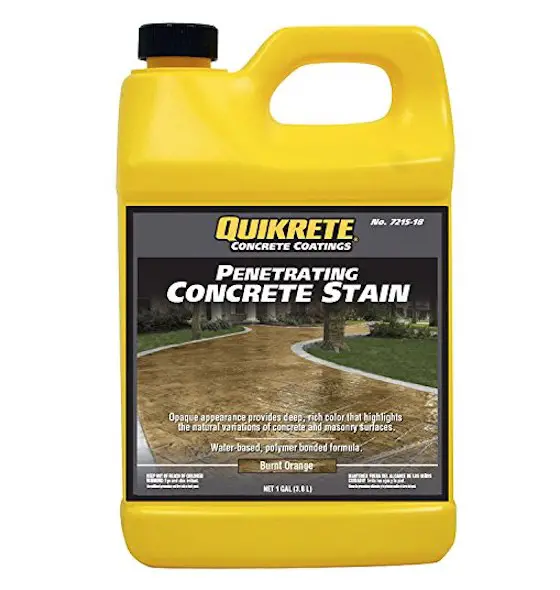
This is a great penetrating stain that will protect stucco. You can buy it in lots of different colors. It will NOT peel. CLICK  HERE or THE IMAGE now to have it delivered to your home.

These products are extremely effective, because they take advantage of the microscopic makeup of concrete and stucco. Stucco and concrete look very much alike under a microscope.

CLICK HERE to get FREE & FAST BIDS from local companies who can remove or strip paint and stains on your walls.

Are There Small Spaces in Stucco?

The space between the aggregate (sand and gravel) is comprised of interlocking crystals. The crystals have void spaces between the interlocking needles of each crystal. 

If you were small enough to climb through the spaces you could travel from one side of the stucco to the other without much difficulty.

How Do the Stains and Water Repellents Work?

The penetrating finishes take advantage of these void spaces. The liquid nature of these products allows them to penetrate into the crystalline matrix. After the liquid portion of the product evaporates, the small solid parts are left behind to partially plug up the void spaces.

Some of the products are designed that they will not allow liquid water molecules to pass by, however, water vapor can readily pass through. This is an advantage, in the event water vapor from the inside of your house is trying to get to the outside air.

I recommend that you give serious consideration to these products, as you prepare to recoat your peeling stucco. You will not be disappointed.

CLICK HERE to get FREE & FAST BIDS from local painters who can paint or stain your exterior walls.

Column 043

Why Cork Flooring

cork flooring

Cork Flooring

DEAR TIM: I was beginning to shop for wood flooring the other day. A visit to a local wood flooring dealer left me perplexed. The salesperson showed me samples of cork flooring. At first, I thought he was joking. Isn't it too soft to use for flooring? Is it really a suitable flooring for heavy traffic areas? A.B.

DEAR A. B.: You should consider yourself extremely fortunate. Should you decide to select it for your home, you will not be disappointed. Cork flooring is one of the most interesting wood floor products that I know of.

If you are an environmentalist, you will love cork flooring. The cork which is used to produce the flooring is harvested from the bark of the cork oak tree. These trees grow primarily in Portugal, Spain, and Tunisia. The cork is harvested approximately every nine years. Amazingly, the cork bark grows back with no harm whatsoever to the tree!

Cork is probably the ultimate resilient flooring. It has excellent shock absorbing and sound deadening properties because of its unique cellular structure. Fifty percent of the volume of the material is comprised of air! These small pockets of air act as natural shock absorbers. Thus, walking or standing on the floor produces little fatigue. Cork also has the ability to absorb sound waves. Rooms with cork flooring are unusually quiet.

Because of its lack of grain, cork flooring offers a unique look. Cork flooring is made by grinding up the bark into small pieces. These pieces are then coated with a non-toxic resin binder. The flooring is produce in sheets of different thickness and often cut into precision 12 inch by 12 inch pieces. When installed, the floor has a very attractive smooth 'pebbled' appearance.

Cork flooring is available in different colors. However, you won't believe how the cork is colored. The cork is placed in ovens and baked. The longer it remains in the ovens, the darker it becomes.It is available in a wide range of colors. The cork can be installed natural (a light tannish brown) or you can request a deep brown similar to dark walnut.


Author's Note: If you want a cork floor of your own and want to see how easy it is to install, you should consider buying my Cork Flooring eBook. It has wonderful step-by-step color photos and easy to follow directions. I guarantee your satisfaction!


Adhesives are used to install cork flooring. The material is also easily cut with a razor knife. Cork flooring can be purchased prefinished, however, finishing the material on site makes for a virtually seamless floor. The best results are achieved by performing a light sanding before applying urethane. Due to its porosity, the cork may require 4 - 5 coats of urethane. Urethane coated cork is extremely durable. Remember, when you walk on a finished floor you wear away the finish, not the flooring.

Your concerns about cork's softness are legitimate. There are some simple precautions you must take with cork flooring. Because it is resilient, heavy furniture can permanently dent it. It is suggested that you use high quality furniture pads beneath table or furniture legs. Also, as with any wood floor, water, in excessive amounts can damage the flooring. Cork flooring should not be installed in basements which may be subject to seepage or flooding.

The maintenance of cork flooring is similar to any standard wood flooring. Simple periodic vacuuming of dust and grit will prevent scratches. Spills should be wiped up with a damp sponge or cloth. Cleaning should be done with mild detergent and a damp mop. Avoid waxing the floor if you have applied urethane finish. The wax may cause problems at a later date, should you decide to brighten the floor with an additional coat of urethane.

Column 044

Hot Water Heater Failure

DEAR TIM: I have just replaced my hot water heater. It was installed just 4-years-ago. This is the second time this has happened. Why is the tank corroding so quickly? Also, the plumber installed a funny looking small tank on the cold water line this time. Will this help extend the life of my new hot water heater? T. Q.

DEAR T. Q.: You are not alone in your misery. For a variety of reasons, many homeowners suffer from reduced water heater lives. There are some steps you can take to possibly extend the life of your hot water heater.

Hot water heater tanks are made from steel. We all know that when exposed to moisture and oxygen, steel will rapidly corrode. Water heater manufacturers, during the 1950's, began to apply a thin glass coating on the inside of water heaters. This coating isolates the steel from the water and dissolved oxygen within the tank. However, certain parts of the tank (inlet / outlet nipples, tank fittings, etc.) can not be easily coated with glass. These can and will corrode.

Water acidity, electrical conductivity, dissolved oxygen, and temperature contribute to water heater corrosion. The first three items are present in varying quantities depending upon the source of your water supply. The water temperature within the tank can also vary, depending upon how high you set the thermostat. As water temperature rises, so does the rate of corrosion.

All water supply systems have dissolved minerals within the water. These dissolved minerals enable the water to conduct electricity. Those people who have well water, or municipalities that draw water from deep wells can have high amounts of dissolved minerals within the water. As the mineral content of water rises, so does its ability to conduct electricity. This flow of electricity within the tank begins to attack the parts which do not have a glass lining.

To offset this corrosion process, manufacturers install a magnesium anode rod within each tank. This rod serves as a miniature lightning rod. The electrical current present in the water is attracted to this rod. The magnesium corrodes easier than the other parts. If your water conditions cause high electrical conductivity, this anode rod can be corroded in a short period of time. Once it is gone, the electricity begins to corrode the other tank parts. Fortunately, anode rods can be replaced. Have a qualified service technician check yours every year.

The little tank that the plumber installed will extend the life of your water heater, but for an entirely different reason. Water expands when it is heated. This expanded water used to simply push the water in your cold water line back into the city water main. However, many public water systems are requiring backflow prevention devices to be installed on residential water systems. These devices prevent water from your house being drawn back into the public water supply. Broken water mains, fire trucks, etc. can actually siphon water from your water pipes.

These backflow devices block the expanding water. The little tank is an expansion tank which acts as a temporary storage site for the expanded water. Without this tank, your hot water heater may fail because of the high internal pressures created by the expanding water. Some water heaters burn natural gas or propane. The internal flues which exhaust the combustion gases can collapse because of high internal pressures. A collapsed flue could cause carbon monoxide to concentrate within your house. Expansion tanks are good ideas. Consider installing one with your next hot water heater.

Poured Concrete Walls vs. Concrete Block

poured concrete foundation walls

Here are some great cast concrete, formal term for poured walls, foundation walls that were formed and poured in ONE DAY just down the street from where I live. You'd NEVER build block walls that fast. (C) Copyright 2016 Tim Carter

Poured Concrete vs Block Wall TIPS Just Below

FAST TIPS for Poured vs Block Walls:

  • Block walls can be as strong or stronger than poured walls
  • Block and concrete are strong in compression, but weak in tension
  • Reinforcing steel needs to be in block walls - both vertical and horizontal
  • Block cores must be filled with pea-gravel concrete
  • Poured, or cast, walls must have horizontal steel top and bottom

CLICK HERE to get FREE & FAST BIDS for foundations walls for your new home.

DEAR TIM: I am getting ready to construct a new home with a full basement. I am convinced that poured concrete walls are stronger than concrete block walls. However, a friend of mine has told me that there is no difference. My contractor has indicated that there are many factors that control overall strength in each type of wall. Can you shed any light on the subject? J. D.

DEAR J. D.: First of all, I can tell you that your contractor is quite right in his statement. There are many variables which control overall strength of masonry or poured concrete basement foundation walls. Design strength of the concrete, concrete blocks, and mortar are very important. The thickness of the wall with regard to its height is also extremely important.

For the most part, each type of wall has two categories, reinforced and non-reinforced. A reinforced wall, either poured concrete or concrete block, always contains some form of reinforcing steel. The presence of reinforcing steel dramatically increases the overall strength characteristics of masonry or concrete.

However, let's compare two 8 inch thick walls. One will be poured concrete, while the other one will be standard 8 inch hollow core block. There are two forces which act primarily upon foundation walls. The one force is a downward force (gravity load) created by the load placed upon the wall. The other force is a sideways or lateral force caused by the backfill or earth which is placed against the wall.

The strength of concrete is often measured in pounds per square inch. This is a measure of the weight that it will support before fracturing. You can apply these same standards to concrete blocks and mortar. Let's assume that each of the test walls have the same strength. The strength of each wall is directly proportional to its cross sectional area. In our example, a standard concrete block wall may only be half as strong as the poured concrete wall when a gravity load is applied to it. This is due to the hollow voids within the wall.

When you apply a lateral load to these two walls, you will achieve similar results. The poured concrete wall has more mass or interlocking cement paste crystals to resist the cracking force. The hollow block wall is depending solely on the strength of the thin mortar bed between each concrete block.

The addition of reinforcing steel to either wall system complicates the issue. For example, you can make a concrete block wall stronger than a poured concrete wall, by simply adding some reinforcing steel and additional mortar to the block wall. The trick is to insert vertical steel rods from top to bottom in the hollow cores and fill those hollow cores to the top with mortar. The addition of thin wire truss reinforcing steel in between the layers of block will add even more strength. This block wall would be far stronger than a similar non-reinforced concrete wall.

CLICK HERE to get FREE & FAST BIDS for foundations walls for your new home.

Your best bet, in my opinion, is to install a steel reinforced poured concrete wall. Have your foundation contractor install two 5/8 inch horizontal reinforcing bars about 16 inches from the bottom and top of the wall. These bars will minimize cracking if your soil beneath the footer rises or falls.

Consider installing singular vertical bars approximately two inches away from the inside face of the foundation wall every two feet on center. These bars will help withstand the bending force caused by the backfill dirt.

Remember, you only get one chance to install reinforcing steel. Spend the extra money and your foundation will not let you down.

Design-Control-Concrete

GET THIS BOOK NOW. CLICK THE IMAGE TO BUY IT.

If you want to learn lots about how concrete should be installed, you must buy a copy of a neat paperback book published by the Portland Cement Association. It is titled Design and Control of Concrete Mixtures. This book is a little technical, but it has many very important facts and guidelines that will help you order and place concrete under all sorts of site and weather conditions.

The Portland Cement Association has another book called The Homeowners Guide to Working With Concrete, Brick and Stone. This swell book contains some great photos, illustrations and numerous tables. It educates you about how to order and work with concrete. The book also shows you how to install brick and stone. It is a must have! To buy it now, just click it.

Column 046


Roof Plywood Swelling – A Case Of The Bumps

DEAR TIM: We recently had a new home built. Within the past few months a problem has developed with the roof. There are distinct bulges and it appears that you can see the outline of many of the pieces of roof plywood. I know for a fact that these humps and bumps were not there when we moved in. The builder and the roofer admit no fault. I am not experiencing any leakage at this point but am worried. What happened and can it be corrected? P.J.

DEAR P. J.: Based upon your description of the problem, you need to get another individual into the loop. Your problem, in all likelihood, was caused by the carpenters who installed the roof plywood. The problem may have been magnified by the roofer and builder as well.

Wood products because of their cellular structure expand and contract with changes in moisture content. They experience the greatest dimensional change across the face of the grain of a piece of wood. Plywood products are giant pieces of wood exposing this face grain. Because of the manner in which plywood is constructed, this face grain points in both directions (width and length) on a piece of plywood. This means that you can experience severe expansion in both directions on a piece of plywood.

Plywood manufacturers are aware of this problem and have specific installation guidelines available to builders and remodelers. It is quite possible that these guidelines were not followed in your case. Two of the primary points in these guidelines speak to panel spacing and attic ventilation.

Because of the expansion problems that can occur with plywood, it is recommended that you plan for this expansion. There should be a minimum 1/8 inch gap around all edges of abutting pieces of plywood. This gap will allow the pieces of plywood to expand without buckling. My guess is that your plywood was installed without this required gap. When your plywood expanded, it puckered at the edges. In severe cases you will also see bulges within a single sheet, such as in your case.

Ventilation of attic spaces must also be adequate. The reason for this is really quite simple. In the summertime, the air in attics can get very hot (120 - 150 degrees F). As air gets hotter it has a greater capacity to hold water in the vapor state. This creates a problem for poorly ventilated attic spaces.

The air in these attics can hold, in the vapor state, a greater quantity of moisture than an equal volume of air on the outside of the roof. This extra moisture can be readily absorbed by the plywood which in turn causes the plywood to expand.

Adequate roof ventilation can minimize this buildup of water vapor by exchanging outside air with the air inside of your attic spaces. Advancements in ventilating technology allow for air in your attic spaces to be exchanged or moved on an almost continuous basis. Model building codes suggest minimum ventilating requirements.

It's very possible that your roof has inadequate ventilation. This responsibility should be shared by the builder and the roofer. There are many ways in which you can properly ventilate roof and attic spaces, all of which should be familiar to your roofer. Continuous roof vents, stationary roof vents, turbine vents and power attic ventilators are just a few. These ventilating systems work in conjunction with adequate soffit ventilation. Your builder is responsible for providing adequate soffit ventilation.

Call your builder and have him fix the buckled plywood. Also, have him prove to you that your attic space is adequately ventilated.

Drywall Finish Problems

DEAR TIM: I have a strange problem. During different times of day and at night, you can see strange shadowing on my new drywall walls. When I slide my hand over these areas they feel smooth, yet they appear uneven. This problem comes and goes with the changing seasons. Is there something wrong or should I schedule a visit to the eye doctor, as my wife suggests? R. S.

DEAR R. S.: There is no need to go to the eye doctor. However, I do suggest that you schedule an appointment for your wife! Your photographs clearly show to me that you are a victim of 'joint banding' or 'telegraphing', as it is commonly referred to in the trade. To make matters worse, your walls were painted with a gloss paint which magnifies the problem.

In order for me to explain just what is happening, I had to dust off my high school physics book. The root of your problem lies in light reflection. The light bouncing from your drywall is not doing so in a uniform manner. This is caused by several things.

While the surface of the drywall appears smooth to the touch, it is in fact comprised of two entirely different surfaces. The drywall paper itself has a completely different texture than the joint compound used to fill the joints and cover the nails and screws. Not only that, the paper and the joint compounds can absorb liquids unevenly. Herein lies part of the problem.


Don't let unsightly drywall happen to you! Learn the secrets to great drywall installation in this Drywall / Plaster Installation Checklist.

I offer a 100% Money Back Guarantee.


When your painter applied the paint, the paint film was not able to adequately disguise these different textures. When light hits these surfaces at a low angle (morning and afternoon), it reflects differently from the paper and the joint compound areas. Because the paper has a slightly rougher texture than the joint compound, the light rays from the sun are scattered by the rough texture. The light bounces more uniformly from the smoother joint compound areas of the wall surface.
This problem comes and goes with the changes in seasons, because the angle of the sun changes in the sky. Your problem is evident at night because of the recessed lights in your ceiling. These lights cast direct light onto the wall at a low angle.

You can solve the problem very easily. All that has to be done is to create a uniform texture on the drywall surface that absorbs liquids at a uniform rate. Ordinary paints do not have this ability, for the most part.

Fortunately, there is a very simple way to enable the light to bounce uniformly from your walls. There are special paints which can be applied to the drywall that will perform this task. These paints contain special compounds which seal the paper and the joint compound so that they absorb subsequent coats of paint at a uniform rate. These paints also contain lots of small solid particles that fill the uneven texture of the paper to make a uniform surface.

Many of these paints are very affordable. Almost all of them are both easy to apply and environmentally friendly. They can also be applied to your walls, even though they have already been painted. Many of them have rapid drying times which allows you to apply the finish coat of paint the same day.

One final tip, try to use flat wall paints whenever possible. These paints, generally speaking, when viewed under a microscope, have a rougher texture than glossy paints. This rough texture enables them to trap the light rays and scatter them as they leave the surface of the wall. This scattering effect can often hide very small imperfections which would otherwise be visible had you used a glossy paint.

Concrete, Snow and Ice

DEAR TIM: Winter is fast approaching. Within the past month, I had a new concrete driveway and sidewalk installed. I am concerned about surface scaling caused by deicing salts and freezing temperatures. Is my new concrete at risk and what, if anything, can be done to minimize the damage caused by salt and ice? A. L.

DEAR A. L.: Many homeowners ask this same question. Because of the relatively high initial expense of installing concrete, homeowners want their driveways and sidewalks to last as long as possible. Virtually everyone knows that deicing salts and freezing temperatures can damage concrete - concrete that has not been ordered, placed, finished and cured properly that is.

Your new driveway is extremely susceptible to damage in its first year. Only use sand for traction. Concrete, contrary to popular belief, is not a totally 'solid' object. It contains microscopic passageways. These passageways are created during the initial crystallization process as concrete transforms from the liquid to the solid state. These tunnels are created as the needles of the interlocking cement paste crystals grow.

Water cannot be compressed. When water freezes and turns into ice, its volume expands by about nine percent. If there is not sufficient room within the passageways to accommodate this expansion, the ice can begin to break the needles of the interlocking cement paste crystals. Your freshly poured concrete already has a high water content. Although it appears dry, there is quite possibly a large quantity of free water still within the crystal structure.

Deicing salts can also cause similar problems. The presence of salts in concrete can create high internal pressures. Deicing salts melt snow and ice and create a salty brine which is absorbed into concrete. As the temperature drops and ice crystals begin to form, the concentration of the unfrozen salt brine begins to increase. This brine actually attracts water creating a pressure difference within the network of cement paste crystals. This pressure can and does fracture some of the crystals.

Fortunately, there are things that can be done to minimize the damage from these forces. When concrete is mixed, additives can be included which create very small air bubbles within the concrete as it dries. These air bubbles provide a place for the expanding ice crystals to relieve their pressure. Residential concrete should have an air content of five to seven percent.

Stop - Purchase Deicing Salt eGuide NowGet a 24-page guide right now that answers all your questions about Deicing Salts. Will it RUIN your concrete? Did you know that salt can SERIOUSLY harm you? What about your expensive landscaping? You can have all these answers and more in less than a minute. Buy it NOW.

Concrete strength is a function of the amount of cement powder that is added to the mix. This strength is often measured in pounds per square inch or PSI. Residential concrete subjected to freezing or deicing salts should attain a minimum strength of 4,000 PSI. You can order concrete with higher PSI strengths. The concrete can only attain this strength if it is properly cured. A liquid curing compound should be applied to your concrete as soon as the final finish has been applied.

When finishing or placing concrete, never add extra water to the mix. Also, do not sprinkle water on top of the concrete as it is being finished. Never finish concrete that has standing water on the surface.

These practices dilute the amount of cement paste at the surface of the concrete. With less cement, there are fewer crystals to hold things together.

You can also apply special sealants to the concrete which minimize the absorption of water or salt brine. Many of these sealants are highly effective and can often help to protect concrete which has been improperly installed. These sealants should have the capability to breathe. Water vapor from the soil beneath the slabs must be able to evaporate into the air.

Allowances – The Financial Black Hole

DEAR TIM: I have just received three quotations for a sizable remodeling project. All of the bids included allowances. What are allowances? What do they include? Is there an easy way to compare them? Help, I'm so confused! H. C.

DEAR H. C.: Be careful! You are about to be pulled into the black hole of bidding! Allowances can easily create confusion. Many homeowners have suffered financial setbacks as a result of this confusion.

Allowances in bid quotations are often used to create a budget number for an item or task which has yet to be defined. It is important to note that the number which is used is often an average or arbitrary number.

Allowances must be carefully spelled out as to what they do and do not include. For example, does an allowance figure include sales tax and delivery charges? How about profit and overhead for the contractor? Special kits or optional items need to addressed. For example, a homeowner may have a $250.00 allowance for a bathtub. However, is the cost of the waste and overflow (drain) assembly part of the allowance or not? It's a good idea to determine if labor costs are a part of an allowance number.

The pricing strategy used in determining the allowance cost of an item can also be a problem area. Builders and contractors often receive special pricing from suppliers when they purchase items. Determine if the allowance number is based upon this price or the retail cost. Often, a homeowner can obtain more competitive pricing if they request that allowances be based upon the contractor's cost of goods. Contractors then include any markup on these materials as a part of their base bid. If they really want your job, they may lower their markup on these items to make their quotation more attractive to you.

Many homeowners have experienced frustration when confronted with allowances. The common cause of this frustration is artificially low allowance numbers. For example, a contractor may quote a kitchen job with a cabinet allowance of $4,000.00. You sign the contract and the job begins. After visiting several cabinet shops, you determine that the lowest quality cabinets cost $7,000. If you don't happen to have any extra money, you have got a major problem.

The best strategy to avoid these problems is to eliminate allowances from your jobs. This is really not that hard to do. The trick is to make product selections before your job goes out for bid. Investing this time during the planning process will reap large rewards. Each contractor will know exactly what you want. He or she will be able to calculate the proper cost and the amount of time required to install the items you have selected. The bids will, in reality, be a comparison of 'apples to apples'.

The preselection of items during the planning stage offers another advantage. Items which need to be special ordered will be identified at the beginning of job. Professional contractors will then be able to order these items in sufficient time so as to minimize project delays.

Allowances can't always be totally eliminated, however. In these cases, make sure that each contractor uses the same arbitrary number and the same conditions in his quotation. This will allow you to more easily determine which contractor is the low, middle, and high bid. Allowing contractors to use their own allowance numbers can create a financial nightmare for you.

Front Door Locksets and Handles

DEAR TIM: I'm getting ready to install a new front door. I went shopping for a fancy door knob and handle lockset. However, once in the store, I was overwhelmed and confused by the different types of locksets. Are there any clear cut advantages between the different types? If you don't mind my asking, what type do you have on your own home? S. J.

DEAR S. J.: It doesn't surprise me that you were confused by the different types of residential locksets that are currently available. Many of the locksets look identical or similar, however there are vast differences between them.

Residential locksets, for the most part, fall into two different classifications: mortise or cylindrical. The advantages and disadvantages of each type are rooted in the way each lockset is constructed and installed.

front door locksets

Mortise locksets derive their name from the mortise you must create in a door in order to install the lockset. A mortise is a deep cavity, usually rectangular, which is created in the edge of a door. The successful creation of this cavity can often only be achieved with specialized tools and skill. Once created, you can then install the lockset case which is filled with levers, cams, and springs.

One advantage of a mortise lockset is the ability to operate the door latch and the deadbolt by inserting a key into just one slot. By turning the key just 90 degrees past a full turn you can unlock both the latch and the deadbolt. Often, exterior mortise locksets have massive 1 inch throw deadbolt locks that are an integral part of the lockset. Newer models offer a special interior emergency release feature which allows you to operate the deadbolt and door latch simultaneously in the event of a fire or other emergency.

Highly polished solid brass knobs, backplates, thumblatches, etc. are common. It is even possible to obtain a lifetime guarantee on some polished brass finishes. These locksets, as you might imagine, can be quite expensive. Also, they require a significant investment in time to properly install. However, mortise locksets, in my opinion, offer the ultimate in security, design, and ruggedness.

Cylindrical locksets, on the other hand, offer ease of installation, wide selection of styles and finishes, and affordability. The cylindrical lockset gets its name from the actual shape of the lockset mechanism and the cylinder into which the key fits. The installation of this type of lockset is achieved by drilling two simple holes. A large hole is drilled on the face of the door for the lockset mechanism, while a smaller hole is drilled in the edge of the door for the latch. Often you can purchase doors with the holes pre-drilled.

You have a wide range of durability available when purchasing cylindrical locksets. These locksets frequently are available in three categories: residential, light commercial, and heavy duty, all of which can be installed in residential doors. Rarely, if ever, do these locksets have an integral deadbolt lock.

If you choose to install a standard cylindrical lockset and want a deadbolt lock as well, you often must drill two additional holes. Locking and unlocking these mechanisms requires that you insert the key into an additional key slot. What's worse, if you don't plan ahead and buy the same brand locks, you may have to use two different keys.

front door locksets

front door locksets

You can obtain high quality locksets either way you go. Personally, I have both. My front door features a classic solid brass thumblatch mortise lockset, while the other doors in my house have cylindrical locks. I am satisfied with the performance of both. Plus, one key operates all doors!

Caulks

DEAR TIM: I need some help with caulks. There are many different types available. How are the silicone caulks different from the acrylic latex caulks. Are they both paintable? Also, I purchased a clear acrylic latex caulk, but it came out of the tube white. Was the caulk in the tube out of date, or was it defective? One last thing, is there a caulk available to fill a driveway crack? M. W.

DEAR M. W.: Caulks have experienced a significant transformation during the past 45 years. Linseed and oil based caulks were used on a widespread basis up until the 1950's. During the 60's and 70's acrylic latex and silicone caulks began to appear. Because caulks need to stick to things, they are closely related, chemically speaking, to adhesives. In fact, I'll bet that you have seen adhesive caulks at your local stores.

Caulks

In as much as caulks are used to fill cracks between things that frequently move, it is important for them to have a high degree of flexibility. The older oil based caulks almost always became brittle with age. Acrylic latex and silicone caulks are formulated so that they will remain flexible for many years.

100 percent silicone caulk is made by reducing silica sand into a basic silicone oil polymer. In order to give the caulk body, fillers such as mica (a mineral) and clay are added. These caulks work best when used on non-porous objects such as metals and glass. The silicone oil makes it virtually impossible for paints to adhere to 100 percent silicone caulk. This oil tends to bleed slowly out of the caulk for many years.

100 percent silicone caulks require moisture from the air in order to cure. If you live in a dry climate, you will notice that these caulks take a longer time to dry. As the silicone caulk cures it emits acetic acid, one of the primary ingredients of vinegar. These fumes can irritate your eyes and nose.

Acrylic latex caulks are comprised of acrylic polymers, latex, water, and fillers. They bond very well to porous materials such as wood, masonry, plaster, and drywall. These caulks cure, or dry, as the water in them evaporates. Acrylic polymers and latex have excellent flexibility. They also retain this flexibility for long periods of time. Also, paints adhere well to the fillers that are present in these caulks.

Some of your confusion may arise from acrylic latex caulks that contain silicone or 'paintable' silicones. Some acrylic latex caulks contain small amounts of silicone. The silicone is added to improve their flexibility. The paintable water based silicone caulks often contain high amounts of fillers which allow paint to adhere to them. However, the high filler content tends to have an adverse affect on the overall performance of the caulk.

Caulks

You and I have shared a similar experience. When I first used a clear acrylic latex caulk, I thought the manufacturer had made a mistake. I never believed that the white caulk would dry clear. I was wrong. The white color in the caulk is caused by the presence of latex. The latex in the caulk is derived chemically. It is similar in nature to the milky colored fluid produced from plants belonging to the milkweed family. As the water evaporates from the latex the structure of the caulk changes so that the caulk becomes transparent. Light waves travel directly through the caulk.

There are caulks available to suit just about any purpose. You can purchase caulks that look like brick mortar, blacktop, and concrete. Special low temperature caulks are available that adhere to cold, damp surfaces. Caulks are made that seal aluminum gutter joints which commonly leak due to expansion and contraction caused by temperature changes. There is a caulk for just about any need.