Installing Ceramic Tile
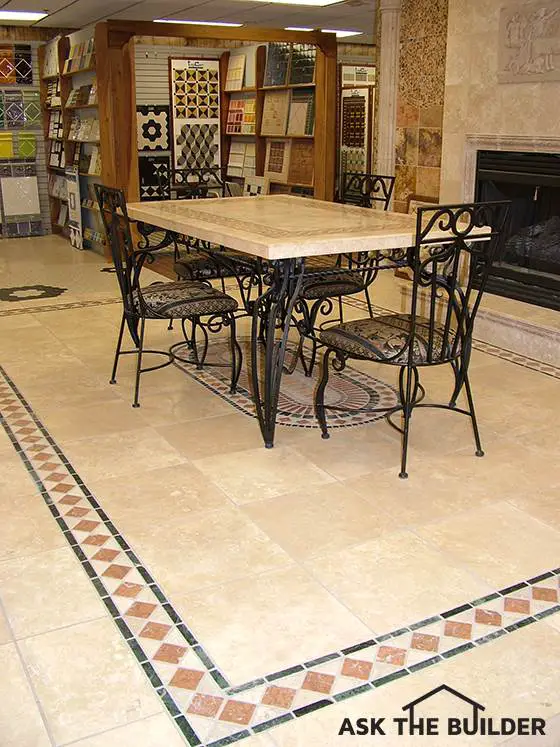
The large tiles on this floor were set on smooth concrete. The smaller inlay tile make for a splendid contrast. ©2017 Tim Carter
Ceramic Tile Installation
DEAR TIM: I have successfully installed ceramic tile in different homes I have owned, but always have worked with tiles that are 12 inches square or smaller. In the first level of my new home I want to install 900 square feet of 18 or even 20 inch square tiles on the concrete slab.
Everyone tells me this is a task for professionals. Is it that hard to work with these giant floor tiles? What can I do to prevent cracks in my tiles? Shelley H., Colorado Springs, CO
DEAR SHELLEY: I think the best analogy I can offer to compare 8 or 12 inch ceramic tiles to the jumbo ones that measure 18 or 20 inches square would be to compare running a race with athletic shoes and then doing the same race fitted with snow shoes.
With snow shoes on you will finish the race, but not without a tremendous amount of difficulty and it will take you much longer to cross the finish line.
The bane of ceramic tile installations in general is rooted in a characteristic all ceramic and natural stone flooring materials share. All of these products exhibit great strength when you squeeze them, but have low strength when you bend or stretch them.
Simply put, if a given tile has a solid base under it that will not flex and you place a heavy object such as a pool table on the tile floor, the tiles will not crack. But if that same tile has a hollow space between it and the subfloor or the subfloor flexes, the tile can easily bend and crack.
CLICK HERE to get FREE & FAST BIDS from local ceramic tile contractors.
The issue of tiles cracking grows exponentially as the size of the tile gets bigger. Small ceramic tiles that are one inch square can be very forgiving but large 18 or 20 inch square tiles demand perfect installation conditions if you want your new floor to be crack-free for the service life of the floor.
Perhaps the most important step is to ensure the surface you are installing the tiles on is in the same plane. Some tile installation guides refer to this as the flatness of the floor. The floor doesn't need to be level as it needs to be perfectly smooth.
Small humps or depressions in the floor can create sinister hollow voids under tiles as you lay them. It is imperative you take the extra effort to eliminate the humps by filling in all depressions with a floor leveling compound.
The best tool to use to discover and eliminate high spots and depressions in floors is a precision aluminum or magnesium straight edge. These tools can be rented and when placed on a concrete or wood floor they immediately expose any imperfections in the floor.
If you employ a flashlight and lay it on the floor and position the light beam so it shines parallel to the floor and aim it towards the straightedge, you will quickly discover even the slightest low spots in the floor.
Full Tile Tool List
Here's a list of tools that I've used for years to successfully install thousands of square feet of ceramic tile.
- tape measure
- pencil
- tile cutter
- nippers
- a 1/4 by 1/4 inch v-notched trowel
- a hammer
- some 6d finish nails
- 8 lineal feet of straight 1/4 inch wood lattice strip
- putty knife
- 3-inch wide-bladed scraper
- grout sponge
- rubber grout float
- several buckets
- accurate 4 foot level
Click the image below to BUY all, or some, of the tools in the above list.
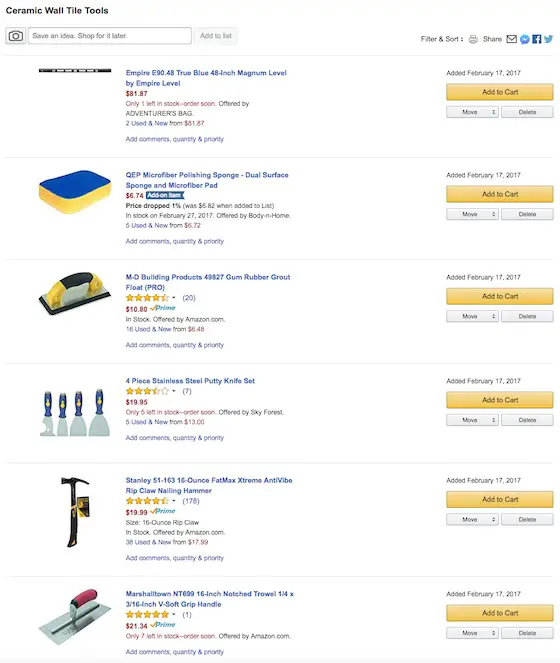
CLICK THIS IMAGE NOW TO ORDER ALL THE TOOLS YOU NEED TO DO CERAMIC TILE.
Once you have filled in all of the low spots with a cement-based floor leveling compound and the floor is smooth as a silk scarf, it is time to install the floor tile. It is extremely important you use the correct notched trowel to spread the cement-based thinset adhesive.
I suggest you use a one-half inch V-notched trowel. This trowel applies a generous amount of thinset for these large tiles.
If you're getting ready to install ceramic tile or have someone install it for you, my Ceramic Tile Installation Checklist is a must. Avoid making costly mistakes with the help of this document. I offer a 100% Money Back Guarantee.

Look what you can do with different colored tile as well as different sized tile. Think outside of the box. You do not have to use the same color and sized tile in one area. Mix it up!
The secret trick is to also skim the bottom of each tile with the thinset adhesive before you lay it on the floor. Use the flat side of the trowel to apply the thinset to the tiles and then to scrape off the excess.
This extra step fills in any hollow areas under the tile with thinset. It also assures you that each tile has nearly 100 percent contact with the floor beneath it.
I feel another surprise in store for you is cutting the large tiles. Many standard wet diamond saws may allow you to cut the tiles, but you may not be able to use the saw's sliding table aspect to help you maintain a straight cut.
All cuts may have to be free hand. If you do not have access to a wet diamond saw, you may have to use a traditional glass cutter unless you can find a large tile cutting tool made for the jumbo tile. The store where you purchase the tile may rent one to you.
Getting a floor perfectly flat or in the same plane also provides other visual benefits. Many ceramic tiles have a satin or even high-gloss glazed surface.
These shiny surfaces readily reflect light. If different tiles are tilted one way or another, your eye readily sees this as light hits the floor at a low angle. This often happens when sunlight streams into a room either early or late in the day.
But if the floor is flat and the thinset is applied evenly, all of the tile surfaces will reflect light the same direction. The glossy surface will telegraph the flatness of the floor beneath it.
It is vitally important to install reinforcing steel in any concrete slab that will be covered with ceramic tile. The steel helps prevent cracks in the concrete and holds the slab together in the event a small hairline crack does develop. Special crack isolation fabrics installed between the concrete slabs and the tile also help prevent future cracks in the tile.
CLICK HERE to get FREE & FAST BIDS from local ceramic tile contractors.
Column 535
Tim built custom homes and did ultra-custom remodeling for 20+ years before launching his Ask the Builder media presence. He was selected as one of the Big 50 by Remodeling magazine in 1993. This award gave birth to Ask the Builder in October 1993. Tim also operates https://DrawPlumbingPlans.com. His @askthebuilder YouTube channel was the first home improvement channel on YouTube.