How to Insulate an Older Brick Home
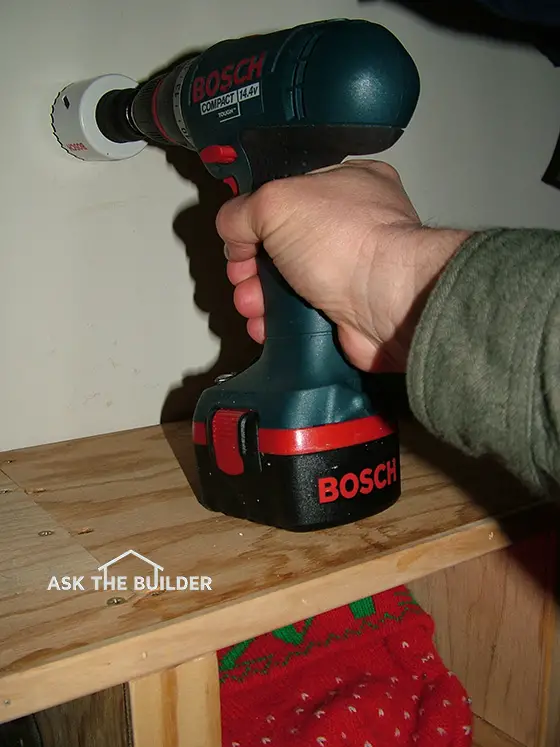
Drill a two-inch hole in a closet wall to see how much space you have for insulation. © 2017 Tim Carter
How to Insulate an Old Brick House TIPS
- Space for insulation may be narrow
- Not all brick homes can be insulated
- Do an energy audit for best ROI
- Wall insulation may take decades to pay back
- CLICK HERE to Get Tim's FREE & FUNNY Newsletter!
DEAR TIM: My story-and-a-half brick home was built in the 1960's. It has no insulation in the walls as far as I can tell. Each contractor I have talked with wants to drill holes in my interior plaster walls and add insulation from the inside.
I prefer to have it done from the outside by drilling holes in the mortar joints between the brick. I don't want all of the dust and repainting mess inside my home. How would you approach this job? What are my alternatives? Bill B., Versailles, KY
DEAR BILL: The house you describe sounds exactly like that of my in-laws. My wife grew up in a brick home built in the 1950's just before your home was constructed.
The exterior of the home is used brick and the second-story dormers that project through the roof out the back of the house are wood frame. The exterior walls of the first story are solid masonry, not brick veneer which is the way most brick homes are now constructed.
Brick Veneer
Today's modern brick homes have a single-thickness of brick that is placed over a wood-framed structure. The wood walls can be covered with insulated sheathing and the wood-wall cavities can be filled with insulation.
CLICK HERE to get FREE & FAST BIDS from local insulation contractors.
Solid Masonry & Foam
Solid-masonry walls can be insulated with modern foam panels that separate the outer layer of masonry from the inner layer, but this method of construction was not in widespread use when your home was built.
Cheap Fuel
The majority of solid masonry brick homes that were built in the 1950's and 1960's were constructed at a time when energy costs were very low. Builders didn't worry about insulation and furnaces were lucky to be 60-percent efficient.
But the Mideast oil embargo of the 1970's changed all that and energy costs soared like a hawk in the sky.
Basement Wall Foam Insulation Video
Watch this video to see how you can use foam on the inside of basements to slow energy loss.
Brick & Block
The masons who built the structures used a finish brick for the outside facing that was usually about four inches in depth. The inner layer of the masonry wall was often concrete block or cinder block that was also a little under four inches in depth.
These block were laid immediately behind the exterior brick. If you can determine that your masonry walls are about eight-inches thick, you know there is no foam insulation between the brick and the hidden block.
The typical total wall thickness for a home built this way is:
- 8 +/- inches for the brick and block
- 3/4-inch for the furring strip nailed to the block
- 1/2-3/4 inch for the interior drywall
Measure Your Wall
This adds up to about 9 and 1/2 inches. You can measure this fairly accurately at a window using a 4-foot straightedge or level that you place flat on the wall.
Slide it along the wall until the tip extends over a pane of glass. Measure between the tip of the level or straightedge to the glass.
Do the same on the other side of the wall. Add the two dimensions together plus the thickness of the glass.
After the masonry work was completed, carpenters would follow behind and nail 3/4-inch thick by perhaps two-inches wide furring strips to the masonry walls. These wood strips were usually placed 16-inches on center and fastened to the masonry walls with hardened, cut nails. Large sheets of gypsum-based plaster lath were then nailed to the furring strips and the final plaster was applied over the lath boards.
Narrow Place
If your home is constructed in this manner, you can see the problem you have. The only void space that is available for insulating is the narrow 3/4-inch space between the furring strips.
You can confirm this narrow void space exists by creating a two-inch diameter hole in several of your exterior walls. Do it behind a piece of furniture or inside a closet that is on an exterior wall.
Long ROI
If you discover you only have a 3/4-inch space between the back of the plaster or drywall and the beginning of the block facing, you might never get a payback, or return on investment (ROI), in energy savings in your lifetime for the amount the total job would cost including all cleanup, re-plastering and repainting.
I say this even if you could insulate this space with the best foam insulation currently available.
Energy Audit
You may want to invest in an energy audit and have an energy audit expert come to tell you where you're losing the most energy in your home. It may not be the walls.
CLICK HERE to get FREE & FAST BIDS from local energy-audit contractors.
Wood Floor Foam Insulation
Watch this video to see how to use foam insulation in a wood-floor system.
Outside is Hard
The contractors you spoke to are correct. Attempting to do the job from the exterior presents a host of problems. For one, the mortar joints are often no wider than one-half inch.
A tiny insulation tool would have to be inserted in eight inches and then somehow have to turn a sharp 90-degree angle to squirt insulation up, down and sideways. A specialized nozzle may indeed exist, but then you have to wonder if the entire cavity is being filled with insulation.
Hitting a Strip
What's more, the furring strips present a challenge. They can't be seen from the outside of your home and a hole drilled into the brick at a furring strip location would be useless. Drilling larger holes inside the home allows the contractors to see if they missed a furring strip and it allows them to more easily install the insulation.
Forget About It
But if it were me, I would not even try to insulate the walls. I feel you can save more energy concentrating your efforts on stopping air infiltration leaks, installing the best energy-efficient windows and exterior doors and improving insulation in your attic space.
Heat Loss Calculation
Calculating energy savings for insulating the narrow 3/4-inch wall space is fairly easy. Heating and cooling contractors have done this for years. They have to perform heat loss and heat gain calculations that allow them to properly size furnaces, boilers and air conditioners.
Businesses that sell this equipment to contractors often have sophisticated computer programs that can quickly tell you how many Btus (British thermal units) of extra energy are required to heat or cool a home that does not have insulation in that narrow void space. I have seen the calculation differences and they are indeed very small.
Windows & Air Leaks
But when you start improving the performance of windows by installing ones that have high-performance Low-E coatings, an overall R-value perhaps 500 percent higher than original windows and a shockingly low air infiltration rate, you start to make serious energy-savings headway. Adding reflective-foil-radiant barriers in attics, in addition to upgraded insulation, can also help save energy dollars.
CLICK HERE to get FREE & FAST BIDS from local insulation contractors.
Column 610
Tim built custom homes and did ultra-custom remodeling for 20+ years before launching his Ask the Builder media presence. He was selected as one of the Big 50 by Remodeling magazine in 1993. This award gave birth to Ask the Builder in October 1993. Tim also operates https://DrawPlumbingPlans.com. His @askthebuilder YouTube channel was the first home improvement channel on YouTube.
IN REGARDS TO THE TYPE OF CONSTRUCTION YOU REFERRED TO ABOVE. IN MY BASEMENT BAND THERE SEEMS TO BE AN AIR GAP THAT RUNS UP BEHIND THE PLASTER. IS THIS PART OF THE DESIGN? CAN I SEAL THIS OFF OR SHOULD I LEAVE IT OPEN?
You can seal it. You may want to have a phone conversation with me about it. I just do pithy answers here.
I own a 1909 stone home. The interior walls are plastered. I know the walls are not insulated, and I have done some homework about blown in insulation, but I also worry about a moisture problem after the insulation is in the walls. I have read that this may cause mold to grow due to the lack of a moisture barrier on the exterior wall. What is your opinion and is there any other way to resolve this dilemma?
Thank you,
Brenda
Breeze way was built between house and garage out of wood front and back and the walls are insulated. Like to insulate garage side, which is inside garage and out of the weather. It is not a heated space but dry. My plan is to put foam board against brick and sheetrock the wall. I do have some heat in breezeway for our dogs when they are home alone. Brick wall is about 8 inches thick. The house itself has vermiculite between brick and plaster, I have new windows so I have seen it, is this ok?
The above question is the exact example of my home, my house was built in the 1950's...would you recommend insulated siding? My house is on the end and next to an alley, which allows my living room and upstairs front bedroom very cold in the winter and very hot in the summer. my windows has been replaced and the crawl space has upgraded insulation.
Brick & Block
8 +/- inches for the brick and block
3/4-inch for the furring strip nailed to the block
1/2-3/4 inch for the interior drywal
I guess no room between the block and brick ?? to insert liquid foam expanding insulation ?? or the Thermabead insulation. To many leaks
Not a reply but need HELP!
I need help!! We have a 60-year-old brick ranch with a new roof installed 4 years ago. For several years, maybe 17 or so, we have developed mold in the outside corners of the bedrooms. Also, have a dripping problem from can lights during the winter. We live in NE Ohio, so it's cold in the winter here.
Now we have begun to get insects that seem to come into the living space when the ceiling lights are on. I have a contract with a reputable company to spray the house 4 times a year for insects. I was told by them that the type of insect was called a plaster beetle that feeds on wet plaster. Upon inspection of the attic insulation, we noticed that the underside was indeed wet.
We have a ridge vent that runs the length of the house and also installed baffles in the attic for more airflow. I know we will need to remove the old insulation which was only R-19 maybe, and replace it. We are thinking about doing the TAP Insulation as it is an insect inhibitor. My question is why is the moisture there to start with? Could it be due to under-insulating? If we do an R-49 amount, will this stop the moisture buildup? I am beside myself dealing with this mold issue and insect problem. Can you please advise me on solving this problem?
Pam,
This requires one of my phone consults. There are just too many things to type.
https://shop.askthebuilder.com/products/15-Minute-Phone-Conversation-with-Tim.html
Is there any thing that can be done in the basement
(above grade) when there's a stone foundation?
I am looking at renovating a 1904 schoolhouse that is solid brick walls, and from what I've seen I should put a rainscreen behind any insulation (much like they do behind siding. The project will be gutting of the whole interior, which was "renovated" in the 80's and never past the drywall stage. Exterior wall does have 2x4 framing, but not sure if I should foam or use rock wool insulation in this case. Central Minnesota