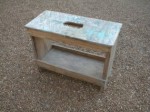
Carpenter Workbench with Tool Storage
Who among us hasn't been frustrated with traditional saw horses? Flimsy ones that collapse are virtually useless. In fact, they are actually dangerous should they give way while you are cutting a piece of plywood or a large 2x12. Sturdy saw horses are cumbersome. They are tough to store and often not stackable unless you custom build them.
What's more, the narrow top surface of a traditional saw horse provides little space to set something. Common sense tells you that an alternative might be better.
Chuck's Idea
The idea and concept for the carpenter's bench I use came from a past friend of mine, Chuck Sallee. He was a carpenter I met about 23 years ago. Chuck and I were actually business partners for a short time with some other fellows.
One day, we needed some sawhorses for a job and none were available. One of the helpers suggested using the customer's garbage cans. I nixed the idea having ruined one 6 months earlier (I cut right through the edge of one of those plastic cans...).
Chuck saw some scrap lumber nearby and went to work. Using some 3/4 inch plywood scraps and cut off sections of 2x12, he produced a strong and efficient bench (saw horse) in about 30 minutes.
Revisions
As time went on, we started to make alterations to the original plan. The shelf at the bottom of the bench was the first revision. It proved to be a great place for us to store nails, shims, hand tools, and just about anything.
We also lengthened the bench to make it a more stable platform for our power miter box saws. Soon it was evident that the bench was a multipurpose tool.
The Cut List
OK, for you to make your own bench you need some plywood or OSB board, some 2x12's and about 30 or 40 2.5 inch long galvanized screws.
If you buy an 8 foot long 2x12 and a single 4x8 sheet of 3/4 inch plywood, you will have enough material to make 2 benches.
Here is the cut list to make a single bench:
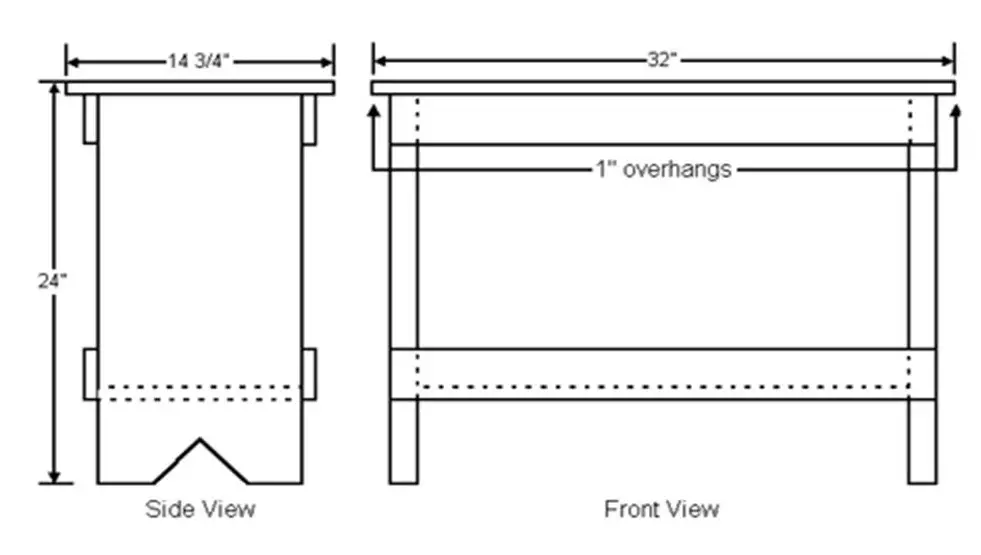
- 1 pc. 3/4 plywood 14 3/4" x 32" (for the Top)
- 4 pcs. 3/4 plywood 3" x 30" (the four side Braces)
- 1 pc. 3/4" plywood 11 1/4" x 27" (the bottom Shelf)
- 2 pcs. 2 x 12 11 1/4" wide x 23 1/4" long (the Legs)
A friend of mine wondered why I just didn't make the top 15 inches by 32 inches. Well, you can. I just used the 14 3/4 inch dimension so that the top would have a consistent 1 inch overhang on all sides. If you decide to cut it 15 inches wide, no problem. Simply center the top on the bench frame and you will be just fine.
Outdoor Use
If you want your bench to withstand all sorts of weather, you can do this quite easily. All you need to do is cut out all of the material and then coat all sides and edges of each piece with two coats of clear urethane or the paint of your choice BEFORE you assemble it. If you take this extra step, the bench can survive for years with little or no rotting. I can assure you that if you urethane it, the bench will be most handsome!
If you decide to do this, be sure you take the time to sand the top edges or use a router with a decorative ogee bit to dress the outer edge and the inside edge of the handhold. The routed edge really gives the bench a finished look.
WARNINGS!
There are two warnings I must tell you:
1. If you use the bench as a step stool, it can tip on you if you move about too quickly or you get up on it too fast. I do NOT recommend that you use the bench for a step stool. I must tell you that I have fallen from it as it tipped over.
2. If you let a friend, neighbor, or in-law see your bench(s), you will probably be "enlisted" to help make some for them!
Related Articles: A Saw Horse Substitute, Work & Storage Bench Assembly
Column B232