Backsplash Grout Cracking
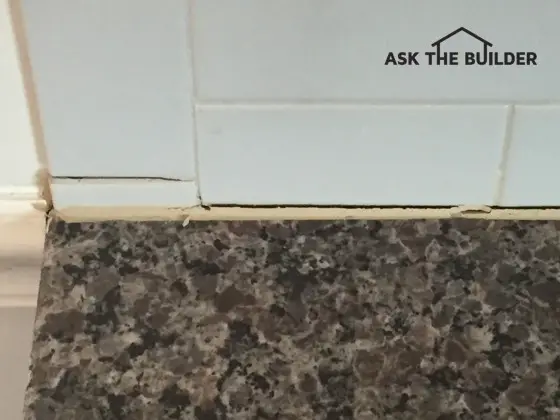
This grout line crack on top of the granite top is quite normal in a new home. Photo Credit: Dave Waters
DEAR TIM: The granite countertops in my kitchen seem to be moving away from the wall or at least they are moving around a bit. The attached picture shows the results. The house isn't even one-year old yet. Is there a way I can secure the granite to keep it from moving? Or, is something else going on that’s causing the problem? How do I achieve a permanent repair? Dave W., Simpsonville, SC
DEAR DAVE: The photo you sent tells the tale. You do have a problem, but I’m not so sure it’s the granite moving around. I’ve carried granite kitchen countertop slabs from the delivery truck into my jobs before. Multiple people were helping they were so heavy. It would take lots of effort to slide those around on top of your kitchen cabinets.
That said, if the granite does move if you push against it or bump up to it, then you can try to carefully lift up the front edge and get some epoxy to bond it permanently to the cabinet(s) below.
My money is on the lumber that was used to build your new home. You gave a very important clue saying you’ve not yet been in your new home one year. What’s more, you live in the deep south of the USA where it’s very humid. Read my How to Repair Cracked Backsplash Grout column to find out more about the lumber now vs the last 1800's
Just a few days ago, I received an email and photo from a woman in California who had major cracks in her ceiling. She wanted to know if they were settlement cracks. That’s a very over-used word by homeowners to describe cracks like yours, the CA woman’s and many others out there.
Here’s what you need to know about wood. It’s a hygroscopic material. That means it’s shape and size change in response to changes in moisture content. Granite, steel, copper, plastics, etc. are not hygroscopic. When they get wet, they don’t swell like wood does.
In your case, I’d say the framing lumber was wet even though it was probably kiln-dried. It can soak up water from the air and from rain that falls on it during construction. This water eventually leaves the lumber, especially when folks like you run your air conditioning down in your humid climate. The air conditioning is like an invisible vacuum cleaner pulling water out of the lumber by the gallons.
As this happens, the lumber shrinks. The tile above the granite top is indirectly attached to the wall studs. The tile is glued to the drywall that’s attached to the lumber. When the lumber moves, so too the tile.
How bad can this lumber shrinkage be? More than you could ever imagine. Years ago when I built my own three-story Queen Anne Victorian home from lumber, I also installed the counter flashing on the chimneys. This flashing is connected directly to the brick and mortar. Other pieces of step flashing lace between each course of shingles on the roof deck and are covered by the counter flashing. The pieces that are laced between the shingles are not connected to the brick or mortar, but can slide up and down as the roof moves.
About five years after building the home, I was up on the roof checking it and cleaning out the gutters. The gap under the cut angled edge of the counter flashing was 2 inches away from the shingles! When I installed them five years prior, the gap was 1/4 inch.
Believe me, the brick and mortar chimney weighing tons did not go up in the air. It can happen in places where chimneys are built on expansive clay soil, but that’s not what happened at my house. The lumber accounting for all three stories shrank collectively 1 and 3/4 inches!
Here’s what I would do if I were you. I’d carefully cut away the old caulk between the granite and tile. Use a straight-edge razor scraper that painters use to get paint off window panes.
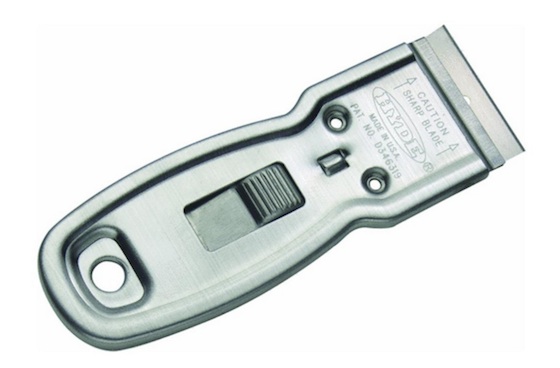
CLICK this image to get this perfect scraper. Image credit: Amazon.com
Wash the granite first. Be sure to use a new blade. You can wet the granite to help reduce friction as you carefully slide the scraper under the caulk at a low angle. Wear a leather glove on the hand that’s not holding the scraper.
CLICK HERE to see an assortment of great scrapers for this job.
Be patient and don’t get aggressive with the scraper. Just do small areas removing all the caulk. You can often soften acrylic caulks with isopropyl rubbing alcohol. Try that if you are having issues.
Once the caulk is removed, I suggest you leave the crack open and monitor its width. Use a small piece of a wood paint stirring stick under one or more places under the tile. Do whatever you have to do to match the thickness of the wood piece to the width of the crack. You want the wood to be snug under the tile but not so snug you can’t pull it out.
Every month check to see what’s happening. Keep a journal with notes. Take photos too. It’s possible the shrinkage is not yet complete. You’ll know if this is the case because it will be easy to pull out the wood and there will be a larger gap.
I’d wait at least nine months to see what’s going on. As long as you’re not seeing any significant growth in the width of the crack, I’d say you’ll have success caulking.
The best time to caulk in my opinion would be the end of February as you’re dealing with less humid air outdoors and your lumber should be as dry as it’s going to be for the year.
Column 1121
Tim built custom homes and did ultra-custom remodeling for 20+ years before launching his Ask the Builder media presence. He was selected as one of the Big 50 by Remodeling magazine in 1993. This award gave birth to Ask the Builder in October 1993. Tim also operates https://DrawPlumbingPlans.com. His @askthebuilder YouTube channel was the first home improvement channel on YouTube.
Tim, thanks for the answer. I should add that if I push the granite toward the wall or lean my body weight against it you can see movement.
Dave,
I added a paragraph up in the column to deal with your extra information. The crack didn't happen because the granite is moving.
If the granite moves it is either not attached to anything, or the base cabinets are moving also. Also, if the granite is moving, how can the grout not crack?
Tim I think when then plane changes, the wall running up and down, the graniet laying flat, you should use silicone calk. It comes in several colors.
The wall will most of time move up or down, If it does the grout will crack, but if you had scilconed the joint, the silcone is very flexable, and will not crack.