Concrete Patch
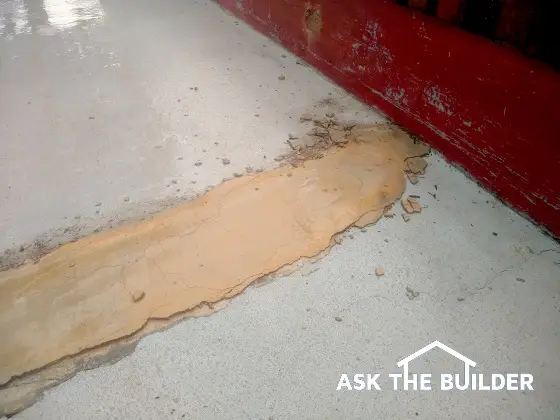
Concrete Patch | This concrete patch on my church’s handicap ramp is a disaster. It’s a trip hazard. With a little work, it could have been smooth and not a hump. Copyright 2021 Tim Carter
Concrete Patch - The Best Ones Require Work
Do you have a wide unsightly crack in your concrete sidewalk, driveway, or patio? The concrete may have cracked all the way through the slab and now one piece is higher than the adjacent piece. Some cracks can be trip hazards.
Each Sunday, I walk up the handicap ramp at my church and shake my head where some handyman, contractor, or well-intentioned volunteer tried to repair a similar crack. They failed miserably and quite a few of my parishioners are older who shuffle up the ramp. The humped repair is crumbling and it’s an accident waiting to happen. Here’s the advice I’m going to give our pastor and you can do the same thing at your home.
Let’s first discuss what to do if you have a crack and the concrete pieces are in the same plane with no vertical offset. This is the easiest of all repairs and there’s a good chance you can do this repair yourself in an hour or less.
Is Epoxy a Great Concrete Patch Material?
Yes, epoxy is a great concrete patch material if you install it correctly. Here's an epoxy I use that withstands brutal New Hampshire winter weather:
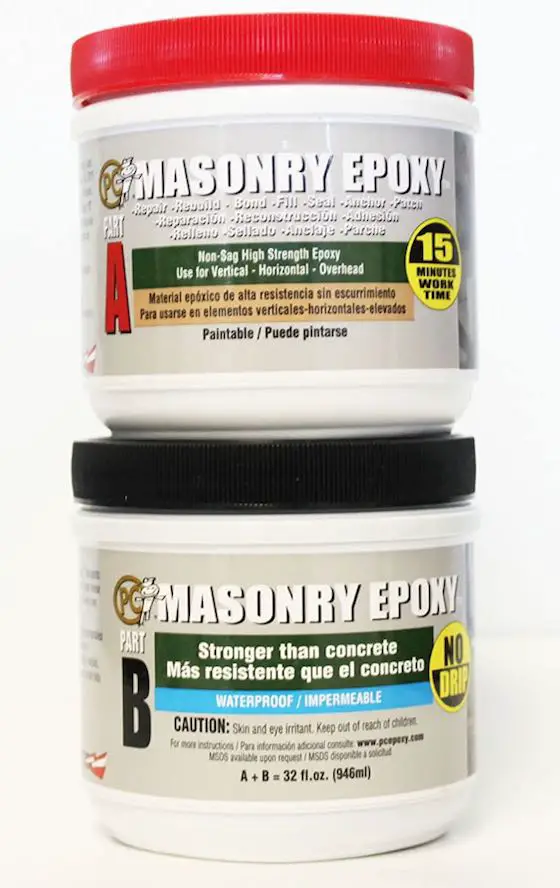
This is a fantastic concrete epoxy. CLICK or TAP HERE to order it. I've used it outdoors for years in New Hampshire. It WILL NOT PEEL if you install it correctly. I can COACH you over the phone how to do this. CLICK or TAP HERE to set up the phone call.
I would make this repair using time-tested concrete epoxy. Years ago, it used to be hard to put epoxy in a crack. You’d have to mix up the two thick components and then try to carefully get it into the crack without making a mess.
Now you can purchase an amazing gray concrete epoxy that’s in a normal caulking tube. A special mixing nozzle screws onto the end of the tube. As you squeeze the handle of your caulk gun the two epoxy components are squirted into the nozzle. A special insert within the nozzle blends the two components so after they travel about 6 inches down the nozzle they’re completely mixed. It couldn’t be easier!
I’ve used this epoxy with great success and I have a concrete epoxy repair video on my AsktheBuilder.com website showing how to use it and how the nozzle works. The epoxy cures to a medium gray color. If your concrete is older and you see the individual sand grains on the surface, you can disguise the epoxy by lightly tamping the same size and colored sand into the fresh epoxy goo. With a little practice, you can do an amazing job of disguising the crack.
It’s important to realize the epoxy needs to get at least one inch down into the crack. To do this, you almost always need to widen the crack. I find a simple 4-inch grinder equipped with a dry diamond cutting wheel is the perfect tool. Wear goggles and a respirator so you don’t ingest the concrete dust.
How Wide and Deep Should the Crack Be?
Make the crack 3/8-inch wide and at least 1 inch deep for great results. For the best results, grind as deeply as you can. Two inches would be ideal if you can accomplish this. Brush out all loose material and remove all dust so the epoxy creates a tenacious bond to the two pieces of concrete.
What Should I Do if the Concrete Crack is Offset?
If your concrete crack has produced an offset where one part of the slab is higher than the other, you need to chip away some of the concrete that’s raised up. Once again the 4-inch grinder with the diamond blade is your friend. You might want to grind a line about 2 inches back from the crack so your finished repair is as smooth as possible. It won’t be in the same plane because of the offset, but you can absolutely get rid of the trip hazard.
The line you grind should be at least 3/4-inch deep. You may find it’s easier to create several parallel grind lines spaced about 1/2-inch apart marching towards the original crack. These multiple lines allow you to crack out the higher concrete with a hand chisel and 4-pound hammer. You can make fast work of this using a rotary hammer drill equipped with a chipping tip.
The goal is to create a shallow trench where you’ll place cement stucco to replace the concrete that was raised up. A trench as shallow as 1/2-inch will work, but 3/4-inch is better. Once again, remove all loose material and brush away all dust from the old concrete.
What is the Secret Bonding Material?
You’ll need to mix up some cement paint as well as the cement stucco mix. Cement paint is just a mixture of pure Portland cement and clean water. Mix it to the consistency of a thin gravy. Keep this paint out of the sun and only mix it just before you intend to use it.
What is the Best Patching Material?
The cement stucco needs to be mixed using coarse sand, Portland cement, and hydrated lime if you can get it. For a strong repair, mix 4 parts sand with 2 parts Portland cement. If you can get the lime, then mix 4 parts sand, 1.5 parts Portland cement, and 0.5 part lime. You blend all of this together dry until the mix is the same uniform color. Then you add clean water and mix until it’s the consistency of applesauce.
The first step is to squirt some of the concrete epoxy down into the crack between the two slabs. If you have to widen the crack, use the grinder. Once you’ve squirted in the epoxy, immediately spritz the trench with a little bit of water. Get the concrete damp, not dripping wet. Paint on a thin coat of cement paint on the bottom and sides of the shallow trench. Immediately cover the cement paint with the cement stucco mix.
Within a few minutes, the stucco will harden enough that you can use a block of wood rotating in a circular motion to smooth the stucco. Once it hardens in about two hours, cover it with plastic for three days keeping the new stucco wet for the entire time.
Concrete Patch Repair Videos - WATCH ALL THREE
Column 1416
Tim built custom homes and did ultra-custom remodeling for 20+ years before launching his Ask the Builder media presence. He was selected as one of the Big 50 by Remodeling magazine in 1993. This award gave birth to Ask the Builder in October 1993. Tim also operates https://DrawPlumbingPlans.com. His @askthebuilder YouTube channel was the first home improvement channel on YouTube.