Best Exterior Nails and Screws

rusty nails in exterior wood trim

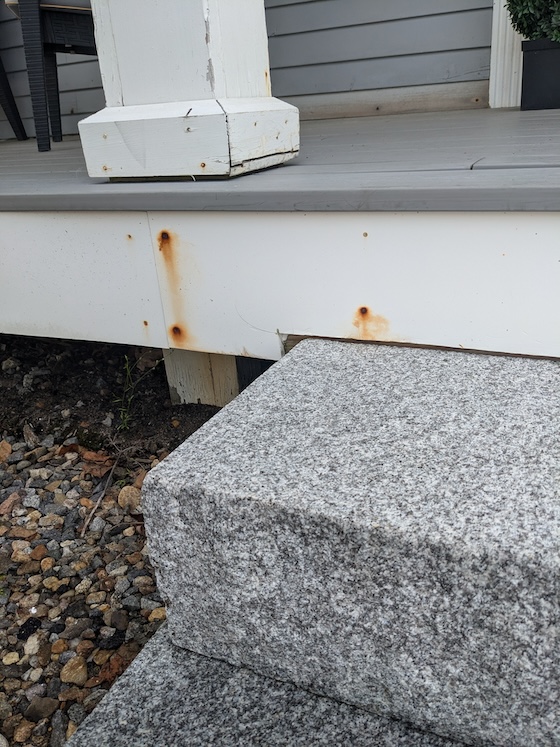
Best Exterior Nails - Inferior nails were used to attach all of the exterior trim on this house. Rust not only looks bad, but it’s also a harbinger the fastener is rotting away. Copyright 2024 Tim Carter

Best Exterior Nails and Screws are Double Hot-Dipped Galvanized or Stainless Steel

I was blessed by God to learn my craft of building and remodeling in Cincinnati, Ohio. The first few years of my career had me working on houses that were close to 100 years old. I have no recollection of seeing rusty roofing nails on any of the jobs where we had to strip off roofs. I had to spackle exposed nail heads on house siding and trim, but none of them were rusty.

Today, I see rust stains on houses where I live in New Hampshire. Some of these structures are less than ten years old. I had to replace my own asphalt shingle roof a few years ago. It was only thirteen years old and many of the roofing nails were rusted and badly corroded. Fasteners used on roofs should always outlast the actual roofing material.

Builders of Old Used Double Hot-Dipped Galvanized Nails

Go back in time and you’d discover old builders and carpenters knew all about rust. They knew the best exterior nails and screws to use.

This is why most, if not all, of them used double hot-dipped galvanized nails to secure any exterior product to a house. These superior fasteners worked very well for decades so long as the building was not near a body of salt water. Salt water, spray, and mist will cause corrosion to steel and iron if it doesn’t have the absolute best coating of zinc. Stainless steel fasteners are the gold standard in marine environments.

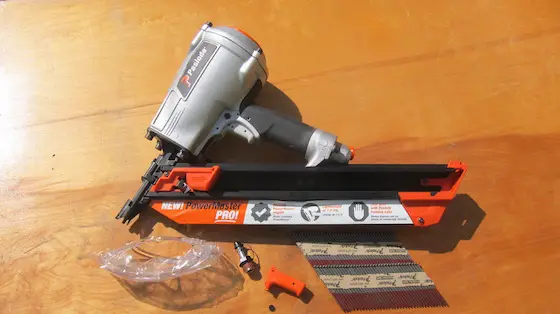
Hot-dipped galvanized nails and many screws were sacrificed on the altar of speed and productivity. The nails of old I saw were nailed by hand one-by-one. The nail guns used today by many carpenters don’t play will with nails that have a thick uneven coat of zinc. This type of coating causes nail guns to jam.

Nail Gun Nails are Questionable

You can purchase some nails for nail guns that claim to have a hot-dipped coating of zinc. I’ve used them and don’t doubt their claim, but I can tell you the coating is not anything like the old-fashioned nails that look like nails coated in a thick gray gravy.

Most nails used in nail guns have a thin zinc coating applied in either a chemical or mechanical process. Nails are manufactured in a machine that’s has a huge spool of wire that feeds into the machine. It’s much easier to chemically coat this wire with zinc than any other method.

The thin zinc coating can wear away in just a few years if you leave the nails exposed. In the manufacturing process when the wire is clipped to create the nail, bare steel can be exposed at the head and tip of each nail. This doesn’t happen in the hot dip process.

Nails dipped in molten zinc have already been created. The zinc coats all surfaces on the nail. I’ve opened a box of roofing nails to find some that are bonded to one another much like cold macaroni and cheese. That’s how much molten zinc can cling to the nails.

The bare steel nails are cleaned and chemically treated before they get dumped into a container of molten zinc that looks like silver stew. The 420-450 F temperature creates a strong chemical bond as the zinc atoms interlock with the nails’ steel and iron molecules. The resulting layer is a zinc-iron alloy.

Stainless Steel Nails & Screws are the Gold Standard

Stainless steel nails or screws are the best fasteners to use for all exterior applications. You’ll vanquish rust from your home if you use them. They are more expensive, but you’ll never have to deal with rust stains. You’ll not lose sleep worrying if the nail or screw is corroding deep in the wood.

Richard, who lives in La Quinta, California, read this column in his local newspaper. He emailed me the following valuable tidbit:

"Your Sunday article recommended stainless steel screws for outdoor use as they don't rust.  You might want to look into the iron content of some of the screws made in Asia.  As we found out in the aviation industry, most stainless screws made in Asia, mostly China, have too much iron in them and will rust when used outside of a plane.  I am sure the building industry screws will have the same problem."

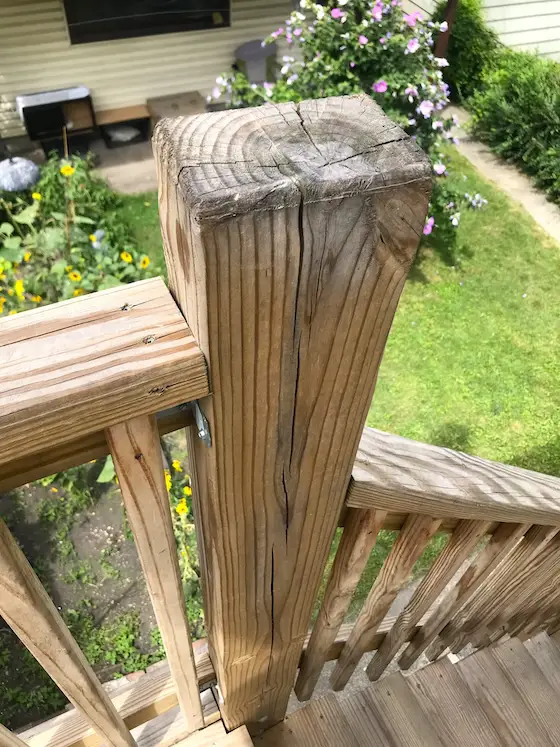
Beware Treated Lumber - High Copper Content = Corrosive Stew

You must be very careful about all of the metal you use when building an exterior deck or structure that’s made with treated lumber. Today’s treated lumber can have very high amounts of copper in the wood. Copper is a natural biocide, and the fungi that cause wood rot can’t survive in the presence of copper.

All of the joist hangers, metal framing connectors, nails, bolts, screws, etc. that will penetrate the treated lumber must have a coating rated for direct contact with the lumber. Many top-quality fasteners will have labeling on the boxes to show you how much exposure they can take.

The problem arises when the treated lumber and fasteners get wet from rainfall, dew, or contact with fresh or sea water. The water leaches out some of the copper into solution creating a corrosive brew. The corrosion of the metal can lead to deck collapses causing serious injury or death.

My daughter worked with a woman in Puerto Rico who broke her neck and had to have her spleen removed when a deck she was standing on crashed to the ground without warning. Don’t think you’re immune from a tragedy like this.

You should perform a thorough inspection of your deck. Check for rust and corrosion on every metal joist hanger, framing connector, and the bolts or nails used to attach all of the metal.

Column 1576

House Settlement Debunked

hybridized 4x6 timber large growth rings and old growth 2x4

House Settlement Culprit - Note the vast differences in the thickness of the growth rings on the two pieces of lumber. The old-growth timber with the narrow bands experiences much less movement as it reacts to changes in moisture content. Copyright 2024 Tim Carter

House Settlement Debunked - Lumber Shrinkage Often, the Culprit

Roy subscribes to my free newsletter and reached out to me about a month ago for one of my phone consult calls. He needed help engineering a drainage system around his house to stop water from infiltrating his basement. I offer a house-drainage design service. I do a phone consult call and draw the plan to stop water infiltration into your home.

My college degree is in geology, with a focus on hydrogeology and geomorphology. Hydrogeology is the study of groundwater movement, and geomorphology is the study of the earth’s surface, where we walk and build things.

I shared how to stop the water infiltration. Roy emailed me a few weeks later to report my advice yielded a dry basement. He was very happy. He asked for additional advice based on some information given to him by a neighbor. All of a sudden we were on the topic of house settlement. His neighbor wandered into the murky depths of a topic that’s misunderstood and mis-diagnosed perhaps tens of thousands of times a day across the USA and the world.

It’s important to realize I could write a book about the topic of house settlement. It’s impossible to give it the respect it deserves in this tiny column. Years ago I wrote a column about house settlement you should read. I’ll attempt now to cover some of the most important aspects of the topic.

I pulled out my trusty paper dictionary and found that one of the many definitions of the word “settle” is “to cause to pack down.” This explains why many feel their house settles or sinks into the ground after it is built.

Bad Soil is Possible

Houses and buildings rarely sink or settle. Most soils are very strong. When a house or part of one sinks, it can be caused by landslides, earthquakes, uncompacted soil, buried vegetation that rots, expansive clay soil movement, glacial clays that ooze like toothpaste, etc.

Roy’s neighbor said settlement causes cracks in foundations that permit water infiltration. This is a true statement. However, most foundation cracks in poured concrete foundations are caused by shrinkage, not settlement. Concrete shrinks 1/16th of an inch for every ten feet of length as it cures over time. You’ll often see the cracks radiating at an angle from the corners of basement windows or any other hard 90-degree angle in an opening in the wall.

Concrete block foundations often develop horizontal cracks between layers of block, often about 4 feet up from the basement floor. These cracks are rarely caused by settlement. The cause can be traced to the inability of the thin mortar to withstand the tension forces applied to the wall. Remember, basement foundation walls are simply retaining walls holding back the earth outside.

The earth presses sideways against the walls and causes them to want to bend inwards. This bending force creates tension or stretching. If the block mason had filled the hollow cores of the concrete block with pea-gravel concrete and put a steel rod from the top of the wall to the footing in every other vertical core void, there’s a good chance there would not be a horizontal crack. Read this in-depth column about how to reinforce concrete block walls.

Mother Nature Compacts Soil on Her Own

Keep in mind that Mother Nature is very good at compacting soil. She uses both rain and gravity. Most soils are very strong, as evidenced by the countless hundreds of-year-old houses and buildings that have no structural defects related to soil movement.

I recall a job in Cincinnati, Ohio. Forty years ago I had to build a room addition on a home. The house was so old it had a stone foundation. My room addition floor had to be lower than the existing basement. I carefully dug along the old stone foundation trying to locate the footing. There was none. The builder just laid the first row of stone on the dense clay soil. The house was over 100 years old and had experienced no settlement of the foundation even with the concentrated load of the house on the soil.

Many new homes' cracks in the floors, ceilings, tile, drywall, woodwork, etc. are often blamed on settlement. In almost all cases, the cracks can be blamed on hybridized lumber. Trees are a crop not much different than soybeans and strawberries. The only difference is harvest time. Lumber companies, I believe, have engineered trees to grow faster so stands of timber can be harvested faster.

Spring Wood Causes Expansion and Contraction

Trees grow the most in spring. The wood produced at this time is lighter in color. The dark bands of growth you see at the end of a stick of lumber are summer wood. Summer wood is denser as the tree slows down its growth most often from a lack of rainfall in the summer. Old growth timber is markedly different. The spring and summer-wood growth bands are almost always the same size.

The more spring wood in a piece of timber, the more it wants to expand and contract as it experiences changes in moisture content. As the timber in a new home loses moisture, it shrinks causing the same tension cracks as happens in concrete. Things attached to the timber in your home then start to move creating cracks. These are shrinkage cracks, not settlement cracks.

Column 1575

Water Loss Causes Shrinkage Cracks

treated lumber deck post with shrinkage cracks

Water loss has caused shrinkage cracks in this new deck's wood. They could have been minimized by sealing the wood just after it was installed. Copyright 2024 Tim Carter

Water Loss Causes Shrinkage Cracks & More

Paula asked me a question about shrinkage cracks affecting her new deck. She sent me three photos showing all sorts of cracks in the handrails, railing posts, and decking. The cracks were in brand-new treated lumber installed in April 2023. The wood has not been sealed since then.

Paula asked, “I’m wondering whether it will turn into a problem anytime soon.” I’d say soon has already come and passed. Deep cracks are now in the wood. These cracks allow rainwater to penetrate into the wood. This water causes the wood to swell. Each time the sun comes out, or the wind blows, the water leaves again, causing repeated shrinkage. These swelling/shrinkage cycles cause the cracks to get bigger and bigger.

This is not the best analogy, but are you aware of the Centennial Light? It’s cared for by the Livermore-Pleasanton Fire Department in California. The light bulb was first turned on in 1901 and still burns today after being turned off briefly for a few times to be relocated.

Where is the Care Tag on Treated Lumber?

Imagine if the treated lumber manufacturers stapled a small plastic care-instructions label on each piece of treated lumber. The label would tell you that you should seal the wood as soon as possible after installation. It would also inform you that keeping the wood sealed would allow it to last for many many decades much like the light bulb.

You can speculate why this label is not attached to the wood. The cynic in me screams that the wood industry is not overly upset their wood cracks, twists, and warps. That way more new treated lumber might be purchased faster. I have no proof whatsoever this is their motivation, but a similar thing happened in the asphalt shingle industry. I cover this in my Roofing Ripoff book.

Roofing Ripoff Cover

Download the first three chapters for FREE now.

Water containing dissolved copper is injected under pressure into the wood when it’s converted from regular wood to treated wood. This causes the wood to swell. The wood cracks when the water leaves the wood too fast. Sealers allow for a slow steady release of the water. Cracks are minimized or eliminated. The application of the sealer just weeks after the treated lumber is put out in the sun and wind will keep it looking brand new.

Shrinkage Happens in Many Materials

The shrinkage happens in many building materials. It happened to me in the past ten days. I applied blacktop sealer to a small patch of cold-patch asphalt. A small one-quarter-inch depression was in the patch. The water-based blacktop sealer was too thick in this spot. That spot was riddled with shrinkage cracks two days later.

blacktop sealer shrinkage cracks

These are classic shrinkage cracks in blacktop sealer. The asphalt is emulsified in water. When the water evaporates from sealer that's too thick or deep, cracks like this appear. The orange object is a Volvo key fob about 1.5 inches wide and 2 inches long. Photo credit: Tim Carter Copyright 2024

Water loss in concrete causes shrinkage. The shrinkage creates tension, or pulling, forces within the concrete. Jagged random cracks in concrete will occur to relieve this tension unless you coax the concrete where to crack.

Control Concrete Cracks

Concrete shrinks 1/16th inch for every ten linear feet you pour. Expert concrete masons know to cut control joints in new concrete. The depth of these cut lines should be a minimum of 1/4th the thickness of the slab. The cut lines do the same thing as happens when you crease a piece of paper with your fingernail. The creasing action tears microscopic fibers in the paper. When you pull apart the paper carefully, it separates on the creased line.

Cracks in walls, woodwork, countertop backsplashes, and tile grout in new homes can all be traced to shrinkage caused by water loss. Seasonal cracks in plaster and crown molding happen because of water loss. Squeaking wood floors that mysteriously stop or start squeaking are also victims of water-related swelling or shrinkage.

Shrinkage cracks can be minimized or eliminated in most cases. Product installation instructions must be followed to the letter. Pay attention to wording about minimum and maximum temperature ranges.

Fill and Seal Exterior Wood Cracks

You may find yourself in the same situation as Paula. Your outdoor lumber has cracked and water penetrates into the wood as fast as it goes into a sponge. I suggest you fill the cracks with an exterior spackling compound. Do a test and find one that matches the wood as closely as possible in color.

Seal or stain the spackling compound once it’s smooth and dry. Coat all the wood at the same time. Apply sealer at least every two years or when you see water fail to bead up on the wood.

You would do well to spend some time at my www.AsktheBuilder.com website. Discover more about concrete shrinkage cracks. All of my past columns and many answered emails are curated on my website. You can save money and time by getting up to speed on topics before you even think of calling in a contractor.

Column 1574

Nails Guns Save Time and Money

Paslode framing gun

Nail Guns Save Time - This is a Paslode nail gun. This one operates using compressed air. My favorite Paslode guns have fuel cells and a spark plug. Copyright 2024 Tim Carter

Nail Guns Save Time & Money - Use Them Wisely

Are you a serious DIYr? If so, you know that the quality and type of tools you use will not only determine when the project gets done, but they’ll also play a major part in quality level of the job.

In my opinion, one of the biggest time savers happens to be nail guns. These tools have a rich heritage dating back to the late 1700s. A nail gun using compressed air was introduced several years before the US Civil War. Nail guns, as you might know them today, stepped on stage in the 1950s during the economic explosion following the great World War II.

Framing Walls in My Son's Basement

If you’ve never used a nail gun, this recent story should greatly interest you. Two months ago, my son and I started to finish off 1,300 square feet of space in his basement. We’re building a small house under his house sans all exterior finishes.

Step one of the process was to frame over one hundred feet of 2x4 walls. Some were parallel with the concrete foundation walls, while others were partition walls separating rooms.

My son’s neighbor is a mechanical engineer who has never seen wall framing up close. I invited him to help us one morning, even though I knew it would slow us down. I spent a lot of time explaining all the steps one has to take to frame the walls.

I was using my Paslode framing nail gun. This amazing tool shoots nails using a tiny combustion engine. A gas cartridge contains the fuel, and an onboard small lithium-ion battery provides the energy to the spark plug, which ignites the gas each time you squeeze the tool’s trigger.

paslode framing nail gun

This is the exact Paslode nail gun I used in my son's basement job. One fuel cell has driven thousands of nails. CLICK HERE to purchase one now. You'll not regret it. Copyright 2024 Paslode, Inc.

The neighbor was astonished at the nail gun's speed and accuracy. He often exclaimed that he’d purchase one should he decide to tackle his own basement project. He mastered using the tool in seconds.

Nail Guns Drive All Types of Nails

Nail guns are made to drive nails for just about any purpose. I’ve had finish nail guns for decades that drive nails through trim boards like baseboards, door and window casing, and crown molding. The tools automatically countersink the nails, saving a vast amount of time. In the old days, a carpenter would have to carefully tap a finish nail using a nail set to drive the head below the surface of the wood.

Twelve years ago, I used a nail gun to attach asphalt shingles to a shed roof. The gun saved my thumb and hours of time. It’s easy to adjust the tools so the nails are driven the correct depth, as the shingle manufacturers call for.

I started using air-powered, pneumatic nail guns in the late 1970s. One of the largest manufacturers at the time, Senco, was based in Cincinnati, Ohio, not too far from my house.

Nail Guns Started My Ask the Builder Career

My Ask the Builder media career started not long after I met Senco’s marketing manager at an Irish dancing fest both our daughters attended. He found out I was a carpenter and asked me if I used nail guns. I responded, “Oh yes! I use Senco guns, and they save me hours of time and wear and tear on my body.” I had no idea at the time he worked for Senco.

After that chance meeting, the corporate executive nominated me as one of the Big 50 Remodelers in 1993. That national award launched this syndicated newspaper column. But I digress!

Pneumatic Air Gun Cons

Pneumatic nail guns are still made, but they have a slight disadvantage. You need an air compressor and hoses between the machine and the nail guns.

DeWALT D55154 Air Compressor with handle

You'll need an air compressor similar to this to power a pneumatic nail gun. Finish guns require much less air. A small pancake compressor will do. A crew of two, or more, framers will need a large compressor to power multiple framing nailers at once. Photo credit: Tim Carter Copyright 2024

It takes time to set all this up and stow at the end of a work day. My gas tool is ready to go when I open the case and place it in my hand. The same is true for all of the electric-powered nail guns.

Serious Injury and Death

Old-fashioned hammer-driven nails can hurt you. I’ve been struck in the face by nails that received a glancing blow from a hammer and then bounced up off the wood. Nails driven by nail guns can be lethal. The Internet is littered with X-ray images of long-framing nails that have been driven into worker’s skulls.

A serious nail gun accident happened at one of my jobs. A carpenter was working too fast and drove a 2-5-inch nail through the center of his big toe bone. We had to cut out the piece of the subfloor his foot was nailed to and transport him and it to the emergency room.

Years ago, when framing a roof, I almost drove a long framing nail into my chest one day. It’s a long story, and the nail missed penetrating my rib cage by an inch. It was aimed directly at my heart. I share all these grim stories to alert you to the power and danger of the tools. When you decide to use a nail gun, remember what Spiderman said, “With great power comes great responsibility.”

Column 1573

Concrete Deck and House Piers

plastic concrete pier form in hole

Concrete Deck and House Piers - This orange tube is going to be filled with concrete. The bottom of the hole is below the New Hampshire frost level. The bottom of the plastic form flares out to spread the concentrated load from above. Copyright 2024 Tim Carter

Concrete Deck and House Piers - Think of Your Legs

Mother Nature is so smart. She taught us to build strong buildings, decks, docks, etc. Just look at your own body, for goodness sake. Your legs and feet do the same thing that concrete piers do in the construction world.

Your legs are vertical columns that the rest of your body rests upon. Your feet spread out the concentrated load that’s above your narrow ankles. The foundation industry borrowed the term footing from human anatomy. The spread footing of a building is the lowest structural element, and it contacts the earth just as your foot does when you walk or run.

My First Piers Like Table Legs

I installed my first piers forty years ago. I was building a very nice paver-brick patio in the rear yard of my second home. I needed to pour a concrete slab and ensure the patio wouldn’t twist or turn from frost heave in the soil.

I used a post-hole digger to create 24-inch-deep 6-inch-diameter holes in the ground. The holes were spaced on 6-foot centers both ways under the patio. I installed a 1/2-inch rebar in the center of the slab, making sure the steel crossed the top of each pier hole.

Wet plastic concrete flowed into the holes as each wheelbarrow was toted down to the patio. The slab resembled my dining room table, although there were six piers under it, not four like the wood table up in the house.

That patio is still in perfect shape today. The couple that purchased the house from me told me they never had issues, and the patio never tilted or moved. My patio was different from a deck because the slab's weight was spread out over the ground.

Deck Piers Support Concentrated Loads

Decks that way several tons often only have two or three support columns that press down on the earth. This concentrated weight should have a wide spread footing under each deck post.

Most architects and structural engineers will specify a 2-foot-diameter concrete footing for a concrete column or pier that supports a deck. The concrete doesn’t have to be poured all at the same time, but it’s a good idea if you can make that happen. If you have to pour the footing separately, then stub up some 1/2-inch diameter steel rods about 18 inches high that will connect the pier to the footing.

More Load = Larger Diameter

As the load above the pier increases, the diameter of the pier and the footing below must also get larger. It’s never a good idea to guess. Piers that have tons of weight should be designed by a structural engineer.

You can use concrete blocks to construct piers. I’ve built many. It’s always a best practice to stub out steel rods from the footing that enters the center of the hollow block cores. The cores should be filled with concrete to make the pier solid. Install additional vertical steel rods in the wet concrete extending to the pier's top.

In my opinion, the easiest way to pour a concrete pier that’s buried in the soil is to use a plastic pier form. The ones I use snap together in seconds. They come with a large, wide bottom section that acts as the footing. The best part is that the 1/2-inch rebar for the footing and the vertical column come precut with the forms.

I set the form in the correct position, ensuring the concrete's top will be about four inches above the grade. I brace the form with a few 2x4s. The next step is to install all the fill around the pier. I compact that fill and often add a little water as I do it. You can remove the braces once the fill is about halfway up and the plastic form is stable.

Within a few minutes, the hole around the pier is filled and strong enough to accept the weight of a loaded wheelbarrow full of concrete. This method is also safer. There’s no hole for a person to fall into while you try to figure out how to shovel concrete into a traditional cardboard form.

Add Reinforcing Steel

Avoid the temptation to save money by eliminating the steel rods in piers. Concrete is a very strong material when compressed. Tension, or bending, forces can snap concrete piers like a dry twig. Concrete usually only has one-tenth the strength in tension as it has in compression.

Steel is a magical material with tremendous tensile strength. The average piece of steel rebar you buy at a home center has 40,000 pounds of tensile strength, compared to concrete, which may have 400 pounds of tensile strength on its best day.

Column 1572

Lochmere Ted Bilodeau Sr Tuesday Golf League

Lochmere Ted Bilodeau Sr Tuesday Golf League

Lochmere Country Club in Tilton, New Hampshire, is one of the best golf courses in the state. It's challenging, and the course superintendent does a magnificent job maintaining it. The greens are cut short and quite fast.

I've played in the Lochmere Tuesday afternoon golf league for two years. My partner and I won the league championship in 2023.

I got off to a very rough start in 2024. My poor play resulted in us winning no matches for many weeks.

lochmere country club hole 14

You're looking up the fairway of hole 14 at Lochmere Country Club. The ball at the bottom of the photo hit the green three inches to the left of the cup and rolled ten feet to this spot. It traveled 146 yards in the air. I choked on the birdie putt but did manage to make par.

How the Lochmere Tuesday Golf League Operates

League play begins around the middle of May. There are thirty two-man teams that play just nine holes each week for fifteen weeks.

The fifteen matches end on the second week of August. Three weeks of playoffs follow regular season play to determine the league championship team.

Two flights of fifteen teams swarm over the entire course starting at about 3 PM. One flight plays the front nine, and the other flight plays the back nine.

Each week you alternate which nine holes of the course you play. It's not a shotgun start, so if your opponents show up late, you might not get home until 7 PM. The Wednesday league is a shotgun start.

USGA Rules Apply

The league plays using the official USGA rules. The USGA lost ball and out-of-bounds rule can cause minor conflicts. Some league members are unfamiliar with the lost-ball rule and think they can just drop a ball back in play where it's thought to be lost. The rule states you must go back to where the ball was hit before it was lost.

The official USGA rule talks about a local rule for casual play. This rule states that a player who has lost a ball can drop no more than two club lengths into the fairway and no closer to the pin forward of where the ball is thought to be lost. A two-stroke penalty is applied if the player chooses to do this. Once again, the local rule must be in place; otherwise, you must go back to where you struck the ball before it was lost. Check with the Lochmere Pro to see if this local rule applies. As of 2024, this local rule did NOT apply at Lochmere.

The league played from the white tees at Lochmere during the 2024 season.

Scoring Points

Each hole counts for one point. If both team members are present to play, that team gets one point. Eleven points are up for grabs if all four players in a match are present. The most points a team can score in a round is 10, assuming the other team shows up to play. A team would have to win outright all nine holes to score ten points.

A team wins a hole outright when one team member scores a lower net score than any other player on the other team. That team gets one point, and the other team cards a zero for that hole. If a player on each team has the lowest net score, resulting in a tie, each team gets a half point for that hole.

In a typical match, one team might finish with 6.5 points and the other 4.5 points. I've seen matches end with one team scoring 8.5 points and the other 2.5 points.

Lochmere Tuesday Golf League Handicaps

Handicaps are used to try to equalize the skill level of the league members. The handicap range is tight. The lowest handicap is 8, and the highest is 14. League members are not required to maintain an official GHIN handicap.

If you have a GHIN handicap in excess of 28, you play in the Lochmere Tuesday golf league at a disadvantage. This league handicap system favors players with a low GHIN handicap, as they don't have to give away as many strokes as they should.

For example, in one match during the 2024 season, a player with a 12 handicap on the official league scorecard had seven pars in nine holes. In another match, a player with a 10 handicap on the official scorecard scored 38 in nine holes. Any math expert will tell you both outcomes, while possible, are extremely rare.

The narrow band of handicaps creates additional inequity. All players must hit from the white tee box. The league is comprised of members ranging in age from 76 to 31. The senior players can't hit the ball off the tee as far as the younger players.

At the very least, the Lochmere Tuesday golf league organizer should use the white/gold tee box option for any member who is 60 years of age or older. There are four holes on the front and back nine where the older players should be allowed to hit from the gold forward tee boxes. This would help equalize the age difference.

Hole 7 is an excellent example. This par-5 hole is 480 yards from the white tee box. It's a very narrow shot. There are wetlands and trees on the left and dense forest down the right side. If you slice, you're toast from the white tees. The gold tees on this hole are forward at least 50 or 60 yards. Look at this satellite photo. An older golfer who doesn't have power will just barely make the fairway. If a wind is blowing from the southeast, forget it. Your ball will be in the rough just over the cart path.

hole 7 lochmere country club nh

The white arrow points to the white tee box. The gold arrow points to the gold tee box. The distance between them is no less than 50 or 60 yards.

lochmere score card

You can see why the white/gold tee box option should be used. Look at how far back the white tees are on those eight holes. CLICK the image above or HERE to see the LARGE SIZE scorecard at the Lochmere Country Club website.

Lack of Transparency

The league organizer offers no transparency concerning the scoring. Each week an email is sent to the league members showing the standings of each team and their total points. The league organizer doesn't share the actual scores posted by each player.

There is no transparency as to how the handicaps are tabulated.

The Lochmere Wednesday League is the exact opposite. The organizer for this league offers full transparency. Each member of the league can see the score of all the other members for each match. The handicap calculation is visible for all to see.

Summary

As of 2024, the Lochmere Tuesday golf league is weighted for players with a low handicap. There is a lack of transparency with respect to players' scores and how handicaps are tabulated. If you just want to go out and play golf on Tuesday's and don't care about scores and handicaps, then by all means consider this league. The course itself is the best one I've played on in New Hampshire. The grounds and greens are always in excellent condition.


How to Avoid Arguments With Contractors

outdoor patio under construction

See the electrical conduits poking up out of the ground? What happens weeks from now when they’re not exactly right? Copyright 2024 Tim Carter

How to Avoid Arguments With Contractors

How many times have you hired contractors in your life? My guess is quite a few. If you had to rate each experience much like you might a meal how many 5-star ratings would you have doled out? While I’m not a betting man, I’d say fewer than five percent.

I’d wager most of your ratings would be in the 2 to 3-star range. Remember the arguments you’ve had in the past? Do you recall your disappointment when the contractor didn’t show up for days at a time? How about the time when the materials delivered turned out to be wrong and another two-week delay stacked up on top of a job already a month overdue?

Allow me to share a few true stories and let me know if it reminds you of one of your experiences. Over the past six weeks I’ve witnessed a slow-moving train wreck. A person I know decided to put a patio in their backyard. Early on, I knew problems would crop up as the job concluded. I had a tough time being a bystander.

Outdoor Electrical Conduit Under Patios

One of the first things that happened on the job was the installation of underground electrical conduit. This was put in to provide power to a future hot tub and a fancy outdoor kitchen. As you might suspect, I’ve had to do this on my jobs for decades. You get one chance to get it right and installing a future conduit under a finished patio is nearly impossible unless one of your ancestors happened to be a POW in Poland that dug the real Great Escape tunnel out of Stalag Luft III.

Perhaps I’m a strange builder. I’m always thinking of the future. I always installed conduits that were one size larger than required. I always installed a pull string with the cable that’s in the conduit. Who knows, maybe an additional cable needs to be pulled in the future? The pull string makes this possible. The electrician on this job I was watching did neither.

A few days after the hot tub was installed, the electrician showed up. He direct-wired the hot tub. The homeowner discovered this at the end of the day and was none too happy. He had wanted it wired a different way. The outdoor kitchen is not yet installed, so I don’t know what will happen with that.

Let’s move on. Five years ago I was installing all of the plumbing, radiant heat, and electric in my daughter’s new home. She and her husband were constantly frustrated with the progress being made by the young brash builder.

 Builder Ignores Detailed Plans

The plans for the house were as detailed as any I had ever seen. I had worked with my daughter for months helping her with the drawings. I knew it was important to include very precise enlarged detail drawings showing how something should be installed. Most of these were ignored by the builder and his employees. It turns out they “did things a different way”.

I’ll never forget the day they came to rip off all of the house wrap and spent hours hammering in thousands of non-approved staples into the wall sheathing rather than remove them. It turns out they had installed the wrong house wrap. When they installed the correct product, they failed to follow the instructions and some of it peeled off requiring a third installation.

Homeowners Must Do Frequent Quality Control

Each week I receive countless emails from homeowners like you describing nightmare encounters with contractors of all types. When I do autopsies on the issues, the cause for the misery is almost always the same. The homeowner placed far too much trust in the contractor hoping all would go well. Quality control on the part of the homeowner doesn’t happen as frequently as it should.

It’s not always easy to get what you want. You have to take ownership in almost all situations. This means you need to have meetings with the contractor, or his subs, at the beginning of important phases of work. You can’t assume the workers know exactly what you want done. It’s foolhardy to think verbal conversations held at your dining room table will transform into your dreams months later. You can’t assume the workers have read and understand the plans.

Just because you told the contractor what you wanted a month ago in a meeting, or even if it’s on the plan, you can’t assume it’s going to get done. You must have numerous conversations and you must check the work in progress during these critical times.

I know, this seems to be far too much work. Or perhaps you don’t know what needs to be done. I’m sorry to say if you want happiness at the end of your job, you need to get plugged into the process. It’s never been easier than now to get a full understanding of how products should be installed. Many manufacturers have clear and helpful videos on their websites showing what needs to be done.

On big jobs you need to do your own quality checks. You need to make sure measurements are correct. You need to get proof the correct products have been ordered. You need to check products when they arrive on the job site.

I can hear you now. “Tim, this is too much work! I’m hiring the contractor so I don’t have to do all this!” Well, decades ago there were far more great contractors than there are now. It’s sad but true. Roll up your sleeves and be prepared to help run your job.

Column 1571

How to Add a Bathroom

pvc pipes in basement wall hung toiled rough in

How to Add a Bathroom - You normally never see the pipes that carry wastewater away from a bathroom. This is a rare instance of a basement bathroom where the sewer line exits the house about 7 inches above the concrete floor. Copyright 2024 Tim Carter

How to Add a Bathroom

You may or may not know this, but I’ve been a master plumber for nearly four decades. I used to do all the plumbing in all the houses I built and in the remodeling jobs that had a plumbing component. I want to let you know if you’re thinking of adding a bathroom to your existing home that’s it’s not as hard as you might think.

Plumbing is Very Complex

Plumbing is indeed a three-dimensional puzzle. That’s one of the reasons I was intrigued by the challenges each job presented to me. I use my talents now to draw 3D riser diagrams for homeowners, architects, and business owners who need a permit. Plumbing departments all across the USA require riser diagrams. The diagram tells the plumbing department that you know the correct pipe sizes for all the drains and vents. The drawings also show how to connect all the pipes together.

riser diagram gray water

Here's a riser isometric drawing showing the separation of gray water from black water in a home. CLICK or TAP HERE to have me draw your riser diagram.

The raging inflation mixed with the high labor costs I’m seeing all across the USA have more and more homeowners like you attempting to install plumbing on your own. I may be one of the few plumbers that applaud this. While you need to have a good grasp of the plumbing code, it’s possible you can successfully install the drains and vent pipes for a typical bathroom. It may seem daunting, but allow me to pull the curtain back so you can see just how easy it might be.

While I no longer do plumbing for customers, my kids tug on me to put my skills to work on a regular basis. I’m in the midst of helping my son finish off his basement. We were able to include a full bathroom that will add lots of value to his home. Bathrooms are prized by most people looking for homes. You can verify this talking with a top-producing real estate agent in your city or town.

Pipe Sizes Matter

Here’s what you need to know about adding a bathroom in your home. First, a single 3-inch-diameter pipe is required. This pipe will connect to the toilet and the wastewater from a shower, tub, and one or more vanities will connect to this pipe as well.

In fact, the plumbing code allows up to two toilets to be connected to one 3-inch pipe that eventually connects to the larger 4-inch building drain in a crawlspace or under a basement slab.

Showers require a 2-inch drain pipe. Bathtubs and vanities are allowed to drain into a 1.5-inch pipe. That said, I prefer to install a 2-inch pipe for tubs. It’s so much easier to send a drain-cleaning snake down a 2-inch pipe rather a smaller 1.5-inch pipe.

Use Wyes not Tees

It’s important to realize that when you connect drain pipes that you use a wye fitting. A wye fitting looks much like the letter Y. In many ways it resembles how streams connect to larger rivers. You’ll typically see a stream enter a larger river at a 45-degree angle. This is how the blood vessels in your body work too. This angle forces the water downstream in the piping system.

Sanitary Tees Create Waterfalls

You can use fittings called sanitary tees for plumbing fixtures. Think of a sanitary tee the way you’d think of a waterfall out in nature. A river is flowing horizontally and all of a sudden the water goes over the edge to fall vertically.

The vanity in your new bathroom will undoubtedly use a sanitary tee. You can sometimes find them under a tub or shower too. Toilets can employ a sanitary tee as well so long as you have enough room to make one work. They work well where the vertical stack (waterfall) is within 3 feet of the toilet.

Venting Confuses Most Homeowners

If you decide to tackle a bathroom project yourself, I think you need to focus your attention on the vent pipes for all the fixtures. Vent pipes are a mystery to most homeowners. Each fixture requires a vent pipe.

The purpose of the vent pipe is to supply atmospheric air back into the system once wastewater is sent down the pipes. Think about your plumbing pipes before you flush a toilet. The pipes are just filled with air before you use the toilet. When you flush the toilet, you inject lots of water into the 3-inch pipe. This water pushes the air in front of it as the water makes its way to the sewer or septic tank. The air must be replaced and the vent pipes do this with ease if you size them correctly.

Not only do the vent pipes need to be sized correctly, but they also need to be in specific locations with respect to the location of the actual plumbing fixtures. This is all covered in the plumbing code but you may find it mind-numbing to read about them. I created a How to Vent Plumbing video for you. It’s on my www.AsktheBuilder.com website. I feel it does a splendid job of showing you all of this vent magic.

I want you to consider doing your own plumbing. It’s very fulfilling and there is a multitude of great information you can draw upon out on the Internet. You can also get on the phone with me if you feel you want a concierge plumber by your side!

CLICK HERE to have me CALL YOU ON THE PHONE or do a VIDEO CALL.

Column 1570

Bad Deck Flashing Causes Rot

rotted wood house corner under a deck

This is severe wood rot that has compromised the corner of this home. Poor workmanship is the cause. The carpenter installed the flashing wrong. Copyright 2024 Tim Carter

Bad Deck Flashing Causes Rot

Ed, my golf league partner, asked me a few days ago if there was a product to fix some wood rot he had discovered at his home. You may be battling wood rot too. In your case it might be interior wall studs or floor joists that get wet from a plumbing leak. Or, you may have some decorative exterior wood trim that’s falling apart. This happened to my very good friend Steve out in California. Allow untreated wood to stay wet for long periods of time and you’re going to experience wood rot.

I told Ed that there was an amazing wood epoxy and a wood hardener that he could use assuming the rot was minimal. I clarified that he had to send me a few photos of the problem the next day.

When the photos arrived, I immediately texted Ed saying, “This is serious. I need to stop by.” Ninety minutes later I was at Ed’s home talking with him and his lovely wife. I visit homeowners quite frequently as many hire me to consult with them. They all want to know the same things:

  • what caused their problem
  • what is the best way to fix it

The wood rot was concentrated at a corner of Ed’s house under a deck. I had asked him to remove the few decking boards above the rot. He had already removed the wood siding, which exposed the rot.

Much of the oriented strand board (OSB) at the corner had disintegrated. The two 2x6s that made up the house corner were rotted out completely. The water damage had been happening for years. It was not going to be an easy repair because the rot extended up behind the exterior deck ledger boards.

An Inferior L-Shaped Flashing

An inferior flashing on top of the deck ledger was the root cause of the leak that caused the wood rot. But the builder made another serious mistake. There was no water barrier at all on the exterior walls. The OSB was just covered with shiplap wood siding.

No Water Barrier Covering the OSB!

If the builder had installed a water barrier correctly, there’s a good chance the flashing leak would have only rotted out the wood siding. But Ed’s OSB and the wood studs behind it were doomed.

I had discovered the same thing at my own home years ago. Many builders in New Hampshire, in my opinion based on visiting hundreds of defective homes, do very poor work. Most have no understanding of water’s surface tension.

Mimic Mother Nature to Stop Rot

You can prevent wood rot when building a home if you just mimic Mother Nature. Have you ever given thought to how wildlife of all types avoids hypothermia? I see ducks and loons bobbing around happy as can be in the lake next to my home when the water temperature is 34 F and it’s raining.

The feathers on ducks, loons, eagles, hawks, and just about every other bird are oriented to shed water. One feather overlaps the feather(s) below it. Roofers do this same thing with the shingles on your roof.

Carpenters need to do the same thing with the products used on the exterior of your home. It Ed’s case, and that of thousands of other homes no doubt, this overlap principle was not followed when it came time to install the deck ledger board against the house.

You Need a Special Flashing Detail

A waterproof membrane needs to be installed over the wood sheathing behind the ledger board. The wood siding is then installed up to the height of the top of where the ledger board will be. The ledger is then installed over the top of the siding.

Once the ledger is installed, a piece of rubberized adhesive flashing can be attached to the waterproof membrane. This flexible flashing should extend over the top of the ledger board and then down the face of the ledger about 3/4 inch. A copper flashing should be installed over this rubberized flashing. This flashing needs to be bent over the top of the ledger board and extend out over the deck ledger board. Ed’s builder/carpenter did this but he let it stop at the outer edge of the ledger board.

Each time it rained, the water went to the end of the flashing and then traveled backwards under the flashing. This is natural and is caused by the surface tension of water.

What should have happened is the flashing should have been 3/4-inch longer and then bent down and over the face of the ledger board. The last quarter inch should have been bent out at a 45-degree angle so the water would form droplets and fall to the ground below the deck.

The deck joists need to have a small 45-degree angled fire cut made at the top so the top of the joist doesn’t touch the flashing. This detail is one of the many things that have transitioned from history to legend to myth just as J.R.R. Tolkien said about the ring.

I created a full-color illustration of this flashing detail that you can purchase from my website.

Column 1569

How to Protect Exterior Wood

weathered picnic table american dirus dog

This weathered wood picnic table sits just 12 feet from the shore of Bass Harbor in Maine. The harsh marine environment will destroy the table if it’s not sealed. That's an American Dirus dog bred to look like an extinct direwolf yet she contains NO wolf DNA. Copyright 2024 Tim Carter

How to Protect Exterior Wood

A week ago, my lovely wife and our 2-year-old American Dirus dog were on Mt. Desert Island in Downeast Maine. We rented a tiny cottage just 12 feet from the shoreline of Bass Harbor. If you’re not familiar with this part of the USA, I can assure you it’s a harsh marine environment. Anything made from wood or iron that’s not protected from the sun and the sea will succumb to the elements and have a very short service life.

Early each morning I took our dog out so she could relieve herself. I sat with a cup of coffee on a gray weathered picnic table watching the 11-foot ebb tide leave the bay. The ultraviolet (UV) rays of the sun, salt spray, and rain, and snow had tortured the table. Perhaps it was intentional so the table matched the rustic weathered appearance of the proud and tired cottage. If so, the property owner achieved the goal.

Weathered Treated Lumber Picnic Table

If this picnic table is not cleaned and sealed in a year or two, it will start to resemble the decking and hand rail on the pier that extended out from the land just 30 feet from the table. Some pieces of the decking and railing had cracks as large as one-quarter inch. Raised summer-wood grain on the hand rail was as sharp as a razor. These slivers of wood could cut your soft skin with little effort.

Allow me to expound and the mechanics of wood weathering. I feel if you understand what’s going on, you’ll be much more inclined to take care of all of the exterior wood on and around your home. This includes decks, fences, siding, wood furniture, playsets, etc.

UV Light Photon Damage

UV rays are far more powerful than you might imagine. About five percent of them contain active photons. These photons resemble microscopic cruise missiles. When the photons strike any surface, they cause damage.

They’re so powerful they can break atomic bonds of softer metals such as copper, zinc, and lead. This is why copper can be used to protect asphalt shingles from decay. I covered that in my Roofing Ripoff book, but that’s a column for another day. Have you ever wondered why the galvanized roof panels on old barns begin to rust? Where did the zinc coating go? The photons blasted it apart and the rain washed the zinc to the ground around the barn.

Knowing this, you can see how destroying wood is child’s play for UV rays. The rays break apart the bonds of the lignin in wood. The damage extends to the coloration of the wood. It’s why unprotected wood turns gray. The softer spring wood that’s lighter in color than the dark summer wood bands falls apart faster. Just as your skin needs sunscreen to prevent sunburn, so does all your exterior wood. Paint and pigmented sealers are very good wood sunscreens.

Water Causes Wood to Swell & Shrink

Water is the next demon that haunts your exterior wood. Wood will rot without protection from water. The picnic table I sat at each morning was probably constructed from lumber that had been infused with copper. Copper is a natural biocide. The fungi that cause wood rot can’t survive in the presence of copper.

Wood is an amazing material, but as with just about everything, it has an Achilles’ heel. It’s hygroscopic. This means the shape and size of wood change as the moisture content within it goes up and down. In other words, wood swells and shrinks. Metal doesn’t do this. This is one reason why the paint on your car never seems to peel yet no matter what you do, you can’t seem to stop paint from peeling on all your exterior wood items. The swelling of the wood is so great the paint can’t maintain its grip.

Checking Cracks are the Harbingers of Damage

Small checking cracks are the first things that develop on unprotected wood. These cracks are very small, about the width of a hair on your head. Checking cracks are the gateway to full-blown destruction. Each time it rains, the water enters the crack. The wood begins to swell and slowly starts to tear itself apart.

Repeated wetting and drying causes more wood fibers to break just as you can do by bending the aluminum tab on a soda can back and forth. Over time the crack gets bigger and bigger as water is allowed to get deeper into the wood. I know you’ve seen cracked exterior wood. The cracks can get so deep the entire piece of wood splits apart.

Now you know what to do. You need to stop UV rays and water from getting to your wood. UV protection is the easiest thing to achieve. Water penetration is far more difficult. Each piece of exterior wood must be completely coated on all sides and edges with paint or a sealer to prevent water infiltration.

This means if you’re building a picnic table like the one I sat on, you must cut all the pieces first and then paint or seal them before you assemble the table. You’re trying to make it impossible for water to get into the wood where one piece touches another piece. Most people won’t go to all this trouble. It’s the primary reason you see paint peel from exterior wood. Water is seeping into the wood in all the places where it’s not painted.

Column 1568