Vaulted Wood Ceilings

vaulted wood ceiling

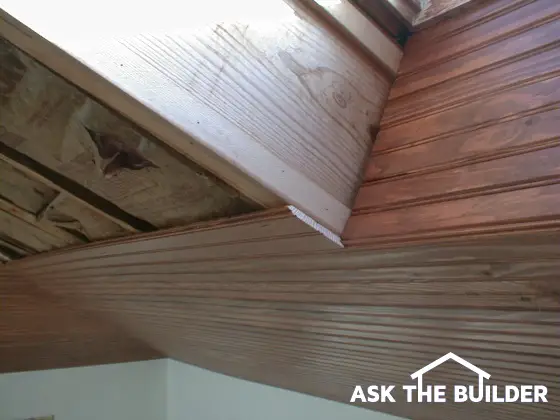
Install T&G wood on a vaulted ceiling requires special talent, tools and techniques. You will probably discover that some colored wood putty will also come in handy.

Vaulted Wood Ceilings

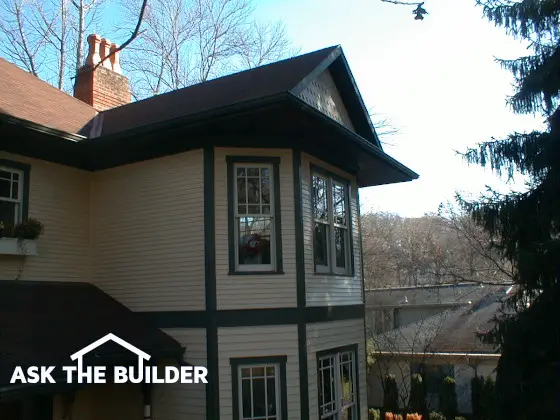
DEAR TIM: While paging through a home decorating magazine I saw a vaulted ceiling that was covered with wood. The look was stunning. I have a corner room of my home that has two drywall vaulted ceilings that rise from each wall producing a diagonal seam in the ceiling. How difficult is it to install wood on this surface? What tools do I need and what can be done to make the job go as smooth as silk? Barb F. San Diego, CA

DEAR BARB: Stunning you say? My wife and other customers have also been heard to exclaim: sensational, awe-inspiring and dazzling. Based upon your description, it sounds as if your ceiling is nearly identical to one in my own bird room. We call our sun room the bird room because that is where our singing male canary lives. The Douglas Fir bead board ceiling in my bird room gets compliments from every person who walks into the room. For some reason our guests' attention seems to be drawn to the wood ceiling. Perhaps the two skylights that drown the room with light are partially responsible.

Is installing wood on a vaulted ceiling hard to do?

Unfortunately, you have selected perhaps the toughest ceiling to tackle. I would have much preferred it if you had told me the ceiling was flat or a standard one-plane vaulted ceiling. The intersecting ceiling planes of a hip roof add a significant degree of difficulty to the project. Installing wood around skylights adds yet another level of complexity. Be thankful you don't have those to contend with.

Here is a list of tools you will need to complete this job:

  • a miter box saw
  • a chalk line
  • hammer and nail sets or a nail gun(preferred)
  • a circular saw or table saw(preferred)
  • ladders and/or scaffolding(preferred)
  • sandpaper and brushes

How do you find the center-line of the ceiling joists / roof rafters?

The first task you need to complete is locating the center line of the ceiling joists/roof rafters. You can do this the old-fashioned way using a nail and hammer or with a modern stud-finding tool that peers through the drywall and locates the solid wood for you. Use the chalk line to snap a line down the center of the rafters from the intersecting hip to where the rafter passes over the exterior wall. Be sure to check for solid wood along both sides of the giant diagonal seam that extends from the outside corner to the peak of the roof. You need solid wood on either side of this seam to secure the ends of the wood pieces that fall between rafters.

What is the best method to use for installation?

Don't even think of installing one piece of wood until you have pre-stained and urethaned every piece of wood you will need for the job. Trying to apply these liquids upside down after unfinished wood is installed is a nightmare. Wood ceilings look best when you use tongue and groove lumber that interlocks. This method allows for blind nailing so you do not see any nails after the ceiling is installed.

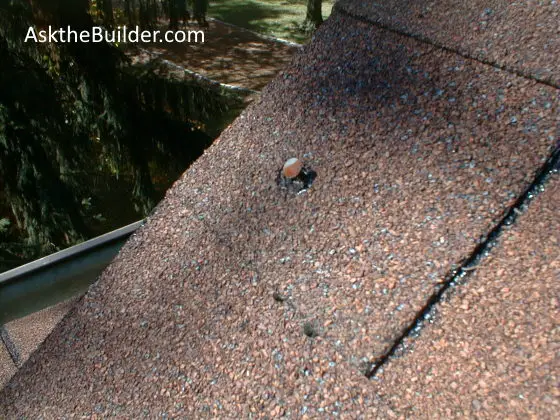
It is extremely important to make sure the actual tongue is covered with stain and urethane. Seasonal movements in the wood can partially expose the tongue. If you fail to stain it, you may have unwanted racing stripes on your gorgeous wood ceiling at some future date.

The nails are installed through the tongues. Drive them at a 45 degree angle in the corner where the base of the tongue meets the actual body of the board. The nails must be long enough to penetrate one to one and one quarter inches into the solid wood rafters that are currently hidden by the existing drywall ceiling.

CLICK or TAP HERE to get FREE quotes from local companies that will install wood on your ceiling.

You will need a circular or table saw to make an angle cut on the groove side of your first starter piece. The angle will reflect the actual pitch of the vaulted ceiling. Failure to make this cut produces an unsightly gap where the wood strip meets the wall. You will also have to face nail this first starter piece so the bottom does not fall away from the ceiling. All other pieces of wood will be blind nailed through the tongues.

How Do You Get the Pieces of T&G Lumber Tight?

Tongue and groove lumber does not always interlock with ease. Never tap or hammer the tongue end to try to drive the board into place. You can flatten and damage the tongue making it impossible to interlock the next piece of lumber. A better method is to use a small one-foot long piece of scrap wood. The groove of this smaller piece should easily fit on the troublesome board. You can then hit the scrap piece of wood which in turn pushes the larger piece into place.

How do you hide the imperfections or small nicks?

Colored wood putty that matches the finished wood is great for filling imperfections, nicks, or small knots. Keep the stain on hand as well to touch up scrapes that will happen as you handle the finished wood. Use a small brush or a cotton swab to apply the stain and/or urethane.

Column 493

Ductwork Design

heating design - Tim's second floor - 5 outside walls

Ductwork Design - This second-floor room has five outside walls! It required two large supply ducts to satisfy its heat loss.

DEAR TIM: We moved into our new home 3 months ago and now that it is cold we have discovered our daughter's bedroom is freezing! The house has vinyl siding, her room has a large double window, faces north and is farthest from the furnace. The builder tells us that is the problem. I have shut down the vents in the basement, laundry room and two other little-used rooms. But my daughter's room is still cold. What is wrong? Surely the builder can't be right. Anne K., Mason, OH

DEAR ANNE: Yes, and there was a full solar eclipse last week as well. Jeeesh! The phoney answers and excuses some builders offer up to cover mistakes seem to be as plentiful as grains of sand on a beach. The following wager may surprise you: Do you think I could keep that bedroom at a nearly constant 72 F even if your daughter's room had floor to ceiling single pane glass with no insulation in the ceiling? Don't bet against me, because you will lose. I can heat or cool an non-insulated house and you will be a snug as a bug in a rug. You'll be a poor bug, but a comfortable one!

Is the builder responsible for the HVAC components?

Your builder is ultimately responsible for this mistake since he entered into a contract with you to supply a livable home. Undoubtedly he will redirect the blame to the heating and cooling contractor who installed the ductwork and the heating and cooling system components. But never forget that it was the builder's job to make sure all heating and cooling components were correctly sized and installed.

Why is a room so cold?

The cold temperatures in your daughter's room can be caused by any number of things. More than one thing can be wrong. The problem could be as simple as a damper control that is blocking air flow within the branch duct(s) leading to the room or the duct(s) could be blocked with construction debris.

What do damper controls do in the ductwork?

Well-designed forced air systems almost always have a simple damper control in each branch line as they leave the main trunk lines. These damper controls allow the installer to fine tune the air flow to each room of the house. The control levers you have at the actual grill in each room are not intended for the purpose of balancing air flow.

The more likely scenario is that the duct system is poorly designed and static pressure within the ducts is not equal throughout the system. Ductwork systems in houses need to mimic our bodies vascular system. Blood vessels get smaller and smaller the farther away they get from our hearts. Doing this allows the blood pressure in our finger tips to be just about the same as the blood pressure in your neck. If you can see the actual main trunk line as it leaves the furnace, it should get smaller in cross section the farther it gets from the furnace.

As the forced air from the furnace starts to head down the smaller branch lines, it takes energy with it. The remaining air in the trunk line still needs to travel to the rooms downstream. If the main trunk line stays the same size, the remaining energy in the moving air simply can't push all of the extra air down the main trunk line.

return duct supply

Look at the duct next to the gray i-beam. Note how it's large next to the steel column but towards the upper left of the photo, the duct gets SMALLER. This is how you maintain static pressure in the main trunk line.

Does each room in the house require different size ducts?

Another possibility is the main ducts are sized properly but the installer failed to put the right size branch line into the room. Each room of a house has its own heat gain or heat loss. As such, the furnace needs to supply a different amount of heated or cooled air to each room so that all rooms are the same temperature.

It is also possible that there are not enough return air ducts in each room. The supply ducts should be located under windows on outside walls. On the opposite side of the room, a return air intake duct should be up seven feet high on the wall. As the furnace operates it pushes air out of the supply ducts and pulls air across the room into the return air ducts. This is where the air begins its journey back to the furnace where it once again gets reheated.

CLICK or TAP HERE to get FREE quotes from local companies HVAC companies in your area.

If you determine that the fix is not easy, don't let the builder tell you to just solve the problem with a space heater. These devices do work and work well. The supplementary heater will not do you any good this summer when it is 98 F outdoors. I guess when you call to complain that it is too hot in that room, the builder will tell you to hang a window air conditioner out of one of those large windows.

What is static pressure?

Static pressure is very important. Professional heating, ventilating and air-conditioning (HVAC) contractors know how to supply enough air to each room so that every room in the house is within a degree or two of what your thermostat reads.

The method used to determine duct sizing is not magic. A professional HVAC contractor performs a heat gain and heat loss calculation using the blueprints. These calculations are done for each room and the final calculations show exactly how many cubic feet per minute (CPM) of air must be supplied to each room. A second calculation converts this CPM quantity to a specific branch duct size. The calculations are so precise they tell the contractor the exact size duct for every part of the system!

Column 491

Whole House Fans

house roof vents

Whole House Fans | These simple pot vents are great exhaust ports for a whole house fan. You may need quite a few to satisfy the power of the fan.

DEAR TIM: While doing a walk through inspection in our new home our builder indicated that he could not put in the whole house fan we wanted. The reason he gave was that both roof vents and eave vents had been accidentally installed. I believe he called them continuous ridge and soffit vents. The builder said the whole house fan would burn up and offered a credit to us. Is this correct? We really want the whole house fan. Kristi B., Manteca, CA

Dear KRISTI: Ooooops! What does the builder mean "accidentally"? The location of your home in the central valley of California needs as much ventilation as possible. If I was building your home, the continuous ridge and soffit ventilation would have been just one part of the roof ventilation package. The great news for you is that you can have the whole house fan installed and it will not burn up so long as your builder and roofer team up and install some extra roof ventilation products.

Do whole house fans work well in all climates?

Whole house exhaust fans come in different types and sizes. Their sole purpose is to move vast quantities of air. They work very well in climates that have moderate to low humidity. As the sun goes down and the outside air temperature begins to drop, a whole house fan can create pleasant breezes through any and all rooms of a house. Ask anyone who has one and they will tell you that even during peak summer months, they sometimes have to sleep under a blanket!

How much exhaust area is needed for a whole house fan?

These fans pull hundreds and even thousands of cubic feet of air per minute into your home. For them to work at peak efficiency they have to push an equal amount of air out of the attic. If there are no places to exhaust air or the exhaust areas are small, the fan blade spins but it doesn't really push much air. Low air flow past the fan motor can cause it to overheat. Spinning car tires on snow and ice are a fairly accurate analogy. A car engine can rapidly overheat in this situation as the car's radiator is not moving through the outdoor air.

When you purchase a whole house fan the written instructions clearly state how much free net area of exhaust the fan needs. The net free area is often called out in square feet or square inches. But don't be fooled. If you cut a one square foot hole in your roof and cover it with some sort of cap, you do not have one square foot of exhaust opening. The insect screening or slits in the metal vent can cut off as much as 50 percent of the hole you created.

I always prefer to exceed this amount by 25 to 50 percent. One way to achieve this required ventilation area quickly is to install simple and affordable spinning roof turbines.

Will spinning roof turbines help exhaust air?

These wonderful roof ventilation products may not look as sleek as the hidden continuous ridge and soffit ventilation you already have, but they also allow massive amounts of air to readily escape from your hot attic space. What's more, they work anytime a slight breeze blows across your roof. I would install these on the back side of your roof so they are not visible from the street.

If you don't like roof turbines you can have your builder install simple static roof pot vents. These are very common roof ventilation products and they work well. I have them on my own home. But depending upon the fan you have purchased, you may discover you need 10 or even 15 of these pot vents to satisfy the whole house fan. Once again, place these vents on a part of the roof that is least visible from the ground.

Don't let your builder pull the wool over your eyes with an expensive change order for this work. The actual materials you need to provide the necessary ventilation for the fan will probably cost you less than $150.00. The time to install the products might be less than 4 hours. In my opinion, the builder should not charge you for the time since he already told you he was going to install the whole house fan in the first place. Necessary roof vents are a part of this package.

The spinning roof turbine vents are an excellent match for whole house fans. The beauty of them is that they do not restrict the amount of opening in the roof. In fact, when they spin either by wind power or air being pushed by the whole house fan, they exhaust far more air than they would if the hole in the roof was simply open to the atmosphere.

The truth be told, you can't have too much roof ventilation. Ask any farmer that raises chickens and they will show you how they ventilate the chicken houses since chickens can't sweat and need to be cool or they die.

Where Are the Fans?

In the June 20, 2021 AsktheBuilder Newsletter, Lewis emailed asking, "Why do you rarely, if ever, see whole-house fans in new houses?" CLICK HERE to read the answer.

Column 491

AsktheBuilder Newsletter

AsktheBuilder logo

AsktheBuilder Newsletter

I can send my column to you via email. I also include interesting questions I get, product news and all sorts of other announcements. In fact, when I travel, I announce where I will be in case you live nearby and want to get together to drink a brewsky or sip a vanilla Pepsi.

See the Newsletter link in the yellow stripe above left? Just go there and fill in your email address and name and you are all set.

PRIVACY POLICY: I do NOT share your personal information with anyone. It is that simple.

RSS Feeds – No SPAM for You!

RSS Feeds

I have the good fortune of belonging to a unique group of entrepreneurs who make their living on the Internet. We participate in a daily email discussion forum where ideas are shared. If you see an email and want to add a comment, the entire group reads your response. It is an incredible hotbed of ideas that are so far out on the curve you can't believe it.

Late April and early May of 2003 had many of this group meeting face-to-face for the first time in fabulous Las Vegas. One of the most progressive members of the group, Chris Pirillo, held court and told all of us about RSS technology. It is a fantastic new aspect of technology that allows you to get the information you want from certain websites without any SPAM or fear of your email address being abused, sold, etc. Why? Because RSS doesn't rely on email to deliver information! It is perhaps the supreme *push* technology.

To see the news aggregator software I use, go to Newsgator. This website has some very good information all about RSS technology and how it can make you very productive.

Glenn Fleishman, a Seattle-based freelance writer for the Seattle Times, wrote a column that appeared on November 8, 2003 in the Seattle Times. Here is a link to the actual column. You will have to register to get access to the column. As of November 19, 2003, the Seattle Times was not charging anything to get into their archives.

Building Stairs

DEAR TIM: I need to rebuild a simple interior staircase. What is the simplest and easiest way to tackle this project? When you cut those deep notches in the side stringers does that weaken the staircase? Are there any products or techniques that can simplify stair construction? Tony G., Reedsburg, WI

DEAR TONY: I sure hope you paid attention in math class and have some basic carpentry and sketching skills. You are going to need all of these to successfully complete the project. Stair construction can be very challenging and confusing. It is important that you follow all safety recommendations and building code requirements. If you pay attention to detail you will be able to complete the staircase in one day. If not, you better have a ladder nearby.

building steps sketch

Take a notepad and make a simple cross section drawing of the existing staircase. Note the vertical distances between each step, and the vertical distance between the first and last step and each floor level. Measure the depth of each tread at the same time and record these measurements. Double check your measurements and drawing for accuracy. Note any gaps between each side stringer, and where these components touch the bottom floor and the sub-floor header.

If you are lucky, the vertical measurements between each stair tread and the depth of the treads will be consistent. Using a piece of rectangular (10 inches high by 14 inches long) cardboard you can make a stair angle guide that will allow you to recreate the top and bottom stringer cuts and the position of the treads before you remove the old staircase.


Author's Note: If you need step-by-step color photos of the stair-building process, you should consider my Stair Building eBook. This helpful guide is the answer to all of your frustration over the stair building process. Click the link and you will be amazed at what you will discover.


Place the cardboard rectangle against one side stringer with the 14 inch edge resting on one of the middle stair treads. Slide it back, so the 10 inch edge just touches the stair tread nosing above. Place a yard stick or other long straightedge on the stair tread nosings. Slide it up against the piece of cardboard. Use a pencil and trace a line on the underside of the straightedge. The result should be a triangle whose sloping leg connects one stair tread nosing with the one below. The bottom leg of the triangle will be your tread length and the vertical leg will be the riser height.

As you demolish the old staircase, make every attempt possible to salvage the side stair beams or stringers. The top and bottom angle cuts on these side stringers are the most challenging part of the project. If there were no gaps where the old ones met the floor and sub-floor header, you can use the old stringers as a template. This will save you hours of agonizing work and wasted lumber.

Trace the pattern of the old stringer onto your new side stringer. I like to use 2 x 10 or 2 x 12 lumber for strong staircases. I never cut notches in my stringers as this weakens the staircase. Cut along the traced lines and place the stringer in position. It should fit perfectly. Temporarily tack the stringer into position, so it will not fall. Starting at the top of the stringer, use your triangle template to mark the location of the top of each tread and the face of each stair tread nosing. Make adjustments, as necessary, to match your original drawing. Remember, the sloping line of the template must be parallel or in line with the edge of the stringer at all times.

There are some wonderful wood and steel products that simplify stair construction. You can purchase adjustable triangular wood blocks that screw or nail to a 2 x 6 or 2 x 8. Once applied to the stringers, you end up with the notched look but not the traditional weak staircase! These triangular wood assemblies allow you to create an infinite amount of riser and tread combinations to fit any situation.

You can also purchase simple L shaped brackets that are nailed or screwed to the side stringers. The stair treads rest on these strong metal brackets. These handy devices eliminate any need to notch the stringers or plow grooves to accept the treads. They can be found at most lumber stores that sell metal deck framing components.

Column 215

Construction Bids and Quotes

Construction Bids

Construction Bids | Window replacement is not always as easy as it looks. Taking an old window out and installing a new one is just one part of the overall job.

DEAR TIM: My wife got an estimate from a small contractor to replace seven windows at our home. The new windows are a major name-brand with wood interior and aluminum cladding on the exterior. He was also going to install new interior trim and restore the exterior trim. The price of the quote was $5,725.00. It seems outrageous to me, but my wife loves the quote and thinks this man is the greatest. I tried to get other quotes but my wife says I scare contractors as they never return my calls. What should I do? What is a fair price? Gary K., Trenton, NJ

DEAR GARY: I'll bet this exchange between husband and wife happens tens of thousands of times each day in the USA. I am constantly flooded with phone calls and emails from people who have all sorts of trouble analyzing quotes from contractors. In many cases, some people would be ecstatic even getting a bid. Believe it or not many people each day wait for the elusive contractor to show up, and even when they do show up to look at the job, some never call back with a quote. Consider yourself lucky that you even got a bid.

Why does a contractor's price seem high?

There are many reasons why some people think a contractor's price might be high. One of these reasons, I believe, is the proliferation of do-it-yourself information that is flooding consumers on television, on the radio, in magazines, on the Internet and even other newspaper columns such as this. All too often difficult jobs are depicted as being no problem or easy. I know what happens before, during and after each installed window replacement job.

First of all let's think about this small contractor's business. He needs to have all sorts of tools, a truck and a place to house his business. Saw blades, tools and his truck need maintenance and parts and they eventually wear out. These costs must be apportioned to each of the jobs he completes. If he is a contractor that offers free estimates, the time spent doing this work activity must be applied to those jobs he eventually gets under contract. After all, you don't go to your job and work for free, do you?

What costs are included in a contractor's quote?

There are many other soft business costs he must pass on to the final consumer. For example, he has insurance premiums (Worker's Compensation, Liability, Disability, Health, etc.), permit fees, association dues, assorted taxes to pay, and all of these are invisible to you the paying customer.


How would you like me to build your new home? It's probably impossible for me to fit your job into my schedule, but I will gladly share hundreds of my tricks and building secrets with you and your builder. Check out my New House Specifications.


Finally, he has to buy the replacement windows. You may be shocked to discover the actual cost of high-quality aluminum clad wood windows. If you want quality, and it sounds like you are getting it, it comes with a price tag. You can get a feel for the cost as nothing is stopping you from going to the window distributor to get a price as if you are going to buy the windows yourself. Granted, the contractor may get a small professional discount while you pay full retail price, but you will get a good idea of what the windows cost.

CLICK or TAP HERE to get FREE quotes from local companies to bid on your next home improvement project.

My guess is that you want this small contractor to be around in six months if you have a problem. That is a very reasonable expectation. For this to happen his business needs to be profitable. Yes, it is not sinful to make a profit. The marketplace usually culls out contractors who charge excessive profits.

Should you get quotes from different contractors?

To find out what the average price is for your job, you do indeed need to get quotes from different contractors who are going to install the same exact windows. You must compare apples with apples. The local distributor for this brand of window may have a list of other small contractors who buy and install these same windows on a regular basis. I would ask the distributor for a list of qualified contractors that you can call.

Bids are complicated. To get tight bids that you can really compare, you must have clear directions and a goal so each contractor is bidding on the same thing. To get contractors to show up, offer to pay them $50 or even $100 if they produce a good written estimate. Show them that you value their time!

If you really want to find the pro, Click here for information on Checklists!

Column 490

Installing Pocket Doors

Pocket Door looking up

Installing Pocket Doors | Note the very important screws on the jambs. These allow you to access the door rollers.

DEAR TIM: I have a large archway between my home office and my dining room. I need to close off my office occasionally but do not want traditional swinging doors. I love pocket doors and want to add them. How much of a project is it to add these doors? Would the walls have to be completely torn out on either side of the opening to do the job? Karma T., Yulee, FL

DEAR KARMA: Pockets doors, in my opinion, are one of the top ten most overlooked items when many architects and builders plan a home. Even I underused this wonderful door option in my own home. If I had the chance to rebuild my home today, there are a minimum of 10 other rooms that would have pocket doors instead of the current swinging doors.

Why are pocket doors so wonderful?

Pocket doors are wonderful for many reasons, but I love the fact that they disappear into a wall. You can pick up an average of ten square feet of floor space when you use a pocket door instead of a traditional hinged swinging door. Modern high-quality pocket door hardware and frames allow these doors to remain trouble free for the life of the home.

Are pocket doors easy to install?

Pocket doors are easily added to a new home or one being remodeled, but installing one or two in an existing home is a little bit of work. Several years ago, I added a pocket door in my own home to separate the breakfast room from a hallway leading to our laundry room. My family and I endured the mess, but the final result has made everyone happy.

I had to do some demolition work to create the opening for my pocket door. You are correct in assuming that each side of your opening will have to be demolished since you want two pocket doors that will meet in the middle of the archway. The amount of wall space that needs to be opened up to create the pocket hideaway for each door is slightly greater than the overall width of each of the pocket doors.

Before starting installation, what is behind that wall?

But before you start swinging a sledgehammer or pounding a pry bar behind the existing trim, slow down and investigate what might be behind and above the wall. There can be all sorts of surprises behind the plaster, drywall or paneling. Plumbing waterlines and drain pipes, heating and cooling ducts, pipes and low voltage cables, and all sorts of electric and communication cables can be living comfortably where you want the pockets to take up residence. This is not to say all of these things can't be relocated, you simply should investigate and see what might be in your way.


Would you like to buy the exact pocket door frame I have in my own home? You know, the pocket door frames that are perhaps the best in the world? All you have to do is Click Here for Tim's Favorite Pocket Door Frame!


pocket door in Tim's house

This pocket door was installed in Tim's house.

The underside and top of walls often yield clues as to what is inside of them. If you can see pipes, cables, ducts and other things that extend from a floor up or down into the wall cavity, then you will undoubtedly have some extra work ahead of you to accomplish your goal. Rest assured though it will be worth it in the long run.

Furthermore, the wall might be a bearing wall. While this is a significant challenge, it is often possible to install a large beam over the opening that will carry the load above and transfer it just beyond the reach of the pockets.

What are the best type of pocket door frames?

For years of trouble-free life, be sure to get the absolute best pocket door frames. Look for ones that have metal wrapped studs that will not warp. The wheeled trucks that latch to the door and ride back and forth in the track must be ones that cannot jump out of the track. Certain pocket door frames and hardware come with this guarantee.

Be sure the rough opening is square and plumb and the top of the rough opening is absolutely level. This will ensure that the pocket doors will glide smoothly in and out of the pockets and that the doors will meet perfectly when they are closed.

It is vitally important that the rough opening is perfect before the pocket door frames are installed. The last vertical studs that create the opening can be plumb but the overall opening can be twisted or in a helix. If this happens, the doors will never meet properly or they might rub when they are slid back into the pockets.


To ensure the rough opening is perfect and not twisted, extend strings diagonally from opposite corners on one side of the opening to create a giant letter X. If the strings just touch each other the opening is perfect and in the same plane. If there is a gap greater than one eighth inch between the strings, you need to adjust one or both of the vertical studs that create the large rough opening. Once the opening is confirmed to be in the same plane and not twisted, you can install the pocket door frames.

Column 489

Roofing Nails That Pop Up

nail pop in shingle

A pesky roofing nail popping out on my own roof. Arrrggh!
This nail probably was driven very close to the horizontal seam of the sheets of plywood under the shingles.


DEAR TIM: Eight years ago, I had a new asphalt shingle roof installed on my 55-year-old home. Leaks recently started to appear in several areas of my home and upon inspection, roofing nails actually had backed out and popped through the shingles. Why did this happen? I hammered the nails back down and applied roofing cement over the holes. Is this the correct thing to do? Is there a permanent way to patch the holes in the face of the shingles? John D., Atlanta, GA

DEAR JOHN: Roofing nails that seem to defy gravity are more common than you might think. In fact, it has even happened on my own roof. There are all sorts of reasons why nails back out of seemingly solid wood, but perhaps the most common reason is that the nail did not get a good bite into the wood when it was first driven. It is vitally important that roofing nails of the correct length were used to secure the shingles. The sharp tip of the roofing nail should completely pass through and extend approximately 3/8 inch past the underside of the roof sheathing.

What type of roof sheathing was popular in the 1950's?

It is entirely possible that your roof sheathing might consist of numerous tongue and groove 1x6 boards. This was a very common roof sheathing product in the 1950's. Every 5.5 inches there is a horizontal seam where two 1x6s interlock. If the roofing nail happens to penetrate the sheathing along this seam, there is very little solid wood to hold the nail. In fact, the roofing nail can actually crack of the thin tongue along the seam. If this happens, there is virtually nothing holding onto the nail.

This same thing can happen on roofs that have large 4 x 8 pieces of plywood or oriented strandboard sheathing. Nails that hit weak spots in these products or along the seams where one sheet meets another are highly susceptible to backing out.

Does your roof and sheathing expand?

Each day and night your roof and the sheathing beneath it go through a heating and cooling cycle. Add to this the changes in humidity, and you can see that the wood sheathing not only expands and contracts but it can also do so with astonishing frequency. This movement can slowly and forcefully push a nail up and out of the wood. The movement is very slight each day, but it does indeed happen. In the most severe cases, as in yours and mine, the head of the nail actually breaks through the top layer of shingles. Many people have nails that have backed out, but they simply see a hump in a shingle.

How do you repair a roofing nail pop?

The repair method you followed will not be permanent. Since you did not relocate the nail, it continues to have minimal or no holding power. The nails should have been removed and relocated about one inch higher in an attempt to find solid wood. If you can enlist the help of someone, they might be able to go inside the attic and see the pesky nail as you pull it out. They can communicate with you and tell you which direction to go to get away from a seam, crack or a knot in the roof sheathing.

The asphalt cement you applied over the hole in the shingle is also not permanent. The sun's ultraviolet(UV) rays break down the asphalt and cause it to age prematurely. The colored ceramic granules that cover asphalt shingles, among other things, serve to shield the asphalt in your shingles from these harmful UV rays. At the very least while the asphalt cement was fresh, you might have collected some loose granules from a gutter to broadcast into the sticky asphalt cement.

I feel a better way to patch the hole is to do so from under the shingle. Cut a four by two inch rectangle of regular 15 pound felt paper and fold it into a two by two inch square. Lift the damaged shingle up and apply a half-teaspoon dab of asphalt cement directly over the nail shaft hole. Press the piece of felt paper into the fresh cement making sure the crease in the paper faces up towards the roof.

The shingle can now be laid back flat on the roof. If it is not flat, apply additional asphalt cement under the lower edge of the shingle and press down until the shingle behaves and lays flat. The hole in the surface of the shingle can be carefully patched with a small amount of asphalt cement. Liberally apply loose matching colored granules to the cement and press them into the sticky black goo. Once you are back on the ground I doubt you will be able to see the repaired hole.

When is the best time to work with shingles?

Repairing shingle leaks is very easy. The trick is to work with the shingles when they are warm. Cold, brittle shingles can crack easily. Use a wide, flat pry bar to break the seal between individual shingles. Slide the pry bar up under the shingle and it will eventually allow you to gently bend the bottom of the shingle up. Do not over bend the shingle as it can crack even if it is warm.

If you can't find any loose granules at your home, you can possibly get them for free at any business that sells shingles. They have thousands of them scattered on the floor or around the pallets where shingles are stored. Roofing manufacturers actually sell buckets of new granules if you need them in larger quantities.

Column 487

The Tim Carter Story

The Tim Carter Story

Life began for me in the early 1950's. I was born and raised in the University Heights suburb of Cincinnati, Ohio. As I replay the tape of my early childhood, it keeps turning up memories of great places to play. A dense stretch of woods started just up the street behind Joe Conrad's house and passed behind my house extending all the way down to McMicken Street. Within these woods one could find a wonderful creek and both the short and long trails that wound through the dense woods down to Central Parkway and the abandoned subway tunnels.

Across the street from my home, directly behind the Little Sisters of the Poor, there was another wooded ravine where the mysterious swamp could be found. The ravaged and charred remains of my Texaco tanker ship are still there. It exploded and sunk in the fabled swamp when an M-80 ignited with a cigarette timing fuse blew it to kingdom come.

Tim Carter photograph

I love my miter box saw and L.L. Bean!

In the early 1960's, the ravine was filled in with thousands of truck loads of dirt to create a new connector roadway between Dixmyth and Clifton Avenues. It didn't take long for my buddies Roger Boncutter, Pekka and Charles Mooar, Mike Wilson, Billy Gottesman and several others to discover that a few scrap pieces of wood and some rocks piled up on one of these mounds of dirt made a great fort to protect you from incoming mudballs. Many a day, my friends and I would play war among the piles of dirt. It was great fun, that is until you got hit in the head with one of those hard mud balls!

Scouting

I was really active in Boy Scouts. I didn't make it to Eagle Scout (I needed just 6 merit badges), because I could not swim. Two of the required merit badges were Swimming and Lifesaving. I had about as much chance of getting those merit badges as growing wings. However, two of the merit badges I did receive were Home Repairs and Journalism. Now isn't that a coincidence?

First Job

Not only that, my first job ever was collecting paper route money for The Cincinnati Enquirer. I was eight years old. Two years later, I had my own afternoon paper route delivering The Cincinnati Post Times Star. It was a one-hundred paper route and I made one penny per paper. That was huge money back then, as each week I got paid six dollars! To put that into perspective, some of my friends got 50 cents allowance each week while others got maybe a quarter.

High School

High school was a really fun time. I went to Roger Bacon High School. Many days after school, I worked at Skyline Chili. During my senior year in high school, I was the editor of my school's newspaper, The Baconian. Although I couldn't hear them, the cosmic tumblers were starting to interlock as I even had my own opinion column in each issue. The subject matter of this column was primarily to poke fun at the administration, classmates, and other schools.

My Wife

Kathy, my lovely and patient wife, also waltzed into my life during my high school years. The University of Cincinnati felt sorry for me or else they were shy of their enrollment quota. In any event, that's where I got my Bachelor of Science degree. My major was Geology. My brain finally got jump-started in college. I was offered a full scholarship and an assistant-ship for a Master's Degree in Engineering Geology. However, I turned it down. I wanted to go into business for myself.

Three months after graduating from college, Kathy and I got married. She worked as a clerk at a hospital. I went to work fixing up old houses. Small jobs led to bigger and bigger jobs. Before our first wedding anniversary, we bought our first house. It was in really bad shape. I fixed it up and turned a profit. The construction bug had bitten me and quite hard I might add.

Becoming a Builder

I rehabbed more houses, did contract work for other homeowners, and eventually began to build custom homes. The houses were always fun. It seemed like a picnic, as I could actually work on top of a foundation that was level and square! The remodeling jobs grew more complex. By the mid-1980's, I was constructing ultra-custom $250,000 room additions and $75,000 kitchen remodels.

Every aspect of residential construction interested me. I read technical journals about how to do everything. Then I tried to do the things myself. Soon I figured out that you can't do every task at the jobsite. You had to invest too much money in equipment that was seldom used and you couldn't multi-task. Once a job is under roof, several trades can work simultaneously. I gravitated towards carpentry, plumbing, ceramic tile and concrete. There is nothing quite like the feeling of completing a complex common framed roof or installing three floors of cast iron plumbing stacks.

Remodeling Magazine Award

In 1993, I was selected as one of the top 50 remodelers in the United States by Remodeling magazine. They publish an excellent trade magazine. This award enabled me to begin a new media career. Kathy suggested that I take my book idea and turn it into a syndicated column. I had always wanted to write a book about how the average homeowner gets taken by builders and remodelers, primarily because many workers simply do not do things the right way. She was right! It worked. AsktheBuilder was born on October 2, 1993, and continues to be sold to new newspapers each month.

On The Air

In March of 1994, I started my radio broadcasting career on 1450 WMOH in Hamilton, Ohio. I ended my radio career 12 years later in March of 2006 at WGRR-FM in Cincinnati, Ohio. I also did 90 second television segments each week on WLWT-TV in Cincinnati, Ohio.

Each year, I attend many shows and editors conferences. I have had the pleasure and good fortune to meet many other media personalities. What I have learned is that very few of them have an extensive background in residential building and remodeling, so be sure to keep that in mind when you read other columns or watch television shows where the advice seems a little too good to be true. I try to tell you how difficult something will really be, as I have done everything it takes to build a home from the ground up.

I am proud to say I worked for nearly twenty years, five days a week, in the field with a tool belt on. I didn't ride around in a truck and call subcontractors on my bag phone. What? You don't know what a bag phone is? They were one of the first cellular phones!

AsktheBuilder.com

Well, that's the scoop. Hey, are you still awake? If so, I hope you enjoy this and future visits to the AsktheBuilder.com. If you have a question, be sure to use the navigation key words on the left of each page on this website. You can also use the Search Engine in the upper left corner of each page. As a last resort, you can tim @ askthebuilder.com, but keep in mind I get over 100 emails a day and can't answer each one.