Ceramic Tile Repair

Cutting circles in replacement tile

Ceramic Tile Repair

DEAR TIM: A plumber had to replace the shower and tub valve in our home. Unfortunately it could only be done from the tub side of the wall. We have a new valve but are left with a rough gaping hole with no tile or backer board.

How does one go about restoring the tile? How will I make the circular cuts in the tile that are needed to go around the new valve? The plumber said to just install some gypsum board and cover it with tile. Is this right? Terrell T. Memphis, TN

DEAR TERRELL: I think the plumber you used was trying to hoodoo you. Telling you to install regular gypsum board in a wet area such as a shower or bathtub is not much different than casting an evil spell upon you.

Drywall or regular gypsum board is simply not acceptable as a backer board for ceramic tile in a wet environment.

To successfully repair the gaping hole, you are going to have to do additional demolition.

The piece of replacement backer material which supports the replacement tile must extend at least three or four inches or more in every direction beyond the perfect circular hole that will be cut into the backer material to accommodate the new shower valve.

CLICK HERE to get FREE & FAST BIDS from local ceramic tile contractors.

Undoubtedly you will create a rectangular opening about 16 inches wide by approximately 16 or 18 inches high. Be sure the top and bottom seam of the new repair piece of backer board does NOT end up directly under the seam where two pieces of ceramic tile touch one another.

The left and right seams for the repair piece work best if they are centered on the wall studs that are on each side of the new shower valve.

A piece this size or larger will be strong enough after you cut the shower valve hole. If I were doing the job for you, I would try to use cement backer board.

If that material were not available, I might chose to use a fiberglass reinforced silicone-treated gypsum board product. Some of these special gypsum tile backer boards are completely waterproof.

The high gloss finish on ceramic tile is your worst enemy in this repair project. High gloss surfaces telegraph imperfections. If the surface under the tile is not in the same plane, once glued in place the tile will conform to the irregular surface.

When this happens, the humped or uneven tiles reflect light at slightly different angles. Your eye quickly sees this imperfection.

To prevent this mistake, it is best to remove tile from some of the existing backer board. Try to remove at least one full tile in each direction.

Be sure to scrape off all old adhesive from the newly exposed backer board that was not destroyed by the plumber. As you fit the new piece of backer board, use a straightedge that spans from the existing backer board across the new piece.

Be sure there are no humps or voids as the straightedge contacts the new and existing backer board. Fasten the backer board to the studs with hot-dipped galvanized nails.

CLICK HERE to get FREE & FAST BIDS from local ceramic tile contractors.

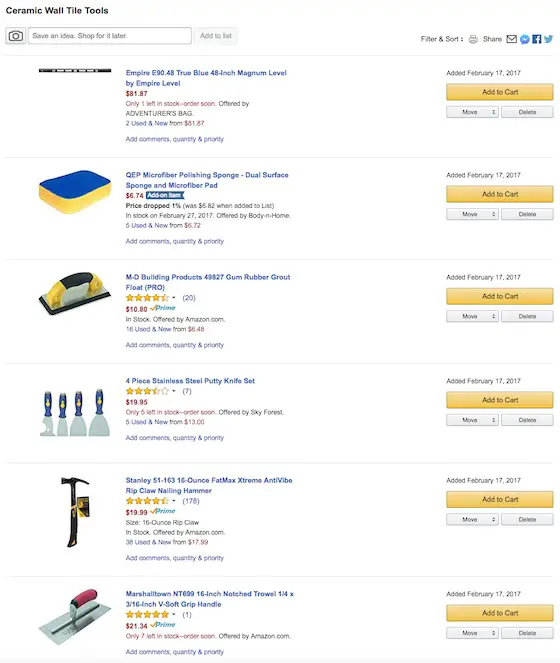
Full Tile Tool List

Here's a list of tools that I've used for years to successfully install thousands of square feet of ceramic tile.

  • tape measure
  • pencil
  • tile cutter
  • nippers
  • a 1/4 by 1/4 inch v-notched trowel
  • a hammer
  • some 6d finish nails
  • 8 lineal feet of straight 1/4 inch wood lattice strip
  • putty knife
  • 3-inch wide-bladed scraper
  • grout sponge
  • rubber grout float
  • several buckets
  • accurate 4 foot level

Click the image below to BUY all, or some, of the tools in the above list.
ceramic tile tools

CLICK THIS IMAGE NOW TO ORDER ALL THE TOOLS YOU NEED TO DO CERAMIC TILE.

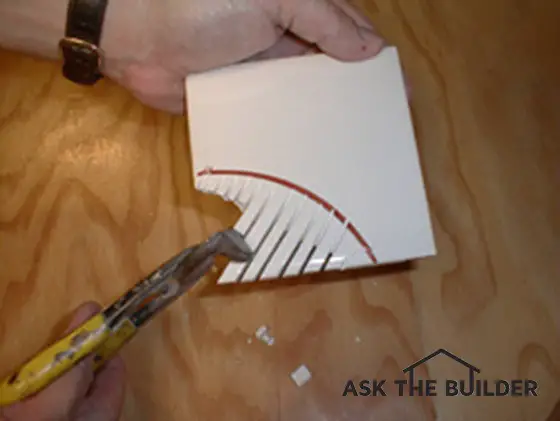
Cutting circles in ceramic tile is not too hard if you have the right tools. Small diameter holes up to 1.5 inches or so can be cut with diamond grit hole saws.

It is not uncommon to have a one piece shower valve that creates a 5 or 6-inch diameter hole. Several pieces of tile may need to be cut to produce the finished hole.

Trace the arc of the circle onto each piece of tile and make straight cuts into the tile so the cut lines touch the arc. Space the cut lines so they are about one-quarter inch apart.

Use a tile nipper to bite away at these fingers of tile. As you get close to the arc, take small bites with the nipper. A tile nipper is simply a pliers-like tool that has sharp jaws that can easily crack the tile.

Performing repairs on shower and tub valves from the wall inside the shower or tub area is a mistake. The most common cause is a lack of planning on the part of the architect or builder. If you ever stay in an older home take a look inside the closets.

Often you will discover a clever access door that allows you quick and easy access to the plumbing behind a tub or shower.

For some crazy reason, these access doors seemed to go the way of laundry chutes. Many planners and builders have forgotten how handy these amenities can be.

If this bathtub and shower does backup to a closet, you may want to install an access panel now as part of the tile repair job. It will prevent all sorts of misery for the next person who has to replace the tub and shower valve.

CLICK HERE to get FREE & FAST BIDS from local ceramic tile contractors.

Column 005
Caring for Water and Drain Lines

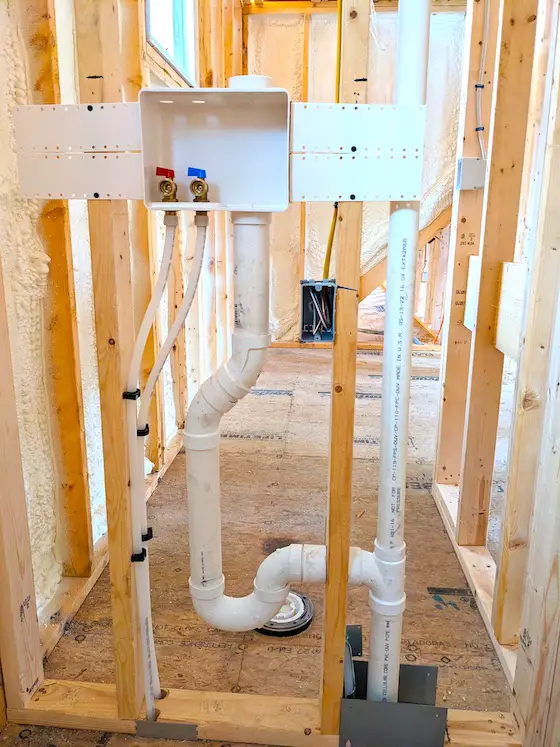
washing machine drain pipe riser diagram

This is what the drain pipe for your washing machine might look like if you had x-ray vision and could see into your walls. The u-shaped pipe near the floor is a trap that holds water. It prevents sewer gas and vermin from entering your home. Copyright 2023 Tim Carter

Clean plumbing pipes are easy to have in your home. Sop up grease from pots, pans, and plates and discard in the garbage. Pour five gallons of hot water down drain lines once a month.

Revised February 2018

Clean Plumbing Pipes - Easy To Achieve Once A Month

DEAR TIM: The water in my kitchen sink drained slowly for a period of months. Last week it stopped draining completely.

A plumber discovered the drain line was clogged with grease. I can't believe this happened as I have been very careful about wiping out my cooking pans. The plumbing service call was very expensive.

Are there things I should do on a regular basis to prevent clogged drain lines? Are there other preventative maintenance things that should be done for my water supply lines? Pamela S., Twin Falls, ID

Related Links

Drain Cleaner Debate - Do They Really Work?

Drain Cleaners & Methods That Absolutely DO Work!

Free & Fast Bids

CLICK HERE to get FREE & FAST BIDS from local drain-cleaning contractors.

Clean Plumbing Pipes Start With Grease Control

DEAR PAMELA: As much as I hate to say it, I don't think you were careful enough. If you're connected to a septic system, your nightmare may be just beginning.

Grease can and does wreak havoc on both the septic tank as well as the drain lines in the leach field. Never pour any grease down any drain line that's connected to a septic system.

If you're on a city sewer, grease can still cause problems over time, as it can completely clog the large-diameter sewer line that leads from your home to the street.

Flushing out sink drain lines can be as simple as filling them with warm soapy water. Photo by: Tim Carter

Flushing out sink drain lines can be as simple as filling them with warm soapy water. Photo by: Tim Carter

Save Used Paper Towels For Grease

Many years ago, my mother taught me a trick. I'd see her use a paper towel and it really wasn't that dirty. She'd lay it on the counter to dry.

The dried towels would be stored in a paper bag. She'd recycle these used towels to soak up grease from skillets, pans, pots, and dishes. These grease-soaked towels would go in the garbage.

This simple task really works to stop grease from coagulating in drains and city sewer lines.

Paper Towels & Grease Video

This may seem like a silly video, but it shows you how well paper towels deal with grease. It's a short video.

Maintain Drain Lines With Water

Many people are unaware that plumbing drain lines and water lines can benefit from simple and periodic maintenance. Drain lines are simple to maintain.

The first thing you need to understand is that it takes quite a bit of energy to move solid objects from your home out to the septic tank or the city sewer line. Often the journey is 100 feet or more.

Flowing water contains lots of energy. Pouring lots of water in drain lines helps flush out debris.

If the main building drain line under your slab or basement and in your yard has minimal pitch, the friction inside the pipe can slow the flow of water. A bigger problem can be too much pitch. If drain lines have too much slant to them, the water in the pipe can actually outrun the solids and leave them behind to accumulate. One-quarter inch of fall per foot of run in drain lines provides for excellent drainage.

Fill All Sinks With Hot Water

It is a great idea to fill all sinks to the brim with hot water once a month. Pull the stopper up and let the water out of the vessel. The volume of water and the hydrostatic pressure of the large volume of water will completely fill the drain line in the wall and possibly the drain stack. This rushing water helps to keep the drain lines squeaky clean.

Drain All Sinks & Toilets At The Same Time

To achieve the same results for the primary vertical drain stacks and the buried building drain under your floors, you must fill all sinks, tubs, etc. in the house at the same time. With the help of family members and friends, pull the stoppers in all fixtures at the same time and flush all toilets simultaneously.

This massive slug of water will help to keep your primary drain line clear of obstructions.

Exercise Water Shut-Off Valves

Water supply lines need little care but the shut-off valves to sinks and other fixtures do need maintenance if you expect them to work when you need them. It is a great idea to exercise valves every six months.

ball valves

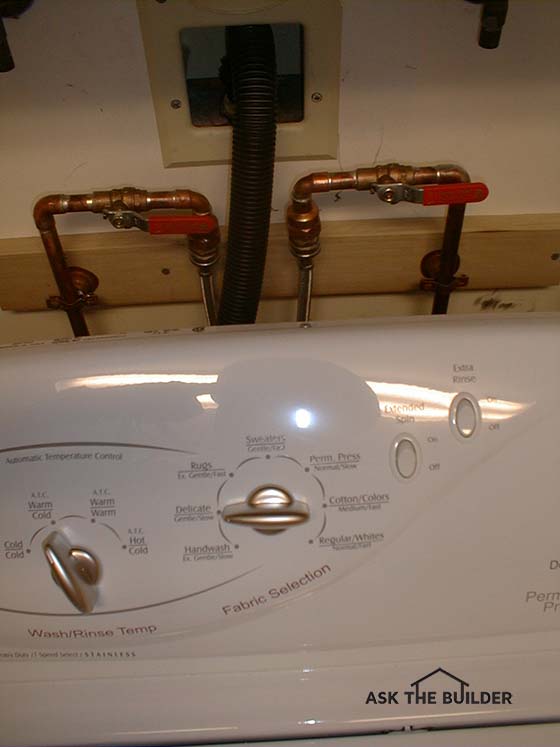
Turning these valves on and off monthly is a great idea to exercise them. Here are two ball valves that control the hot and cold water to my washing machine. I have them up above the machine in view so it's easy to operate. I also exercise them once a month so they don't get stuck. Copyright 2017 Tim Carter CLICK THE IMAGE NOW TO ORDER BALL VALVES.

This simply means closing a valve and then reopening it. If the valve has a traditional stem, this may cause a tiny leak around the valve stem. Simply use an adjustable wrench and tighten the packing nut to stop the leak.

If you want to avoid valve stem leaks, I suggest you install ball valves whenever possible. Ball valves cost just a few dollars more than standard valves. But because of their internal design, they allow for full water flow. Ball valves also are much more reliable than traditional washer-type valves.

Invisible Fence

Cinder wearing invisible fence collar

Invisible Fence | Cinder wearing his invisible fence collar. PHOTO CREDIT: Tim Carter

DEAR TIM: I am about to add a new member to my family - a dog. I hate it when other neighbor's dogs roam so I intend to be a good neighbor and will install a fence. But a traditional fence will spoil the natural look of my yard. I have seen ads for fences that work via radio waves through a buried wire. My dog will be a large one and I just can't believe a buried wire can contain my beast. How do these buried wire fences work and are they reliable? Anne M., San Jose, CA

DEAR ANNE: Do buried wire fences work? Absolutely, positively Yes! Believe it or not they work for both dogs and cats. I have my own buried wire fence system and several of my neighbors have had one for years. In my opinion, this invention is one of the most practical, innovative and reliable inventions ever conceived for pet safety and control.

Will an invisible fence stop your dog from escaping?

My own dog would have had a star role in the movie The Great Escape had he been cast for a part. He is a tenacious digger and could create an escape hole under a traditional fence in a matter of minutes. I never have to worry about him digging under the wire as he maintains an enormous respect for the boundaries of his personal territory created by the simple buried wire.

How do buried wire fences work?

Buried wire fences are not much different than the radio in your home or car. A compact transmitter in your home or garage is connected to one end of a wire that loops around the safe area you create for your pet. After creating the loop, the other end of this wire connects to a second terminal at the transmitter. Once the transmitter is powered up, the buried wire becomes a simple antenna that transmits a radio signal, just as a commercial radio station does. The difference is that a real radio station creates a different frequency signal that travels for miles, while the buried wire creates a far weaker adjustable signal that can be transmitted anywhere from four to fifteen feet away from the wire. The circular signal field created around the entire wire stops animals from crossing or jumping over the wire.

How does the dog collar work?

Your pet wears a compact receiver on a special collar. The highest quality and most reliable receivers are those that can be programmed for your particular pet. The pet's personality, age and weight are all considered when the professional installer programs the receiver. The best receivers can be reprogrammed in just seconds if your pet starts to disrespect the boundaries you create. Not all buried wire fences have this innovative feature.

When your pet wears the best receiver collar, he hears a tone that warns him he is at the edge of his boundary. If he does not respond within a second or two, the receiver collar delivers a simple static electricity correction to the underside of your pet's neck. This stimulus is no different than the one you or I receive when we walk across a carpet and touch a door knob during dry winter weather. The system I use is so pet-friendly it is the only one of its kind to be granted the prestigious Seal of Approval from the American Society for the Prevention of Cruelty to Animals.

Can a buried wire fence protect your flower beds?

My wife Kathy loves our system for another reason. Before we installed it, our dog loved to bury things in her flower beds. Kathy is putting up with this bad habit for now, but if she snaps one day, the professionals can come back out to our home and create secondary off-limit islands within the primary outer boundary zone. You may decide that your pet is not allowed near a swimming pool, a vegetable garden, or pond. The right buried wire fence system will protect your beloved pet as well as all the other things you value in your yard.

Perhaps the most important part of the system I use is the professional training that was part of what I received when I ordered the system. I researched all buried wire fences and saw you could buy several from the Internet or a home center. But after talking to a real company that installs these systems each day, I quickly discovered that teaching my dog how to respect his boundaries was the most important thing. This hands-on training by a pro was so good that within an hour our dog knew where his new boundary was.

A professional trainer visited our home within an hour after our buried wire fence was installed. He worked personally with our dog. For the first three days, our dog learned the boundaries by responding to a special clicker attachment to his receiver collar. On the fourth day, this clicker was removed by the professional trainer. The training was so effective that our dog had no desire to cross test the buried wire fence. Believe it or not he would not even chase our frisky white kitty across the boundary. Imagine how effective both the fence and the training must be to keep an energetic puppy away from a swaggering cat!

Painting New Stucco

Painting New Stucco

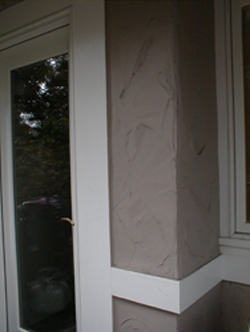
Painting New Stucco | New stucco and the right primer and paint make for a very long marriage. Photo credit: Tim Carter

DEAR TIM: I am going to paint the exterior of my stucco home early this fall. The stucco is seven years old and has never been painted. Is there a specific paint to use on bare stucco? I know to caulk the small settlement cracks, but what about the stucco that extends below the grade. Should I paint that as well? I have seen other paint low to the ground peel. I want to avoid blisters and peeling paint if at al possible. What finish paint would you use? John B., Columbus, NJ

DEAR JOHN: You are already on track for a first-class paint job without knowing it. Applying the paint in the early fall is a fantastic idea. The weather is often dry and the daytime temperatures are well within the acceptable high and low temperature limits that are published on the labels of virtually every can of paint. Furthermore, your productivity should be very high since the weather will be so fair.

Can stucco be painted?

Unpainted stucco or virtually any masonry material is well suited to paint. The rough texture of stucco, brick, concrete block, even stone provides lots of micro nooks and crannies where the paint can lock itself onto and into the surface. In essence, the paint and the stucco, or other masonry, become one and the same. In my opinion, there is only one finish paint I would use. I prefer exterior paints that have a blend of urethane and acrylic resins. I have used this type on my own home and the paint sticks like epoxy to my wood siding. This same paint will grab tenaciously to your stucco.

How long do you have to wait before painting stucco?

Since your stucco is seven years old, you have waited more than enough time to allow it to cure. Brand-new stucco needs to cure for several months before it can be successfully painted. This 90-day wait period allows sufficient time for the original mix water to liberate itself from the stucco. Much of the mixing water is needed to fuel the hydration chemical reaction that happens as the stucco gets hard over time. But any leftover water that remains in the stucco will cause fresh paint to peel and blister if it is not allowed to escape prior to painting.

CLICK or TAP HERE to get FREE quotes from local companies that can paint your house.

Does stucco need to be primed before painting?

You must prime your bare stucco before you apply a finish coat of paint. The primer you use should be matched to the exterior paint you choose to use. Each paint manufacturer will tell you on the label of their finish paint what the compatible primer is for a given substrate. For example, if the surface being painted is new wood, they may say to use oil primer or a water based primer. In your case, one manufacture may feel an oil primer is better than a water based primer. Avoid amateur chemistry! Do not buy a bargain primer and hope it will work. Only use the specific primer as recommended and manufactured by the finish paint company.

You should also read the instructions on the can of primer. They often tell you to apply the finish coat of paint within so many hours to achieve the best bond between the finish paint and the primer. It may not be a good idea to prime the entire house and then follow behind with the finish paint days later. You may have to work in sections where you prime one side of your home on one day and then finish paint it the following morning.

How do you prepare the house to be painted?

Be sure to wash the house down well with soap and water before you begin to paint. Wash it as you would your car. Use a firm brush on a pole to scrub the stucco with a soapy solution. Rinse well with a garden hose. If you are tempted to use a power washer, be very careful. They can damage a stucco surface and inject water behind the stucco where it touches up against doors and windows.

Dealing with the stucco at the base of the wall is simple. The stucco below grade will wick water up the wall. You want to create a strip of stucco where this water can freely evaporate to the atmosphere. I suggest that you stop the primer and paint about 1.5 inches above the current grade. A week after the paint job is complete, install some small decorative gravel around the house that slopes from the stucco down to the soil. You can find beautiful colored stones at landscape supply stores. A wedge of colored gravel will hide the unpainted stucco and provide a wonderful colored transition between the earth and your home.

Dress Up a Plain Mirror

plain flat mirror

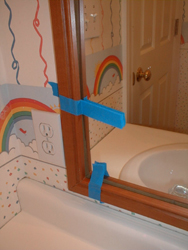
Dress Up a Plain Mirror | Applying wood trim around a plain flat mirror is a simple task. The end results, however, are anything but ordinary. Photo credit: Tim Carter

DEAR TIM: I have a 40 inch high by 60 inch wide plate glass mirror in my bathroom. My wife wants to dress up the mirror and asked me if I could frame the mirror with wood trim. I said I could before thinking it through. Is it possible to do this? How would you frame this mirror? Is it safe to do? Carl R., Fayetteville, NC

DEAR CARL: Gosh, I thought I was the only one who spoke too soon. But my wife Kathy knows better - she knows if she can dream it, I can usually do it. In your case, you dodged the bullet. Transforming the plain float glass mirror into an asset within the bathroom is not very difficult. To achieve excellent results, you will need to do some work ahead of time.

What type of wood should be used to frame a mirror?

Depending upon the tools you own and your skill level, you have two basic options with respect to the type of wood you will use. Perhaps the simplest wood frame would be a flat piece of wood that covers the outer edge of the mirror. When you look straight at the mirror, you will get the desired wood-frame look. But this method does not cover the actual edge of the glass mirror. Your wife may not mind but I can tell you that Kathy would want that edge covered as well.

What is a rabbet cut?

To do this, you need to use a piece of wood that has been cut with a rabbet on the underside. This rabbet allows the wood to overlap the edge of the mirror and hide the edge of the glass. The depth of the rabbet equals or slightly exceeds the thickness of the mirror. Many traditional lumber yards often have decorative wood moldings that have this rabbeted profile. You may be able to find one or more pieces of trim that are ready to miter. If not, you can create a rabbet profile with a standard table saw. Be sure to buy or make a small amount of trim for testing purposes. I will describe that in a few moments.

When do you prefinish the wood trim?

Once you have the necessary wood trim, you need to prefinish it before you attach it to the mirror. Finish the test piece of trim with the rest of the wood. Failure to do this may lead to an undesirable look as you look closely where the wood ends and the mirror begins. The reflectivity of the mirror will allow you to see the first one eighth inch or so of the under side of the wood trim. For example, if you were to stain a light wood a dark color, you would end up with a light colored racing stripe around the interior of the wood frame. This same thing can happen if you paint the wood trim a medium or dark color.

Once you have prefinished the wood trim, it is a good idea to let the finish cure for a minimum of two weeks. This wait time will help insure there is no adverse reaction between the paint or urethane and the adhesive that will be used to hold the wood to the glass mirror.

How do you attach the wood to the mirror?

I prefer to use clear fast-setting epoxy when attaching wood to glass. This durable adhesive can often be found at a hardware store or home center. When you are buying the adhesive, purchase or obtain a small piece of clear glass at the same time. You will use the test piece of trim, the epoxy and the scrap glass to see how well the epoxy works.

Follow the directions on the epoxy and mix as directed. Apply a thin coat to the back of the wood trim and tape it to the scrap glass. Use the special low strength painter's tape for this task. Do not use aggressive regular masking tape.

CLICK or TAP HERE to get FREE quotes from Local Glass & Mirrors Services.

Wait the required time for the epoxy to cure and test to see if the wood trim is securely fastened to the glass. If all is well, proceed to epoxy the wood trim to the mirror. Take your time and do not use too much epoxy. You do not want any epoxy to drip down onto the face of the finished mirror.

Save for a Rainy Day

electronic spreadsheet

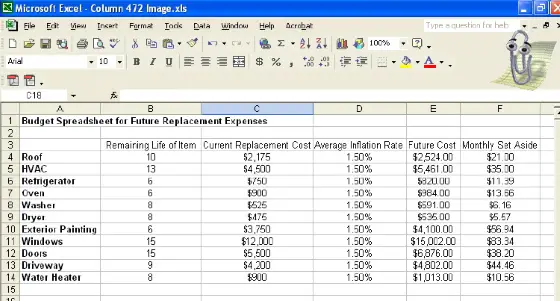
Save for a Rainy Day Accounts | An electronic spreadsheet can help you determine how much money you need to set aside each month for periodic repairs. Image credit: Tim Carter

DEAR TIM: I realize that interest rates are at or near historic lows, but my home improvement emergencies and needs don't always happen at once. It seems I always fret about how to pay for the next thing that breaks or needs updating. Is there a way to create a realistic budget for home repairs and emergencies? If so, how do you account for things that seem to have a medium to long useful life? Maria B., Cincinnati, OH

DEAR MARIA: Owning a home is indeed wonderful, but the maintenance baggage that comes with home ownership can cause financial hardships on a frequent basis if you don't put away money on a regular basis. To make matters worse, if an expensive repair becomes necessary when funds are limited, the low bidder may actually cost you more money down the road when his work falls apart prematurely or he causes damage to parts of your home that previously were in fine shape. Home maintenance financial issues can be challenging and complicated to say the least.

It is extremely interesting how many people who buy new homes think they have nothing to worry about for a very long time. Anyone who has bought a new condominium knows differently.Those who took out a loan for their condos not only have to pay a monthly mortgage payment but they also have to pay a monthly condominium assessment fee. Part of that fee covers current expenses of garbage removal, hallway cleanup, security, grass cutting, etc., but a significant portion of the fee is actually salted away in an interest-bearing savings account to pay for common space repairs that may be one, five or even 15 years down the road.

What is a sinking fund?

Everyone who owns a home, no matter if it is new or 100 years old, needs to create a special savings account to cover the cost of future home repairs. Accountants often call this a sinking fund because you need to make regular payments into a fund whose proceeds will pay off a future expense or expenses. The trouble is, many people do not set aside enough money each month and they do not raise the monthly payment each year to account for inflation.


If you want to see the full size image of the Spreadsheet page I created showing an example of different items in a typical house, the remaining useful life at that point in time for each item, and how much money you need to put away each month to be prepared for the anticipated cost, then Click Here now.

If you want to make your own calculations, open the Save For A Rainy Day Google spreadsheet. Enter your information and see how much you will have to save for that rainy day. A Google account is required to view the spreadsheet. Signing up is free. If you aren't currently signed into your Google account, the above link will take you to the sign in or sign up page.


How do you get starting saving for the rainy day?

If you live in an existing home, the best way to get started is to complete an appraisal of all of the major systems in your home. Inspect your roof, heating and cooling equipment, appliances, exterior surfaces, windows, doors, exterior paving, plumbing, and possibly your electrical equipment. Determine the condition of all of these and more importantly the remaining useful life in each category. Fortunately, some things in the above list have longer useful lives than others. If they all had the same useful lives and were installed at the same time, they might all go bad at the same time. This could become a financial time bomb.

Where do you get quotes on replacements?

Try to get quotes as to the current cost to replace each item on the list. Friends and neighbors who have had similar work done may be able to help you with pricing. Do not rely on a price that is 18 months old or older. If you can get free estimates from contractors that advertise this service, do so. Be sure to always ask how long the repaired or new item will last. This information will be needed to keep your sinking fund calculations accurate as time passes.

To determine how much money you need to set aside now for future repairs start with just one item on the list. For example, let's say you determine your roof has only ten more years of useful life. If your roof is 15 squares in size and the current roof you prefer costs $145.00 per square for total replacement, then it would cost $2,175.00 in today's money to have a new roof installed.

Assuming a 1.5 percent inflation rate per year over the next yen years, you will need $2,524.00 to pay for the roof replacement. Since there are 120 months between now and when the roofer pulls away from your house, you should begin to set aside about $21.00 per month. This computation does not cover the interest that will accrue as that money sits in the savings account. Use that extra money to cover any cost overruns or estimating mistakes.

CLICK or TAP HERE to get FREE quotes from local General Contractors.

Using a spreadsheet to calculate your monthly deposit

To get the total number you need to deposit each month into your new sinking fund, you must run the calculation for each item on your list. This total number will possibly surprise you. If saving money is not an option because your budget is already too tight, you will have to make these payments in another fashion. My guess is that you will bundle the repairs into one lump sum and then apply for a home equity loan. One thing is for sure, you will pay the money in one form or another. I suggest you set aside money now by cutting back or eliminating some other extravagance in your lifestyle.

Wide Variety of Blacktop Sealers

red blacktop driveway

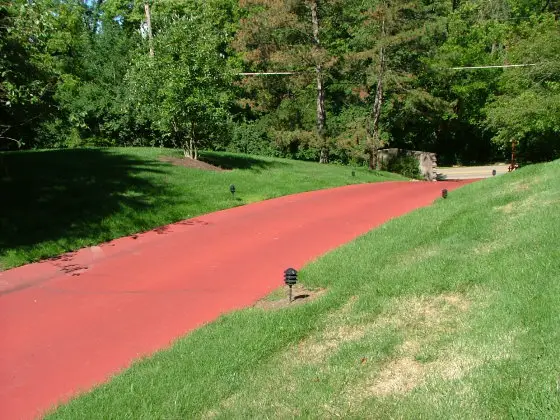
Blacktop Sealer | Your monitor is fine. This is a red blacktop driveway sealer applied by a professional driveway sealing company. Not only do they seal driveways, but they also seal tennis courts on a regular basis. Start thinking outside the box if you want something other than a black driveway. Photo Credit: Tim Carter

Best Blacktop Sealing Checklist - Get Mine and Hire the Pro

DEAR TIM: My asphalt driveway has seen better days. The original deep-black asphalt surface is now gray and the drive has several cracks in it. The surface is not in bad shape. What is the best sealer for the money? What do I have to do to achieve professional results? When is the best time to apply asphalt sealer? Bobbie S., Lolo, MT

DEAR BOBBIE: It sounds to me as if you have captured the perfect moment to save your asphalt drive surface. Of course, if you were from the East coast, I would have said hot top drive, and had you been from the Midwest, I would have mentioned blacktop. It is fascinating how the same paving material is called different names by different people. No matter what you call it, the process to preserve and maintain it is the same.

What are the types of asphalt sealers?

There are two basic asphalt sealer products. One is a simple asphalt emulsion where regular asphalt is suspended in water. Water-based asphalt sealers are earth-friendly as they do not cause ozone pollution. Perhaps the most popular asphalt sealer is a coal tar-based product. Coal tar is a by-product distillate when coal is made into coke for the steel industry.

Do You Want the BEST Contractor to Seal Your Blacktop? 

Go Here and Get my Ask the Builder Blacktop Sealing Checklist!

It's GUARANTEED to help you Hire the BEST CONTRACTOR.

What are the advantages of coal tar asphalt sealers?

Coal tar asphalt sealers have many advantages over their asphalt competitors. For one, they have built-in ultraviolet stabilizers, and as such, they stay blacker much longer than an asphalt-based sealer. Coal tar sealers are chemically different from asphalt, and this difference allows them to resist damage from spilled gasoline, oil, brake, and transmission fluids. These fluids can rapidly eat away at asphalt drives and sealers.

How do you apply asphalt sealers?

To obtain professional results when applying asphalt sealers, you need to do many things. Patience is the first thing you need to pull out of your toolbox. The preparation work can often stretch over several days and possibly a week. The driveway surface must be cleaned. You must remove all fine dirt, silt, mud, oil and any foreign material. You can pressure wash the surface, so long as you do not use so much force as to erode the asphalt surface. Pressure washers are excellent tools to deep clean cracks in asphalt drives.

Once the cracks are clean and dry, you can begin to fill them. Follow the instructions on the label of the crack filling products. Deep and wide cracks will probably need two applications as the material often shrinks as it dries. Many crack fillers insist that their products are thoroughly dry before you apply a coat of sealer. It may take several days for the crack filler to become sufficiently hard so that it can be coated with sealer.

What is the best sealer to purchase?

If you purchase a high-quality sealer, you will not have to struggle to mix it. Most modern, high-quality sealers are formulated as no-stir or easy-stir. It is important to make sure the product is mixed well and homogeneous if you want consistent color results. Your neighbors will know if you slack off when mixing any asphalt sealer. Failure to mix well results in a blotchy appearance with different shades of black. Low cost and quality sealers must be stirred very well as the resins separate from the water.

You should buy one of the highest-priced products since you are a person who lets their driveway sealer wear until the blacktop turns gray. Some people prefer to have a jet-black driveway each season. These people should use low-cost sealers that wear quickly. It is a huge mistake to install top-quality sealers each year. Doing so creates layers of sealer that can actually peel over time.

When is the best time to apply an asphalt sealer?

The best time of year to apply asphalt sealer is when the weather is warm to hot. All too often, people procrastinate and wait until fall to seal their asphalt driveways. Virtually every sealer tells you to avoid applying it if the outside temperature drops below 50 F during the application and drying phase. It simply makes better sense to avoid brushing up against this low temperature. I recommend that you get busy right now while the summer sun is high in the sky.

New Water Heaters are Safer

water heater

New Water Heaters are Safer


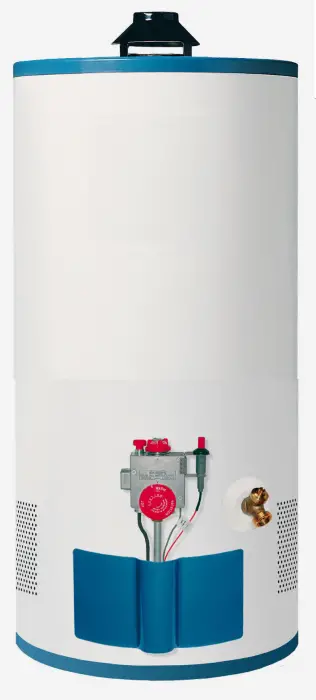
DEAR TIM: I was shopping for a new gas water heater and looked closely at the labeling. I never realized that the pilot light and actual burner flames could ignite vapors from flammable liquids. I have a friend who stores gasoline and other flammable liquids in their garage which also happens to be where their water heater is located. Why hasn't their house gone up in smoke? Is the danger real or imagined? Are gas water heaters safe? Should I buy an electric heater? Sally F., Lansing, MI

DEAR SALLY: Existing gas water heaters are safe. The unsafe part of the equation happens to be us. We humans frequently do unsafe things. Stop by your local fire department and ask the officer in charge how many fires they have extinguished that were caused by negligent humans who stored flammable liquids in a very unsafe manner. Common sense should tell you that any flame or spark in the presence of invisible flammable vapors is a recipe for disaster. Loss of life is a reality. But do you need to buy an electric water heater? I think not.

What are water heater manufacturers doing about the flammable vapor issue?

Interestingly enough, the major manufacturers of gas water heaters decided to be very proactive with respect to the flammable vapor issue. With the approval and cooperation of the Consumer Products Safety Commission, these major water heater manufacturers began to jointly study the issue. They shared research and patents while they individually developed separate new gas water heater products that stop the ignition of flammable vapors outside of the water heater. This was a voluntary effort on the part of the manufacturers.

What is a flame arrestor barrier?

Flame arrestor barriers represent an enormous technological safety advancement for traditional storage water heaters.

Effective July 1, 2003, all new 30, 40 and 50 gallon gas water heaters that use a traditional atmospheric vent must meet a new standard. This standard was written by the American National Standards Institute (ANSI) and it basically states that any heater meeting the above description made after this date must be designed so that vapors created by spilled gasoline near the heater will not ignite outside of the water heater. Thirty, 40 and 50 gallon power vent water heaters must meet this standard on July 1, 2004. All other residential models must meet this same ANSI standard on or before July 1, 2005.

These new heaters are very interesting as they all employ a special one-way technology that allows regular combustion air as well as flammable vapors to enter the combustion chamber of the water heater. But if flammable vapors enter the sealed combustion chamber and ignite, the fire can't go backwards and ignite the rest of the vapors just outside of the heater. More importantly, the heaters have built-in sensors that detect the burning vapors. The designs of the heaters are such that the supply of gas to the heater and pilot light is shut down.


CLICK or TAP HERE to get FREE BIDS from local plumbing contractors.


What is the biggest problem for water heaters?

Perhaps the biggest problem that all of the new water heaters face is lint, dust and oil. In the past, many people were not concerned with dusty and lint-covered appliances in a basement or garage. But the new heaters built with this advanced safety technology will work best when you keep them free of as much lint and dust as possible. As you begin to see these new water heaters in the marketplace note that some will have filters and others will not.

If there happens to be airborne dust and lint in your environment, be aware that this particulate matter can and will find its way into the water heaters unless you stop it in some manner. You may choose to maintain a cleaner environment to stop problems before they begin. You may choose to use a water heater that sports an external filter that is easy to clean. Or you may choose a heater that claims to never need cleaning, although the dust and lint most certainly is accumulating somewhere within the heater. My advice is to do your best to eliminate lint and dust in the vicinity of the water heater and buy a water heater that fits your lifestyle.

How to protect your family from flammable liquids?

If you want to really protect yourself, your loved ones and your possessions, I think the best advice is to schedule a fire prevention meeting at your home with your local fire department. Ask the visiting official about flammable liquids and the absolute safest way to store them. Be aware that these include gasoline, kerosene, paint thinner, etc. I am quite certain the fire official will tell you how to safely store them.

Finally, do not be lulled into a sense of security with these new, safer water heaters. When you buy one, do not think for a moment you can now store or work with flammable liquids and be immune to danger. Gas water heaters are by no means the only thing that can ignite the invisible and deadly flammable vapors!

Edging With Granite Cobblestones

granite cobblestone

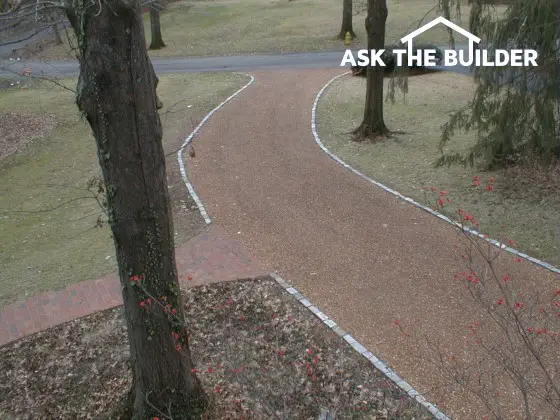
Granite Cobblestones Make Great Edging

"The cobblestones I have used in the past often served as ballast in sailing ships. They were often unloaded while the ships were in port and used as pavement in many older city streets and roads."

DEAR TIM: I have several gravel garden pathways and a gravel drive. They look swell but I am constantly battling vegetation that creeps into the gravel. Mud will also wash onto both paved surfaces during periods of heavy rain. I am sure you have solved a problem such as this. The trick in my case is to install an edging on a very limited budget. I would also prefer to use a material that is very earth friendly and possibly one that is recycled. Beth D., Worcester, MA

DEAR BETH: You have very strong mystic powers. I have solved the problem of migrating weeds for both past customers and my wife. There are any number of ways to do this some of which are more economical than others. But the solution I have used most often gets the highest amount of praise for both beauty, durability and creativity. As you might expect, this solution will be a bit pricey. But the edging I have in mind is one of the few materials that actually holds its value. In some instances, the materials I use actually are worth more money over time.

Where Can You Find Granite Cobblestones?

Visit any home center, garden center or landscaping supply business and you will see all sorts of garden edging products. Some of these products are metal, while others are wood or plastic. Perhaps the least expensive edging products are the thin plastic ones that have a rounded top. Thin edging material comes in handy if your path and drive are curved. These materials bend around very tight radius curves.

The metal, wood and plastic materials might satisfy your earth-friendly requirement as they could be made from recycled materials. Wood edging that comes from sustainable forests would be a very responsible choice.

CLICK or TAP HERE to get FREE BIDS from local cobblestone contractors.

Why is Granite the Best Edging?

But the material I prefer to use for garden edging is one that meets or exceeds your environmental concerns by a longshot. I have a soft spot for rock-hard stones. In particular, I prefer to use salvaged and recycled granite cobblestones for garden and driveway edging. The cobblestones I have used in the past often served as ballast in sailing ships. They were often unloaded while the ships were in port and used as pavement in many older city streets and roads. Modern redevelopment often unearths these stones and the demolition contractor sells them to landscape supply or stone-supply businesses.

Can You Get New Cobblestones?

You can also buy new granite cobblestones. White, pink and gray are perhaps the most common colors. You may find ones that have been tumbled to produce softer edges. Laborers in India, South America and other nations still shape thousands of cobblestones each day and these imports stream into the USA on a regular basis.

Is it Hard to Install Cobblestones?

Installing the cobblestones is very easy. Typically the stones are only five inches thick. I like to have about 1.5 inches of stone show above the paved surface. This creates a formidable barrier for weeds, grass and mud. If you dig a four-inch deep trench you can install a thin base of coarse sand or small crushed gravel under the stones. This material helps you position the cobblestones as they are very rarely the exact same height. It is very important to keep the top of the cobblestones in the same plane so the edging appears uniform.

Do not install the cobblestones one at a time. I find it is best to dig the narrow trench and then position perhaps 15 or 20 stones in a line or around a curve. Use a short piece of 2x4 to help you maintain the finished height above the gravel surface. After you have the stones positioned, stand back and look at the curve or the line. If it looks good to your eye, then add small crushed gravel on the side that contacts the gravel path or driveway. Soil can be used to backfill the other side of the cobblestones. Use coarse sand or very small gravel chips to fill any spaces or cracks where one cobblestone touches another. This gravel helps lock the stones together.

Can Cobblestones Be Installed in Sections?

If the granite cobblestones are too expensive for you, you have two choices: You can install them a few at a time as you can afford them or you can use a more affordable stone product. There is a distinct advantage when you select recycled granite cobblestones. There is only a finite amount of these worn cobblestones left on the planet's face. People are noticing the beauty and unique character of these stones. As such, the price is actually going up each year for these prized works of Mother Nature. I can tell you for a fact that my wife Kathy thoroughly enjoys the granite cobblestones that tame the grass and plants along our gravel driveway.

Paying A Contractor In Cash

Paying A Contractor In Cash

100 dollar bill cash us currency

Pay a Contractor in Cash | This is the Big Green. It's dangerous to pay a contractor in cash. Be SURE you get a signed receipt and better yet, a notarized affidavit BEFORE handing over the cash.

DEAR TIM: My contractor has offered me a 10% discount if I pay him in cash. This seems like too good of a deal to pass up. Is there a danger in doing this? P. V.

DEAR P.V.: Paying your contractor in cash can be very risky. Generally, building and remodeling projects cost hundreds and thousands of dollars. Usually, business transactions dealing in sums such as these are not done with cash.

WATCH THIS VIDEO to see what a CPA has to say!

What's a Good Way to Pay in Cash?

If you decide to pay your contractor in cash so as not to pass up the deal, you must do several things. I recommend that the payment transaction occurs at your bank at a prearranged time. You should not get the money and take it to your home or to the contractor's office. This is very dangerous.

Get FREE BIDS from Local Remodeling contractors.

Should I Get a Signed Receipt?

The contractor must produce a receipt for the amount you are giving him. Make him sign the receipt in your presence and mark the receipt 'PAID'. Have his signature notarized.

Is a Notarized Affidavit the Best Receipt?

A notarized affidavit is the best legal receipt. This is your protection against a valid mechanic's lien being filed against you and your property. The contractor is swearing under oath that as the date on the affidavit he's been PAID IN FULL for all work. This means that he can't file a valid lien for the days BEFORE the signing of the affidavit. The date on the affidavit should be the same day as you hand over the cash.

Obtain a signed, notarized affidavit from the contractor at the same time. This affidavit should clearly state that all workers and material suppliers have been paid. If they have been paid, they will gladly supply a similar affidavit stating that they have, in fact, been paid. Demand these documents.

Should I get Materialmens' Certificates Too?

Yes, if your state has this document, get those as well. This certificate signed by the material suppliers states that they've also been paid in full for the material they delivered to your home. Not all states require this, so call the supply house accounts receivable employees and ASK THEM. Don't trust what the contractor says. A supply house can also file a valid lien on your property if they've delivered material and NOT BEEN PAID.

After you have received all of these documents and you are satisfied with their accuracy, you can then hand over the cash to the contractor. Remember, do this at your bank in the presence of a bank officer. This person will witness that you, in fact, paid the contractor. This same person is often a notary public and will notarize all of the necessary signatures. Dealing in cash can be dangerous, simply because it cannot be traced. You must have a receipt!

Column 001-3