Concrete Slab Cracks

Concrete Slab Cracks

DEAR TIM: I just had a new driveway installed 6 months ago. However, within 3 months, a crack developed in the middle of one of the sections. The crack is getting wider every week. The installer has told me that virtually all concrete slabs crack and that there is nothing he can do to prevent it. Could this really be true? Is there a way to stop the crack from widening? R. A.

DEAR R. A.: I believe that your concrete contractor is only telling you half of the truth. He is, in my opinion, 100 % correct about concrete's desire to crack. However, I disagree with his statement concerning crack prevention.

Concrete is a very unique material. When installed properly, it can be one of the most durable and long lasting products you can use around your home. However, many concrete contractors fail to follow established guidelines with respect to concrete placement.

Durable, high strength, and crack resistant concrete does not happen by accident. You must do many things to achieve these qualities.

Concrete can crack for many reasons. Shrinkage is a primary cause of cracking. As concrete hardens and drys it shrinks. This is due to the loss, thru evaporation, of excess mixing water. Thus, in most cases, the wetter or soupier the concrete mix, the greater the shrinkage will be.

CLICK HERE to get FREE & FAST BIDS from local Contractors who can finish your concrete driveways and floors.

Concrete slabs can shrink as much as 1/2 inch per 100 feet. The actual amount is 1/16th inch for every ten feet of horizontal distance. This shrinkage causes forces in the concrete which literally pull the slab apart. Cracks are the end result of these forces.

Concrete does not require much water to achieve maximum strength. In fact, a wide majority of concrete used in residential work, in many cases, has too much water. This water is added to make the concrete easier to install. It is a labor saving device. This excess water can not only promote cracking, it can severely weaken the concrete.

Also, rapid drying of the slab will significantly increase the possibility of cracking. The chemical reaction which causes concrete to go from the liquid or plastic state to a solid state requires water. This chemical reaction, or hydration, continues to occur for days and weeks after you pour the concrete.

You can make sure that the necessary water is available for this reaction by adequately curing the slab. The use of liquid curing compounds, covering the slab with plastic, wet burlap, and other methods can be used to cure concrete.

Cracking can be minimized by following other guidelines as well. Install the proper strength concrete for your intended use. Concrete is available in many different strengths. The ground upon which the concrete will be placed must be compacted.

Concrete Crack Repair Kits

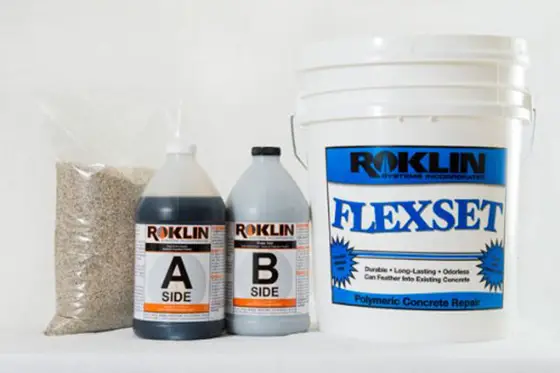
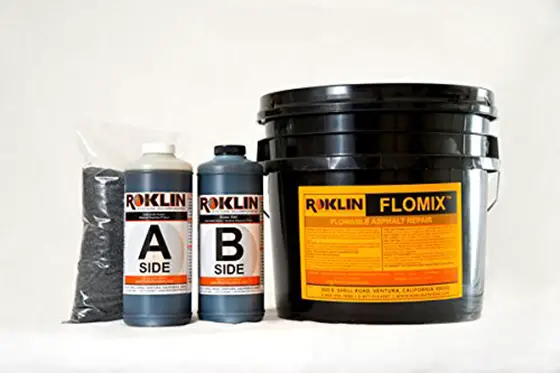
CLICK THE IMAGE to get long-lasting Concrete Crack Repair kits.

Never pour concrete on frozen ground. Install adequate control and isolation joints. Control joints occur at regular intervals in the slab and are intended to account for horizontal and vertical movement in slabs. These joints can be formed with a tool or sawcut soon after the slab has hardened.

The purpose of these joints is to create a zone of weakness where the forces which are pulling on the slab will relieve themselves. Isolation joints allow a slab to move independently of other fixed or stationary objects.

As a last resort, consider installing reinforcing steel. Reinforcing steel for residential purposes comes in two basic varieties, wire mesh or rigid reinforcing bars (rebars). The use of reinforcing steel can help in the event a crack develops.

The steel can often stop the crack from widening and displacing vertically. Reinforcing steel is also quite inexpensive. It is usually very easy to properly install. Steel can significantly enhance the strength and durability of concrete. In addition to all of the other measures taken to prevent concrete from cracking, steel offers a low cost last line of defense.

CLICK HERE to get FREE & FAST BIDS from local Contractors who can finish your concrete driveways and floors.

Column 023

Room Additions – Start with an Interior Design

DEAR TIM: My wife and I recently had a large room addition project completed. We spent months with an architect developing the plans. Now that we are moving into the space, the furniture layout seems cramped and the floor plan is awkward. What did we do wrong? S. S.

DEAR S. S.: The description of your planning meetings tells me that you "forced the plan." This is a very common occurrence. I have seen it happen more often than not.

"Forcing the plan" can happen very easily. This concept describes what happens when you draw a shape for a room or several rooms and then decide what will happen within the room or rooms. I frequently refer to it as working from the outside in. Proceeding with plans in this fashion can be a recipe for disaster.

It is very common for some architects or homeowners to start their planning with a certain size room on a piece of paper. The planning then progresses through stages to see what will fit in this room. Sometimes things are squeezed into the room. Doorways, hallways, closets, etc. can end up in strange places.

Some of the best plans for rooms, room additions, or homes are created when you decide to work from the inside and proceed to the outside. Simply put, decide what you want to do in the space and then put the walls and ceiling on your 'space' to protect it from the elements.

CLICK HERE to get FREE & FAST BIDS from local builders who can finish additions or remodel your home.

Many design schools have specialized programs for individuals who specialize in this type of work. They are called interior designers. These individuals have specific training which allows them to comfortably place furniture and other fixtures in such a way as to maximize function and minimize the space necessary to achieve this function. They are not to be confused with interior decorators.

The training for architects, on the other hand, tends to be oriented more towards exterior design, scale, and form. They often receive specialized schooling with respect to various types of building materials and how the use of these materials can influence the way a structure will look. Many architects are exposed to interior design, but not to the degree of an interior designer.


Adding an addition onto your home? Save more money and use Room Addition Checklist to get the addition of your dreams. My Checklist includes a large cost-breakdown table. I offer a 100% Money Back Guarantee.


Depending upon how complex a project is, it may become necessary to have an interior designer work in conjunction with an architect. Their talents can be blended and the end result can be spectacular. Projects that are not complex may require a minimal amount of time spent with an interior designer.

The design process should generally start with the architect. This individual is knowledgeable concerning zoning laws and setback requirements. It usually is a good idea to obtain from the architect a simple site plan that indicates the limits to which the room addition or home can extend on the lot.

Then take this simple plan to the interior designer. Allow the designer to develop a preliminary drawing. At this point you should be able to turn the bulk of the work over to the architect.

Periodically allow the interior designer to do a quick check of the plans as they become more and more refined. This may seem like an enormous amount of work, but you will be rewarded with a dramatic and functional project.

Remember, the entire concept of this process is based upon working from the inside out. You must try to create a workable plan which provides you with the necessary space to do everything you wish to do. Add your exterior walls and roof only after you are satisfied that the plan will in fact work. Don't fall into the trap of starting with an empty room.


How would you like me to build your new home? It's probably impossible for me to fit your job into my schedule, but I will gladly share hundreds of my tricks and building secrets with you and your builder. Check out my New House Specifications.


Adding to a House is the ideal book for designers and builders who understand basic construction but have not had access to a single source of information that covers the entire process of planning, designing and building an addition.

Adding To A House

No builder or designer's library should be without Adding to a House written by Philip Wenz. CLICK the image above to get the book now.

Adding to a House is also perfect for home owners who intend to contract the work out and want to understand the process so they can make intelligent decisions and work effectively with people they hire. This book will help you avoid costly mistakes, make sure no potential problems are overlooked and handle tricky construction details.

By following the advice in this book designers, builders and home owners will be able to create an addition that solves space problems and increase the value of a house. This book is published by Taunton Press, one of my favorite book publishers, and has wonderful color photographs and easily understood illustrations.

Featuring more than five hundred spectacular full-color photographs, Better Homes and Gardens' 408 - page manual of home decorating and design discusses style, budgeting, color schemes, furniture, fabrics and patterns, window treatments, accessories, and more for each room of the house.

Basically two books in one, Better Homes and Gardens' The New Decorating Book is both a stylish dream book and a practical workbook. The lush color photos present hundreds of ideas to stir decorating fantasies and clear text explains all one needs to know to make those dreams a reality.

New Decorating Book

If you need help decorating your new addition or remodeling project CLICK THE IMAGE above to get the book that will help.

Special features include floor plans, punch-out furniture templates, and graph paper. Whether you're a novice or experienced home decorator, this new, must-have volume will help you make your home everything you want it to be.

CLICK HERE to get FREE & FAST BIDS from local builders who can finish additions or remodel your home.

Column 024

Roof Flashing Leaks

Roof Flashing Leaks

DEAR TIM: My house was recently reshingled. However, leaks are present near a chimney and where a lower roof meets a second story wall. I was able to get up on the roof and look around. The metal work around the chimney and along the wall was not replaced. It is old and rusty. However, I discovered fresh silicone caulk in and around this metal work. Was the caulk installed incorrectly? J. W.

DEAR J. W.: YES! The caulk was installed incorrectly. It should have never been used in the first place! Caulk is not a substitute for roof metal work or flashings.

Roofing shingles are a fantastic product. Many of them are easy to install so as to create a leak proof covering in normal weather conditions. When installed properly, they shed water just as the feathers on the back of a duck. This system works great as long as you have nothing sticking through your roof.

However, almost every roof has something sticking through it. Chimneys, plumbing vent stacks, skylights, roof vents, exhaust fans, walls, etc. are examples. Whenever objects like these penetrate a roof surface, you must install metal flashings along with the shingles to create a leak proof situation. This technology has been in use for hundreds of years. It is time tested.

Pipe Flashing

CLICK THE IMAGE to get the an easy to install ultimate pipe flashing.

These flashings are almost always two part systems. They are called different things in different parts of the country. In most instances, the system consists of a base or step flashing which can be 'laced' into each shingle layer and a counter flashing which covers the base or step flashing. The flashings can be made from tin coated steel (terne), galvanized steel, copper, lead, or any other metal which can be easily soldered, brazed, or welded.

CLICK HERE to get FREE & FAST BIDS from local roofers who can repair your leaky flashings.

There are several reasons why these flashings need to be a two part system. One of the reasons has to do with your question. Roofs, as well as houses, have a great tendency to expand and contract due to seasonal moisture differences and temperature differences. However, the things that stick through roofs do not always expand or contract at the same rate. Some thing barely move at all (chimneys).


This expansion and contraction must be allowed to occur without creating the potential for a roof leak. The two part flashing system allows this to happen. The one part of the system moves with the roof and framing, while the other part of the flashing stays attached to the chimney, side wall, skylight, or other part which is stationary or moving at a different rate.

The caulk, which was used in an attempt to seal the rusted flashing, does not have the ability to handle the movements which occur on a regular basis. More often than not, the caulk will not be able to bridge the cracks that develop.


Avoid repairing roof leaks yourself! Find a professional using my Roofing Replacement / Repair Checklist. I offer a 100% Money Back Guarantee.


Remember how I mentioned that the technology has been around for hundreds of years? Professional roofers have never depended upon caulk in the past. They instead solder or braze the joints in their metal work. This method attaches the metal together so it acts as one piece.


Bath Exhaust Hood

CLICK THE IMAGE to get an easy to install fully assembled Bath Exhaust Hood.

Caulk, on the other hand, relies strictly on its ability to stick to something. If that 'something' is dirty, oily, dusty, rusty, or expands and contracts a great deal the caulk may have trouble holding on. You can depend on solder.

Call your roofer back and have new flashings installed that are soldered.

CLICK HERE to get FREE & FAST BIDS from local roofers who can repair your leaky flashings.

Column 025

Are There Dispute Resolution Alternatives

DEAR TIM: I became involved in a dispute with my contractor. To make a long story short, we ended up in a court battle which lasted two years and cost thousands of dollars in attorney's fees. The case was not settled to my complete satisfaction. Can you suggest any other ways to settle disputes? Is there a way to make both parties agreeable to an alternative method? J. M.

DEAR J. M.: Court battles can be an extremely distasteful situation. Often the parties involved in the dispute fail to recognize historical facts concerning many court battles. Rarely does either party 'win'. Generally speaking, court battles become blood baths.

They almost always are long and drawn out and the financial costs can be overwhelming. Fortunately, there are several other methods that can be used to resolve a dispute.

Simple negotiation between the parties is frequently considered to be the first step in dispute resolution. Using this method, both parties should try to calmly discuss a solution to the problem. Often, the parties may employ attorneys to negotiate. However, it is not necessary.

Dispute Resolutoin

CLICK THE IMAGE to get a comprehensive guide to settling disputes without litigation.

The parties should realize that the negotiations which occur at this level are often the exact same negotiations that occur just before going to a full blown trial. Realizing this, the parties can save months of time and huge sums of money to arrive at the same destination.

In the event that negotiating fails, the next level of dispute resolution is mediation. Mediation is usually conducted in a private, informal setting. A disinterested, knowledgeable third party should be chosen by the parties to mediate the dispute. This person does not try to say who is right and who is wrong.

He or she attempts to convince each party that the dispute will eventually have to be resolved. A mediator usually tries to offer suggestions as to how the dispute can be solved fairly. For the most part, mediators have no power to invoke a decision. They simply try to get the parties to settle.

Another method of dispute settlement is arbitration. Arbitration can be either binding or non-binding, depending upon what the parties agree to do. It is a more formal method of dispute resolution. It many ways it resembles a typical court case.

The individuals who are arbitrators often have been trained and often have experience in the situation which is being disputed. There are nationwide and local associations who perform arbitrations. Many local Better Business Bureaus also offer arbitration services to their members.

Getting To Yes

Getting to Yes is an aid to helping people come to mutually acceptable agreements from various sorts of disputes. CLICK THE IMAGE to get the book now.

A rarely used form of dispute resolution is that of private judging. This method is actually quite simple. The parties agree to employ a retired judge to make a decision regarding the dispute. It is a formal proceeding similar to a regular court trial.

Often the parties agree that the decision of the judge will be final. This method is attractive in some respects, simply because it takes much less time than a regular court case. Also, as long as the parties agree to a binding decision, neither party can appeal the decision.

The key to dispute resolution is to avoid it in the first place. Make sure that you have a very clear and concise contract before starting your job. Include in your contract specific language which addresses how you will settle a dispute.

Because disputes often cause people to polarize and become less likely to agree on anything, choosing a method of dispute resolution before it happens makes sense. Be sure to check with a competent contract attorney to make sure that this type of language and dispute resolution is permitted in your state. Good luck!

Column 026

Hardwood Floor Cracks

Hardwood Floor Cracks

QUESTION: We had strip hardwood flooring installed throughout our new home. However, after nine months in the house some large irregular cracks have appeared between some of the pieces. The cracks occur more in the center of the house. I can see the underside of the subfloor from the basement and it looks dry. The floor is also strong, it has no 'bounce' to it. What happened?

ANSWER:  Your description of the problem leads me to believe that you were a victim of edge crush or compression set. If in fact this is your problem, it will not be an easy one to remedy.

Edge crush or compression set occurs when a newly installed hardwood floor absorbs moisture and swells prior to being finished.  Because hardwood floors are installed 'tight' in the first place, any swelling whatsoever can cause the pieces of wood flooring to push up against one another.  This wouldn't be such a problem except for one thing. 

AsktheBuilder Podcast

CLICK this image and listen to the first call on the podcast. I talked to Jill about how to repair wood kitchen flooring, and possibly installing an inlay border as an option. Copyright 2018 Tim Carter

Strip hardwood flooring is manufactured so that the pieces interlock.  Each edge of the flooring has either a tongue or a groove.  However, during the milling process, when each piece of hardwood flooring is shaped, the tongue side is not milled at a 90 degree angle to the face of the flooring that you walk on.  This is done intentionally. 

The tongue edge is milled so that only the top of that piece touches the groove side next to it.  This process permits the wood flooring to be installed tightly even if there are slight imperfections in the subfloor or on the hardwood pieces themselves.

CLICK HERE to get FREE & FAST BIDS from local contractors who can install or repair your hardwood floor.

As with every pro there is always a con.  So to with this.  Since just the top edge of each board is in contact with the next piece, any significant pressure will compress the wood fibers.  These fibers rarely expand back to their original shape and size. 

The hardwood floor manufacturers know that this can occur.  They have developed strict installation guidelines which, when followed, eliminate this problem from happening.

hardwood floor got wet, swelled

This hardwood floor got wet, swelled, then dried. Cracks are now telling the ugly tale. Photo Credit: Tim Carter

The moisture that caused your flooring to swell could have had many origins.  The wood may have been delivered on a rainy  or snowy day.  The floor could have been installed in damp or humid weather. 

The weather may have been fine, but moisture was introduced by construction activities.  The drywall or plaster may not have been thoroughly dry.  The framing lumber may have had residual moisture from being exposed to rain. 

Painting activities can release large quantities of moisture into the house.  Freshly poured concrete in the basement can also raise the humidity level.

Hardwood Floor Repair Kits
There are all sorts of products to do minor hardwood floor repairs. CLICK THE IMAGE to see ALL of them.

Also, you mentioned that your problem was most severe at the center of your house. My guess is that your furnace and main duct trunk lines lie directly underneath the problem areas. In all likelihood, the ceiling in your basement above these areas is uninsulated.

The heat from the furnace and the ductwork 'cooked' the flooring in these areas and caused them to shrink more than the areas at the edges of the rooms.

You can avoid these problems by making sure the flooring material is dry before installation. Also, the interior of the house must be dry. The floor should be finished as soon as possible after installation. This process seals the wood and makes it very difficult for swelling to occur.

In your case, your only solution may be to fill the cracks with color putty and invest in some decorative area rugs.; Refinishing of the floor will not cause the cracks to disappear.

CLICK HERE to get FREE & FAST BIDS from local contractors who can install or repair your hardwood floor.

Column 027

Superb House Plans

DEAR TIM: My husband and I are getting ready to build. We have come to the conclusion that we need the services of an architect. Our contractor, however, has told us that there can be a wide range in quality of residential house plans. Is this really true? If so, how do you spot a high quality set of house plans? J.W.

DEAR J. W.: I feel that your contractor's statement is extremely valid. Residential house plans, just like many other items, come in varying degrees of quality and detail. The primary reason for this lies in the training that many architects receive as they work towards their degree. A large number of schools that offer architecture degrees base their scholastic programs on commercial architecture.

This approach is very sound, because the vast majority of architecture jobs are in the commercial field. For the most part, architecture students do not concentrate on residential problems in their schooling. However, after graduation, some architects choose to work in the residential field.

Some may work for an experienced residential architect and serve an "apprenticeship." Others may choose to dive in head first and quickly expand their knowledge through the school of hard knocks. In either case, much of the knowledge and expertise is self-taught.

Hands on construction experience can be a tremendous help for those young architects who are willing to make the investment. There is no substitute for this type of training.

CLICK HERE to get FREE & FAST BIDS from local designers who can help you make superb house plans.

As a builder, I feel that house plans should be judged on content, not design. Because the plans often are the primary media by which the homeowner's wishes are transmitted to the builder, they must be accurate and specific. Blueprints without detail leave them to create assumptions. You and I know what happens when you assume something.

High-quality house plans often contain an accurate site plan showing the placement of the building on the real estate. Utility connections and routes are indicated as well as present and finished topography or grading profiles. Floor plans are generally drawn for each level of living space.

These plans are dimensioned accurately and drawn to scale. All windows and doors are indicated as well as the direction in which they open. All interior elevations are drawn showing cabinet layouts, all fixtures, and configuration of any built-in furniture.


How would you like me to build your new home? It's probably impossible for me to fit your job into my schedule, but I will gladly share hundreds of my tricks and building secrets with you and your builder. Check out my New House Specifications.


Exterior elevations showing all detailing and separate mechanical drawings are generally found on high quality blueprints. Electrical plans should never be drawn on the main floor plans. They should have their own page.

Top notch plans have adequate cross sections to depict all structural members. These cross sections are extensively labeled so that all structural items and construction materials are spelled out. Nothing is left to question.

Superb house plants also have window, door, and room finish schedules. These tables clearly indicate what happens in each room. They are extremely important. Written specifications almost always accompany a good set of plans.

These specifications cover general conditions of the project and often spell out specific fixtures which are to be used as a part of the job. High quality blueprints can be worth their weight in gold. They are the key ingredient to a successful job.

CLICK HERE to get FREE & FAST BIDS from local designers who can help you make superb house plans.

Column 028

Prevent Blacktop Cracks From The Start

Prevent Blacktop Cracks

DEAR TIM: My husband and I are going to have a new blacktop driveway installed. I love blacktop, but I dislike the cracks that develop in blacktop. What, if anything, can be done to minimize or eliminate cracking in blacktop? Should I simply install a thicker layer of blacktop? K. C.
DEAR K. C.: Your questions are excellent. If I knew how to eliminate cracks in blacktop, I wouldn't be writing this column. I would be retired and on a beach somewhere in the Caribbean! However, I can tell you what you can do to help to minimize cracking.

I feel the best place to start is to explain just what blacktop is. A grasp of this information will help you better understand blacktop's limitations. Blacktop is a generic term for hot mix asphalt or asphalt concrete. The makeup of asphalt concrete is similar to the makeup of regular concrete in many respects.

Blacktop consists of aggregate and asphalt cement. Concrete consists of aggregate and cement. Both of them derive a great deal of strength from the size and amount of aggregate.

Asphalt cement is a product of the refining process of crude oil. There are different grades of asphalt cement. These grades are based on chemical makeup and viscosity. At or about 80 degrees F, paving grade asphalt is a semisolid. When heated to 300 degrees F it becomes a thin liquid.

CLICK HERE to get FREE & FAST BIDS from local Asphalt Pavers who can install your blacktop driveway.

Asphalt concrete is made by mixing this product with a mixture of dried aggregate. The aggregate becomes coated with the asphalt cement in the mixing process. The entire batch will now stick to itself and just about anything else it touches.


Would you like to have a gorgeous driveway? How about step-by-step photos and instructions that show you how I had my own tar and chip drive installed? If so, you might want my Instant Download Tar and Chip eBook.


This manufacturing process gives blacktop a unique characteristic. Blacktop is somewhat flexible. This flexibility is both an advantage and a disadvantage. The advantage is that it can stretch somewhat without cracking.

Blacktop's disadvantage is that in and of itself, it has very little tensile strength. Blacktop derives the greatest portion of its strength from its base or foundation. Herein, lies the source of a majority of the reasons for crack development in blacktop.

The base for many blacktop driveways is crushed gravel. This base is more often than not applied directly on the soil. The base and the soil have to be able to support the loads which will be placed on it. For the base to attain its maximum strength, it must be placed on compacted soil.

blacktop cracks

CLICK THE IMAGE to repair the cracks in your blacktop that sour your mood.

Furthermore, the base and the soil beneath it must not be allowed to become saturated with water. Water softens the soil and allows the base to move which then allows your blacktop to crack. Poor subsoil drainage can turn the strongest soils into mush. If this mush contaminates the gravel base, the base rapidly looses strength.

Years of research and development have produced some methods which help to solve these problems. Instead of using crushed gravel for a base, a different type of asphalt concrete can be used. This initial layer has very large aggregate which gives it fantastic strength characteristics.

Also, manufacturers have developed geo-tech fabrics which can be laid on the soil before either of the bases are applied. These fabrics prevent soil mush from traveling up into the base, should the soil become over saturated with water.

Crack prevention starts at the beginning of the job. Thickening of the final blacktop layer is not the answer.


Asphalt repair got you down? Save time and money by using my Asphalt/Blacktop/Tar & Chip Installation & Repair Checklist. I offer a 100% Money Back Guarantee.


CLICK HERE to get FREE & FAST BIDS from local Asphalt Pavers who can install your blacktop driveway.

Column 029

Painting New Wood Siding

DEAR TIM: We are in the process of building a new home which will have redwood siding and trim. We are going to paint the new house. The painting contractor mentioned in her quotation that all of the exterior siding, trim, and other wood should be backprimed. What is backpriming? Is it necessary and / or worthwhile? M. S.

DEAR M. S.: As long as you feel that her quotation is in order, give her the job! She is one of the few painters I know of who really is on top of her game. Backpriming is absolutely necessary on redwood. It is also an excellent idea for any exterior wood siding or trim.

Backpriming is really a very simple procedure. It simply means painting the back side and all other hidden edges of a piece of wood. Just think of it as a basic form of plastic shrink wrapping. Very few painters take the time to do this extremely important step.

However, it is not always the painters fault. Builders must allow the painters sufficient time and space to perform this task prior to the installation of the wood by the carpenters.

Backpriming can dramatically extend the life of the initial and all subsequent paint jobs. For this reason alone it should be seriously considered. Backpriming extends the life of a paint job by virtually eliminating the possibilities of paint peeling and blistering.

CLICK HERE to get FREE & FAST BIDS from local painters who can paint your new wood siding.

Here is how it works. Water, for the most part, can easily enter and exit wood. The structure of wood makes this possible. That is how the water from the soil gets up to the leaves while a tree is alive. However, this property is a negative quality when the wood is on your house.

Under normal atmospheric conditions, water wants to evaporate. That is why people hang clothes up to dry. This same thing will happen to a wet piece of wood. If the wood does not have a coating on it, it really isn't a problem.

However, if something gets in the way of the water which is trying to evaporate, the water vapor will simply push it out of the way. This effect can be dramatic with highly flexible latex paints. Evaporation can create a high enough vapor pressure behind the surface of the paint so as to create a bubble not unlike that of bubble gum.

Paints are simply coatings. Many are sold on the basis of their effectiveness in protecting wood from water and the elements. The trick is to use this technology to your advantage. By applying paint to an entire piece of wood, you make it extremely difficult for water to enter the wood in the first place. This process is not as difficult as it sounds.

An advantage to backpriming is that it can be done on the ground and very quickly. If you plan your work, have the weather on your side, and have plenty of room, it goes very quickly. Simply set up some saw horses or a large painting platform and get out the roller or spray equipment.

Rolling or spraying the paint will make fast work out of this process. First, paint the side of each board which will not be seen after it is installed and all edges. Set aside to dry. After the paint is dry, paint the remaining unfinished side.

However, glide a paint brush over this side after you have applied the paint. This will give it the texture of a hand brushed application. Hand brushed finishes tend to look more professional.

I also recommend applying the second coat on the ground as well. By doing this, the painter usually only has to set ladders and scaffolding one time. This is safer and quicker. Finally, don't forget to leave a brush and some paint for the carpenters. Every time they cut a piece of wood, the cut edge must be sealed.

These cuts usually expose the wood's end grain. End grain is the easiest and fastest way for water to enter wood. If this end grain is not sealed, all of your work and effort will be wasted!

You never really appreciate how smooth a painting job can go -- and how much better it can look and how much longer it can last -- until you sit back and watch a pro at work. And even then, you're usually hard-pressed to duplicate your painter's prowess on the next project. This book will change all that. House Painting - Inside and Out is written by two men who are eager to show you what they have learned from years of professional painting experience.

With their help, you can avoid common mistakes, learn everything you need to know to get professional results, and pick up time-saving tricks of the trade along the way. You'll learn how to assess and plan a paint job,choose everything from the right paint to the best brushes, rollers, scrapers, and sanders for your job, professionally prepare every kind of interior and exterior surface, whether you are painting new or old drywall, woodwork, plaster, siding, stucco, aluminum, or vinyl - brush, roll, spray, and touch up all these surfaces, work--and clean up--safely, responsibly, and efficiently. There's even a gallery of great paint jobs to show you what you are capable of. It is published by the Taunton Press, a company with the highest quality standards. I highly recommend this book.

CLICK HERE to get FREE & FAST BIDS from local painters who can paint your new wood siding.

Column 030

Whole House Fan Sizing

DEAR TIM: I have a whole house fan located in the second floor hall ceiling of a house I just purchased. The fan and louvers look new and seem to operate smoothly, but the fan doesn't seem to exhaust very much air. I have seen these fans operate in other houses very effectively. What could be the problem? Laurie B., Beavercreek, OH

DEAR LAURIE: I hate to be the bearer of bad news, but you may have several problems. Fortunately, they are quite simple to diagnose. The effectiveness of a whole house fan depends upon several key setup features. Everything must be just right, or the fan will not operate properly.

Whole house fans are work horses. They are designed to move great quantities of air. That is why they are able to provide comfort during periods of hot weather. The principal by which they operate is extremely simple. During the daytime, the air inside of your house gets hot and stale.

whole house fan

There are a wide variety of fantastic whole house fan products available. CLICK THE IMAGE to see them.

Generally speaking, after sunset the air temperature outside of your house is lower than the air temperature inside. A whole house fan pushes the hot air out of your house and replaces it with the cooler, outside air.

Air movement creates a cooling effect by increasing the rate of evaporation from your skin. The faster that perspiration evaporates, the cooler you will feel. If you can completely replace the air inside of your house every two minutes, you should experience this cooling effect.

CLICK HERE to get FREE & FAST BIDS from local contractors who can install the correct size house fan for your home.

Because houses come in a variety of sizes, whole house fans must be made to accommodate the different volumes of air. The strength or power of a whole house fan is measured by the amount of cubic feet of air per minute (CFM) that it can push. These ratings are commonly in the range of thousands of feet per minute.

There is a simple way to determine the size fan you need for your house. Assuming you have standard eight foot ceilings, simply multiply the total square footage of the finished living space of your house by three.

This number represents the minimum cubic feet per minute that the fan must push. Simply purchase a fan that has a CFM rating equal to or greater than the number you calculated.

There is one other major consideration. These powerful fans must be able to easily push the hot air out of your house. They require openings in the roof or gable ends of an attic space to do this.

If these openings are not large enough, the fan will spin ineffectively. For every 750 CFM that the fan is rated, you need a minimum of one square foot of free open exhaust area. Beware, insect screening placed over these openings can significantly reduce their free exhaust area. Many louvers and roof vents are stamped with a rating of their free open exhaust area.

Now, let's solve your problem. First, check to see if you have the right size fan for your house. Then, check to see if the exhaust areas in your attic are large enough to handle the CFM capacity of the whole house fan. If your fan is belt driven, make sure that the belt is adjusted to the proper tension.

Based upon the model number of your fan, check to see if it is a multi-speed fan or variable speed. Possibly your fan was operating at its lowest speed when you checked it. By the way, did you have several windows or doors open when you turned the fan on? Remember, you have to provide the fan with a readily available and ample supply of replacement air.

Author's Notes

February, 1999

There are new variations on the traditional monster attic fans. You can now purchase quiet dual blade fans that operate at lower CFM rates - up to 1,000 CFM - and still do a very good job of moving air through your home. These fans have insulated doors as well.

CLICK HERE to get FREE & FAST BIDS from local contractors who can install the correct size house fan for your home.

Column 031

Mechanic’s Liens

DEAR TIM: I recently paid my contractor in full for a large remodeling project. Several weeks after paying him, three sub-contractors and two material supply houses filed liens against my property. My attorney has advised me that these liens are in fact valid. Is just doesn't seem fair that I have to pay twice for the work. How could I have avoided this unpleasant situation? E.B.

DEAR E. B.: If it is any consolation, many people have been mired in the same situation as you have described. Fortunately, there are steps that you can take to prevent this from happening to you in the future. The first thing you need to do is to speak with a competent real estate attorney in your state concerning lien law in your state .

Many states have very specific laws regarding the rights of workmen and businesses that offer goods and services to homeowners. Often, these laws allow workmen and businesses the right to place a lien against a piece of real estate.

A lien simply is a matter of public record which states that there may be a valid, unpaid debt against the specific real estate named in the lien. In certain states, a lien can be a very powerful legal instrument.

For the most part, the laws were enacted to help protect honest workmen and material suppliers who, for one reason or another, don't receive payment from a homeowner. In your particular case, the individuals who filed the liens haven't been paid. You paid your contractor, but he, for some reason, decided not to give your money to the sub-contractors and the material suppliers.

CLICK HERE to get FREE & FAST BIDS from local builders who can complete your addition or remodeling project.

This situation is very easy to avoid. However, it takes some work on your part. Because liens can have serious implications, the work is worthwhile.

Prior to the start of a project, ask your contractor to provide you a list of every person or sub-contractor who intends to work on your project. This list should contain the name and address of each person and what task they will be performing.

Also, ask for a list of material suppliers who will be delivering material to your house or job site. Make sure the lists are complete. In other words, if your job involves painting, there better be the name of a painter on the list.

Contractors' & Homeowners' Guide to Mechanics' Liens

Stressed because of liens? CLICK THE IMAGE to get a book that will help you find relief.

Monitor the building process as closely as you can. Introduce yourself to each and every person at your job site. Ask them who they are and what they are doing. Make notes. Compare these notes with your list.

Depending upon the laws in your state, each and every person who works at your house and/or delivers material to your job site has the right to file a lien if they are not paid!

When it is time to make payments to your contractor, obtain a valid, signed, notarized affidavit or materialman's certificate from each and every individual or business who is owed money. These legal instruments are similar to receipts. You must obtain them.

Consider making out your payment checks individually to each person who is owed money. This is a tremendous amount of work, but may keep you out of court. Be sure you make arrangements to do this with your contractor at the beginning of the job.

The best advice is to consult with a competent real estate attorney prior to the start of your job. Ask him or her exactly what documents you should have prior to issuing payments to anyone. Issuing checks to contractors who do not present affidavits can be very risky business!

CLICK HERE to get FREE & FAST BIDS from local builders who can complete your addition or remodeling project.

Column 032