Hanging Hammocks

hammock

Yes, that is me filling my backyard with lots of ZZZzzzzzz's. The sun somehow makes my blonde hair look gray in this photo.

DEAR TIM: I just received a splendid hammock as a gift and now I need to hang it. What is the best way to hang the hammock? What is the minimum and maximum distance trees can be apart from one another to make a hammock work? If my trees won't work, what are my alternatives? Allen W., Cheyboygan, MI

DEAR ALLEN: Just thinking about hammocks makes me sleepy. When the soft cotton ropes of my hammock gently cradle me on a summer afternoon, my troubles fade away as fast as a shooting star steaks across the night sky. I can't think of a more comfortable way to relax than in a hammock that is suspended properly and securely.

I still have the first hammock my wife and I purchased over 15 years ago at a small shop in Pawleys Island, South Carolina. While at the shop, I knew I had a great location to hang it, but I was unsure if it would work. Hammocks come in several sizes and the size you have controls, to a large degree, how it is hung. Since my hammock was a deluxe or two person size, I needed 15-feet of space between the two trees where I wanted to hang it. Believe it or not, when I arrived back home, the spacing was 14 feet 11 inches.

If you have a smaller one-person hammock, you probably can get away with a distance of 12-feet between trees. The way to check is to simply lay the hammock on a clean flat surface. Unfold the hammock on the ground as it will be suspended in the air. Measure the distance end to end from the circular suspension rings where the cotton cords are strung. The spacing between the trees should be about one foot more than the total length of the hammock. Once hung, the hammock develops a slight sag. This works to your advantage as you need some space for the hardware that is used to connect the hammock to the trees, wood posts or metal frame.

I prefer to use one half inch diameter eye bolts as the primary connector. Do not confuse these with eye screws. An eye bolt has a circular closed end loop at its end and fine machine threads that accept a standard bolt and washer. You drill a hole completely through the tree five to six feet above the ground. The threaded shaft of the eye bolt should be two inches longer than the diameter of the tree where you drilled the hole. Insert the eye bolt through the tree so that you can attach a washer and a nut to secure the bolt to the tree. If you have trees that are spaced farther apart than 15 feet or so, the eye bolts need to placed higher off the ground to account for the inevitable sag that will result when you suspend and lay in the hammock.

I feel it is very dangerous to use an eye screw. This hardware item has coarse threads and no nut or washer. An eye screw fastens into the tree as you would turn any screw into a piece of wood. Eye screws can strip and can pull out of the tree with little or no notice. If your hammock suddenly crashes to the ground with you or someone else in it, serious permanent back and neck injuries are a distinct possibility.

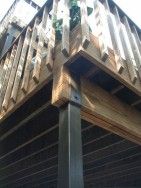
The hammock is attached to the eye bolt with a connecting-link chain connector. This connector allows you to safely connect the rounded loop of the hammock to the eye bolt. If the trees are too far apart or you want the hammock closer to the ground, you simply purchase some 3/16 or 1/4 inch sized chain and use it in between the eye bolt and the hammock loop. If you use chain, you will need two chain link connectors at each end of the hammock. Wooden six inch by six inch posts can substitute for trees if your trees are too far apart or too close together. These posts need to be placed in the ground and surrounded by at least eight inches of concrete. The post should extend a minimum of 24 inches into the ground. Be sure that the bottom of the hole is wider than the top diameter. This bell-shaped design prevents frost heaving from pushing your pole out of the ground over time if you live in a colder climate.

If you want to avoid the hassle of trees, hardware, posts and concrete simply purchase a hammock stand. These are made from tubular steel and fit most common hammocks. They assemble in less than one hour and are very sturdy. You can set them up anywhere and move them about in your yard as the sun creates new areas of shade during the day.

Column 418

Deck Support Columns

deck support column

Deck Support Column - This is how NOT to support a deck. There's no metal post-to-beam connector. Copyright 2018 Tim Carter

"Tall decks typically need larger diameter support columns than decks that are closer to the ground."

Deck Support Column Checklist

  • Wood is good but steel is supreme
  • 6x6 wood posts are best
  • 4x4 steel columns last forever
  • Local welders can make steel columns fast

Related Links

Wood Deck Post? Always Notch and Go Big - Secret Notching Info Here - Do NOT SHARE

Pro Deck Railing Connection Tips

Deck Support Column - Don't Kick Steel to the Curb

DEAR TIM: It's time for me to build a fairly tall deck. I've seen wood support posts twist and crack. I don't want that problem. What are my alternatives? I am looking for something that's sleek, simple and easy to install. Mark O., Scottsdale, AZ

What Causes Wood Posts to Twist and Crack?

DEAR MARK: The hot and dry climate you live in can quickly cause wood to shrink. This shrinkage creates all sorts of internal stresses within the wood that lead to twisting and cracking. Some wood species are much more resistant to these defects, but I doubt a lumber retailer would ever give you a bulletproof guarantee. I think you should consider another building material - steel.

treated lumber post

This is a treated lumber post that's been well cared for. Note the rot and the cracks. I know the homeowner. It's been regularly sealed yet it still rotted out! Copyright 2017 Tim Carter

Does a Steel Deck Support Column Make Sense?

steel column for a deck

This 4 x 4 steel column is about 9 feet long. Welded to the top of it is a U-shaped saddle that is just the right width to handle two 2 x 12s. The steel fabricator punched the 5/8 inch diameter holes in the saddle so it was easy to drill the beams and insert the through bolts to secure the wood beam to the steel.

There are several reasons steel makes sense in your situation. Tall decks typically need larger diameter support columns than decks that are closer to the ground. If you were to build with wood, a structural engineer might specify six inch by six inch or larger wood support columns instead of traditional four by four columns.

Switch to steel and I am quite confident a four by four steel column will perform as well or better than a six by six wood column of the same length. A structural engineer can quickly confirm this for you.

Free & Fast Bids

CLICK HERE to get FREE & FAST BIDS from local welders who can make the steel posts.

Do Steel Columns Look Sleek?

The smooth and uniform appearance of painted steel also makes it a good choice for you since you desire that sleek look. Steel keeps its shape and requires very little maintenance if you paint it correctly from the start.

EB015 Cleaning & Sealing Deck eBoo Cover

Have You Installed a Steel Deck Support Column?

I've installed steel support columns on more than one deck. The material is easy to work with and connecting the steel to the underside of the deck is a simple matter.

Making the connections to the concrete piers buried in the ground is also an easy task. Perhaps the hardest thing is taking accurate measurements to determine the height of the steel columns. A local welder can build the columns for you and should be able to help you confirm the accuracy of your dimensions.

How Do the Columns Connect to the Beam?

The steel columns almost always connect to a beam under the deck. You need to determine the thickness and height of this beam.

These dimensions dictate the width and height of the metal channel that will be welded to the top of the steel post. This U shaped channel cradles the beam. The welder will punch or drill 9/16 or 5/8 inch diameter holes in the U-shaped cradle. Once the beam is in place in the cradle, you drill through these holes and insert one half inch bolt and nut to permanently attach the wood beam to the steel column.

two level deck

Believe it or not, this is one 21-foot-long steel column! It passes through the first deck on its way to support the second triangular deck off the master bedroom. It was very cool to assemble this deck I must tell you.

The steel column is connected to the concrete piers with one half inch diameter stud anchor bolt. The welder should install a 12-inch square 1/4 inch thick steel plate to the bottom of the steel column.

A similar 9/16 inch diameter hole should be punched near each corner of this plate. Once the steel column is perfectly plumb and resting on the center of the concrete pier, you drill through the holes in the steel plate into the concrete below. Hammer in the stud anchors and tighten the nuts. Be sure the nuts and washers are installed on the stud anchors before you strike them with a hammer. The hammer blows can damage the uppermost threads of the anchor preventing you from installing the nuts.

CLICK HERE to get FREE & FAST BIDS from local welders who can make the steel posts.

Should the Steel Column Be Pre-Painted?

The steel column assembly should be completely primed and painted before it is installed. Painting it this way minimizes any future rust problems. I prefer to use special rust inhibitive primers that are formulated to bond well to bare steel. There is a very good chance your welder will have some high-quality primer for this purpose. Many welding shops deliver primed fabricated steel to job sites. It may make sense for you to have the welder prime the steel and you apply the finish coat.

Should a Drain Hole Be in the Base Plate?

Be sure the welder produces good solid welds at the top and bottom of the column. Ask if he can punch a drain hole in the middle of the bottom steel plate. This hole allows any water that may one day find its way into the column a place to drain from the column. Water that gets trapped inside the column can cause the column to prematurely rust from the inside out.

CLICK HERE to get FREE & FAST BIDS from local welders who can make the steel posts.

Adhesive Remover

flooring adhesive

The adhesive under this cork flooring is thin and impossible to scrape up without some type of liquid adhesive remover.

DEAR TIM: I recently removed some old plastic wall tile and floor tiles. There is a rock hard layer of adhesive that needs to come off before I can install new flooring and wall coverings. What is the best way to chip off this hard material? I struggled to remove the floor tile. Is there a trick to removing vinyl floor tiles? Veronica M., Atlanta, GA

DEAR VERONICA: Wow! Now here are two jobs I would make excuses for all day long. The thought of doing both projects back to back is true mental anguish. There are some tricks I have discovered that will make the jobs progress somewhat faster. The good news is that the hard adhesive residue can almost always be softened and disposed of.

Adhesive removal can be a chore. The primary reason is that there are so many different types of adhesives. Reversing the chemistry to make the rock hard deposits soft again can only be accomplished by using the correct adhesive remover. Fortunately, there are many superior products that are readily available. What's more, many are job specific. The product label frequently describes exactly what they will do.

Adhesive removers are very closely related to paint strippers. The reason is very simple: paint is simply a colored glue. Many of the companies that produce paint strippers manufacture adhesive removers. The products soak into the adhesive transforming it back to the paste or liquid state. Once it is softened, you can usually remove it with a hand scraper.

The most user-friendly adhesive removers are made with citric acid technology. Look for the word "citrus" in the label and be assured the product will be fairly easy to use. These products often are water washable and are low-odor. Some are liquid and others are a paste. You simply apply them to the hard adhesive, stand back and let them work. The paste products work best on vertical surfaces.

Another user friendly product is a soy-based adhesive remover. This product softens a wide range of old adhesives. It also rinses off with water. Keep in mind that these products often have a dwell time of several hours. This means that you apply them and wait for them to soften the glue. The product labeling usually gives you a good idea of the minimum dwell time. If you get impatient and try to remove the adhesive before the remover has had sufficient time to work, you will just add to your workload. Let the remover soften the hard adhesive completely, before you start to scrape.

Pay attention to recommendations regarding sunlight and wind. Direct sunlight and wind can evaporate the products. If you apply certain adhesive removers and neglect to follow instructions, the adhesive may get soft and then re-harden before you have a chance to remove it. It is a wise idea to try a small test section to get a feel for how quickly the adhesive remover works.

Tough adhesives sometimes require a solvent based adhesive remover. These products are more toxic than the water based adhesive removers. Pay very close attention to all label warnings. These products are often highly flammable and the fumes can be very dangerous to inhale for a period of time. Work in a well ventilated space.

The adhesive removers can be found in many hardware stores and large paint stores. The Internet is also a good place to shop for specialized adhesive removers for unique projects. Keep in mind that most of the paint stripper manufacturers also have a companion adhesive remover line. A particular store may be able to order the product if it is not a stock item.

Several years ago, I read about a technique to remove vinyl floor tile one piece at a time without breaking the tiles. All you need is a block of dry ice. Slide the dry ice over a tile and within a few seconds it will contract just enough to release itself from the adhesive bond. Frequently, you will hear the tile "pop" loose. You move the ice block to the next tile and pick up the full tile that is now floating free above the adhesive layer.

If you decide to try this method, be aware of certain dangers. The dry ice is simply solid carbon dioxide. You must ventilate the space you are working in very well to dissipate the gas. Failure to do this can cause serious injury or death. The carbon dioxide can also kill any animals that might be nearby. As long as you can open some windows and bring in outdoor air, you should be fine. Wear thick gloves as well. The dry ice can cause instantaneous frostbite if it touches exposed skin.

Column 421

Handicap Showers

Handicap Shower
DEAR TIM: I am building a bathroom and want the ceramic tile shower to work with a wheelchair. Since a curb of any type will hinder access into and out of the shower, the floor of the shower needs to be flush with the floor of the bathroom. Can this be done in a typical home? If so, what do I need to know to make the shower and bath floor leakproof? Earl B., Sacramento, CA

DEAR EARL: You bet you can do this. It is far easier to do it in a new home rather than a remodel, but even in an existing home, a top quality remodeling contractor working with an expert tile setter can accomplish this task. Perhaps your biggest obstacle will be creating a large enough space for the shower area. Rotating a wheelchair in a confined space requires a floor space that measures 54 inches square. A 60 by 60 inch space would be ideal.

Many people are familiar with gang showers in high school where all sorts of shenanigans happened after each physical education class. Some modern day gym and workout businesses also have showers where the floor is flush with the changing room. Accessible showers are nothing new, not by a long shot. But as the population is aging, there is indeed a growing need for them in average residential housing.

A typical ceramic tile shower has a cement mortar base that is just beneath the tile. The thickness of this mortar system can be as little as 1 to 1.5 inches. If you have ever used one of these showers, you know the slope does not have to be significant for water to find its way to the drain. The shower floor area simply needs to slope 1/8 inch per foot to achieve excellent drainage. The rest of the bathroom floor should have a very slight tilt back towards the shower stall so that water spray from the shower into the bathroom could work its way back into the shower area.

The subfloor system needs to be designed so that the shower area is 1.5 inches lower than the subfloor in the main area of the bathroom. If the subfloor is a wood based system using traditional joists, you create a small, dropped flooring area using joist hangers and smaller sized floor joists. If your house is built on a concrete slab, the concrete in the shower area needs to be lowered the same amount. In both instances, the tile setter will add a sufficient amount of cement mortar to raise the floor within the shower to the same level as the remainder of the bathroom.

A special liner is placed on the subfloor of the bathroom and the shower area before the cement mortar is installed. This waterproof membrane is permanently connected to the shower drain and it laps up the side walls of both the shower and the bathroom walls. Any water that seeps through the tile and mortar is collected by the membrane and directed to weep holes within the body of the shower drain. I prefer to use a membrane that is made with chlorinated polyethylene. This material comes in rolls and has a special solvent that allows you to weld seams together so that you can protect the entire floor area. This membrane is commonly sold at ceramic tile specialty stores and full service plumbing supply houses.

There are several other issues that you need to be aware of when building this shower area. Soap dishes and shelves for shampoo need to be at a comfortable height for those using the shower. The actual shower valve control needs to be positioned so the challenged individual can easily turn the water on and off. A hand held shower device attached to the main shower head is also a must.

The shower valve is very important. Many shower valves are anti-scald. In fact, the modern building codes mandate it. Most anti-scald valves are designed to sense pressure differences. That is fine in most instances. But if you desire the best valve to protect against scalding, consider installing one that is both temperature and pressure sensitive. These valves allow you to preset temperatures so that people using the shower have little risk of getting burned.

Finally, be sure to install one, or possibly two, shower curtains to prevent water spray from getting into the main bathroom area. These shower curtains need to extend down to the floor and have weighted corners. One curtain should be well within the shower area so that water spray can't find its way onto the main bathroom floor.

Column 422

Stucco Repair / Patching

DEAR TIM: The removal of an old fan left a large hole that needs to be patched in my stucco home. What type of backer board is used to close up the hole? I assume the stucco just sticks to it and all is well. How does one match the existing texture? I also have many different sized cracks to patch. How do I tackle those? Andy N., Apple Valley, CA

DEAR ANDY: Patching stucco so that you don't see the repaired area is as difficult as patching a hole in a piece of fabric using scrap from the original bolt of cloth. It is virtually impossible to do. A stucco mason can create an infinite amount of textures depending upon the materials used to create the stucco and the tools used to finish it. Blending the new texture with the original is a true art and craft. If you succeed in creating the illusion, go out and immediately purchase a lottery ticket!

Stucco Repair

To get fantastic results on your job, I urge you to build several small test boards that are slightly smaller than the size of the existing hole. Practice your technique on these. Once you think you have the texture matched, insert the test panel in the hole and step back 20 or 30 feet to view it. Things tend to look different when viewed from a distance. If your existing stucco is painted, paint the test panel as well.

The repair process begins by simply looking at how your existing stucco was installed. Stucco is applied differently in many parts of the nation. In some localities, tar paper is applied over the wall studs and then wire mesh is nailed to the studs. In other areas, wood sheathing is nailed to the studs before the tar paper and mesh is applied. Look at the exposed edge of the hole to see how your stucco was applied.

To make the repaired area waterproof, you need to remove some of the existing stucco to expose the tar paper beneath the stucco. Remove the stucco slowly and carefully so as not to tear the tar paper. The new tar paper needs to slide up behind the tar paper at the top of the opening. One inch of overlap will work, but two inches would be better. The tar paper overlaps the sides and bottom of the existing opening the same distance. This important detail prevents water that may seep behind the stucco from rotting the wood sheathing and structural wood framing.

Galvanized chicken wire or plastering mesh is then nailed over the tar paper. Use galvanized nails that penetrate 1.5 inches into solid wood. The stucco sticks to this wire mesh, not to the tar paper.

The stucco is applied in either two or three coats. Typically a thin scratch coat is applied to the wire mesh. Once dry, this coat stiffens the wire mesh so the weight of subsequent coats does not create waves in the final finish. The thickness of the second coat depends upon the type of final finish you are trying to copy. If the final finish is very rough, then the second coat must stop just short of any indentations that are created when you apply the final coat. Be sure you use a stucco comb to create grooves in the wet second coat. These lines help bond the final coat to the middle layer of stucco.

Try to work in the cooler part of the day if possible. Be sure to wet the edges of the existing stucco before you apply the second and final coat. These edges must also be dust free. Keep the patched area damp to prevent shrinkage cracks. You can mist the repaired area or tape plastic over it to hold in the moisture. Stucco that dries too quickly can crack and never attain full strength.

Patching stucco cracks is not too hard, it just requires some patience. Cracks less than an 1/8th inch in width can usually be successfully patched with a high quality siliconized acrylic caulk. Remove all loose debris and dust from the crack. If the crack is deep, apply the caulk at two different times as one thick layer will shrink and cause an unsightly depression. Let the first layer of caulk dry for several days before applying the second coat. Quickly scatter sand that matches the existing finish into the final bead of wet caulk. This will help disguise the crack repair.

Wider cracks can be patched with the cement stucco mixture you created for the hole repair job. These cracks must be undercut for the stucco to hold. Use a grinder or hand-held chisel to make the crack slightly wider at the base than at the surface. This is the same technique dentists use when filling cavities in our teeth. This dovetail design will permanently lock the repair stucco mixture in place.

There is an updated column dealing with Repair Stucco Walls. CLICK HERE to read this column.

Column 423

Ceramic Tile Crack Prevention

DEAR TIM: Cracks are beginning to appear in the floors of our three-month old new home. The tile was laid directly on the concrete slabs that make up the sub-floor of my home. The day after the slabs were poured the concrete block walls were erected. Could this be the cause of the cracks? What could have been done to prevent the cracks? Do the tiles have to be taken up and replaced or is there another solution? John D. Hallandale, FL

DEAR JOHN: Tile loves to be installed over concrete because concrete is such a hard, durable substrate. But concrete does have an Achilles' heel - not only does concrete crack, it wants to crack. As concrete makes the transformation from the liquid state to a rock-hard material, it shrinks ever so slightly. In fact, concrete slabs can shrink 1/16th of an inch for every ten linear feet of distance. This shrinkage creates a significant tension force within the slab.

This tile is cracked. It is a very fine crack, but should be filled with clear epoxy before repainting begins.

This tile is cracked. It is a very fine crack, but should be filled with clear epoxy before repainting begins.

The concrete slab cracking process is very similar to what happens prior to and during an earthquake. As the plates of the earth move, they often get wedged against one another. This stored force is relieved naturally the by-product being a violent earthquake. Similar forces build within the freshly poured concrete slab. As soon as they exceed the strength of the concrete, the slab pops and cracks. Cracks can appear within hours of the concrete pour, but typically you begin to see them within 30 days. I doubt the block laying activity caused the cracks. In all likelihood, they would have happened with or without the concrete blocks.

Ceramic tile is a dense building product just like concrete. Both materials are very strong when you compress them, but they typically only have one tenth the strength when tension forces successfully pull them apart. To make matters worse, cracks that happen in the slab below ceramic tile will often telegraph through the tile because the organic or cement based adhesives make the tile and concrete one monolithic material.

You can prevent cracks in ceramic tile that is laid over concrete in any number of ways. The first thing to do is add steel and fibers to the concrete slab. While these materials will not insure a crack-free slab, they will hold the concrete together such that small harmless hairline cracks occur instead of cracks in excess of 1/8 inch or more. Quality builders will place inexpensive one half inch diameter steel reinforcing bars in the middle of the concrete slab. These bars should be placed in a grid pattern with the bars on two foot centers in both directions. The bars must be supported during the pour so that they end up in the center of the concrete. In addition, the concrete can be ordered with special fibers that will help prevent shrinkage and tension cracks.


Restore the "clean" to your grout. Just go to STAIN-SOLVER to see the beautiful, quick results.


The ceramic tile installer could have also installed crack isolation membranes under the tile. These membranes are available as a liquid coating that is applied over the concrete slab or an actual synthetic fiber fabric. They allow the concrete floor below to move independently of the tile that is laid just above. The membranes work well if there is slight cracking but will not prevent cracks in tile should there be significant structural movement caused by a foundation, soil, or construction defect. These membranes are often sold at ceramic tile specialty stores that cater to real ceramic tile professionals.

Since your home is still within warranty, I would write a letter to the builder informing him of the defect. Hopefully, you have extra tiles left over that are from the same run or batch. If not, try to get some matching replacement tiles immediately. Purchase matching tile grout at the same time. I would wait another six months or so before I would initiate the repair. Additional cracks may appear between now and then and all broken tiles can be replaced at one time. If the grout gets dirty before the repair, it should be cleaned just before the workmen arrive. Doing this will insure that the new grout will match the existing grout perfectly. Dirty colored or white floor tile grout can be successfully cleaned with a solution of oxygen bleach.

Existing floor tile cracks can be patched with clear epoxies. Apply the epoxy carefully and add additional epoxy until the dried epoxy is flush with the tile surface. Using a fine artist's brush, apply oil based paint that matches the color of the tile to the epoxy. Once this dries, use the same brush to apply three coats of clear water-based urethane over the repaired crack. This urethane will protect the paint for several years. Apply additional maintenance coats of urethane every two years.

Message from Tim:

Years ago while researching a column about cleaning decks, I discovered the wonders of Oxygen Bleach. It is perhaps the 'greenest' cleaner I know of as it uses oxygen ions to break apart stains, dirt and odor molecules. There are no harsh chemicals, and it works on just about anything that is water washable.

I decided to create my own special blend using ingredients made in the USA. In fact, the raw materials in the active ingredient are food-grade quality registered with the FDA. I call my product Stain Solver. I urge you to use it to help with cleaning your ceramic tile grout. You will be amazed at the results!

Column 424

Outdoor Rooms Create Extra Living Space

DEAR TIM: My growing family needs more room but a traditional room addition is out of the question. Our budget is very tight and local zoning laws prohibit us from building what we need. My wife quickly rejected my idea of putting the kids up for adoption and has hinted that perhaps I am the one who needs to leave. Surely you have a solution that will keep us together! Brad L., Scottsdale AZ

DEAR BRAD: If I didn't know better, I would bet money that you had a very bad case of cabin fever. Marital counseling is not my forte, but I think the solution to your restlessness is just outside the rear windows of your home. I think you can satisfy the local zoning department and avoid deep debt by simply creating an outdoor room or two in your back yard.

Cast a glance eastward over the Atlantic Ocean and you will discover that this concept is not new by any means. People in Great Britain are experts at transforming an ordinary back yard into a private outdoor room where one can work and relax. You need to think outside the box and develop some patience. Instead of using traditional building materials to create walls and a roof that protect you from the elements and create privacy, you will use plant materials, low walls and fencing, and garden structures that should allow you to pass undetected under the radar of many zoning codes.

Perhaps one of the best kept secrets of the home improvement industry has been the rapid expansion of products that are available for patios, decks and other outdoor spaces. The time spent on decks and patios is increasing because many of the creature comforts found indoors are now available for outdoor use. Some traditional barbecue grills have transformed into actual outdoor stoves and ovens. Fixed counters with faucets, sinks and cabinets are a reality. Retractable awnings, and attractive screened tents can provide shelter from sun, rain and insects.

Creating a comfortable environment outdoors is quite possible. Wood burning or gas appliances can provide you with wonderful radiant warmth if the temperature drops. A simple fire pit will accomplish the same thing and offers the retro feel and aroma of a Boy or Girl Scout campfire. Those who live in hot climates can cool an outdoor space with modern water misting devices. These systems dramatically drop the temperature as the misters broadcast un ultra-fine screen of heat absorbing water.

You do not need to go indoors as the sun sets. Significant advancements in low voltage outdoor lighting allows you to cast a soft glow on surrounding vegetation and garden structures that make up the outdoor room. Specialized task lighting fixtures allow you to work and read with the same comfort as any indoor light fixture.

The key to creating a spectacular outdoor room that will add value to your home begins with planning. Develop an overall plan for what you want and need and begin to build it in stages as your budget allows. Consult with outdoor plant experts and choose vegetation that will create privacy and beauty at the same time. Keep in mind the size of the vegetation as it reaches maturity. The plants must be placed in strategic locations that will not interfere with the function of the room.

Be sure to include water features in the outdoor room. Fountains, small pools, waterfalls, etc. add beauty and will produce a much needed calming force in your life. Do not underestimate the power of bubbling or trickling water. It is a subtle feature that produces pleasing background sounds that add to the overall ambiance of the outdoor room. Water features also attract butterflies and birds. These living creatures will add even more beauty to this new room addition.

Before you get started I suggest that you spend time looking at magazines and websites that feature photographs of completed outdoor rooms. Pay attention to the different features and how different materials and plants compliment one another. Look for patios that have different shapes or secondary smaller patio extensions that could be built in phases. Develop a final plan and pass it by your local zoning department before you start to work. The extra time you spend planning and exploring options will yield enormous dividends down the road.

Column 425

Hanging Wallpaper

DEAR TIM: I tried to install wallpaper after watching a home improvement television episode. I must have missed a few important steps as I have a mess on my hands. There are lots of bubbles and blisters, seams that have puckered and bumps and depressions showing under the paper. What went wrong? Is there an easy way to activate the paste on pre-pasted paper? Is there a way to fix the flaws? Carolyn W., Paramus, NJ

DEAR CAROLYN: Don't you just hate those home improvement television shows? The hosts seem to constantly tell us how easy things are to do.

They smile, rarely have problems and within a span of 30 minutes seemingly impossible jobs are done to perfection. Television is a magical media format.

With the help of background music and an editing machine, hard tasks are made to look easy. Wallpaper hanging is by no means impossible to do, but to get professional results you need to know many things.

Tim installing wallpaper

©2017 Tim Carter

The bubbles, blisters and puckered seams that are plaguing your paper most likely happened because the wallpaper expanded on the wall instead of on the pasting table.

CLICK HERE to get FREE & FAST BIDS from local wallpaper hangers in case you're getting cold feet.

Wallpaper begins to swell and grow in size as soon as you apply paste or activate the dry paste that is on the back of pre-pasted paper.

Professional wallpaper hangers call this process relaxation. The paper needs to relax and expand completely before you hang it.

If you hang it before it relaxes, it continues to expand and grow on the wall. The paper can only move sideways and out from the wall.

The relaxation period usually takes anywhere from five to ten minutes. All you have to do is cut several strips of paper to get started. Paste or activate the paste on the first strip.

As soon as you have completed this, you fold or book the paper. Booking simply means to fold the paper back on itself so that the wet pasted back side of the paper contacts itself. Do not fear, the paper will not stick to itself as adhesive tape might. You will be able to unfold the paper in a short amount of time so it can be hung on the wall.

Set this first strip of paper aside and do the same thing to the second cut strip. If you are a fast hanger, you can get three strips of paper cut and booked. By the time you have finished this, the first strip of paper will be relaxed and ready to hang.

Once you have hung the first piece of paper, cut the next strip and paste it. By doing this, you simply create an inventory of cut and pasted strips of paper that are in different stages of relaxation.

Wallpaper also contracts slightly as it dries. When it does, it can telegraph imperfections that lie just below the paper. Small, harmless grains of hardened paint on the wall will show through. Holes in the wall or small divots may show up as a depression under the taut paper.

CLICK HERE to get FREE & FAST BIDS from local wallpaper hangers in case you're getting cold feet.

Just A Few Tools

Let's get started with the tools. Fortunately, you don't need many tools to wallpaper.

Here's a list that will get you going on this job:

  • retractable razor knife with snap-off blades
  • 4.5 or 6-inch drywall taping knife
  • smoothing brush or plastic smoother
  • 4-foot level
  • grout sponge
  • measuring tape
  • paint roller & pan
  • paint brush

Click the Image Below to get all, or some, of the tools now:

Wallpaper Tools List

CLICK HERE to get all the tools I recommend in one place. It's easy and fast.

Just before applying a special primer/sealer paint that will size the walls, you should look and feel for these imperfections. Use a wide flexible scraper to knock down any small grains or bumps. Use a similar knife and rapid-dry spackling compound to fill in any holes.

The amount of time spent getting the walls perfectly smooth will really pay off. If you are really concerned about humps and depressions showing through the paper, use an exposed light bulb at night against the wall. The light rays glancing off the wall at this shallow angle will readily draw attention to all minor wall defects.

Pre-pasted paper manufacturers talk about using trays of water, putting paper in bathtubs, etc. to activate the paste. I have found all of those methods to be somewhat cumbersome. You can buy a wonderful, powdered product at most wallpaper stores that eliminates the need to get pre-pasted paper wet.

This powder mixes with water and in about 30 minutes creates a clear liquid gel that you easily spread on the back of pre-pasted paper. It is made to activate and maximize the adhesive on the back of the paper. When you use this product in conjunction with properly sized walls, you have plenty of time to adjust paper while it is on the wall.

As much as I hate to say it, I don't think the flaws on your wall can be easily repaired. It is typically impossible to remove and reuse a strip of wallpaper. It simply is too delicate to remove from the wall. You might be able to prick the bubbles and blisters to relieve the air pressure.

Using a small syringe, you can inject them with some water to re-activate dried paste. Use a rolling pin or a small wallpaper roller to try to flatten the paper. The trouble is, there may not be enough room on the wall for all of the paper!

CLICK HERE to get FREE & FAST BIDS from local wallpaper hangers in case you're getting cold feet.

Column 426

DIY Bathroom Plumbing

DEAR TIM: I definitely have a leaking toilet. I have removed the ceiling beneath it and can see an occasional drip of water running down the actual main pipe beneath the toilet. When you go up to the bathroom, the toilet, floor and the walls are bone dry. Is the leak positively originating from the toilet? What could be the problem and the best way to repair it? Is it a realistic do-it-yourself project? Ed P., Essex Junction, VT

DEAR ED: Although I would not bet my life on the source of the leak, I am 99.999 percent sure the source of the leak is a failed seal between the toilet and the toilet flange. The toilet flange is a special drain pipe fitting that allows you to securely connect a toilet to the actual waste piping. The seal between the toilet and the flange could have failed for any number of reasons.

If you look at the underside of a toilet where the water and waste exit the fixture you will see that the china has a shape similar to a crude funnel. The shape of the toilet flange is also like a funnel only it is larger. When mated together properly, the actual china of the toilet fits loosely inside the actual flange. It is a classic male-female connection of sorts.

It is absolutely necessary for this joint to be sealed permanently. Not only does the seal prevent water leaks, but it also prevents harmful and objectionable sewer gas from escaping into your home. There are two ways to make the seal permanent: traditional wax gaskets or a newer seal device that incorporates high grade rubber o-ring seals with an adjustable sliding collar that attaches to the underside of the toilet.

Once you remove your toilet from the flange you will possibly discover that the toilet flange is not at the correct height. It can be either too high or too low with respect to the finish flooring. Being a licensed master plumber, I have learned over the years that the best seal occurs when the top of the toilet flange is one quarter inch higher than the finished flooring. It is also an enormous advantage to have the finish floor level in the area around the toilet. It goes without saying that the top of the toilet flange should also be level.

The toilet flange should also be securely attached to the sub-flooring material. Often this is not the case. Most modern flanges have multiple holes in the outer flange ring. The plumber who installs the flange is supposed to install screws through these holes into the sub-floor below. Do not confuse this task with the function of the actual toilet bolts. The bolts that are used to attach the toilet to the flange will indeed pull the toilet tight against the flange. But if the flange is not secure to the floor, the toilet can still move. Do not rely upon caulk or tile grout between the floor and the toilet to make a toilet like the rock of Gibraltar.

If you discover that the toilet flange is significantly lower than the finished floor surface, you can possibly add flange extenders on top of your existing flange. Not all plumbing inspectors will allow this retrofit. You must make sure that your local plumbing code allows these specialized fittings. These also must be properly sealed so that water and gas can not get between the old flange ring and the new one. If your local code does not permit the use of extenders, the actual piping and flange may have to be re-done. The same is true if the toilet flange is too high.

Working with toilets is not too terribly difficult but there are all sorts of challenges. If you think it is as easy as it is often shown on home improvement television shows, you are in for a surprise! When you disturb an existing toilet you can break the seals between the toilet tank and the toilet bowl. Reconnecting a toilet to the water supply line may also be an adventure. What's more, some plumbing codes and municipalities forbid unlicensed homeowners from working with plumbing drainage and water systems. If you decide to attempt the repair yourself, I sincerely hope you have a second functioning toilet in the home or you feel exceptionally lucky.

Column 428


Concrete Overlays

concrete overlay

Here's a concrete overlay on a small concrete slab. You can see the form boards that allow you to get the top in the same plane. There's a nice coat of cement paint that bonds the new overlay to the old concrete. (C) Copyright 2018 Tim Carter

"In addition, a liquid bonding agent or traditional cement paint can be brushed onto the damp slab immediately prior to pouring the overlay."

Cement Paint & Concrete Overlay Installation Checklist

  • Remove all crumbling concrete and dust
  • Overlay stones no larger than 1/3 thickness of the overlay
  • Use secret cement paint to bond overlay to the old concrete
  • Dampen old concrete slightly before applying the cement paint
  • Cover the overlay with plastic to cure it for 48 hours

DEAR TIM: My concrete sidewalks and driveway look horrible. For some reason, the top 1/8 to 1/4 inch of the finish surface has peeled up in patches.

The contractor I used blames road salt for the damage. Is it possible to patch the concrete with some mixture that will last for a long period of time? If so, how is the task completed? Is this a task that the average person can tackle? Betty G., Ft. Wayne, IN

Related Links

Concrete Resurfacing Tips & Tricks - DO NOT SHARE!

More Concrete Restoration Professional Tips

Concrete Overlay

CLICK this image and listen to the first call on the podcast. I talk to Vic about how he can do a concrete overlay to SAVE thousands of $$$. Copyright 2018 Tim Carter

DEAR BETTY: What a shame! Exterior concrete that is ordered, mixed, installed, finished and cured properly can withstand many, many years of exposure to road salt and freeze and thaw cycles that occur during cold winter months.

Free & Fast Bids

CLICK HERE to get FREE & FAST BIDS from local concrete resurfacing contractors.

Why Does Concrete Spall?

The most common reason for concrete spall is water was sprinkled on the concrete during the finishing process. Extra water could have been added to the entire mix when the truck arrived at the job site.

There are many things that could have gone wrong that most likely caused the concrete wear surface to fail, but the good news is that there is a repair method that will yield long-lasting and beautiful results.

blacktop with car keys

Can a Thin Overlay Be Applied to Concrete?

Residential contractors and large-scale commercial concrete contractors can install a thin overlay on concrete slabs that have damaged surfaces.

The overlay material can be a simple mixture of sand and cement or it can actually be a real concrete mixture that includes small pieces of stone or even large stones depending upon the thickness of the overlay. Cement or concrete overlay thicknesses can range from 1/4 inch thick up to a full 2 inches or more.

How Do You Install a Concrete Overlay?

The secret to success is a combination of ingredients. You must determine that the existing slab is sound. Be sure that the exposed parts of the slab are not crumbling.

Tap the damaged areas moderately with a hammer. If the slab sounds solid and it is difficult to do further damage to the slab with moderate hammer blows, the existing concrete is probably a superb candidate for an overlay.

What is the Best Weather to Install a Concrete Overlay?

Weather conditions also impact the success of the overlay. Cool days with temperatures in the 50 F range are ideal.

It's even better if there is little or no wind and the skies are overcast. Heat, sunlight, and wind cause the overlay mixture to dry too rapidly. Rapid drying makes it harder to work and finish the overlay. These conditions can also cause undesirable plastic shrinkage cracks in the surface of the brand new overlay.

How Do You Achieve the Best Bond?

The overlay mixture will bond permanently to the existing concrete slab, if you make sure the existing slab is clean, dust-free and slightly damp before you apply the overlay.

In addition, a liquid bonding agent or traditional cement paint can be brushed onto the damp slab immediately prior to pouring the overlay. Cement paint is simply a mixture of Portland cement powder and water. Add enough water to the cement and mix it until it is the consistency of regular latex wall paint.

How Much Portland Cement Should be in the Overlay Mix?

It is important that a sufficient amount of cement is added to the overlay mixture so that it will resist freeze-thaw cycles that will occur in the winter months.

Since your overlay material will be mixed most likely in a wheelbarrow or a rented mixer, be sure that you include 1 measure of Portland cement for every 2.5 measures of sand for thin overlays. If you are going to include stones or larger aggregate, then the mixture should be:

  • 3 measures of gravel
  • 2 measures of sand
  • 2 measures of Portland cement

How Do You Apply the Overlay?

The overlay mixture is installed over the existing slab just like the original concrete pour. Form boards are placed alongside the existing slab.

The top of the boards are set so that they create a plane that represents the desired final thickness. Once the overlay material is dumped in between the form boards, a long straightedge board can be used to remove excess overlay mixture. The straightedge board extends over the form boards and is wiggled back and forth to smooth out the overlay.

How Soon Do You Apply the Final Finish?

Depending upon the weather conditions and the moisture content of the overlay mixture, the final finishing process can begin within 10 minutes, or in some cases, up to an hour after the mixture is poured. Be sure to apply a liquid curing compound on the overlay as soon as the final finish is complete.

Is An Overlay a DIY Project?

Overlays can be done by homeowners. The entire project does not have to be completed in one day. You can work on one or two sections each day.

To make sure the final color of the overlay matches, be sure that all of the necessary materials are bought at the same time. Mixing brands of Portland cement and using different sand can cause color differentiation when the materials cure.

Column 429