Hanging Wallpaper
DEAR TIM: I tried to install wallpaper after watching a home improvement television episode. I must have missed a few important steps as I have a mess on my hands. There are lots of bubbles and blisters, seams that have puckered and bumps and depressions showing under the paper. What went wrong? Is there an easy way to activate the paste on pre-pasted paper? Is there a way to fix the flaws? Carolyn W., Paramus, NJ
DEAR CAROLYN: Don't you just hate those home improvement television shows? The hosts seem to constantly tell us how easy things are to do.
They smile, rarely have problems and within a span of 30 minutes seemingly impossible jobs are done to perfection. Television is a magical media format.
With the help of background music and an editing machine, hard tasks are made to look easy. Wallpaper hanging is by no means impossible to do, but to get professional results you need to know many things.

©2017 Tim Carter
The bubbles, blisters and puckered seams that are plaguing your paper most likely happened because the wallpaper expanded on the wall instead of on the pasting table.
CLICK HERE to get FREE & FAST BIDS from local wallpaper hangers in case you're getting cold feet.
Wallpaper begins to swell and grow in size as soon as you apply paste or activate the dry paste that is on the back of pre-pasted paper.
Professional wallpaper hangers call this process relaxation. The paper needs to relax and expand completely before you hang it.
If you hang it before it relaxes, it continues to expand and grow on the wall. The paper can only move sideways and out from the wall.
The relaxation period usually takes anywhere from five to ten minutes. All you have to do is cut several strips of paper to get started. Paste or activate the paste on the first strip.
As soon as you have completed this, you fold or book the paper. Booking simply means to fold the paper back on itself so that the wet pasted back side of the paper contacts itself. Do not fear, the paper will not stick to itself as adhesive tape might. You will be able to unfold the paper in a short amount of time so it can be hung on the wall.
Set this first strip of paper aside and do the same thing to the second cut strip. If you are a fast hanger, you can get three strips of paper cut and booked. By the time you have finished this, the first strip of paper will be relaxed and ready to hang.
Once you have hung the first piece of paper, cut the next strip and paste it. By doing this, you simply create an inventory of cut and pasted strips of paper that are in different stages of relaxation.
Wallpaper also contracts slightly as it dries. When it does, it can telegraph imperfections that lie just below the paper. Small, harmless grains of hardened paint on the wall will show through. Holes in the wall or small divots may show up as a depression under the taut paper.
CLICK HERE to get FREE & FAST BIDS from local wallpaper hangers in case you're getting cold feet.
Just A Few Tools
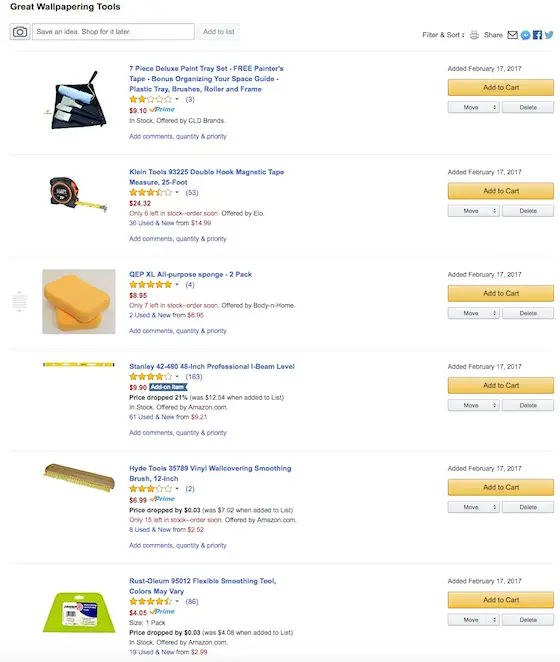
Let's get started with the tools. Fortunately, you don't need many tools to wallpaper.
Here's a list that will get you going on this job:
- retractable razor knife with snap-off blades
- 4.5 or 6-inch drywall taping knife
- smoothing brush or plastic smoother
- 4-foot level
- grout sponge
- measuring tape
- paint roller & pan
- paint brush
Click the Image Below to get all, or some, of the tools now:
CLICK HERE to get all the tools I recommend in one place. It's easy and fast.
Just before applying a special primer/sealer paint that will size the walls, you should look and feel for these imperfections. Use a wide flexible scraper to knock down any small grains or bumps. Use a similar knife and rapid-dry spackling compound to fill in any holes.
The amount of time spent getting the walls perfectly smooth will really pay off. If you are really concerned about humps and depressions showing through the paper, use an exposed light bulb at night against the wall. The light rays glancing off the wall at this shallow angle will readily draw attention to all minor wall defects.
Pre-pasted paper manufacturers talk about using trays of water, putting paper in bathtubs, etc. to activate the paste. I have found all of those methods to be somewhat cumbersome. You can buy a wonderful, powdered product at most wallpaper stores that eliminates the need to get pre-pasted paper wet.
This powder mixes with water and in about 30 minutes creates a clear liquid gel that you easily spread on the back of pre-pasted paper. It is made to activate and maximize the adhesive on the back of the paper. When you use this product in conjunction with properly sized walls, you have plenty of time to adjust paper while it is on the wall.
As much as I hate to say it, I don't think the flaws on your wall can be easily repaired. It is typically impossible to remove and reuse a strip of wallpaper. It simply is too delicate to remove from the wall. You might be able to prick the bubbles and blisters to relieve the air pressure.
Using a small syringe, you can inject them with some water to re-activate dried paste. Use a rolling pin or a small wallpaper roller to try to flatten the paper. The trouble is, there may not be enough room on the wall for all of the paper!
CLICK HERE to get FREE & FAST BIDS from local wallpaper hangers in case you're getting cold feet.
Column 426
