Granite

granite countertop tile
DEAR TIM: I have read a great deal about granite countertops and I am very confused. Will granite stain? Does it have to be sealed?

Is it better or worse than the solid surface tops that try to look like granite? Is granite child-proof? I am moving into my last home, I hope, and I do not want to make a mistake. Maj. Brian McK., Quantico, VA

DEAR MAJ. BRIAN: I have seen several horse races in the past that required a photo finish result to determine the winner. There is no doubt in my mind there have been other past horse races that have ended in a dead heat with no clear winner. That is how I feel about the comparison between granite,solid surface and the new stone composite countertops. All of them are top-of-the-line products that have their own nuances.

Both granite and solid surface countertops have been installed on many of my past jobs. I have granite tops in my own home. I have never heard a complaint from any of my past customers regarding the beauty or functionality of the tops. In fact, my past clients continually gush about the wonderful countertops they own. In my own case, the fix was in. My college degree is geology and I happen to be very partial to natural stone products. I have yet to find a man-made countertop material that even comes close to what Mother Nature can produce on her worst day.

What are Natural Stone Composites?

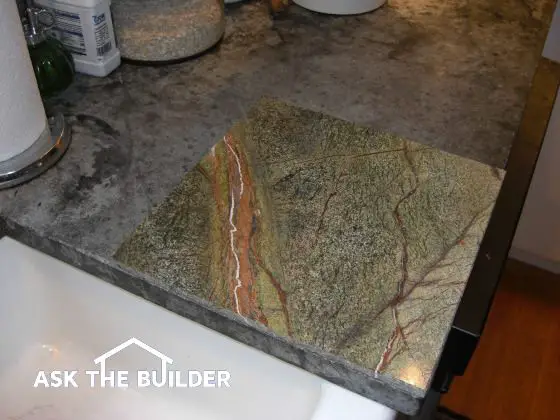
Before I digress further, let me describe a countertop material you may not know about - natural stone composites. Several manufacturers are making a countertop material that is a blend of natural stone and synthetic resins that hold the stone chips together. These new products are very eye-catching and sport many of the positive attributes of both natural stone and solid surface countertops. My only complaint with these tops is that a side-by-side comparison with real granite will quickly indicate to you that this new product is an impostor. But, you should definitely give it a serious look before you make a final decision. It may possess the exact look you and your family desires.

Do Countertops Stain?

Does granite stain? I think the better question is: Do all countertops stain? The answer is - Yes to all. Granite, by its very nature, contains micro fissures where the quartz, mica and feldspar minerals interconnect. Some granites are more porous than others. But the highly polished granite is highly resistant to staining, especially when it is sealed. The biggest enemy to granite happens to be oil. Cooking oils, olive oil, bacon grease, oil that seeps through pizza boxes, etc. are to be treated with respect. Oil that seeps into granite can be removed and sometimes it dissipates on its own over time. But once again, regular sealing will almost always stop oil from damaging the top.

How Do You Seal a Granite Countertop?

Sealing granite is simple. The clear sealers are applied with a cotton rag and simply rubbed into the surface. Often it only needs to be done twice a year. Sealing granite is by no means a hardship and it takes just a few moments of your time. I feel it is a very small price to pay for the beauty and durability you get with a granite top.

If you want a child-proof countertop, perhaps you better get a military surplus piece of armor plating from a tank or warship. I have seen firsthand damage caused by both children and adults to all countertops. Often people panic when a granite top is chipped or a small corner cracks off. They throw away the chunks or chips of stone in frustration after the accident happens. Never discard any of this debris. Bag it up carefully and call your granite fabricator. They have fantastic clear colored epoxies that can be used in conjunction with the granite chips to rebuild the top.

Perhaps this will help you. My wife and I are about to remodel our own kitchen. We have several different countertop areas in our kitchen. Do you know what kind of material we plan to install? In all likelihood it will be a blend of materials. There is a good chance that we will use several types of natural stone along with a few pieces of solid surface countertop in strategic locations. I have done this before on several jobs. If you pick materials that blend well together, the look is stunning.

Column 448

Modular Homes Surpass Stick Built Homes

DEAR TIM: I have heard horror stories about custom homes that have taken forever to build. Framing lumber exposed to the elements can support mold growth.

Construction delays can create extra loan interest and living expenses. What can I do to make sure my new custom home gets built quickly but with no sacrifice in quality? Is there an alternative method to achieve my goal? Ted S., Lumberton, NC

DEAR TED: If you would have asked this question ten or fifteen years ago, I would have told you that you have little hope. Don't get me wrong, there have always been highly skilled and productive builders in the marketplace. You can find them in just about every city or town. I will grant you, however, that they are a very small minority. The good news for you, and many others, is that cost savings, high quality, and lightning-fast construction are present in today's new home marketplace.

pre-built home

Yes, this home arrived at the jobsite pre-built on the back of several flatbed tractor trailers. You would never think it was possible when you walk up to it and inside of it. I did both as this fantastic home is just several miles from where I live.

Let's talk about conventional home construction practices first. Understand that many builders have never had extensive formal training with respect to manufacturing processes. After all, they are manufacturing a product. It is common for builders to start off in their careers as carpenters who transform from a subcontractor into the person who runs the show. Many of these individuals do not have strong technical and business skills in the actual art of planning and management. I know there are builders who have strong college business degrees, but I believe you will find that many smaller custom builders have minimal college level business classroom experience.

Add this to the mix of subcontractors who have work commitments with other builders, weather conditions that can hamper construction, scheduling and ordering mistakes on the part of the builder and a myriad number of other variables and you can see why a five month construction time frame can become a bloated nine or ten month fiasco.

If you decide to use a traditional custom home builder, you can tighten up the schedule and possibly get the job done on-time if he is familiar with critical-time-path planning. A home building project can be represented on a chart that shows each task that must be completed, the amount of time it takes to do that job and when certain tasks can happen simultaneously. If the correct data is put on this chart and all sub contractors hit their mark, you can get a traditional home built in a minimal amount of time. But that being said, always remember that Mother Nature bats last. She can throw multiple curve balls that will retire the side causing weeks of delay.

Imagine if I told you that you could actually save considerable money, get your home built in weeks instead of months, and have just about every item in the house you want all with no sacrifice in quality. Millions of people such as you can get a new home that looks and is identical to any traditional site or stick built home but believe it or not, it is trucked in cubes or modules to the jobsite. I urge you to begin talking with a modular builder in your city or town.

 two-story modular home

Check this out! A two-story modular home. It looks as retro as can be. You would think this home is 90 years old based upon its style and architecture. But is is modular and less than one year old.

Modular homes are built in factories that are climate controlled. The homes are assembled with enormous precision and quality. The same or better materials are used that a traditional site builder might use. The work force shows up on time each day at the modular factory. They are team players that know exactly how each home is to be built. The entire process is computer controlled down to the hour. Modular homes meet or exceed just about every local building code. Incredible as it may seem, the interior of each module is finished before it is trucked to the jobsite. Walls are painted, cabinets and tops are in place, flooring is complete, etc. I suspect if you asked for it, the factory might even stock the pantry with dry foodstuffs!

I have inspected many modular homes. The workmanship astounds me. The level of quality is higher than a vast majority of traditional site-built homes. Perhaps the most unbelievable aspect is the cost savings. As modular homes get bigger, the price compared to traditional site-built homes goes down. For example, if you plan to build a 4,000 square foot custom home, a modular home that is identical in every way might cost you 20- 25 percent less. That can translate to savings of possibly $80,000.00 - 100,000.00! The break-even point is about 1,500 square feet. If your planned custom home is larger than that, expect to save money and time but no loss of quality.

Column 449

Drywall Finishing Requires Skill

drywall finishing

Drywall Finishing | This small section of wall has just about every drywall finish challenge in it: flat and tapered seams, inside and outside corners, and an archway! Drywall installation and finishing is not as easy as it appears on those fake cable home-improvement shows. Photo credit: Tim Carter

DEAR TIM: My husband and I are on a very tight budget as we complete our new home. I have decided to add some drywall in a garage and unfinished room.

Watching the drywall finisher work in my new home has been fascinating. I am sure I can do what he is doing.

Should I use paper or mesh tape for the seams? Is one finishing compound better than another? How hard is it to get smooth walls and ceilings? What are the common mistakes a rookie finisher makes? Linda B., Racine, WI

DEAR LINDA: Oh, I am quite sure you can do what the professional is doing, but I am not yet convinced you can do it as well or as fast. Don't let your eyes or home improvement television shows fool you for a moment. Great skills and techniques are being employed by the finisher you observed. It may have taken years for him to acquire the talent he possesses. Don't despair, you very well may get wonderful results, just be realistic with respect to the amount of time and effort it will require.

drywall finishing tools

Finishing drywall is a very interesting job. Before you start, you need the right tools. For the most part, finishing drywall requires very simple and inexpensive tools. Can you think of another trade where you can get virtually all of the professional level tools you need to do the entire job for less than $75.00? You can buy plastic impostor tools for far less, but professional high-quality stainless steel mud pans, an assortment of stainless steel broad knives and pole and hand sanding equipment will help you get the pro results you are striving for. These great tools can often be found at drywall supply houses- businesses that sell drywall to home builders and professional installers and finishers. Check your phone book Yellow Pages for a list of these well-hidden companies.

I have used both paper tape and the adhesive open-mesh tape. Both tapes work well for flat seams. But I happen to prefer the traditional paper tape for corner seams. Unless you have great coordination, the mesh tape can give you fits as the knife blade bumps across each of the pieces of fiberglass that make up the tape. Paper tape is amazingly easy to work with and yields wonderful results. Thousands of professionals swear by it, not at it.


Finish drywall like a pro! Learn the secrets to great drywall installation in this Drywall / Plaster Installation Checklist. I offer a 100% Money Back Guarantee.


Drywall manufacturers typically manufacture the finishing compounds for their drywall. I have used different brands all with great results. I happen to prefer the lightweight pre-mixed drywall finishing products. They are very easy to sand.

Smooth seams on both walls and ceilings comes with practice. The key is to have a finished thickness of joint compound about one eighth of an inch thick over any given seam. If you use paper tape, half of the joint compound should be under the tape with the remainder of the creamy mixture floated and feathered out to disguise the buildup of material. The adhesive mesh tape is completely covered with joint compound since it is applied to the drywall before any compound is applied.

Perhaps the most common mistakes are working with joint compound that is too thick and lumpy. I have found that adding a very small amount of water to the pre-mixed compounds and whipping them with a mixing tool attached to a power drill creates a mixture that resembles creamy cake icing. Blisters can form in taped seams if you press out too much joint compound out with repeated strokes from the taping knife. Remember, the joint compound is an adhesive and a 1/16th inch layer must remain between the tape and the drywall surface.

Another common mistake is trying for perfection as you apply the second coat of joint compound on flat seams. A slight ridge of material can remain at the center of these wall and ceiling seams. Once dry, you can lightly sand this ridge away before you apply the final third coat. Rookies often try to finish both sides of a corner on the same day. The opposite side of a corner can only be finished after the first side is dry. Beware of the temptation to use a 90 degree angle corner knife. These knives appear to be made to finish both sides of a corner at the same, but using them requires enormous skill and patience.

Column 450

Replacing EIFS with Traditional Cement Stucco

DEAR TIM: I own a six-year old home covered with EIFS synthetic stucco. Even though I have the home inspected each year for moisture intrusion, I am convinced I will replace the EIFS with a mixture of real cement stucco, artificial stone and possibly brick. Can these products be installed over the existing EIFS? If it can, is it a good idea? If you were running this job, what other things would you do to make sure this is a permanent solution to moisture infiltration? Lynne McD., Arlington, TX

DEAR LYNNE: Another one bites the dust. I know you are not the first nor will you be the last person who abandons the EIFS cladding on their homes. While moisture can get behind just about any exterior surface on a home, the plastic nature of the EIFS synthetic stucco coatings tends to trap moisture. This trapped moisture is the match that lights the mold growth and wood rot fuse. When enough of either grows, you can have an explosive repair bill.

stucco house

Perhaps the best thing to do is be pro-active. Replacing rotted structural framing members and hiring people who work in moon suits to remove mold can be an expensive proposition. If you have neither at this point, thank your lucky stars. Some people may get relief from insurance policies, but that income stream is rapidly drying up. Insurance companies no longer wish to take the fall for poor workmanship and unforgiving building materials.

The EIFS synthetic stucco system must be removed for any number of reasons. Even if you could leave it on, it would pose an enormous hidden risk. Imagine what might happen when water gets behind your new cement stucco, brick and stone. If it then traveled behind your current EIFS cladding, you would be no better off than you are today. Furthermore, the detailing around windows and doors becomes very difficult if these openings are recessed too far behind the exterior surface.

If I were in charge of this job, I would want to inspect all of the exterior sheathing and framing that was covered by the EIFS stucco. The specter of mold and wood rot would have to be removed from my mind as a builder. If I discovered either, now is the time to repair any and all damage.

Removing the EIFS system also gives me access to the windows and the doors. There is a very good chance that these items were probably not installed with the best flashings. Furthermore, window and door flashings and their nailing fins must interface a special way with the water barrier that covers the wood framing and sheathing. I would not hesitate to use traditional 30 pound felt paper as the primary water barrier. It is a superior product that has yielded the spotlight to the glamorous air and water infiltration house wraps.

If you decide to use brick, you may need to employ a structural engineer. This professional will create a detailed plan that shows what structural elements are necessary to support the brick load. The weight of the stunning artificial stone and stucco does not concern me. Both of these stunning exterior finishes can be easily attached to the wood-framed structure.

I would give serious consideration to the creation of a hidden drainage plane behind the new stucco, brick and stone. Once the 30 pound felt paper has been properly attached to the home, you can fasten vertical strips of one half inch thick by two inch wide pieces of treated plywood to the outside of the home. The stucco and artificial stone may be applied to stiff galvanized mesh that is fastened to these strips. Water that gets behind these materials now has a large and direct pathway down to the ground. This system also allows air to readily circulate behind the masonry materials. Dry is good as water fuels mold growth.

Finally, consider tinting the stucco you apply. If you chose a color that compliments the stone and brick, exterior painting may be limited to a few trim boards. Be sure to have the stucco mason do a test panel. The stucco color often changes as it cures. Try to arrange for the stucco work to take place when outdoor temperatures are in the 50F range if at all possible. Extreme weather conditions of any type can cause all sorts of stucco installation problems.

Column 453

Roof Leaks – Look in Valleys

Shingle Cuts

Roof Leaks - Look in Valleys | The bottom shingle is a regular one before being cut. The middle shingle has been cut so it runs parallel with the center of the valley. See the sharp tip? The top shingle has the second cut creating an arrow point so water runs down the valley and not up along the top edge of the shingle. Copyright 2018 Tim Carter

DEAR TIM: We recently had a room addition built onto our home. A valley is present where the addition roof intersects the main house roof. We get a leak in the room under this valley just about every time it rains. We have a valley on the other side of the roof that was part of the original house construction. We never get a leak there. The shingles look identical at both valleys. What might be the cause? Do we need to get a new roof? Lorrie B., Dunedin, FL

DEAR LORRIE: Roof leaks of any type cause lots of anguish. It can be especially distressing when there appears to be no obvious cause. The good news is the solution to the problem is very simple. I doubt that you need a new roof. Typically the problem can be traced to a rookie roofer who made one or more basic mistakes.

I have investigated hundreds of roof leaks for homeowners. Ninety-five percent of the time, the cause of the leak, as stated in my autopsy report, is centered around roof flashings. A flashing is a transitional roofing material that connects the roof material to some other building material or to another part of the roof.

In your case, your valley may have a metal valley flashing or even a granular asphalt sheet that takes the place of traditional metal valley flashing material. In other parts of the nation, many roofers actually weave shingles together in valleys. This weaving method appeals the least to me, since a hollow spot is created under the shingles. Any significant weight placed on the shingles in this area can lead to cracking and tears. This never happens when metal valley flashings are used.

What is the most common cause of a roof leak?

The most common cause of a roof leak where metal flashings are used is shingles that have been improperly cut. When a shingle from either roof intersects and passes over the metal valley flashing it needs to be cut at an angle. The resulting cut is very similar to the angle you might see on the tip of a wood chisel. This first cut, which parallels the center line of the valley, forms an acute angle. As a homeowner, you never see the cut at the top of the shingle where this troublesome tip is located because the next shingle row covers it. This is why your roof looks okay.

But wind-blown rain or water that crashes up against the edges of the cut shingles in a valley during a heavy rain can readily find this shingle tip. If water does contact this tip that lurks just under the shingle above, the water can flow across the top edge of the shingle until it finds a place to drop down into the home.

How do you prevent roof leaks?

To prevent these leaks, a secondary cut needs to be made at the top of each shingle that is in the valley. The acute tip is transformed into an arrow point by clipping off the tip of the shingle. This simple cut rejects water that tries to flow across the top of the shingle. The secondary cut places the tip of the shingle lower on the valley and water that wants to flow along the top of the shingles must first go uphill to do so. Gravity works very well to win this battle.

If you inspect your shingles and find that the secondary cut is missing, you can simply make the cut without removing any shingles. Separate the shingles from one another in the valley and use a tin snips to clip off the tip of the each shingle.


Avoid repairing roof leaks yourself! Find a professional using my Roofing Replacement / Repair Checklist. I offer a 100% Money Back Guarantee.


When the roofer showed up to install the roof, there are several things he could have done as extra insurance against leaks. Two strips of 30 pound felt paper could have been run down the valley before the metal valley was installed. This felt should go under any valley system.With some effort, this felt paper can be installed under the existing shingles. Ice dam and wind-blown rain membranes can also be installed under valleys. These are very good leak-prevention products.

If your roofer had access to a metal brake that bends metal, he could also have hemmed the edges of the metal valley that are hidden by the shingles. Hemming an edge simply means folding it back on itself. The hem is about one half inch wide and folds up and over to a nearly 180 degree angle. An air gap of approximately one eighth remains between the bent piece of valley and the main body of metal. As water tries to flow to the edge of the metal valley, it is captured by the hem and redirected to the bottom of the valley flashing where it flows into the gutter.

Column 455

Arbor

Arbor -redwood shade shelter

Arbor | This is a superb redwood shade shelter. You can build one like it in a few days. Photo courtesy of the California Redwood Association.

DEAR TIM: The sun punishes me and my family when we try to relax on our patio and deck. An awning does not appeal to me because I do want some filtered sunlight to pass through, but not too much.

I am very interested in a elegant wood arbor/shelter of some type but do not want a forest of support posts. Furthermore, I do not want to feel closed in by the shelter. Do you have any ideas or am I asking for too much? Sally P., Aurora, IN

DEAR SALLY: Rest assured that I have worked for many people who were far more demanding. If only many of my past customers had your great sense of vision and proportion. Your requests are very reasonable and the good news is that they are achievable.

Patio and deck shade shelters are very effective at blocking harsh summer sun rays. Depending upon the design of the structure and the spacing of the wood members, you can block a great deal of sunlight. The amount of shade that is created is also a function of the angle of the sun in the sky. When the sun is at a lower angle during the mid morning and mid afternoon time frames, a great deal of shade can be created by these functional and gorgeous shelters.

Shade Shelter vs Rain Shelter

The first step is to plan where the edges of the shelter need to be to offer shade to the most important parts of your deck and patio. A shade shelter is much different than a rain shelter. If you want to stay dry in a light to moderate rain shower, a typical shelter does not require much of an overhang. But a shade shelter is much different. Direct sunlight can pour into the patio and deck seating areas if the overhang of the shade shelter is not large enough.

Create a quick schedule of the times you use your deck and patio. You should focus on the mid and late-afternoon times as these can be the hottest part of the day. On a sunny day, hold a regular straw broom upside down such that the end of the broom is nine to ten feet off the level of the deck or patio. Proceed to stand at different locations around the outer edges of your deck and patio to see where a shadow is cast. Make chalk marks on the deck and patio surfaces noting the time of day. As the sun moves, so will your chalk marks.

You can eliminate support posts that will hold up the shade shelter by switching to steel beams or possibly laminated wood beams made from rot-resistant redwood and exterior rated glue. I actually prefer redwood for shade shelters. Redwood comes in many different economical grades that work very well for this purpose. If you decide to use steel beams that can span 20 or more feet between support posts, you will undoubtedly have to consult with a structural engineer. This person will size the beams and columns as well as specify how all structural elements will be connected together. The money invested in engineering pays dividends for many years.

How Tall Should an Arbor Be?

To prevent a closed-in feeling while relaxing under the shelter, be sure the main body of the wood slats is at least nine feet off the surface of the deck and patio. Ten feet might be an even better height. To get a feel for the correct height, you might have a local outdoor restaurant or garden supply business that has a similar shade shelter. If you find one that feels right, measure its height off the ground.

Be sure to coat all of the lumber with an epoxy-fortified synthetic resin water repellent before the shelter is built. This trick will save you hours of labor since it is so difficult to apply wood water repellent overhead. Applying the product before hand also insures that all the wood is treated. If you wait until the shelter is built, it becomes impossible to coat wood where one piece of lumber sits on top of another piece. If at all possible, try to use stainless steel nails and bolts. These will not rust. If you can't find these, then use only hot-dipped galvanized fasteners.


Column 456

Lasting Materials for Wood Fences

wood fence treated lumber - rough-sewn cedar

Lasting Materials for Wood Fences | Here is my wood fence. It is a combination of treated lumber and rough-sawn cedar. We painted it to match our house and the paint job still looks good even after 14 years!

Wood Fences That Last

DEAR TIM: What is the best wood, both economical and durable, for a fence? The fence will be subjected to both hot and cold weather, if that factors into your opinion. If I decide to use CCA treated lumber, can I paint it or should it just weather? What is the best way to set the posts? Should they be surrounded with concrete or gravel? Dan H., Omaha, NE

DEAR DAN: If after reading this you decide to use chromated copper arsenate (CCA) lumber, you need to do the job this year. The CCA lumber industry and the EPA reached an agreement last year that calls for CCA lumber to be removed from the consumer market on December 31, 2003. There are other chemically treated lumbers available that will take the place of CCA lumber if you happen to be a procrastinator.

Wood fences create a delightful look and feel. I think the thing I like most about wood is that you often have an infinite number of possibilities with respect to design and texture. But there are two things that can restrict what your fence will ultimately look like: your own imagination and any local zoning laws, that limit the type of fence you can install. Be aware that some zoning laws can be highly restrictive to where fences can be used, their height, and even the type of material to be used. Some sub-divisions may have deed restrictions that further prohibit the fence size and type. Be sure to investigate all of these things before you make a trip to the lumber yard.

Can you get sick from CCA lumber?

Chemically treated lumber is an industry currently in transition. The removal of CCA lumber from the consumer market has gotten the attention of many consumers who are afraid of chemicals. There are countless stories and claims about people who have become very sick from exposure to CCA lumber. If these are true and factual, would you want your children climbing on such a fence? Is it worth the risk? Those are tough questions to answer. In your case, it may be a moot point. Two coats of exterior paint that contain both acrylic and urethane resins might encapsulate any chemicals in the wood for a very long period of time.

What natural woods are best for fences?

You have other wood options. Mother Nature has been manufacturing naturally rot and weather-resistant lumber for many years. Ask any farmer about the longevity of locust fence posts. Redwood and cedar also make superb long-lasting fencing materials. Both of these wood species have grades that are very affordable. Do not be fooled by the prices of clear redwood and cedar. You do not need this premium grade for fencing. Choose a more economical grade such as construction heart redwood or similar grade of cedar. If you are lucky, try to see if you can round up some bald cypress. This lumber species weathers outdoors very well.

Thirteen years ago, I built my own decorative wood fence. It was a combination of wood materials. I used CCA treated lumber for the posts and horizontal frame members. Since my wife wanted the fence to be painted as you do, I built the frame in the fall and let it weather until the next summer. This gave the lumber plenty of time to expel any excess moisture. The pickets of the fence were made from rough-sawn cedar.

The painting of my fence happened in stages. I painted the posts and horizontal frame members completely before I installed the vertical pickets. Each individual picket was completely precut to size and painted on all sides and edges before they were installed. I paid close attention to the bottom end of each picket. This spot received three coats of paint since it would be so close to the ground. Be sure to use stainless steel nails or hot dipped galvanized nails to fasten the fence parts together.

I did not use concrete or gravel to set my posts. Fortunately, I owned a post hole digger that created a hole just two inches in diameter larger than the size of my posts. After digging the holes two feet deep, I used a scrap 4x4 piece of lumber to compact the earth at the bottom of each hole. I then set each post in line and made sure it was plumb as I carefully tamped earth around all four sides of the post. My fence has remained in perfect position for the past thirteen years. If a post does go bad for some reason, the absence of concrete or gravel will make it a quick and easy job. Before you begin to dig any fence post holes, make sure there are no underground utility lines in the vicinity of the fence line.


I received an email asking in part... "I am going to buy a nailer to rebuild my wood fence. What diameter nail would I use for this project? Can the nailer be used for different size nails on other projects?"

Use a ring shanked 8 or 10 penny nail. You can use different length nails of the same diameter if they are made specifically for that gun.

Column 458

Slate Porch

Slate Porch - Is it Durable?

DEAR TIM: My wife keeps telling me she is tired of our plain concrete porch and the attached stoop. I would like to surprise her with a distinctive, yet affordable surface. The biggest problem I face is thickness. The new surface can't be any higher than one-half inch above the current concrete surfaces. A neighbor told me to look at slate. Do you think that would work? Is it durable? How hard is it to install? Stan W., Staten Island, NY

DEAR STAN: If only the rest of us husbands could be as lucky as you! You have stumbled across an idea that will make your wife the happiest woman in the neighborhood. She is going to be thrilled with this elegant building material choice. Slate has so much character. It is beautiful yet subtle. I consider it to be one of the most classic natural stone products that you can use on the exterior of your home. As for durability, think how many homes, churches, and government buildings have slate roofs that are 100 or more years old. Can you think of a more extreme exposure than roofing? You can successfully install slate on your existing concrete surfaces so long as they are in good condition.

Slate porch

Slate Porch

The job you are about to undertake is nearly identical to one I did about six years ago. A friend of mine wanted to completely change the look of the front entrance to her home. She picked out a new gorgeous mahogany front door and decided to mask the plain concrete stoop with black slate. The finished look was stunning. If you feel your wife would prefer another color, you can choose from red, green, purple and gray slates. You can also mix the colors.

The slate I used for my friend's stoop was one quarter inch thick. The cement-based mortar I used to adhere it to the concrete added perhaps one eighth inch additional thickness. This will easily meet your height requirement.

Installing the slate is actually quite easy. You need just a few tools: a tape measure, a four-inch wide putty knife, notched trowel, an old paint brush, a diamond wet saw, sponges, and a rubber grout float. All of the tools are affordable except for the diamond wet saw. You can rent this specialized saw at a tool rental shop. The store where you buy your slate might also rent this tool. If you plan your work well, you might only need the saw for 24 hours. You can cut slate with a dry abrasive blade on a circular saw, but it creates massive quantities of dust. It is also possible to cut the slate by hand with a special carbide blade in a hacksaw, but it is a tremendous amount of work.

To insure the slate stays attached to the concrete for many years, you need to do several things. The concrete surface needs to be completely clean and dust free. Scrub it with a scrub brush and soap or use a pressure washer to deep clean it. Only mix as much thinset as you can apply to the concrete surface in one hour. Dampen the concrete with a little water using the old paintbrush moments before you trowel on the thinset mortar. Only spread as much thinset as you can cover with slate in five minutes. Make sure the back of each piece of slate is dust-free and wiped with a damp rage or sponge just before it is set in the wet thinset mortar. Avoid installing the slate on a hot, dry, breezy day.

Once the slate is installed but before it is grouted, sprinkle the entire area with water lightly. Immediately cover the slate with plastic sheeting for at least 24 hours. This plastic and the added water will raise the humidity level and allow the thinset mortar to gain maximum strength. Do not walk on the slate during this time period. Block it off with a barricade so mail carriers, delivery people, neighbors, etc. do not walk on it by mistake. Ungrouted slate or ceramic tile is prone to movement or damage until such time as it is grouted.

Prior to grouting the slate, apply a grout release agent. The cleft surface of the slate is gorgeous but it also makes grout removal very difficult. The release agent will help minimize the amount of work you have to do to get all excess grout and grout film from the surface of each piece of slate. Be very careful to use a minimal amount of water in the sponges as you wipe excess grout from the slate. Using too much water during the grout removal phase can severely weaken the grout. Weak grout will crack and turn to powder after several exposures to freezing temperatures.

Column 459

Deck Sealer – Epoxy Fortified

DEAR TIM: I love my wood deck but hate to care for it. I have tried many deck sealers and they all turn black or green in short order. Those that do seem to perform better than others suffer significant fading. Is there a miracle penetrating deck sealer that will last for three or possibly four years? What is the best way to clean my wood deck before applying the sealer? Christine R., Roswell, GA

DEAR CHRISTINE: Up until recently your quest for the fabled miracle deck sealer might have been more difficult than the quest for the Holy Grail. Millions of homeowners including yourself and professional deck restoration companies have longed for a product that will look superb for two and even three seasons in a row. But just about every product has led to a certain degree of disappointment. When you begin to look closely at the problem, one quickly discovers that there are many reasons why many common deck sealers fail so quickly.

Many common deck sealers are oil based. The primary water repellent ingredient in many of these products is a natural oil. The oil might be linseed, vegetable, tung or even a modified animal fat. These oils do indeed repel water, but they attract mildew and algae. In fact, these oils are delicacy foods for these black and green organisms. The deck sealer manufacturers have known this for many years. They add chemicals - mildewcides and algaecides - to the sealers that poison the organisms and inhibit their growth. But ultraviolet (UV) sunlight, rain and snow-melt degrade these chemicals. Once this happens, the mildew and algae begin to feast on your deck sealer.

Wood decks are also exposed to the harshest conditions of just about any other horizontal or nearly horizontal building material at your home. Concrete drives, patios and sidewalks are far more durable than wood. Roof shingles typically have ultra-durable ceramic glass granules that protect them from UV and water. The wood that is laid flat to create the deck surface and handrails absorbs the full impact of the destructive UV rays during the middle part of the day. This same flat wood does not easily shed rainwater. Water can sit on the wood or, in the worst cases, soak into unprotected wood via small or large cracks in the wood surface. Wood siding and trim on the walls of a typical home never has to put up with this type of abuse.

EB015 Cleaning & Sealing Deck eBook CoverYears ago, I discovered several high-performance synthetic resin deck water repellents that worked much better than other brands. The synthetic resins are not food for mildew and algae. But recently a vast improvement has hit the marketplace. You can now purchase an epoxy fortified synthetic resin deck sealer that shows enormous promise. Test results show it is highly resistant to fading. The epoxy helps to bond the sealer to the wood fibers greatly extending the service life of the sealer. An added benefit is the product is a penetrating water repellent. The epoxy fortified water-based product soaks deeply into wood instead of laying on the surface, where it might peel after a year or two.

Cleaning a wood deck is very important before sealing it. The cleaning process removes dirt, mildew, algae, and sun-damaged wood fibers. I am not a fan of pressure washing, even at lower pressures. This water blast can and does erode soft lighter colored spring wood from each decking board. If your deck is made with chromated copper arsenate (CCA) lumber, pressure washers may pose an additional danger. The pressure washer may dislodge CCA impregnated wood fibers and transport them to the soil around your home.

Perhaps the best cleaning method is a combination of oxygen bleach and a small amount of old-fashioned elbow grease. Oxygen bleach is a non-toxic powder that mixes with water. Beware as not all oxygen bleach products are the same. Many contain ingredients made off-shore that might be not as pure as USA made ingredients. What's more, not all products contain the same amount of active ingredient. Some low-priced products contain vast amounts of filler. The high performance oxygen bleaches typically cost more.

The active oxygen ions released after the powder is mixed with water vigorously deep-cleans the wood. Typically, the oxygen bleach solution is liberally applied to the wood surfaces and allowed to bubble for 10-15 minutes. If it soaks in or starts to evaporate, add more solution. After waiting, lightly scrub the wood with a scrub brush on a pole and rinse with a garden hose. If you use the water-based epoxy fortified sealer, you may be able to clean and seal your deck in the same day.

Message from Tim:

Years ago while researching a column about cleaning decks, I discovered the wonders of Oxygen Bleach. It is perhaps the 'greenest' cleaner I know of as it uses oxygen ions to break apart stains, dirt and odor molecules. There are no harsh chemicals, and it works on just about anything that is water washable.

I decided to create my own special blend using ingredients made in the USA. In fact, the raw materials in the active ingredient are food-grade quality registered with the FDA. I call my product Stain Solver. I urge you to use it to help with cleaning your deck or wood. You will be amazed at the results!

Deluxe Shower Doors and Enclosures

corner shower

Deluxe Shower Doors and Enclosures - Copyright 2018 Tim Carter

DEAR TIM: I have decided to pamper myself with the bathroom of my dreams. I am struggling with the shower enclosure. For years I had a shower door that was a nightmare to keep clean. What in the world can I do? I have selected a magnificent tile that will be in the shower and I want it to become part of the room, not hidden behind a scum-covered panel. Help me, you are my only hope. Brenda H., High Point, NC

DEAR BRENDA: You are spending your money in one of the best rooms of your home. Investing money in high-quality products for a bathroom is a sure way to get a high rate of return. This is positively true if you select timeless designs and fixtures that will look as good 25 years from now as the day they are installed.

Shower doors and enclosures have undergone a tremendous change in the past several years. You can still get traditional bypass doors that hang from a track. But anyone who has had one quickly learns this style is very hard to keep clean. The framed doors and channels in the tracks are the galactic black holes of bathroom maintenance. Sleek frameless shower doors and enclosures are the rage. Taking a relaxing shower in one of these gorgeous easy-to-clean shower enclosures is like finding an oasis in the middle of a scorching desert.

acrylic shower walls

Installing do-it-yourself acrylic shower walls can be easy so long as you select the right acrylic shower set! (C) Copyright 2017 Tim Carter

The newest luxury shower doors and enclosures offer you exactly what you want. Not only are they easy to clean as the glass on the inside of the shower is smooth, but they also can be purchased with crystal clear glass. The fancy tile you have planned for the shower will be visible to all who enter the bathroom.

An added benefit of these see-through shower enclosures is they create a positive illusion of more space. Your bathroom will seem larger than it is. The payback for this extra space requires just 15 to 30 seconds of effort on your part moments after you turn off the valve after each shower. Use a professional quality squeegee to rid the glass of each and every water droplet. As an extra incentive to do this, you will have a much lower likelihood of mold in your new bathroom. Mold needs water to grow. If you quickly squeegee the shower glass and tile, you stop mold growth before it can start.

For those who have a higher modesty setting, the new shower enclosures are available with patterned glass, molded glass and glass that has been sandblasted with countless designs to suit anyone's tastes and decorating flair. In addition, the glass is available in shades of blue, green, gray, and bronze. If you are a glutton for making decisions, you can consider silvering the glass and several other artistic colorations. The abundant choices and options insure that you will find something to make your bathroom that paradise of personal pleasure.

Be sure to pay attention to the hardware. Brushed nickel and satin chrome will compliment just about any glass selection. Brass, gold plating, traditional chrome and acrylic are all available as well. After you towel dry your body, take just a few seconds and wipe off the hardware to maintain its brilliant finish.

Perhaps the best feature of the new shower enclosures is the flexibility of design. Many manufacturers offer custom sizing and design features. The glass can be cut to almost any size, shape and layout. If you contact the manufacturer before you complete the design of your new bathroom, they can often give you advice that will allow you to maximize the shape and size of your enclosure. It will immediately become the crown jewel of your new bathroom. The manufacturer can also tell you what works and more importantly what can be done during construction to insure the enclosure is installed with ease. Tips such as these will also insure long-term trouble-free performance.

Once your new shower enclosure is completed, be sure to obtain written care instructions. Pay close attention to the approved cleaners that are recommended by the manufacturer. A good-intentioned person can ruin hardware or even scratch the custom glass if they use the wrong cleaner. Avoid all cleaners that contain any abrasive ingredients whatsoever.

Column 461