Drywall Finishing Requires Skill
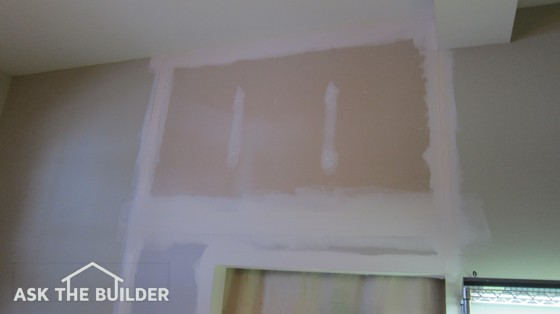
Drywall Finishing | This small section of wall has just about every drywall finish challenge in it: flat and tapered seams, inside and outside corners, and an archway! Drywall installation and finishing is not as easy as it appears on those fake cable home-improvement shows. Photo credit: Tim Carter
DEAR TIM: My husband and I are on a very tight budget as we complete our new home. I have decided to add some drywall in a garage and unfinished room.
Watching the drywall finisher work in my new home has been fascinating. I am sure I can do what he is doing.
Should I use paper or mesh tape for the seams? Is one finishing compound better than another? How hard is it to get smooth walls and ceilings? What are the common mistakes a rookie finisher makes? Linda B., Racine, WI
DEAR LINDA: Oh, I am quite sure you can do what the professional is doing, but I am not yet convinced you can do it as well or as fast. Don't let your eyes or home improvement television shows fool you for a moment. Great skills and techniques are being employed by the finisher you observed. It may have taken years for him to acquire the talent he possesses. Don't despair, you very well may get wonderful results, just be realistic with respect to the amount of time and effort it will require.
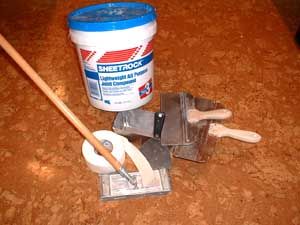
Finishing drywall is a very interesting job. Before you start, you need the right tools. For the most part, finishing drywall requires very simple and inexpensive tools. Can you think of another trade where you can get virtually all of the professional level tools you need to do the entire job for less than $75.00? You can buy plastic impostor tools for far less, but professional high-quality stainless steel mud pans, an assortment of stainless steel broad knives and pole and hand sanding equipment will help you get the pro results you are striving for. These great tools can often be found at drywall supply houses- businesses that sell drywall to home builders and professional installers and finishers. Check your phone book Yellow Pages for a list of these well-hidden companies.
I have used both paper tape and the adhesive open-mesh tape. Both tapes work well for flat seams. But I happen to prefer the traditional paper tape for corner seams. Unless you have great coordination, the mesh tape can give you fits as the knife blade bumps across each of the pieces of fiberglass that make up the tape. Paper tape is amazingly easy to work with and yields wonderful results. Thousands of professionals swear by it, not at it.
Finish drywall like a pro! Learn the secrets to great drywall installation in this Drywall / Plaster Installation Checklist. I offer a 100% Money Back Guarantee.
Drywall manufacturers typically manufacture the finishing compounds for their drywall. I have used different brands all with great results. I happen to prefer the lightweight pre-mixed drywall finishing products. They are very easy to sand.
Smooth seams on both walls and ceilings comes with practice. The key is to have a finished thickness of joint compound about one eighth of an inch thick over any given seam. If you use paper tape, half of the joint compound should be under the tape with the remainder of the creamy mixture floated and feathered out to disguise the buildup of material. The adhesive mesh tape is completely covered with joint compound since it is applied to the drywall before any compound is applied.
Perhaps the most common mistakes are working with joint compound that is too thick and lumpy. I have found that adding a very small amount of water to the pre-mixed compounds and whipping them with a mixing tool attached to a power drill creates a mixture that resembles creamy cake icing. Blisters can form in taped seams if you press out too much joint compound out with repeated strokes from the taping knife. Remember, the joint compound is an adhesive and a 1/16th inch layer must remain between the tape and the drywall surface.
Another common mistake is trying for perfection as you apply the second coat of joint compound on flat seams. A slight ridge of material can remain at the center of these wall and ceiling seams. Once dry, you can lightly sand this ridge away before you apply the final third coat. Rookies often try to finish both sides of a corner on the same day. The opposite side of a corner can only be finished after the first side is dry. Beware of the temptation to use a 90 degree angle corner knife. These knives appear to be made to finish both sides of a corner at the same, but using them requires enormous skill and patience.
Column 450
Tim built custom homes and did ultra-custom remodeling for 20+ years before launching his Ask the Builder media presence. He was selected as one of the Big 50 by Remodeling magazine in 1993. This award gave birth to Ask the Builder in October 1993. Tim also operates https://DrawPlumbingPlans.com. His @askthebuilder YouTube channel was the first home improvement channel on YouTube.