Bathroom Remodeling Sequence
Bathroom remodeling Project © 2017 Tim Carter
Bathroom Remodeling Steps TIPS
- A great plan is mandatory
- Frame walls
- HVAC, plumbing, electric then insulate
- Install electric heat floor mat
- CLICK HERE to Get Tim's FREE & FUNNY Newsletter!
DEAR TIM: I'm adding a bathroom in my house. The framing is complete and I am a little confused as to the order of the rest of the tasks. When do I install the plumbing pipes? Do I tile before or after the tub is installed? When are the vanity and the toilet installed? When do I drywall? Mark O., Chicago, IL
DEAR MARK: Adding a bathroom is tough enough, but the job can be even harder if you goof up the sequence of events from start to finish. Not only can you make things more difficult, there is a chance of ruining completed work that is already in place. As you might expect, there is a logical order that professionals follow to maximize profits and minimize the amount of time spent working.
CLICK HERE to get FREE & FAST BIDS from local bathroom remodeling contractors.
Overall Size
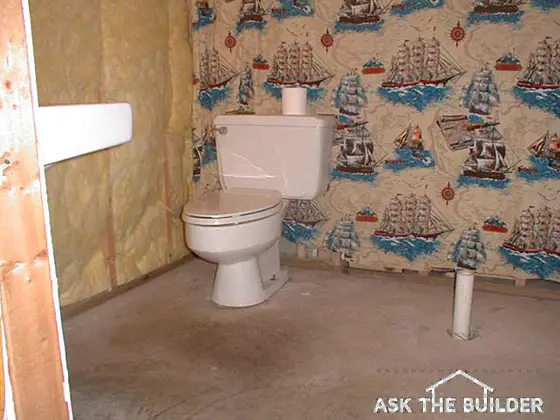
One of the first things that should be done is to determine the proper placement of the bathroom walls. This requires precise planning as many model building codes dictate minimum clearance requirements in and around toilets and bathroom sinks. I hope you have your walls in the right place, if not, you may have to start over.
Toilet Space
For example, a toilet must be centered in a space no less than 30 inches wide. The actual space can be larger, but in no instance can another fixture be closer than 15 inches from the centerline of the toilet.
The minimum distance from the front edge of the toilet bowl to the wall you face while resting on the toilet must be 18 inches or 24 inches depending upon your local code. This same minimum distance requirement applies to the front edge of the sink countertop as well.
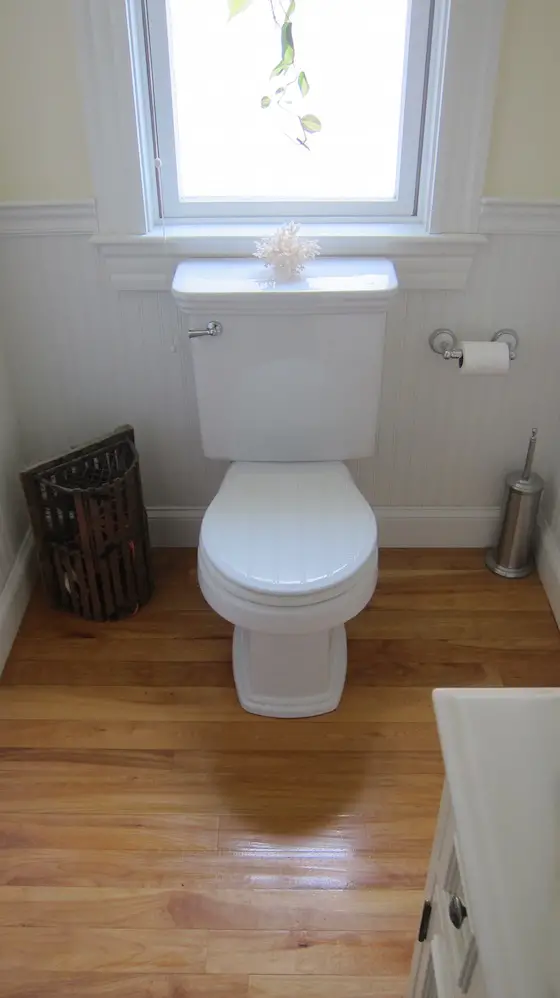
This is the toilet in my own 1/2 bath powder room. There's plenty of room because the distance between the two side walls is 54 inches. That leaves about 19 inches of space from the edge of the toilet bowl to either wall. © 2017 Tim Carter
Always check your local codes as you create your plans. Apply for your building permit as soon as your plans are complete.
Walls Before Plumbing
If the floor to this new bathroom is constructed with wood floors joists and a wood sub-floor, the walls should be constructed before plumbing drain lines are installed. The opposite is true if the bathroom will be located on a concrete floor.
Slabs and Plumbing
In this case, all below-floor-drain lines need to be installed first. Triple check the pipe placement before you pour the new concrete floor.
The best way to ensure the plumbing pipes are installed in the correct location is to stake out the bathroom wall plates and suspend them in the work area with wood stakes. Be sure this frame is in the right location so the actual walls will be right where the bottom plates of your frame are after the slab is poured.
I'd always drill the holes in these temporary wall plates for the plumbing drains and vent lines that would extend up through the slab after the concrete is dry.
This trick was taught to me by an old master plumber named Ralph Vilardo. It allows you to get the drain and vent pipes perfectly centered on the walls.
The rough carpenters will hug you!
Keep in mind that some states and local governments only allow licensed plumbers to install drain and water supply pipes. Check your building department to see if you are permitted to do your own plumbing work.
Frame the Walls
The day after the concrete is poured, the walls can be framed. Keep in mind the location of the tub and shower faucet. The center line of the tub or shower should be the center of the space between two wall studs on this wall.
This allows you to install the faucet without cutting a wall stud. When all of the walls and ceiling studs are in place, install the remaining above grade plumbing drain lines and vent pipes.
CLICK HERE to get FREE & FAST BIDS from local bathroom remodeling contractors.
Tub and Shower
It's now time to install the tub or shower. After the tub is in place, keep it covered with heavy drop cloths to prevent scratches and nicks. With the tub in place, complete the installation of all of the water supply lines.
Heating Hardest
The next step is to rough in any heating and cooling ducts, heat piping, and ventilation piping for fans. Realize that HVAC ducts are big. This subcontractor has the hardest time making things work out in tight spaces. After he's done, then all the above rough plumbing pipes should be installed.
Electric Rough Last
Once this is complete, install all of the rough electrical wiring. Make sure that wall-mounted light fixtures don't interfere with medicine cabinets, mirrors, or side walls. This is a common mistake.
Wall sconce fixtures hang out beyond the small rough-in boxes. Be sure the final fixture doesn't cause a conflict with a mirror or swinging door.
Magic Floor Heat!
You've got a one-time chance to make your new bathroom floor toasty warm in the winter. Install an electric radiant floor mat on top of the subfloor.
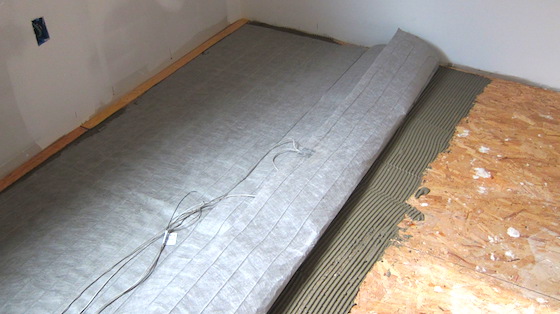
This is the electric radiant floor mat that's heating my man cave ham radio shack. It's a great DIY project. CLICK the IMAGE NOW to order your own NuHeat Electric Floor Heat Mat.
I've got one in my man cave ham-radio shack and it heats the entire room. You'll never have cold feet from icy ceramic tile!
It's easy to install this mat. Please watch the three videos of me installing the mat in my man cave:
Insulation
Insulate all exterior walls for energy savings and consider insulating all interior walls for sound control.
SECRET TIP: It's a great idea to pack insulation around the underside voids of the tub as well. This will keep bath water nice and warm for extended periods of time.
Cement or Waterproof Board
It's now time to install cement board on any walls around the tub that will be covered with ceramic tile. Consider installing moisture-resistant drywall on all walls. If you never want any problems with this drywall failing, then coat it with clear urethane - two coats - before it's finished.

I've had excellent results with this clear water-based urethane. It dries FAST. CLICK THE IMAGE TO ORDER SOME NOW.
Normal Drywall
Regular drywall can be used for the ceiling. Finish and sand the drywall.
Watch this video to see a few drywall finishing tips. I have MANY OTHER drywall videos here at AsktheBuilder.com. Just type: drywall videos into the search engine here on any page to view them.
If you have a wood floor system, it's now time to install cement board on the floor to support the ceramic tile. You can skip this step if you installed the electric floor mat. You covered the floor mat with thinset to create the solid surface for the tile.
Ceramic Tile
The tile in the tub and shower area should be installed and finished first. Follow that with the floor tile. Tile the entire floor in case someone decides to install a pedestal sink.
Finish Carpentry
When the floor tile grout is dry, install the bathroom door and trim.
Paint Now
Consider painting the room at this point. It's easier to paint with no toilet or vanity cabinet and top in the way.
Install Fixtures
After the paint is dry, carefully install the toilet and sink. Cover the floor with drop cloths during this process to avoid hurting the new tile. Complete the job by installing mirrors, towel bars, and accessories.
CLICK HERE to get FREE & FAST BIDS from local bathroom remodeling contractors.
Column 287
14 Responses to Bathroom Remodeling Sequence