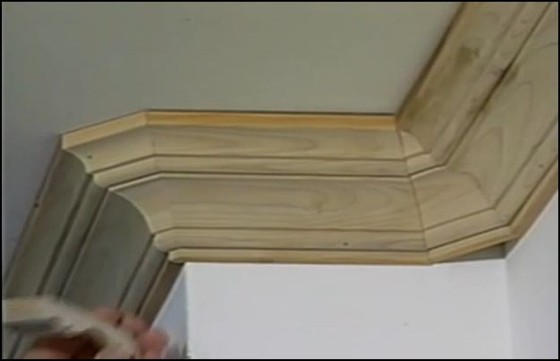
Cutting Crown Molding Quick Start Guide
DEGREE OF DIFFICULTY: 
Cutting crown molding is HARD. Don’t underestimate this task. If you get it right your first time, drop your tools and go buy a lottery ticket. That’s how lucky you are!
The first small eBook I wrote was about cutting crown molding. It’s still a best seller. You MAY need it, but for now, see if you can’t get the job done without it.
Do NOT SKIP the second tip below. It’s the secret that no one else tells you about. It’s all about the test pieces of crown molding.
Watch the video below unless you’ve come here from YouTube having already watched my video.
Be sure to look at the RELATED CONTENT links at the bottom of this page. Lots of goodies there for you.
REQUIRED TOOLS:
| |
 |
|||
| |
|
|||
| |
|
|||
RECOMMENDED ITEM: The AsktheBuilder.com Cutting Crown Molding eBook.
Use Promo Code: QSTART for 30% off the price of the Crown Molding eBook!! (Discount not applicable to the Crown Molding DVD.)
TIPS:
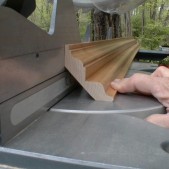
- Create test pieces of cut crown. Make them 16 inches long and cut at 43, 44 and 45 degrees for inside corners. Cut outside test pieces at 45, 46 and 47 degrees. Use these to determine best angle cut for each side of a corner. RARELY is the cut 45 degrees on both sides of a corner.
- Install triangular-cut rough lumber strips filling void space behind the crown molding. Nail this to the top plate of wall. The crown is nailed to this blocking.
- Forget about angled miter cuts at butt joints on long runs. It creates MORE surface area to perfectly match the molding profile. Make straight cuts, block solidly from behind and GLUE the two ends of molding together once a perfect seam is created.
- Apply glue on the back of the molding pieces and the blocking. This will also hold the seam together for eternity or until the termites show up. Immediately nail the molding before the glue sets up. The glued joint will not separate over time.
- For perfect corners, remember you’ll have to roll the pieces of molding to get the fit right. Rolling means twisting the molding ever so slightly so it moves up or down the wall or across the ceiling. I’m talking movement not much more than 1/16th inch or so.
- Still having trouble? Get my Crown Molding DVD NOW.
- Celebrate your Victory!
Please subscribe to my Newsletter and get insider information on the latest home-improvement tips, and products. I guarantee you that my newsletter WILL save you time and money. Frequently, I include your questions with my answers and proposed solutions. Perhaps the best part of the newsletters are my reviews of new products based on my own testing. Click here to read my past newsletters.
It is FREE & EASY.
RELATED HELPFUL CONTENT:
- Crown Molding eBook
- Crown Molding DVD
- Cutting Crown Molding Without Losing Your Mind
- Crown Molding Cutting Tips
- Cutting Crown Molding Upside Down and Backwards
Column: QSG004
3 Responses to Cutting Crown Molding Quick Start Guide