Paint Door
DEAR TIM: I have to paint a door. The last time I tried painting a door, it ended up in a disaster. Paint ended up all over the hardware no matter how careful I was. Can you coach me so I know how to paint a door like a professional? What skills and magic do you draw upon to get results that us mere mortals only dream of achieving? It can’t be that hard painting a door, or is it? Cindy B., Palo Alto, CA
DEAR CINDY: I’m just a mortal like you, so don’t think that I have super-human skills. What I do have that you might not have is thousands of hours of painting experience. My guess is that if I went back in time 40 years, you and I would see lots of paint on the hardware of doors I painted, as well as other rookie mistakes. But over time, I’ve developed a system that really works well for me for painting new or existing wood doors. Talk to other painting professionals, and they may have their own way to paint doors.
Long ago, I discovered that I’m a perfectionist in certain areas of construction. I’m the guy that has to have the screw slot perfectly plumb on electrical cover plates. Paint on hardware is simply unacceptable to me, as are the tiny unpainted lines near hardware where paint can’t cover and the brush strokes that don’t match the wood grain of the door. For these reasons, I prefer to remove as much hardware as necessary so it’s simply out of the picture when it comes to painting. This almost always means removing the door from the jamb as well as removing the door hinges.

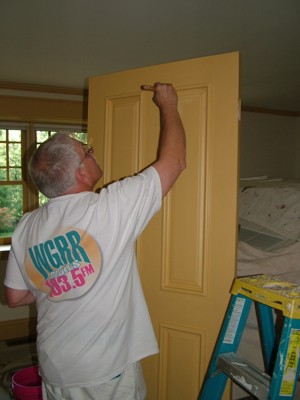
This door is not in its jamb. Removing it from the opening allows you to achieve true professional results. PHOTO CREDIT: Kathy Carter
Removing the door hardware takes a few minutes, but I’ve timed it compared to carefully cutting in with a brush. For me, removing the hardware ends up being faster. No doubt another painter may be able to do just the opposite, so your mileage may vary.
Part of your problem may have been the brush you selected as you prepared to paint the door. I’ve learned the hard way that it really pays to purchase a high-quality brush when painting. What’s more, I’m very partial to using a tapered brush for all interior trim work. These brushes have a chiseled bristle profile instead of the common profile where all the bristles are the same length. You’ll discover that using a tapered brush gives you fantastic control when painting in corners and cutting in fine edges.
There are many tricks you need to know to get professional results, and I’ll cover as many as I can fit into this space. For starters, if you want a smooth finish, the door itself must be smooth before you apply the finish coat. If you’re painting a new wood door, this means the door needs to be sanded after you prime it. Primers tend to have heavy pigments that fill microscopic voids in the wood. Water-base primers will raise the grain of wood doors slightly. Sanding the dry primer with a sanding sponge that has 120 grit abrasive usually will suffice. Be sure to brush away all dust. If you’re sanding a previously painted door in an older home, be very careful. If the door was painted prior to 1967, there is a good chance there might be lead in the paint. Lead dust is highly toxic.
You may be able to get by with one primer coat and one finish coat of paint, but that will only happen on rare occasions. Typically you’ll need three coats to get professional results. The key is to apply thinner coats of paint, not a thick coat that might run or sag.
You can use a roller to apply paint to wide open areas of the door, but I would recommend brushing the paint immediately to give you the look that the paint was brushed on. Some people don’t like the texture created by paint rollers. You’ll have to experiment to see if you like the texture. Be sure to use a roller cover with minimal nap if you decide to do this.
Watch for paint that builds up on the edges of the door. This excess paint can be very problematic when the door hits against the door jamb. If the door was a tight fit, the paint may cause the door to bind. If you hang the door before the paint cures, the paint on the door can stick to the paint on the jamb and you’ll have a huge mess.
Spray painting doors can save enormous amounts of time. There are some fantastic spray-painting tools that give you professional results with a very small learning curve. If you have access to a garage where you can spray the doors all at once, you’ll save hours of time.
The trick is to stand the doors up and tack them together with wood strips at the top of the doors. You want to assemble the doors in a contiguous V-pattern much like the sections on an accordion door. Just be sure you can easily get the spray tool into the inside angle where two doors meet. Setting the doors at a 45-degree angle should give you plenty of clearance.
It only takes minutes to clean the spray-paint tool, so don’t let the cleanup process stop you from trying to use this method. Spraying paint indoors in an occupied home with furniture and finished floors can be problematic. I don’t suggest spraying paint indoors in these situations.
Column 792
3 Responses to Paint Door