Bathroom Remodel Sequence
DEAR TIM: Last week you talked about a removing a shower floor in a project you’re doing. I have a big bathroom remodel project I’m about to start but I’ve never done one before. I don’t know when to do what and am worried about wasting time, materials and causing damage to finished surfaces. Is there a universal bathroom remodel sequence so I know when I should be doing what work? I’m sure you’ve done lots of remodels and any other tips you can share would be appreciated. Madelyn J., Morgan Hill, CA
DEAR MADELYN: Yes, I lost count of the bathroom remodels I’ve done over the years. Back in the day when I was deep into remodeling for paying customers, I can remember quite a few of the jobs. I was talking to my son the other day and told him that we could completely gut a bathroom to the stud walls and have it back in service in 12 days or less when everything went as planned.
You’re correct in thinking there’s a recommended sequence of events that needs to happen in a precise order. This ensures a bathroom remodel project moves ahead as fast as possible yet no one contractor has to endure a hardship because of the work put in place by another trade or subcontractor. This applies even to DIY folks like you who don’t need any additional aggravation while you’re trying to do the work at nights and on the weekends.
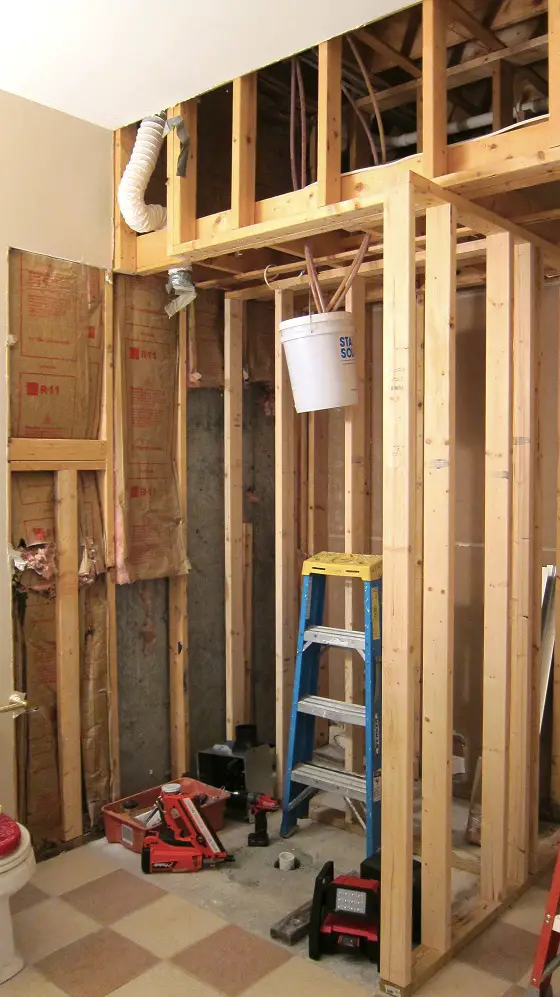
This bathroom is undergoing a major remodel. Each step must be done at the right time to minimize cost and get the job done fast. Photo Credit: Tim Carter
I often feel the best way to think of a bathroom remodel is to think about the sequence when one builds a new home. With almost every remodel, you need to do demolition work. That’s the first phase as you need to remove all the things that are going to be replaced. This phase is nasty work and I recommend you get this behind you as fast as possible.
Once you’ve gutted the bathroom, it’s time to make any repairs to the wood subfloor that may have happened by water leakage. It’s also time to do any other wall or ceiling framing where you use wood or metal studs. Get all of this wood framing complete before you do anything else.
Be sure you have all of the diagrams of all the plumbing fixtures, medicine cabinets, light fixtures, towel bars, etc. so you put the wood studs and blocking in the correct location. I’ve seen many a rough carpenter put a wall stud directly in the way of where a tub and shower faucet is going to be. Don’t make that same mistake.
The next phase of work is your heating and air conditioning. This work should be coordinated with the plumber as well. If your home has forced-air heating and cooling there may be ductwork changes. It’s always much harder to work with large objects, such as 6-inch metal ductwork, than with small things like 1/2-inch water supply lines.
For this reason, the plumber and electrician need to yield to the HVAC installer. However, the plumber also has very tight constraints as certain large pipes can only go in one place. This is why the plumber and HVAC man should meet at the job site and discuss what they need to accomplish so they don’t get in each other’s way.
Once the heating and cooling rough-in work is complete, it’s time to bring in the electrician. It’s very easy for an electrician to place his flexible wire where it needs to be. Some cities require the wires to be in metal conduit, but even this is easier to install than a 3-inch PVC toilet drain or a 1.5-inch sink drain pipe!
Be sure your light fixtures don’t interfere with any mirrors, opening medicine cabinet doors, etc. I’ve seen electricians install wall sconce boxes way too close to mirrors. All of this has to be thought out long before the electrician shows up to work and nail in boxes.
After the electric is complete and you’ve passed all your mechanical inspections, you need to make sure your bath fans are vented properly with metal pipe. Don’t make the mistake and use that wretched flexible pipe that looks like a plastic-covered slinky toy.
With all this work done, it’s time to insulate, install a great high-performance vapor barrier on any exterior walls and then drywall. The finished floor happens next followed by any finish carpentry trim work. You’d then will probably paint the walls and ceiling and then install the toilet, vanity, countertops and faucet.
In certain instances, I often decide to paint the walls and ceiling before I do the finished floor. It all depends on the job. The last thing you want is to spill paint on finished floor and believe me, accidents can and do happen.
I feel the biggest tip I can offer up is to plan, do more planning and go over the plan a third time. You need to make sure everything is going to work and there are no conflicts with fixtures. If time is of the essence and you don’t want delays, then get all finished fixtures at the job site and open them up. Be sure everything is perfect and there’s no concealed damage.
Column 1139
Tim built custom homes and did ultra-custom remodeling for 20+ years before launching his Ask the Builder media presence. He was selected as one of the Big 50 by Remodeling magazine in 1993. This award gave birth to Ask the Builder in October 1993. Tim also operates https://DrawPlumbingPlans.com. His @askthebuilder YouTube channel was the first home improvement channel on YouTube.