Cleaning Paint Brushes and Rollers
DEAR TIM: I argue constantly with my husband about him wasting expensive paint brushes and roller covers. He says it's too hard to clean them and when he tries, he seems to ruin them. I can't believe that pros throw away brushes and roller covers. What do you do? If you clean your tools, how do you accomplish it? What's the oldest used brush you have? Terry C., Montreal, Quebec Canada
DEAR TERRY: Your husband may have valid complaints, but only because he's never been trained how to clean painting tools. My years of accumulated knowledge of how to preserve high-quality paint brushes, roller covers and other painting tools, came from the College of Hard Knocks and some secret tips gleaned from professional painters that used to work for me. The good news is that it's not that hard to clean paint brushes, roller covers and other tools.
As with many things in building and remodeling, if you ask ten different pros how to do something, you'll usually get no less than eight different answers. They all may achieve the same desired result. The same is true for cleaning painting equipment. I'm going to share with you what's worked well for me for nearly forty-five years. For sake of discussion, let's assume we're working with water-based paint which employs the use of water for cleanup. Oil-based paints require paint thinner, mineral spirits or some other solvent.
Cleaning paint brushes starts before you dip it in the paint can. I discovered years ago if I'm working with a water-based paint that my cleaning job is so much easier if I dip the brush in water and shake it out before I first dip it in paint. This water gets the bristles wet up inside the heel of the brush where the bristles are covered by the metal ferrule.
This stored water keeps the paint from drying deep inside the brush as you use it. So long as you keep the brush wet with paint as you use it and then clean it immediately after use, the paint deep inside the brush bristles where you can't see it stays in the liquid state.
The biggest mistake I see most people make when cleaning brushes is they point them upside down under a sink faucet. This is the fastest way to ruin a brush. Never ever do this.
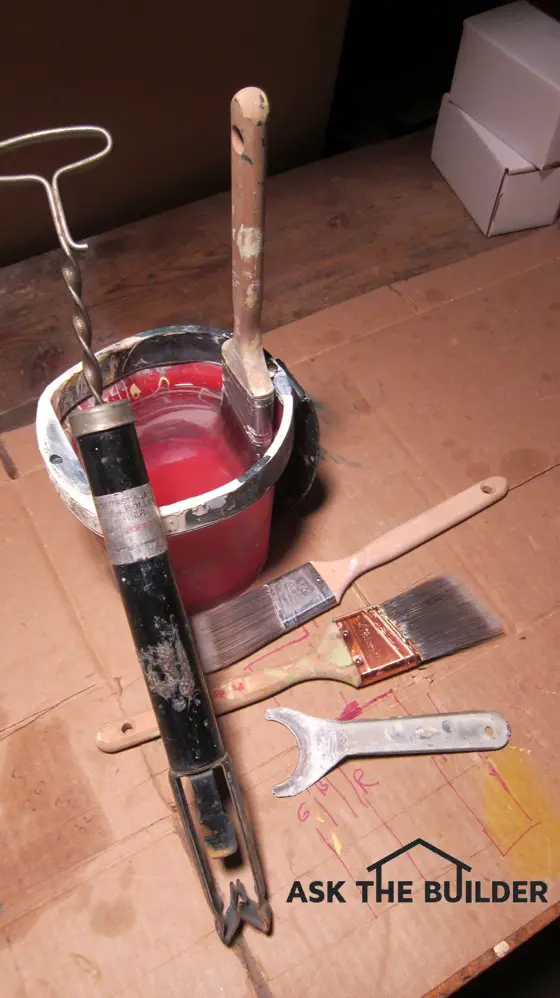
Here are a few tools that make cleaning paint brushes and rollers fast and easy. Photo credit: Tim Carter
I try to get out as much of the paint as possible by stroking the brush on old cardboard or rubbing the bristles with old paper towels, clothes dryer softener sheets, or any other thing that will remove the paint from the bristles. Don't put excessive pressure on the brush trying to bend the bristles. This will also ruin the brush.
I then fill a small bucket with warm water and a generous squirt of liquid dish soap. I take the brush and move it rapidly side to side in this solution as if I'm stirring the water with the brush. The brush never touches the bottom of the bucket.
Within seconds, the water becomes filled with paint from the brush. I discard this paint water into a five-gallon bucket of sand. The bottom of the bucket has holes punched in it so the water can eventually drain from the bucket. If you have a septic system at your house, never allow paint to get into your drain system.
I then fill the small bucket with warm water and once again swish the brush back and forth. As soon as the water turns cloudy from the paint, I dump it into the sand-filled bucket. I continue to do this rinsing until the water is clear after swishing. Usually it takes about two minutes to get to this point.
The last step is to suspend the brush in warm water for twenty-four hours. I have a handy plastic paint pail that has a magnet near the top lip. The steel ferrule grabs onto the magnet and holds the brush perfectly vertical. I fill the pail so the water is just below the metal ferrule. Believe it or not, you'll often see more paint pigment and resin at the bottom of the pail after 24 hours.
I lay the brush flat on a piece of cardboard and allow it to dry naturally after taking it out of the pail. I do not shake it to remove excess water. I allow the bristles to stay tightly bound to one another from being soaked with water. As the brush dries flat, the bristles fluff out on their own. I then store the brush in the protective cardboard cover that came with it when the brush was new.
Cleaning roller covers is easy. Use a semi-circular tool to scrape as much paint as possible from the roller cover. You'd be stunned how much paint can be stored in a roller cover, sometimes up to four ounces in a 9-inch cover. I then use a magical hand-powered spinning tool that spins the roller at a high speed. When you get the roller wet with soapy water and crank the tool, the paint flies off the roller cover. I do this in an old 5-gallon bucket so the paint stays in the bucket.
Repeated rinses with clear water and subsequent spinning with the tool produces a clean roller cover in just minutes. The roller cover fibers may be stained the color of the paint, but don't think that means it's not clean. I also suspend the roller covers in clear water for 24 hours and once again, paint you can't seem to get out by spinning magically drifts out of the roller cover into the water.
Once clean, store the roller cover vertically on some cardboard until it's dry. Don't lay it flat to dry as you'll compress the roller cover fibers. As for my oldest paint brush, I've got a favorite 2-inch tapered brush that I use for painting woodwork that's close to twenty years old. She's a beauty and the bristles are not floppy or worn out.
Column 1067
Tim built custom homes and did ultra-custom remodeling for 20+ years before launching his Ask the Builder media presence. He was selected as one of the Big 50 by Remodeling magazine in 1993. This award gave birth to Ask the Builder in October 1993. Tim also operates https://DrawPlumbingPlans.com. His @askthebuilder YouTube channel was the first home improvement channel on YouTube.