Clothes Dryer Vent Leaks in Ceiling
DEAR TIM: I live in a condo on the ground floor. My dryer is located in a closet in my bedroom. My dryer duct is routed from the back of my bedroom out into my living room ceiling where it connects to the dryer vent. Lately I have noticed a leak in my living room ceiling. The plumber found the dryer vent to be leaking at the elbow. What could be causing this? Please help, I'm living with a large hole in my ceiling and am unsure what to do. Alexandra N., Bedminster, NJ
DEAR ALEXANDRA: The leak is being caused by condensation that is forming either inside or outside of the actual clothes dryer vent pipe. That part of the pipe is getting cold and the very moist hot air from the clothes dryer is turning into liquid water as it gets closer to the exterior of the condominium's exterior wall. To stop the leak, you must keep the entire length of dryer vent pipe nice and warm.
To do this job correctly, you may have to enlarge the hole in the living room ceiling to expose the entire length of the dryer vent pipe. This may seem radical, but the drywall repair person can fix a larger hole in just about the same time as it takes to fix the small one created by the plumber who discovered the source of the problem.
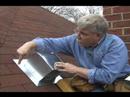 I have found that it is often best to vent fans and dryers through the roof. I urge you to watch this video of mine to see how easy it is to install the correct vent-cap flashing on a roof. Have no fear - if done right you will have no leaks.
First, you need to caulk around the hole in the exterior wall where the dryer vent pipe exits your condominium. I'm willing to wager that cold air is leaking in this location and it allows the exhaust pipe to get cold. But only perform the caulking if the correct exhaust pipe is installed.
Clothes dryer vent pipes should be made from smooth, rigid metal dryer duct of at least 4 inches and no longer than 25 feet. Be sure that you have a minimum amount of 90 degree bends in the pipe. Each 90 degree bend produces the same amount of resistance to air flow as ten linear feet of straight pipe. Most clothes dryers limit the total length of vent pipe run, so you must pay attention to this installation requirement. You can find this information in the clothes dryer instruction manual.
If you use either of the metal pipes, tape all seams with real heating and cooling duct tape. This tape is meant to be used on steel or aluminum ducts. Do not confuse it with the common gray duct tape sold in all hardware stores and home centers. Heating and cooling duct tape has special adhesives and often a very shiny outer surface.
The final step it to completely insulate the outside of the clothes dryer vent pipe as it travels across the entire living room ceiling to where it exits your condominium. The insulation must be expertly installed and no part of the metal vent pipe must be exposed. You can use regular fiberglass insulation for this task. If you simply want to fill the entire joist space cavity with insulation, that will work. If you want to just wrap the pipe with thinner insulation, be sure you use the special duct tape to keep the insulation tight around the dryer vent pipe.
Once you have performed all of this work, it is time to repair your ceiling. Be sure there is plenty of insulation in the ceiling joist cavity near the outside wall. If you decide to just insulate the pipe, then be sure to completely fill the cavity with fiberglass insulation extending back four feet from the exterior wall towards the center of the room. This will block the cold from entering the ceiling cavity where the clothes dryer vent pipe is located.
Column EM0009
Tim built custom homes and did ultra-custom remodeling for 20+ years before launching his Ask the Builder media presence. He was selected as one of the Big 50 by Remodeling magazine in 1993. This award gave birth to Ask the Builder in October 1993. Tim also operates https://DrawPlumbingPlans.com. His @askthebuilder YouTube channel was the first home improvement channel on YouTube.
this is what they thought was wrong with my dryer vent, after we replaced our washer and dryer trying to figure out what problem was HOWEVER it was not, it still leaked, so bad that it smelled like animal urine every time i turned dryer on. Took the insulation down and omg it was totally SOAKED. I am at a total loss of what to do. I have put so much money into this problem and no one can find a solution for me. Any other suggestions?
Becky, you need to schedule a 15-Minute call with me. There's simply too much to talk about and type.
I need to have my condo dryer vent pipe replaced. I have read your articles on dryer venting. But the contractor still wants to put 4+ feet of flexible dryer hose between the dryer and the wall so he can attach the hose to the dryer without pulling out the washing machine. I currently have a metal periscope vent kit as a connector but I admit it is hard to install and seems flimsy. (see http://www.amazon.com/Builders-Best-110172-Adjustable-Periscope/dp/B000KKO4ZM/ref=sr_1_5?ie=UTF8&qid=1418697403&sr=8-5&keywords=offset+dryer+vent for an example). What is the best way to make that dryer to wall connection? In this case, the hole in the wall is almost directly opposite the hole in the dryer and the space between the wall and the dryer is only about 5 or 6 inches.
I am in a condo where the dryer exhausts outside. The duct work is extended with a motor before it reaches the exterior vent.I am getting exterior air entering through my dryer duct. Defeats the purpose of using heat or air conditioning because it's like I have a window open at the same time. I have no idea why this is happening. I do not think there's a back draft flap,don't think the motor does anything unless the dryer's on.
Tim,please do NOT publish my question about my condo duct using my name. I had NO idea you used the name we fill in. Will you please change my name to susan if you respond?
Tim,
I have lived in my condo for 13 yrs. It is two levels. Just recently I discovered water coming out of the dryer vent that runs up the wall to the attic. I recently had my air conditioner checked and he assured me that that was not causing the problem. Would you have a suggestion of what might be causing this?
Thanks
Who knew a dryer vent could cause so much grief ! I own a condo in a concrete building. Apparently, the vent is embedded into the concrete in the ceiling which makes it totally inaccessible. In spite of the concrete water has found its way into the suite through the ceiling. I have tried a number of things but I and everyone else are at a loss. I'm guessing the run is close to25 feet from the dryer to the exhaust.
1. I have a concrete ceiling and wall, and I am noticing a leak due to the dryer vent issue. In order for the water to reach the concrete ceiling, the water should have escaped the vent pipe, right? So does this mean, the vent pipe is broken?
2. How much does such a procedure cost? I know that it would depend on the nature of leak and the exact procedure involved, but I would like to know some ballpark figures. I can't find the cost information anywhere on the internet (including this post).