Drywall Problems – Blisters and Falling Tape

Drywall blisters are prevented by ensuring you have at least a 1/16th-inch layer of joint compound UNDER the tape. Do not scrape out all of the mud from under the tape. Copyright 2018 Tim Carter
Drywall Blisters - Common Mistake / Easy To Avoid
Drywall blisters are bubbles that form under paper drywall tape. The form because too much joint compound was scraped from under the tape. The joint compound contains glue that holds the paper tape to the drywall surface.
DEAR TIM: My bullheaded husband has been trying to finish some drywall. The taped seams constantly blister when he applies the second coat of compound.
Some of the tape delaminates a day or two later. He says the pre-mixed joint compound is defective. What's the secret?
Just how does one get perfect blister free taped drywall joints? We are running out of time. Thanks. Karla D., Norridge, IL
Related Links
Top Drywall Finishing Secrets - Sharing Years of Experience
Taping Drywall - Basic Steps in Seconds
DEAR KARLA: Let's not be too tough on your husband. After all, he is giving it the old college try.
Drywall Blisters Mean Defective Finisher, Not Joint Compound
The odds that the pre-mixed joint compound in the bucket is defective are very low. If the product was fresh when purchased and has not been frozen, it should be fine.
You can test to see if it is good by simply spreading a 1/8 inch patch of it on some dust free drywall. Let it dry. If it is difficult to remove with a scraping tool, the product is fine.
Leave Mud Under Tape
The most common reason for drywall tape blisters is a lack of joint compound between the tape and the drywall surface. All too often I see rookie weekend warriors make the mistake of removing too much joint compound from underneath the tape.
Some people press the taping knife so hard they snap it in two! The blisters form on the second coat when the tape absorbs moisture from the second application of joint compound.
The paper tape swells and there simply is not adhesive present to hold the paper tape flat. Keep in mind that the pre-mixed joint compounds are simply advanced water-based adhesives mixed with finely ground solids that give them body and mass.
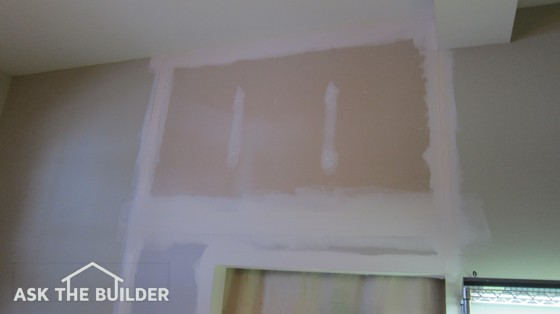
This small section of wall has just about every drywall finish challenge in it: flat and tapered seams, inside and outside corners and an archway! Copyright 2018 Tim Carter
Ideally, one should place one-sixteenth of an inch of joint compound between the tape and the drywall to prevent blister and tape delamination. The tapered edge of drywall is made to accommodate this.
The recessed area created when two pieces abut one another is about one-eighth inch deep. The paper tape should be right in the middle of this area with equal amounts of joint compound above and below it.
You can also switch to a different open mesh tape that actually sticks directly to the drywall. Apply it first and then cover it with joint compound.
The trick to achieving pro results with traditional paper tape is not magic but it does take a considerable amount of hand-eye coordination, joint compound mixed to the right consistency, and the right tools.
Professional drywall finishers add just a small amount of water to pre-mixed joint compound and then stir it by hand or with a paddle attached to a drill.
Watch this video of me showing you how to get the right consistency when you use joint compound:
The compound, once mixed, resembles smooth warm cake icing that will actually slowly flow out of a bowl or pan. Often the joint compound from the factory is moist but far too stiff.
Avoid Drywall Blisters With Correct Knife
My tool of choice is a five inch wide flexible taping knife. I use it to apply a generous amount, up to a one-quarter inch thick, of joint compound to the drywall seam surface.

This is a great knife to tape drywall. Be sure to round off the corners with a metal file to avoid tearing inside corner tape. CLICK THE IMAGE NOW to have this knife delivered to your home.
Step-By-Step Taping Tips
It's important to make several light passes over the compound to smooth it out and remove some of the excess material. It is now time to place the tape.
Be sure it is centered in the seam. I angle the knife blade much like a snow plow and lightly press as I glide the knife over the seam. With each pass, a little more compound oozes out from beneath the tape. I stop when I am confident that the tape is at the desired depth in the recessed seam area.
Use Fan To Speed Drying Time
To speed drying time you can place a regular oscillating fan in the room. This will help speed up the drying time. It is also possible to use a rapid set joint compound.
These products are sold in the dry form and are mixed on site with water. They come in different set times and some set hard in as little as 30 minutes. Using these materials you can tape, second coat and final coat drywall in less than 90 minutes.
Mix Small Amounts of Rapid-Set Joint Compound
If you decide to use these rapid set materials to make up for lost time, you must be careful not to mix up too much at one time.
I made that mistake once and a half bucket of compound turned rock hard in the bucket while I was up on a ladder. Using cold water can retard the set time slightly. If the compound does start to set up before it is used, do not add more water. Simply discard it and make a new batch.
Column 387
Tim built custom homes and did ultra-custom remodeling for 20+ years before launching his Ask the Builder media presence. He was selected as one of the Big 50 by Remodeling magazine in 1993. This award gave birth to Ask the Builder in October 1993. Tim also operates https://DrawPlumbingPlans.com. His @askthebuilder YouTube channel was the first home improvement channel on YouTube.
Tim, my roof leaks when it is a blowing rain. How do I fix the problem? I have both metal on main house and asphalt shingles on the rest.
Thank you, Nelson
Nelson,
This requires one of my phone consult calls. I've got many questions to ask you and I need to see some photos of the situation. Go here to set up the call:
https://shop.askthebuilder.com/products/15-Minute-Phone-Conversation-with-Tim.html