Grouting Quick Start Guide
Grouting Quick Start Guide
DEGREE OF DIFFICULTY: 
If you’ve not seen tile grout, I’d bet you really did live under a rock. It’s just about everywhere: public bathrooms, kitchens, restaurants, retail stores, etc.
Even though you’ve seen the dried concrete powder in between tiles and possibly watched it being installed on a job or on a TV show, believe me it’s not as easy to get professional results as you might think.
I know this because I get emails all the time from people who have ruined their first grouting job.
©2017 Tim Carter
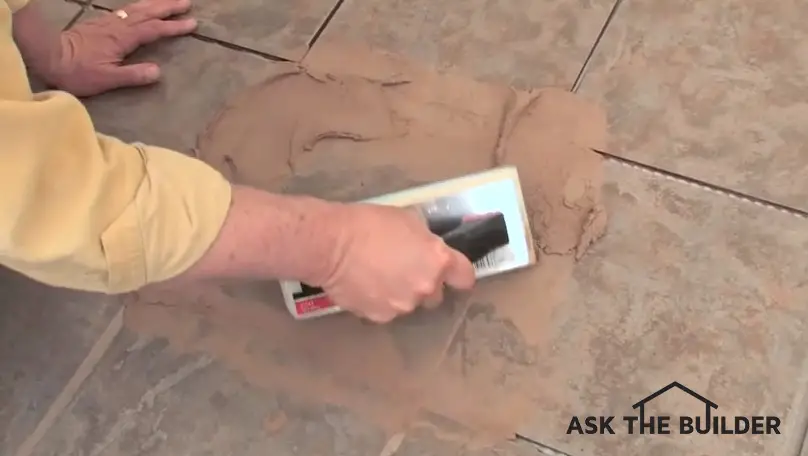
I’ve rated this project three hammers out of five because I want you to practice first before doing the project. That practice will take a little extra time and effort. It’s also a tough job if you’re grouting a floor because you’ll be on your hands and knees for a long time.
Watch the video below unless you’ve come here from YouTube having already watched it.
Be sure to look at the RELATED CONTENT links at the bottom of this page. Lots of goodies there for you.
REQUIRED TOOLS & MATERIALS:
 |
||||
| |
|
|||
TIPS
- Build a small 2 x 2 foot panel of cheap tile similar to what you’re going to grout.
- Practice on this test panel first - seriously. There’s nothing harder to do than scraping out ruined grout from tile joints when you need to start over.
- Don’t mix all of the grout at once. Always keep some of the grout dry in case you add too much water.
- Don’t mix up more grout than you can trowel onto the tile in 30 minutes. This is especially true if you’re working in hot, dry weather.
- Wall grout contains no silica sand. Don’t use wall grout on joints wider than 1/8 inch. Use sanded grout for larger joints.
- Use clean cool or cold water to mix grout.
- The consistency for wall grout (contains no silica sand), once mixed, should be as stiff as room temperature cake icing. You should not be able to pour it from a bucket, but it might slowly flow out.
- The consistency of sanded grout should be like fresh bricklayer’s mortar. It should not be runny.
- Dip the rubber grout float in water before using. Shake off excess water.
- Wipe the surface of the tile with a damp sponge before applying grout. A very LIGHT film of water helps to lubricate the surface of the tile.
- Push the grout into the tile joints with the rubber float. Use a back and forth S-shaped motion with your arm to speed the process.
- Remove excess grout from the tile with firm pressure on the rubber float at an angle to the tile joints.
- Squeeze all water from sponge when you use it to tool the grout joints and wipe excess from the tile.
- Change the rinse water frequently.
- Do not leave a heavy film of grout on the tile. The tile should look completely clean when you pull the sponge across the tile for the last time. Even then, there will be a dried haze of grout on the tile.
- Remove the dried grout haze using an old bath towel as soon as the grout is hard enough to walk on. Buff the surface with the towel.
- Celebrate your Victory!
Please subscribe to my Newsletter and get insider information on the latest home-improvement tips, and products. I guarantee you that my newsletter WILL save you time and money. Frequently, I include your questions with my answers and proposed solutions. Perhaps the best part of the newsletters are my reviews of new products based on my own testing. Click here to read my past newsletters.
It is FREE & EASY.
RELATED HELPFUL CONTENT:
Column QSG010
Tim built custom homes and did ultra-custom remodeling for 20+ years before launching his Ask the Builder media presence. He was selected as one of the Big 50 by Remodeling magazine in 1993. This award gave birth to Ask the Builder in October 1993. Tim also operates https://DrawPlumbingPlans.com. His @askthebuilder YouTube channel was the first home improvement channel on YouTube.
I am doing a shower wall with glass blocks. What is the best grout to use? as well as the best adhesive for the blocks?
helpful videos - I am replacing the thinset on tiles that look exactly like the ones you have on the floor. Can you tell me the name of the tiles on the floor you are working on?
Also, do you have to remove the thinset between the tiles before grouting?
thanks.