How to Build a Sloping Partition Wall
Quick Column Summary:
- Build partition wall for sloped surface
- 6 tools are all you need
- Determine correct angles
- Use a prehung door
DEAR TIM: I have an attic space in my home that has small vertical walls that transition to a sloped surface. There's a small flat surface of ceiling area in between the two sloped surfaces. I need to build a partition wall in this space to create a separate storage room. How hard is this to accomplish? What tools will I need? How do you cut the angles correctly? How do you get the correct measurement for the wall studs? Why don't you just come over here and help me do it instead of me asking so many questions? Maggie B., Bismark, ND
DEAR MAGGIE: One of my great memories with my children is going to a famous bakery on Sunday mornings with my oldest daughter. It was a busy place. When you walked in, you had to grab a numbered paper ticket. Doing this ensured you were waited on in the proper order. Why am I telling you this? Here's your number: 383,951. We're currently serving number 45. I won't be able to come to your house in person for quite some time. Other homeowners are waiting for me to help them.
I'm going to help you build this wall virtually. It's not hard, but I understand how a rookie would not know where to start. Let's begin with the tools. You can do this job if you have a standard circular saw equipped with a blade that tilts. This allows you to make regular 90-degree cuts or angled cuts. A tape measure, a 2 or 4-foot level, plumb bob on a string, a hammer, and a framing square will be all you need to complete the job.
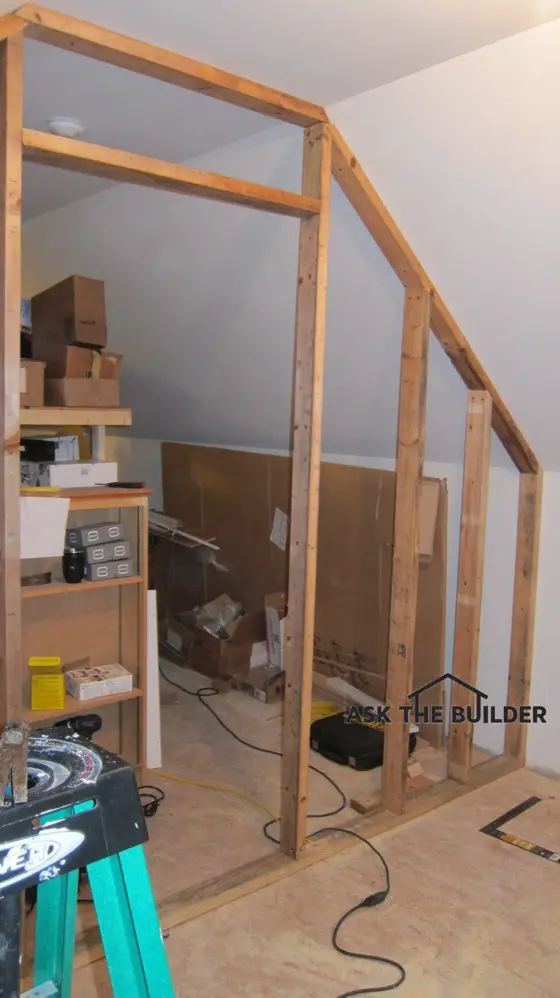
This wall was built with very simple tools. It took less than one hour. Photo Credit: Tim Carter
The first step is to install the bottom plate of the wall. This is the foundation for the entire job. Make sure you place it where you want it and nail or screw it to the subfloor. Be sure the wall is parallel with the attic floor joists or a gable end wall in the attic. Gable walls in attics often contain a window or a louvered vent near the peak of the roof. Keeping your new wall parallel will make everything easier for you, trust me.
It's now time to install the top wall plates. I prefer to do this by first installing the end wall studs. The end wall studs extend up from the bottom plate and are attached to the short vertical walls in your attic. If your attic is unfinished and your end wall studs do not fall upon the existing short vertical wall studs, you'll have to nail pieces of blocking in between the existing vertical wall studs. Your end wall studs get nailed to these pieces of blocking. Be sure your end wall studs are plumb. Use one of your levels to assist you with this task.
It's now time to install the top wall plates on the sloped and flat parts of the attic ceiling. You may have to install similar blocking in between roof rafters to support the top wall plates. I prefer to nail blocking so the wide flat part of the blocking is flush with the face of the rafters or wall studs. Space the blocking so it's about 4 feet apart.
Using your trusty plumb bob, a tool that never needs calibrating, suspend it from the center of the blocking down to one side of the bottom wall plate. Push the string against the blocking and adjust it for height and side to side. It helps to have an assistant making sure the tip of the plumb bob is hovering just above the edge of the bottom plate. Make accurate marks where the string is touching the blocking above it once the plumb bob is where it needs to be.
Cut and install the pieces of wall plate that go on the sloped and flat parts of the ceiling. To determine the correct angle to cut these plates and the top cut of each stud that touches a sloped top plate, you'll need to determine your roof pitch.
Roof pitch is often stated as so many inches of rise in 12 inches of horizontal run. For example, the roof in my garage attic has a 9 / 12 pitch. It rises 9 inches for every foot of horizontal run. Take a 2-foot by 2-foot scrap of OSB or plywood and tack it alongside a rafter so one edge is in contact with the underside of the roof sheathing.
Use your short 2-foot level to draw a plumb line down along the scrap of wood. This line must start at the underside of the roof sheathing. Draw a line at 90 degrees to this plumb line along the wood. This line must not be longer than 12 inches and the end of the line needs to start against the underside of the roof sheathing.
Measure up from where these two lines intersect to get the vertical rise of your roof. Get on the Internet to convert roof pitch in inches to degrees. In my case, the angle in degrees of my garage attic rounds to 37 degrees. Set the bevel cut adjustment on your circular saw to 37 degrees to make any and all angled cuts.
Layout on your bottom plate the location of all the vertical wall studs. Be sure you space your wall studs at 16 or 24 inches on center. This spacing will ensure minimum waste of wallboard and any insulation you place in the wall cavity.
Use your plumb bob to tell you where the long tip of each wall stud contacts the sloped top wall plate. The door into your new room doesn't have to be centered in the wall, but the rough opening should be a rectangle to accommodate a standard pre-hung door unless you intend to make a custom door cut at an angle to match the slope of the roof.
Good luck on this simple project. I'm sure you'll do great!
Column 1010
Tim built custom homes and did ultra-custom remodeling for 20+ years before launching his Ask the Builder media presence. He was selected as one of the Big 50 by Remodeling magazine in 1993. This award gave birth to Ask the Builder in October 1993. Tim also operates https://DrawPlumbingPlans.com. His @askthebuilder YouTube channel was the first home improvement channel on YouTube.
Sir,
You give instructions and use terms as though you are speaking to a seasoned carpenter. If I knew all of your terminology I probably would not have asked how to build the wall in the first place!
Mrs. Carneal