How to Deck Stair Railing
DEAR TIM: I read your column each week in our paper and a few weeks ago you talked about building stairs for a deck. I can handle that but am worried about how to make all the complex cuts required for the deck stair railing. I realize you can’t provide step-by-step directions in the space you’re given, but can you point out the challenges and give me a few life-line tips so I don’t mess up my deck railing? Mandy C., Clemson, SC
DEAR MANDY: You’re correct that it’s impossible for me to offer you step-by-step directions on how to build stair railings in the limited space provided in this newspaper column. I could write a book about the process easily devoting one hundred pages or more with countless step-by-step photos.
What follows should be a decent quick-start guide you can use along with some common sense to get very good results. The first thing to realize is it doesn’t require complex math to make a great stair railing.
The angle of the stair railing is determined by the rise and run of the steps you’re working with. The bottom and top rails of the steps simply run parallel to the line created by the nose of each of the stair treads. To see this line, place a long straightedge on the steps. If you built the steps right with the same riser and tread combination and the needed one-inch overhang of the tread over the riser, then the straightedge will just touch the front tip of each tread all the way down to the bottom step.
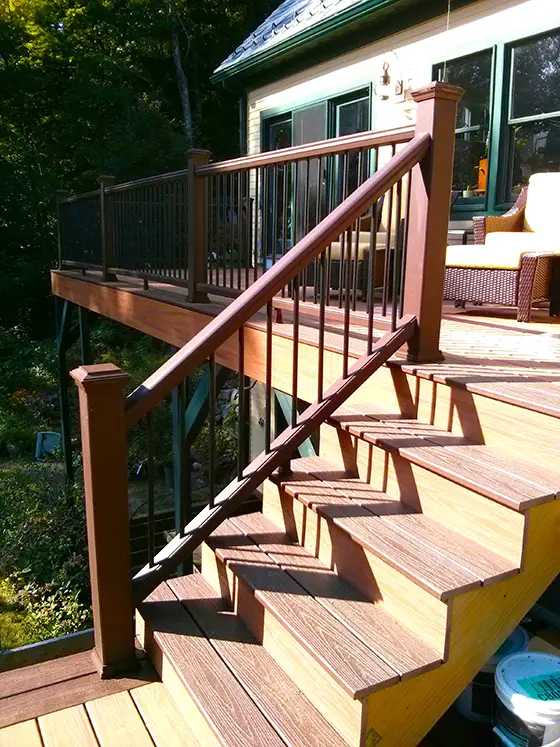
This deck stair railing was made using great skill and modular parts designed to fit together. Photo Credit: Tim Carter
The posts that support the railing need to be very secure and they need to be in the same relative position on each tread. In other words, if the face of the top post on your deck is set back 3 inches from the tip of the decking board at the edge of the deck, then all the other posts on the steps going down must also have their face 3 inches from the tip of the stair riser they’re sitting on.
It’s vital to maintain this spacing and position for the posts so that the railings connect to the posts at the same height above each tread. This creates a uniform sight line and professional look. It also creates a safe railing. The building code is very specific about the height of the railing and you have some leeway.
Remember that line that’s created by the straightedge along the tips of the stair treads? If you extend a vertical line up from this sloped line, the top railing must be not less than 34 inches and no more than 38 inches above the line connecting the tips of the stair treads.
Calculating the angle of the cut for the railings is very simple. Once you have your railing posts in position and secure, you just clamp your bottom rail to the posts with the excess railing extending past the posts. Be sure the bottom railing is at least one inch above the tips of the stair nosing and that the railing is parallel with the sloped line created by the tips of the tread nosings.
Use a pencil to carefully mark the line where the vertical posts are touching the railing. These will be your cut lines. Be sure to cut on the correct side of the line with your miter saw.
Both the bottom and top railings need to be securely fastened to the vertical posts. Use screws that will not corrode and will penetrate deep into the posts. The last thing you want is a flimsy connection between the post and the railing. Pre-drill pilot holes so you don’t split the wood.
One trick some carpenters use to ensure the railings are in the correct position is to use a giant piece of plywood that has been cut to create the parallelogram that the railings and posts create when all the pieces are connected.
In other words, if you were to take a piece of plywood and rest the long edge on the stair tread nosing tips, the top long edge would be parallel to the stair nosings, but it would be too tall. Using a 4-foot level resting at the tip of the lower stair tread, you can make a mark up on the wood at the 34-inch level that meets the code requirement. If you make an identical mark using the level sitting on the top tread and then snap a line between those two marks, you’ve now created the top of your handrail. You can also trace where the sheet of wood contacts both posts.
Use a saw to cut along the three odd lines and now you should end up with a parallelogram that fits nicely between the two posts. If you did everything right, the top line is also parallel with the bottom edge of the plywood. Your top cut line represents where you hand will touch the top of the handrail as you go up and down the steps. As you stand back and look at this odd-shaped piece of wood, it should look good and uniform.
This template will help you to ensure your angled cuts are right and provide you with guidance as to where you need to place the top and bottom handrails so they’re in the correct positions allowing you to end up with a safe and sturdy stair railing.
Column 1161
Tim built custom homes and did ultra-custom remodeling for 20+ years before launching his Ask the Builder media presence. He was selected as one of the Big 50 by Remodeling magazine in 1993. This award gave birth to Ask the Builder in October 1993. Tim also operates https://DrawPlumbingPlans.com. His @askthebuilder YouTube channel was the first home improvement channel on YouTube.