Insulated Concrete Foundation Forms & Attach Wood to Concrete
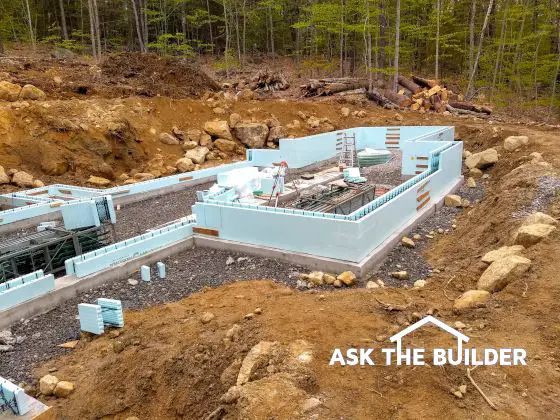
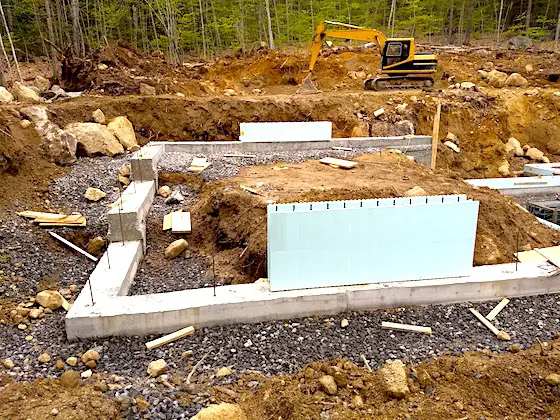
This is a house foundation that’s being built with insulated concrete forms. (C) Copyright 2019 Tim Carter
Insulated Concrete Foundation Forms
QUESTION #1: Hello, Tim. I was doing research about house foundations and came across interlocking foam forms that stack on top of one another. They assemble much like children’s plastic blocks. Does a concrete foundation poured this way work as well as a traditional poured or cast concrete foundation? What, if any, are the drawbacks from using these foam forms? Is there an alternative way to achieve a well-insulated house foundation? What about the cost of an ICF foundation? Audrey P., Mt. Desert, Maine
You may have the same questions as Audrey does if you’re researching new home construction. The insulated concrete forms (ICF) that she’s talking about have been around for several decades now. The industry has undergone some consolidation, but that’s normal.
I’ve seen these products at all the trade shows and I’ve been on job sites where they’ve been used. A large two-story building was built near my last home in the Midwest using ICFs. If you drove past it, you’d have no idea it was a solid concrete two-story building as it was covered with lap siding.
The manufacturers typically will sing the praises of their products. Not one will readily talk about the challenges of installing them, and there can be challenges. The finished ICF foundation performs structurally as well as a traditional poured concrete foundation.
It’s important to realize the foundation footing the ICFs rest on should be perfectly flat and level. The ICF blocks are precision products and will conform to whatever they’re placed on.
The footing must be perfectly level for ICFs to work well.
If the footing has humps or dips in it or is tilted side-to-side, the ICFs will telegraph all these defects. As you might imagine, it takes lots of extra time to get the footing perfect like I describe.
The footing also needs to be perfectly square so the ICFs are placed on the center of the footing with adequate flat area remaining to install any bracing that might be called out for by the ICF manufacturer. It’s important to realize that traditional concrete forms can be aligned using special screw bracing so the walls are perfectly straight. This takes minutes to do with traditional forms but ICFs might take a while longer to brace so the walls are as straight as an arrow.
Another key point is that traditional concrete foundation forms don’t require the footing be perfectly level. The concrete poured into the forms can be made level with great ease and moderate skill using laser levels, string, finish nails and chalk. Realize that you typically pour the concrete into ICFs until it reaches the top of the last row. Thus it’s super important that the top row of the ICFs is perfectly level. Since they stack on top of one another you can see why it’s so important for the footing to be level.
There are any number of alternative ways to achieve what ICFs do. The ICFs almost all use the same high-quality closed cell foam that you can purchase at building supply wholesalers or at the big box stores. These foam sheets can be purchased in giant 4x8 sheets that you glue to the sides of smooth poured walls. You and a helper could apply the foam to a standard foundation in a few hours using a caulk gun that dispenses an adhesive and a simple circular saw to cut the foam. The foam can be put on both sides of a typical foundation just as it will be on the finished ICF foundation.
I’d absolutely do a simple cost comparison. The cost of the concrete will be nearly identical in both scenarios. The ICFs use the same foam and you should be able to get giant sheets of foam for much less than the ICFs, but it depends on several factors.
I’ve seen traditional poured concrete foundation contractors set and pour fairly complex foundations in less than eight hours. Your local ICF contractor may be able to do the same with his interlocking blocks, but as Kenny Chesney said in his hit song, “only time will tell, but it ain’t talkin’.“
Attach Wood To Concrete
QUESTION #2: Help me, Tim! I need to attach some wood 2x4s to concrete in several places. I need a cave-man simple way to do this and don’t want to mess with expensive fasteners and complex methods or tools. I’ve tried using old-fashioned cut nails but they keep bending. Is there some secret method that seasoned builders like you use when homeowners aren’t looking? Thanks for anything you can share. Mike P., Phoenix, AZ
Hah! You may also wonder if builders like me have magic methods that save time and money. Well, when it comes to attaching wood to concrete, I do have such a method. My good buddy, Chuck Sallee, showed it to me one day many years ago. Chuck and I were carpenters working on a job together when he pulled out a rotary hammer drill and two simple nails.
The method Chuck shared with me all those years ago is so simple it astonished three young carpenters just this past week here in Bar Harbor where I was working on a job. I asked them how they attached wood to concrete and they told me about all the expensive tools and fasteners they use.
I said, “Would you be interested to see how to do it using two regular everyday nails?” They all responded, “Are you serious? You can do it with just regular nails?”
I got out my cordless hammer drill and inserted a 6-inch-long 1/4-inch bit. I then placed a scrap piece of 2x3 onto a vertical part of the foundation below where the driveway will be.
Then I drilled through the 2x3 in seconds and the bit started to go into the concrete. I drilled a hole about 3 inches deep into the concrete.
I took two regular 10d common nails that were 3 inches long. I placed them next to one another making sure the tips were touching and tapped both through the hole in the wood at the same time.
When they started to pass into the hole in the concrete I was careful to deliver solid blows with my 20-ounce hammer squarely on both nail heads so they both advanced at the same time into the concrete. In seconds, the nails were flush with the wood and the carpenters couldn’t pull it off the wall!
I have a video at my AsktheBuilder.com website demonstrating this method. Just click on this link - attach wood to concrete video - and watch the video!
Column 1302
Tim built custom homes and did ultra-custom remodeling for 20+ years before launching his Ask the Builder media presence. He was selected as one of the Big 50 by Remodeling magazine in 1993. This award gave birth to Ask the Builder in October 1993. Tim also operates https://DrawPlumbingPlans.com. His @askthebuilder YouTube channel was the first home improvement channel on YouTube.