Paying Contractor | This small new home has been under construction for over a year. There could be many reasons it’s taking so long and one of them might be the contractor was paid too much money up front. As it turned out, the homeowner did pay too much money to the contractor, the contractor abandoned the job and the homeowner had to declare bankruptcy. It could have all been avoided. (C) Copyright 2017 Tim Carter
"When you pay a contractor money in advance, you hope the contractor is going to show up, do the work right, and not make off with your money."
Paying Contractor Up Front Checklist
- Moderate or excessive deposits put you at a huge disadvantage
- Deposits are only required if job has special-order or custom non-returnable materials
- Contractors don't pay employees, subs or suppliers in advance!
- Watch How-To-Hire-A-Pro video series below
- CLICK HERE to Get Tim's FREE & FUNNY Newsletter!
A little over a week ago, I devoted part of my free weekly AsktheBuilder.com newsletter to a polarizing subject. I did this because I had received a spate of emails from homeowners just like you who had hired out work to be done in the spring and the contractors were demanding to be paid a substantial amount of money up front before they did the work. This made many uncomfortable and they reached out to me for advice.
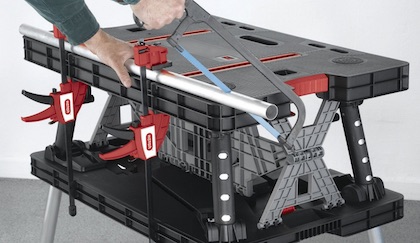
Paying Contractor Video
Please watch this video. It's the first in a four-part series. The other three videos are below.
Don't Hope For Things You Can Control
I wanted to devote this column to that topic and to touch on the second biggest reason your home improvement dollars may go down the proverbial drain. Believe it or not, that situation has the same root cause as the up-front money issue - hope.
When you pay a contractor money in advance, you hope the contractor is going to show up, do the work right and not make off with your money.
Hope is an emotion you employ when you can't control the outcome. Here are examples of things you can hope for:
- You hope the weather next week will be nice
- You might hope to get rescued from a deserted island
- You might hope to win the lottery
Control Your Contractors
Forget about hope when it comes to contractors! You can control your money and when a contractor gets it and you can absolutely ensure that you’ll get top quality work that will stand the test of time.
When I broached the payment issue in my newsletter, I knew I’d make lots of homeowners happy and many of the contractors on my list bristle. Money is a very sensitive topic.
Free & Fast Bids
Money Is Your Only Leverage
Here’s what you need to know about paying contractors up front for a job. When you do this, you put yourself at an immediate disadvantage. If your contractor takes off or does poor work, you’ll never ever get all your money back plus attorneys fees should you pursue legal action.
On the other hand, contractors or suppliers can easily place a lien on your home in most states and they’ll get paid when you sell your home as long as the lien doesn’t expire.
Do Some Jobs Require Deposit Money?
Yes, there are jobs where a deposit is normal and required. If your job requires the purchase of non-returnable custom-ordered products, the supplier often asks for a 50-percent deposit. The contractor needs to supply this or you the homeowner can pay it directly to the supplier.
What Should I Ask The Contractor?
But in all other cases, it’s not wise to pay up front money. If a contractor asks you for a deposit like this, be prepared to ask these honest questions:
Mr. Contractor, do you pay your employees in advance?
Do you pay your sub-contractors in advance for the work they do for you?
Do you pay your suppliers in advance or do you have open accounts and are billed monthly?
Do you pay your truck service center in advance before they repair your truck?
Since you don’t pay anyone in advance, why are you asking me to do it?
Why Do Some Contractors Need Deposit Money?
I’ll give you a few reasons: The contractor might be using your money to pay off his last job. Your contractor may be in a cash-bind in his business for any number of reasons. Do you really want to do business with a capital-strapped individual? The contractor may not have credit at local supply houses. Why is that? I could go on and on and on with reasons.
John Hoeh The Bricklayer
When my newsletter is published, an announcement shows up on my AsktheBuilder Facebook page. The bricklayer in Cincinnati, Ohio, that used to do all my jobs saw it and this was his response, “As a contractor, I've always believed I will make you happy to pay me!! Have never asked for a dime up front. Great advice as usual Tim!”
Do Professional Contractors Worry About Payments?
John Hoeh, the bricklayer, is a pro.
Professional contractors have no fear that you’ll pay them. They know they’ll satisfy you. They have plenty of cash in their business account. They don’t need your deposit to make payroll that week or to pay for the supplies they need.
How To Hire A Pro Videos
Watch these four videos to ensure you get a pro and the BEST VALUE for your money.
Excuse: Deposits Prevent Cancellations
One of the subscribers to my newsletter is a contractor and he objected to my feelings about up-front money. He said he does it because homeowners back out of his contracts and hire a contractor they find later at a lower price. When I asked him how frequently this happens, he never responded. I found that silence troubling.
Create Specifications To Get Job Done Right
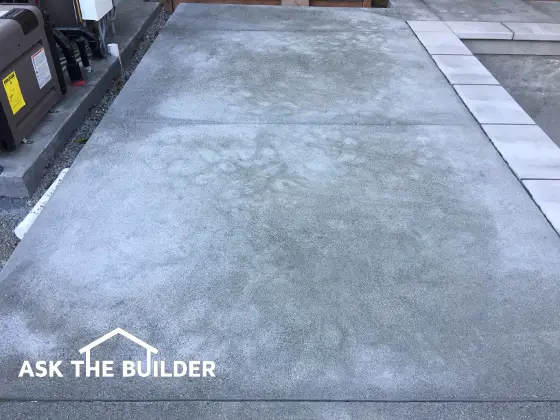
Let’s talk about you hoping the job gets done right. Just two days ago I received an email from a man in Tennessee. He hired some contractor to repair a sunken area in front of his garage door. The homeowner was none too happy with the repair because the sticky asphalt rocks got tracked into his garage by his car tires.
When I did an autopsy on his situation it became painfully obvious the homeowner didn’t spend the time required to discover how to do the job the right way. He just called contractors up, they told them how they’d fix it and the homeowner hoped it would all work out.
Listen to this SHORT five-minute podcast to see how easy it is to ensure things go right for you:
Had this homeowner spent some time online, he’d discover that the settled blacktop needs to be cut out and removed. Depending on the amount of settlement, the cut line might be back as much as 8 feet from the garage door so the driveway has a nice gentle transition to the concrete garage slab.
He’d also have discovered that cold patch blacktop is not really meant for repairs like this. All one had to do was read the label on the bag. Regular hot-mix asphalt put on top of compacted gravel fill was the only way to create a repair that might last twenty or more years.
Related Column:
Column 1200