January 22, 2013 AsktheBuilder Newsletter & Tips

So much is happening, I don't know where to start!

We're days away from introducing a new smaller size of Stain Solver. This little guy will weigh in at just 0.4 pounds.

It's PERFECT if you're a person that's wanted to try Stain Solver Oxygen Bleach, but needed a price point below $10. Well, we did it! We can ship this nice little guy to you for $9.97 anywhere in the USA. Watch for more details next week. We're NOT ready to ship just yet.

Speaking of next week, that's when I put in the door for the latest Kickstarter project that was successfully funded this past Sunday night. Thank you if you were one of the backers.

By the end of February, I'll have ready for you an authoritative step-by-step video guide that will show you how you can install a new front door saving up to $1,000 in labor costs. That money can be used to buy the door. Wow!!!

Finally, I'm getting ready to head to the West Coast. Two weeks from today, I'll be in the Las Vegas convention center for 1.5 days. Then I head to Los Angeles to tape the videos for my NEXT Kickstarter project. You absolutely want to back that project. What is it? Wood rot repair the Easy Way! Watch for that Kickstarter launch next week if all goes well.


TIP OF THE WEEK - DRYER VENT FIRE ALERT!

You may be a person that still hangs your clothes on a line to dry. My mom did that in our basement for years.

But then again, you may be like John, a fellow subscriber, who uses a clothes dryer. Read what he sent me over the weekend:

"We had an incident at our home two weeks ago involving a near dryer vent fire. Our problem is that our vent ductwork runs about 15 feet to our outer wall, so there's plenty of room for build-up, and boy, did we have build-up. Thirteen years of it.

Long story short, the Bayport, MN, fire chief came over last Saturday and personally helped me clean it all out. His strong advice: Clean out the vent pipe -- not just the flexible hose connected to the back of the dryer -- at least once a year (he cleans out his twice a year), and replace the flexible hose at the same time (it cost me about $12 at our local Ace Hardware). Money and time very well spent."

dryer vent pipe

John and his family were lucky. Many are not and become statistics for the NFPA. There are dryer vent fires all the time.

This is a serious topic because of the nature of the fire and the action of the dryer. If the lint in the vent pipe catches on fire while the dryer is on, it's like a massive blowtorch. The intensity of the fire is extreme, and it can quickly spread to things around the vent pipe.

The blast of air from the dryer supercharges the fire causing it to grow faster and burn hotter than a normal fire.

If you have metal vent pipe in your crawlspace or basement, go take it apart NOW and inspect it. It's very easy to take it apart and put it back together.

Last fall I had to help a NH woman do this. Julie's dryer vent pipe was clogged SOLID. She dodged the bullet just like John and his family.


BETHEPRO.COM

Are you a pro builder or remodeler? Back when I was still building all day long with sticks and bricks instead of electrons like I do now, I used to love meeting some of my friendly competitors for breakfast at the local White Castle.

Be The Pro Construction Community

We'd all tell tall tales about how many yards of concrete we poured, pieces of drywall we carried or other super-human feats each day at the jobsite as we munched on cheeseburgers at 6:30 am.

Well, how would you like to hang out with some pros online? You can share your tips and help other builders and remodelers with what you know. The best part is you may discover lots of tips that will help you save time and money. That translates to happier customers and more profit. Both of those should be at the top of your list.

If you're a professional, get over to BeThePro.com right now. Be sure to jump into the Pro Forum because that's where the action is. Become a Member and earn points for great tools and gear!


NEW HEAT-REFLECTING PIGMENT - THIS COULD BE HUGE!

The most recent issue of National Geographic had a small article about a discovery made by Oregon State University researchers. They discovered the first new inorganic blue pigment in the past 200 years. That's hard to believe, but I won't argue it since I'm not a pigment expert.

One of the great things about this pigment is its ability to reflect heat. That's pretty unusual for a darker color.

You may soon start to see exterior building products that are colored blue and say they will save you energy dollars. Be on the lookout.


POSSIBLE COLUMBUS HOME AND GARDEN SHOW APPEARANCE

Do you live in or near Columbus, OH? If so, I may be coming to town to do a talk or two at your Home and Garden show the last Saturday in February.

I got an overnight invitation and we're working on the details now. The Columbus Dispatch, the main daily in Columbus, is the show owner I believe. My weekly Ask the Builder column runs in the Dispatch each Sunday.

Do you want me to come to your city or town? If your local paper helps to put on an annual Home and Garden show, contact your paper and ask them to bring me to your town. I've done home and garden appearances for years and would LOVE to come and see you.

All you have to do is ASK them. If enough readers/residents request it, they'll bring me in. We have loads of fun at the shows!


LE JOHNSON POCKET DOOR CONTEST RESULTS

I don't know about you, but I had a blast with last week's contest. I hope to have more challenging treasure hunts like that as the year progresses. You simply wouldn't believe the number of comments, you might have been one, that said how much they enjoyed the contest. It was tough, but not too tough.

Did you participate? Did you like the Treasure Hunt format of contest? Would you like to see more challenging contests?

Reply back to me with your comments. I'd love to hear what you have to say. Remember, change the Subject Line to:

LE Johnson!

That way I can filter them from all the other email I receive.

The best part were the comments about how gorgeous the pocket doors were and the many uses. Yes, I've enjoyed pocket doors for years. You should really consider them.

Here are the CORRECT answers to the contest in case you're wondering. The door was #26.

It was a wood door with a large center panel of glass. I also accepted acrylic or plastic since none of us knew really what it was. But my money is on tempered glass.

The handle, I thought, was black. I accepted dark brown, bronze, oiled bronze, etc. Because monitor colors are off, I accepted any dark color.

There were nearly 700 correct entries. WOW!

I'm doing the drawing of the Grand Prize Winner on Saturday (01/26/2013) at Noon Eastern Time LIVE on my AsktheBuilder YouTube channel.

AsktheBuilder Live Broadcast

I'd LOVE it if you would be kind enough to tune in and watch. Let's see how that technology works. You can email me during the broadcast. I did a test of it yesterday that you can see now on my channel.

When you do go to my YouTube channel on Saturday, the TOP position SHOULD be the item you need to click to see the LIVE broadcast. I'll tune in about three minutes early to make sure it's working. You can email me questions about pocket doors and we can discuss them during the broadcast if you want.

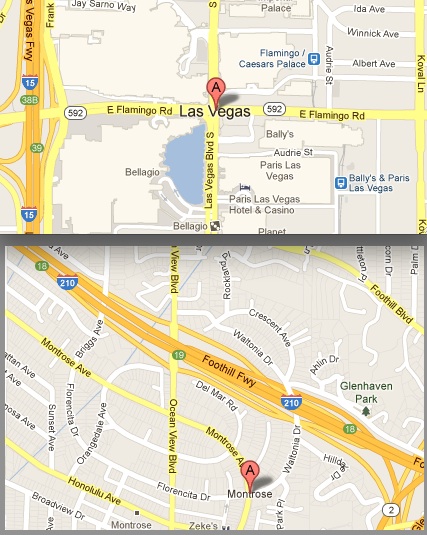
Look at the image above of my channel at YouTube. See the red arrow? That's where you should see the link to the LIVE broadcast. I saw it clearly yesterday when I did the test.

Kitchen Island on a Budget

DEAR TIM: I'm in desperate need of a kitchen island. They provide so much functionality, but I can't build one nor can I afford a new one. Is there a way to purchase a used kitchen island cabinet with a top? Can you easily refinish the cabinet to match my existing stained cabinets? Or, is there an easier way to save time and money? Victoria B., Racine, WI

DEAR VICTORIA: You're preaching to the choir about kitchen islands! I've got two of them in my own home. They're fantastic utility items to have in a kitchen, and I highly recommend that anyone building or remodeling a new kitchen should try to plan to have one.

Kitchen islands don't have to be enormous in size to be highly useful. The two islands in my kitchen are not big. The tops only measure 26 by 50 inches. However, there's plenty of space at each island for three people to work at each one at the same time!

Here's the good news. If you're patient, you'll be able to find a used one. I suggest using one or more of the online classified websites where homeowners, and some companies, sell used products. What's more, in certain cities, there are businesses that specialize in recycling used building materials from houses.

This is a kitchen island purchased from an online classified ad site. With a little work, it will look brand new. Photo Credit: Tim Carter

This is a kitchen island purchased from an online classified ad site. With a little work, it will look brand new. Photo Credit: Tim Carter

I routinely sell and buy things using the online classified websites. My favorite is Craigslist. You have to look in different categories, as the seller sometimes lists the item in the wrong place. I'd look in Building Materials and Furniture.

Be sure you read all the warnings and tips when using these sites. Don't ever go alone to look at the item. Take a friend or two and tell others where you're going. Be sure to really look the item over checking it for quality and structural integrity. When you buy from another person in these situations, there's usually a no return policy. As they used to say in Rome, Caveat emptor - Let the buyer beware!

Before you go to look at a used kitchen island, be sure you can transport it. If you find one you like from a homeowner or a store, you need to react and buy it then. You want to transport it home at that time. Be aware of how big and how heavy they are. It's your job and responsibility to load and secure it for a safe trip back to your home.

Once you have it home, you can refinish it. Keep in mind if the cabinet is older than 1978, there's a great chance there could be lead in any paint or even clear finishes that coat the wood. This means you don't want to sand the old finish off.

If you're not sure of the age, you can purchase small lead-paint test kits to see if the cabinet has lead in the finish. If the cabinet you buy is painted, it could have multiple layers of paint on it. The original paint may have lead, but it could be hidden under subsequent layers of paint. Just testing the paint on the surface is not a definitive test to ensure there's no lead.

Trying to match stain colors of existing wood cabinets in your home is a really tough thing to do. The first challenge is the actual wood of the island you purchase may not match the wood that's in your cabinets. What's more, you'll not have any test wood pieces of the same lumber the island's made from to do stain tests.

If you're bound and determined to strip the island cabinet and restain it, I suggest you treat the bare wood with a special clear wood conditioner. This liquid helps to prevent stain from soaking in too deeply. It makes for a better finish that really highlights the wood grain.

Matching stain colors is hard for a rookie, that's why I highly recommend you consider painting the wood island you buy. It can look spectacular to have one painted cabinet in a room filled with stained-wood cabinets. I know this as I've done it on countless jobs and the customers and visitors always complement the look.

Painting a cabinet is pretty easy. You can make the job go faster by taking off any doors and removing the hardware. Be sure the wood is clean before painting. If the existing paint has a medium or high gloss, you should use a liquid deglosser to help the new paint adhere to the existing paint.

Purchase a high-quality paint that's made for interior woodwork. It can take up to three days for the paint to fully cure and get hard. Use a high-quality brush to minimize the work and to guarantee that the finished paint will look superb.

Don't try to put the paint on heavily to get the job done in one coat. Two light coats is always better.

You can watch a video about staining wood with the special wood conditioners. Simply click for my wood conditioner video.

Column 971

January 17, 2013 AsktheBuilder Newsletter

This is REALLY quick.

I've been overwhelmed the past 42 hours handling the flood of great comments and correct answers about the pocket door contest.

It's been a gargantuan success.

But I've received MANY emails from folks who have peepers that just aren't up to the task. What was I thinking? I apologize to all whose eyes have seen better days - no pun intended. (okay, so that's a little fib :-> )

To be fair, I've come up with a written clue or two that will help those who simply can't see as well as others.

A convenient link to the LE Johnson Pocket Door Gallery page where you'll need to go again is below.

Pocket Door Contest Image

I told you a week ago I've been re-reading The Hobbit.

So in the spirit of J.R.R. Tolkien, I crafted this silly poem.

Tolkien made clever use of simple poetry in The Hobbit. As you'll soon discover I'm not Tolkien, nor am I a poet. I'm a carpenter/plumber/builder.

If you're a NEW subscriber in the last 48 hours, CLICK the colorful image on the right that says Pocket Door Contest. If you can't click on the image, click here for full contest details.

If you tried to find the door using the image clue and gave up, this should be all the help you need:

If you've got weary eyes

You'll need another sign

Make a mess eating pies?

Or spill wine when you dine?

Reach for the rolled cloth

Tinted like late day sun

Dabbing the food and froth

With water from deep sea fun

I told you I wasn't a poet.

Go here to hunt again for the correct photo. Remember, you need to tell me TWO things to be entered to win all the loot in Tim's Treasure Chest:

What material makes up the CENTER of the door in the photo?

What COLOR is the pocket door handle?

When you have the correct answers, REPLY to this email but change the Subject Line to:

LE Johnson!
If you've already guessed correctly, please do NOT enter again.

That's bad form as Captain Hook would say.

P.S. I've got a HUGE announcement about the contest I'll share on Sunday.You don't want to miss that announcement!

Tim Carter

January 15, 2013 AsktheBuilder Newsletter & Tips

Spring housecleaning time is going to be here soon. Each day here above the equator there's more daylight, so you know it's coming.

If you live in the warm and balmy south, you may just about ready to do it. as the weather down there is springlike now!

I have to do the same spring cleaning with this email list. I have to remove people that are inactive because they cause my delivery rate to go down.

Can you do me a HUGE FAVOR? You need to show me that you still want to get the newsletter. You do that two ways:

1. When the newsletter comes, you need to open it up. Don't read it in a preview window in your email software. Open it.

2. I then need you each week to click at least ONE LINK in the newsletter. You can *trust* me. Every link in this newsletter is safe. They may look odd to you, but they're completely safe.

Let's start by clicking the link in the article just below about the pocket door contest, okay? You'll have a bunch of fun, I guarantee it!

P.S. Far below is an update on the Front Door Kickstarter project. I just added a NEW Reward! Wait till you see it!


TIP OF THE WEEK - CAN ANY DOOR BE A POCKET DOOR?

What types of doors do you think can be pocket doors? Can you think of all the different types? My money says you can't.

But I'm going to do my best to show you many of them, and we'll have some fun while we're doing it. You could win some great loot if you enter my contest!

How would you like to WIN:

  • FREE access to all the DIY Shed videos
  • FREE access to all Front Door Install videos
  • Any five of my eBooks or Contractor Hiring Guides
  • Brand new lithium-ion cordless drill / driver
  • $25 Coupon for a Hertz Car Rental (don't ask me how I got this - long story)

Will you be the sleuthful subscriber that's going to win all of that? I hope so!

All you have to do is go to the LE Johnson single pocket door gallery and hunt for a specific photo in that gallery. I provide a link below to the gallery. Read the rest of the instructions first, though.

Once you locate a certain photo at the gallery, you have to answer two questions correctly. I'll pick a random winner from those that provide the correct answers. You have to get your correct answers to me by January 20, 2013, at midnight Eastern Time. Just reply to this email and change the Subject line to: LE Johnson!

I give you a clue so you can locate the right photo just below.

When you locate the right photo, you have to tell me two things:

What material makes up the center of the pocket door and what color is the pocket door handle?

Remember, to answer correctly, you have to be looking at the correct photo! The small image below is a small part of the photo you need to study at the LE Johnson Single Pocket Door Gallery.

Yes, I realize the image is tiny. I did that so you have to work a little bit! Go locate the photo at the gallery that has this in it:

Happy Hunting! and Good Luck to you!


LAS VEGAS MEET UP!

I'll be in Las Vegas on February 4th on business. I can do a meet up that night. Reply to this email and tell me if you want to hang out for a couple of hours.

PATRICK BOWMAN AND CHIMNEY FLASHING VIDEO

Patrick emailed me over the weekend after he read my Workmanship WARNING piece about the declining quality standard at Fine Homebuilding magazine.

He said, "Why don't you do a video on "How to properly flash a chimney?"

I replied back to Pat, "I may make one this year. I have to determine if there's a market for it. I'll publish your comment in Tuesday's newsletter and lets see how many respond."

So tell me, if I invested the time to create a detailed step-by-step series of videos on exactly how I flash a chimney, would you invest in them?

Do you want your chimney flashing to be leak-free for decades?

If you want me to tape a series of videos on how to properly flash and SOLDER a chimney, reply to this email and change the Subject Line to: Chimney Videos Please!


SPALLING CONCRETE

Do you have concrete at your home where the top layer has peeled or popped off? You could have this happen no matter where you live. Intense power washing can cause it to happen. Cold weather can also be the culprit.

Spalling or scaling most frequently happens where the concrete is exposed to snow and ice. Deicing salts often take the blame for the problem, when in fact it has nothing at all to do with salts you may broadcast on concrete.

The scaling or spalling of the top surface can almost always be traced to poor workmanship. In almost all cases water is to blame.

The workmen who installed the concrete might have added extra water inside the ready-mix truck. This is commonly done to make the concrete flow easier. Another mistake is to trowel bleed water back into the concrete. The finishers could have sprinkled water on top of the concrete as they finished it.

All of this added water dilutes the Portland cement in the top quarter inch of concrete. Portland cement is the glue that holds the rocks and sand together in the concrete mix. If you dilute it, the concrete can't resist the freeze-thaw events that happen when water soaks into the concrete.

Water expands as it freezes. Eventually the weakened concrete mix at the top fails when the growing ice blasts it apart.

Deicing salts tend to increase the frequency of freezing and thawing of water in concrete, so that's why they get the blame.

You can repair spalled concrete fairly easily by installing a thin concrete overlay. Would you like me to do a video series on that in the spring?


STAIN SOLVER AND JAN'S AGING COONHOUND

Jan Murphy, a subscriber to this newsletter and Stain Solver customer, wrote to me this weekend:

"I'm sending you an unsolicited 'plug' for Stain Solver. I don't recall you commenting on this, but it's a great deodorizer. I have a 15-year-old coonhound who's absolutely the sweetest thing on four legs. As you can imagine, at her age she's slowed down a lot. Obviously, I'm dealing with dog accidents, and the "sopping-up" towels have been a real challenge to get odor-free.

Anyway, a good hit of Stain Solver, plus a trip through my washer's pre-soak cycle, does the trick with the towels every time. I don't recall you mentioning this use for the product, but I can't be the only subscriber living with an old friend, and thought this info might be useful to you. Happy New Year!"

Thanks for the V8 forehead slap Jan! Yes, Stain Solver is an incredible odor remover. It removes strong cat urine, male cat marking spray, fuel oil and other hydrocarbon odors, and even pungent skunk odors!

http://shop.stainsolver.com/

P.S. Do you do quilting? Did you know that Stain Solver restores old quilts? If you've used it for this can you PLEASE send me your story how it save your quilt. I'd love to see a photo of the quilt.


KICKSTARTER UPDATE

There are only FIVE days left before my latest project on Kickstarter closes. If you don't become a backer by then, you WILL PAY MORE for all the videos in that series when they eventually get loaded to my shopping cart in about six weeks.

That means if you go to Kickstarter NOW and back the project, you're going to save money. Do it. Go back the project. You'll never regret it.

Read what Russell Morris said about my videos:

"I just want to tell you that you have made a fantastic [DIY Shed Building] Video Series. Very well put together, and in a very good logical sequence. There are very few lingering questions about any details. Just about anyone could follow this and with almost no experience and build a pretty respectable shed. I know I will be referring to this many times in the future. Great Job!"

What am I doing in this new project? I'm going to show you in a series of videos how to take out an existing exterior door and install a new Therma-Tru pre-hung door with Fypon trim on the outside.

I'm also going to show you how to install the amazing Jamsill door flashing under the threshold. This means I'm going to show you how to take out the entire door frame and the trim and then install a new pre-hung door from the factory!

I just added a NEW reward. It's only $20. For just $20, you get access to all the videos online AND you get access to a 1-hour video where I deal with the FAQs about exterior door installation.

You can submit your exterior door installation questions to me, and there's a very good chance I'll answer them in the video. I'll crash through as many as I can in one hour. If I need more time to answer the best ones, I'll extend the video.

If you've already backed the project at a LOWER amount, you can go back to Kickstarter and upgrade to this new reward. Click here to read the instructions on how to do that.

If you've already backed the project with a reward of $25 or MORE, you'll automatically get online access to this 1-hour FAQ video. You don't have to do a thing.

Remember, the project will CLOSE in just five days. After that, you'll pay a lot more for the videos.

P.S. On the Kickstarter page I said there were going to be 12 videos in the series. I was WRONG. Last week after I saw we were going to hit our goal, I started taping videos! I've already taped TEN videos and the old door hasn't been taken out yet.

Imagine how many videos there are going to be in the complete series!

Garage Door Opener Tips and Technology

DEAR TIM: I'm having issues with my garage door opener. I wonder if it's time to invest in a new one. When I push the button to open the door, the door opens fine. But when I push the door to close it, the door starts to close but immediately goes back up and the door lights flash rapidly. I've seen new door openers that can be operated remotely from a computer, tablet, or a smartphone. Will one of those solve my problem? Lisanne L., Denver, CO

DEAR LISANNE: I often get the itch to try new technology as it's fascinating how computers, tablets, and smartphones are more and more becoming part of everyday living. I'm constantly amazed at the things technology can now do in our homes.

I can understand your desire for wanting the new garage door opener, but you may not need it just yet. I feel you should try to troubleshoot your problem before you pull out your credit card for a new garage door opener.

The description of your impish garage door opener's antics makes me think the problem is easy to fix. If your door is fairly modern, it's probably equipped with sensors that are attached to the bottom of the steel tracks that accept the door rollers. These sensors are a great safety mechanism that stop the door from closing if something is in the way of the door.

Years before these sensors became standard equipment on overhead garage doors, people and pets were killed by garage doors that transformed themselves into slow-moving guillotines. The doors would close and crush anything in their way. The sensors, as well as electronics in the door openers, work together to make the doors return to the safe position if they even think there could be a problem.

The first thing I would check is your garage door owners manual. There's undoubtedly a section there about troubleshooting the sensors. My guess is the first thing you'll look at is to see if the sensors are aimed correctly. There's a sensor on each steel rail and they need to be pointed at one another.

If the sensors seem to be aimed correctly, see if they have small LED lights on them. If they do, the lights should be on when electricity is reaching the sensors. If you don't see lights, or there are tiny LEDS but they're off, start looking at the wires feeding the sensors. Make sure the wires have not been cut.

If the wires appear to be in great shape, the last thing to check would be where they connect to the garage door opener. I once had the same problem you're having and I traced my problem to a loose connection where the sensor wires attached to the opener. Once I made sure the connection was solid, the opener opened and closed as it should with the wall control and the buttons in my truck.

All this being said, if you still have issues, the actual sensors could be bad. It's easy to replace them.

If you do decide to invest in a new garage door opener, I highly recommend the newer ones that do connect to the Internet and allow you to control them remotely. I installed one of these at my home several months ago and love the convenience.

My opener not only has this Internet remote control capability, but it also sports an internal battery that powers the opener in case of a power outage. I live where we do get occasional ice storms, so it's nice to be able to count on the opener working in bad weather.

You can open and close your garage door with a smartphone even if you’re thousands of miles away. Photo Credit: Tim Carter

The software that operates the garage door opener from my computer, tablet and smartphone was easy to activate. It only took minutes to install. If you have multiple garage doors at your home, you'll be able to name each door and control each door separately.

The software application that operates the garage door opener clearly shows you if your door is open or closed. When you touch the screen to tell it to open or close, the graphics change so you can see the door moving.

When you tell the door to close using the software, the door opener is really smart. In the garage, the lights on the opener start to blink and you hear a warning beep for ten seconds. This tells anyone in the garage the opener is about to move.

At the end of the ten seconds, the door magically closes. Once closed, you see a closed door graphic image on your phone or computer screen. My guess is that within ten years the garage door openers will be equipped with tiny cameras that let you see in and around the garage before you operate the door remotely.

This functionality would be ideal if you need to open and close the door remotely to let a workman or deliveryman into your garage. You can then monitor their activity to ensure they're doing what they're supposed to do.

You can watch a video about garage door technology. Just click "overhead door options video".

Column 970

January 13, 2013 AsktheBuilder Newsletter & Tips

I emailed you a few days ago about the Flash Sale for Stain Solver.

It's about to end in just a little less than 14 hours. The sale ended January 13, 2013 at midnight.

You can save 10% off the 2.2-pound size or 15% off the 4.5-pound size.

Go now to the Stain Solver cart to save money.

The SALE PRICE is already computed at the Stain Solver shopping cart.

Remember, you also get FREE SHIPPING to anywhere in the lower 48 states.

In a few days I'm going to have more news about the new smaller size we're introducing! It's perfect to use as gifts for friends, family, or co-workers.

If you work at a store that wants to SELL Stain Solver, this is going to be perfect for you.

THANKS for your support!


WORKMANSHIP WARNING

Last night, I was paging through the most recent issue of Fine Homebuilding magazine. I've been a subscriber for nearly 40 years. That's a long time.

I have a DVD that contains all of the past magazine articles from the beginning of the magazine. Many, if not all, of the articles from 20 - 40 years ago were written by real craftsmen.

But times are changing. I can clearly see a frightening erosion of the quality standard that's promoted by this amazing publication.

It saddens me deeply as I try to promote Fine Homebuilding magazine as one of the finest publications in the industry.

Some of the people writing articles for Fine Homebuilding are not as talented as they could be. I was shocked as I read an article in the most recent issue about how to flash a chimney.

The author was using expensive copper flashing. Copper is, perhaps, one of the best metals to use for roof flashing because it doesn't rust. It can last, in certain climates, well over 100 years.

But the SHOCKING thing is the author, who's a roofer, was using a caulk as part of the installation.

He was NOT soldering the tiny gaps where two pieces of copper flashing meet at the corners of the flashings.

Why is this important? Why should this concern you?

Fine Homebuilding for decades has been a gold standard of displaying quality workmanship.

Many young builders and remodelers think that if it's in Fine Homebuilding, then it's the right way to do something.

Here's the bottom line: I don't care WHAT the caulk manufacturers claim.

Caulk is NOT a permanent roofing material.

I don't know of a caulk that can last for 50 years up on a roof. I don't know of a caulk that can take that intense beating from the sun's ultraviolet rays.

I don't know of a caulk that can maintain its flexibility for as long as the copper expands and contracts over the 125-year period.

Metal and solder ARE long-lasting roofing materials.

You want flashings to last as long or LONGER than the actual roofing material. Caulk WILL fail long before that.

Solder will NOT fail if done correctly, and it's caveman simple to solder copper and tin!

How do you protect yourself in the future from workmen who think they know the correct way to do something?

I would recommend starting with my Contractor Hiring Guides. In all of them, I provide a checklist that contains the time-tested methods to do work around your home.

Be Careful Out There!

I've got a fantastic CONTEST for you on Tuesday. If you like hunting expeditions, then you MUST OPEN Tuesday's newsletter.

Thanks, as always, for your trust.

Tim Carter
Founder www.AsktheBuilder.com

Do It Right, Not Over.

January 8, 2013 AsktheBuilder Newsletter & Tips

Late last week, Kathy and my son Tristan worked together to make my favorite soup. It's a beef vegetable soup Kathy has made for years.

You know in cartoons how the artist draws an aroma cloud that wafts through rooms only to find it's way under a person's nose? That happens here.

I work in the basement, and even though we don't have forced-air heating that would easily circulate aromas, that simmering soup bouquet made it into my office. I was taking a normal deep breath, and I was overcome by the delicious smell.

It brought back fond memories of me coming home on a cold winter's day after pounding nails all day. I'd walk through the garage and open the door to the house. Immediately the vegetable soup aroma would wash over me like a giant warm water wave at the beach.

No matter how bad my day was, that soup aroma soothed me like a deep shoulder rub. I wonder if you could bottle that aroma and sell it?


TIP OF THE WEEK - WINTER CHECKLIST

I'm really lucky to be able to meet many who subscribe to this newsletter. Perhaps you're one. Maggie subscribes, and she live just a few miles from my house. I had the pleasure of meeting Maggie and Jack, a visiting subscriber from Chicago, as we ate lunch along the shore of Lake Winnipesaukee on a delightful summer day several months ago.

Maggie emailed me last week asking me if I had a checklist. She pointed out that if she had possessed one of mine, she might not have been without heat last month. Sorry about that, Maggie!

Maggie's misery has spawned the official AsktheBuilder.com Winter 2013 Checklist.

It's FREE. There's NO COST. It can SAVE a life! or prevent thousands of dollars of damage to your home.

Download the checklist NOW.

Click here to get the AsktheBuilder.com Checklist.

Winter 2013 Checklist

But there's a little issue. You see, there are subscribers to this newsletter that live all over the world. You may live in Indonesia where it never gets cold. You may be one who lives in Australia, New Zealand, Patagonia or South Africa where it's currently summer!

I have a few tips for you if you do live where it's warm now, but most are for those who live in the Northern Hemisphere.

I'm going to make up a number of checklists for you in the coming months, but this one will help you over the next sixty days. If you have tips and suggestions for checklists, SEND THEM TO ME. I'll gladly give you credit.

Could you do me a favor? After downloading the checklist, can you please send it to all your friends, co-workers and relatives?


INSTALL A NEW EXTERIOR DOOR IN ONE DAY

Guess what? Earlier this morning, I clicked the button that officially launches my second Kickstarter project.

This new project is about creating an intensive series of videos that show you how to install a new factory pre-hung door in less than a day. Doing this, you could easily save over $1,000 and gain enormous confidence that will allow you to tackle other projects!

I'll be installing a gorgeous Therma-Tru Classic-Craft mahogany door with leaded glass in the door and sidelights. On the exterior, I'll trim it with Fypon PVC trim that won't warp or rot.

Kickstarter New Front Door Video Series

I plan to tape about 12 videos showing you how to do the entire job, from getting the proper measurements for the door to spackling the last hole prior to painting the trim. But guess what? I have a feeling I'll be delivering about 25 or more videos, maybe as many as 30!

That's what happened with my DIY Shed project. I promised 100 videos, but it turned out to be closer to 200. What a deal all those backers got! WOW!

I learned so much with my first Kickstarter project. The biggest thing is the videos for this project WILL be available on a DVD. You don't have to watch them online if you choose the DVD reward. In fact, I'm getting ready to create a DVD for all the shed videos, but that's another matter on another day.

I also discovered that it's really important to have a reward at Kickstarter for all those that miss the EARLY BIRD SPECIAL. This time the EARLY BIRDS get online access to ALL the videos in this new series for just $7.

That's an INSANELY low price. This new door series will NOT sell anywhere near $7 or even $15 when I load them to my shopping cart in seven weeks. The price will be MUCH higher for sure.

If you're not one of the first 100 people to get online access to ALL of the videos for just $7, then you can get access for just a little more money. But hurry NOW if you want the videos for just $7.

The coolest part of this project is the new AsktheBuilder.com Apprentice Certificate. You can back the project, get access to all of the door videos AND get an official real certificate that I sign if you select that reward.

In fact, if you start to collect the certificates, you're going to get other free stuff in the future. Read all about that at the Kickstarter page.

Remember doing that as a kid? I clearly recall saving cereal box tops and other coupons and sending them in to get a magic decoder ring or other cool prize. If you collect multiple certificates, you're going to be eligible to get some extra stuff for FREE!

How about you just go look at the project, become an official backer, and help me create this unique video series? You can even pledge just one dollar!

Would you like to get FREE access to the video series? No problem.

The first TEN people that reply to me with the correct answer to the following question get access to the door video series for FREE. Here's the question:

Watch the video at the top of the Kickstarter page. I'm wearing a hooded sweatshirt in the video. Tell me WHAT the sweatshirt represents or supports. Good luck!

IMPORTANT NOTE: I plan to do about 10-15 other Kickstarter project this year. All of them will be similar in that the projects just take one or two days - not three months like the shed project. You'll have access to the videos very quickly after I do the project.


DOOR ADJUSTMENT TIP

I can hear you now. "Tim, I don't need a new door. My door just rubs and doesn't fit right. What do I do?"

Easy. The most frequent cause of this issue are loose screws in the top or center hinges of the door.

Open your door, and check the tightness of the screws on both parts of the hinge. Tighten the screws that go into the edge of the door and those that go into the frame.

If that doesn't solve the problem, push against the top of the frame at the top hinge and see if the frame moves in ever so slightly. If it does, you need to take off just the hinge face on the frame and install two hidden LONG screws under the hinge. These screws will pass through the door frame and go into the rough wood frame. You'll probably need 3-inch-long screws. Be SURE to pre-drill the hole in the frame so you don't split it!

These long screws pull the frame tight against the rough framing lumber and get the door back into adjustment.


STAIN SOLVER SALE

What got stained at your house over Christmas? Well here's what happened to me.

We set up our live Christmas tree just two weeks before Christmas. It was a beautiful live tree we cut down at a local tree farm.

During the process of setting it up, I got pine sap stains on my khaki pants. Ugh!

Not a problem. I took them off, soaked them for three hours in some Stain Solver solution, then washed them normally. They looked like NEW!

Stain Solver Bottle

Did a guest spill red wine at your dinner table? What food got ground into your carpet? Is it time to clean the grout in your tile floors? Stain Solver can tackle all those things and more.

You can get 10% off the 2.2-pound size and 15% off the 4.5-pound size right now. But this sale ENDS on Sunday. You better hurry. CLICK NOW to get the great pricing.

We've already reduced the price at the shopping cart. You won't see it marked as a sale price. The normal prices are $24.97 and $39.97 respectively.

Remember, FREE SHIPPING included to any of the 48 contiguous United States.

Have a GREAT week! I'll be getting ready to install that Therma-Tru Classic-Craft mahogany door and that Fypon PVC trim!

Tim Carter - Founder AsktheBuilder.com

Do it Right, Not Over!

January 2, 2013 AsktheBuilder Newsletter

Happy New Year! I don't know about you, but I'm always stoked about starting something new.

In this case, it's a new year. How about you? Are you excited? What are your goals, no matter how big or small, for 2013? What can I do to help you achieve your home improvement goals? Talk to me. Email me. We're all in this together.

I spent much of the past few days creating the roadmap for what I'm doing this year. A close friend of mine, Jeff Walker, taught me it's best to do this between Christmas and New Years.

If you write down your ideas and plans on paper, there's a far better chance they'll happen. It's the first step in commitment. As I created my written list, do you know what ideas kept coming up?

2013 is the Year of More Video at AsktheBuilder.com.

Why video? I've received hundreds of emails from those who backed my DIY Shed video project. They want more step-by-step videos of me teaching you how to save money and do things yourself.

By gosh, I'm planning on doing just that. Just take a look below.

Just after Christmas, I went to see The Hobbit with Kathy and my son Tristan. It was a great movie. I read the book 40 years ago, but started to re-read it last week.

If you've not read The Hobbit and the Lord of the Rings trilogy, you're missing a great read. I loved all of them.


TIP OF THE WEEK - OIL THOSE TOOLS AND EXERCISE VALVES

I spent a few days before Christmas cleaning up my garage. One of the things I did was apply a very thin coat of oil on any bare metal that I could see on quite a few hand tools. These tools hang on my wicked useful metal Wall Control metal pegboard awaiting their next call to duty. Here's a photo of a few of the tools in my garage.

Wallcontrol Pegboard Workshop

My garage is not heated, so everything in there gets cold. Every now and then, we get a jump in temperature usually accompanied with increased humidity. I've seen condensation droplets on bare metal in my garage on any number of occasions.

The oil on the bare metal prevents rust. It also helps them work so much better.

Do you need shut off valves under sinks and toilets to work in the future? Then you need to exercise them by turning them off and back on every six months or so. Be sure to tighten the packing nuts after you turn the valves back on.

Packing nuts? Oh, that's a new video I'll tape for you! The packing nut is that hexagonal nut that surrounds the valve stem. Tighten it ever so slightly when you open the valve again.


GARAGE DOOR TECHNOLOGY!

What's the latest in garage-door technology? You might be surprised. Watch this video. The payoff is at the end!

LiftMaster Garage Door Opener App


MY CHRISTMAS WISH FROM YOU

The weeks before Christmas were as hectic as ever. I'm sure your head was about to spin off.

I didn't want to bother you with a tiny request that I had until now.

Remember that scene in Star Wars Episode IV when Princess Leia made the recording on R2-D2? "... This is our most desperate hour. Help me Obi-Wan Kenobi, you're my only hope."

The Death Star is not aiming me, but it's imperative that I add subscribers to my newsletter. For all sorts of normal reasons, I'm losing more subscribers each week than gaining. That's not a good situation.

Is it possible for you to do just one thing for me? Just one small favor?

Can you do whatever it takes to get just one of your friends, co-workers or relatives to subscribe to this newsletter? If you can get more, fantastic.

All you have to do is send them to the home page of www.AsktheBuilder.com. The sign-up form is right there in the center of the page.

But you need to follow through and make sure they did sign up. If you do this, AND reply to me that you did it, I'll summon all the other local wizards up here in New Hampshire and we'll cast a protective spell on you so that all your upcoming home improvement projects will be a success!

If you can prove to me you got a friend to sign up, I'll send you a one-of-a-kind special AsktheBuilder.com gift!


LAS VEGAS AND LOS ANGELES MEET UPS!

I'll be traveling on business to the great West Coast of the USA the first week of February. I'm available Monday evening, February 4th, for a Las Vegas meet up. I'll be staying at the Rivera Hotel just north and east of the strip.

Map of Las Vegas - partial

I'll then be in Los Angeles from February 6th until the 10th. I suspect that sometime on Saturday the 9th would be best for most people. I'll be in Montrose, CA just off the 210 if that helps locate you.

If you want to hang out and chat about anything, reply to this email but change the Subject Line to either: Las Vegas or Los Angeles Meet Up.


WOOD-STAINING NINJA SECRET

Do you know how to get professional results when staining wood, especially soft woods? If so great! If not, you must watch this video of mine.

Wood conditioner video thumbnail


CLOSE-OUT T-SHIRT SALE AND ASKTHEBUILDER.COM GEAR

You'll see just below that I'm about ready to start my second Kickstarter project. That means I need to clear the shelves of the remaining loot from the DIY Shed Project.

The remaining items are super high-quality shirts, and they're SOFT.

How soft you ask? Maggie is a NH subscriber that backed the shed project when I launched it on Kickstarter. She smartly opted for a reward that included the t-shirt. Here's what she wrote to me,

"I know that you'll probably not want to hear this, but I refuse to wear the DIY t-shirt out of my house. "Why" you might ask: Because it's the SOFTEST t-shirt I've ever owned and wear it for my pajama top. That limits the audience to my husband, daughter and assorted pets. Now if you had only gotten one of those rough, obviously cheap t-shirts, then the folks at the hardware store, grocery store, etc. might actually have seen it. Ah well, you live with the consequences of your actions (much to my sleeping comfort)."

Maggie

Tim in DIY Shed Project T-shirt

I have to admit it, but Maggie's right. The t-shirts are soft. I purchased the best one's I could find from a local NH business.

Here's the skinny. There are ONLY seventeen total t-shirts left:

13 Large and 4 Medium.

That's it. Once they're gone, they're gone. I'm never printing more with this design.

If you purchase one of these LAST DIY Shed t-shirts, when you open the box, there'll be a secret gift for you inside. It's like a grown-up Cracker Jacks surprise!

You'll discover the gift is highly useful and color coordinated with the t-shirt. Your friends and neighbors will be so jealous. They'll be in awe of your smart shopping!

Be SURE to read the text at each of these pages if you live in Alaska or Hawaii.

Click Here for the Large t-shirts.

Click Here for the Medium t-shirts.

This is a NO REFUNDS or EXCHANGES deal. Why? Because I'll not have any to exchange, and my goal is to get rid of them.

I guarantee you these will be gone in hours. I'm so sorry if you miss out.

QUESTIONS FOR YOU:

Should I create a standard AsktheBuilder t-shirt that's a stock item? Would you like that? How about an AsktheBuilder.com hat? Do you want me to stock those? What other gear would you like to see?

I have many skills and magic, but ESP is not amongst them. You need to reply to me letting me know what you want.

If I get a strong response, I'll commission a design.


VIDEO TUTORIALS

I mentioned above that you're going to see more videos. Well, we've been busy here at AsktheBuilder.com! Check out all the new video guides in my store. There are 23 different video series you can purchase! More are being added soon.

Are you perplexed by simple roof framing?

Do you want to know the basics about installing asphalt shingles?

What's the secret trick to getting a wall or foundation square without knowing all the complicated math?

Do you want step-by-step instructions on how to install a VELUX skylight? Wait till you watch that video series!

The answers are all waiting for you in my videos.


INSTALL AN EXTERIOR DOOR IN ONE DAY!

In less than a week, I'm launching my second Kickstarter project. This one will only take one day to complete, not four months like the shed!

Would you like to discover how to install an exterior door like a pro in less than a day? Well you must be part of this Kickstarter project.

On the morning of January 8th, about 9 am, I'm going to click the green Launch button on the control panel at the Kickstarter page that I get to see. There's an image just below for you.

I'm going to install a deluxe Therma-Tru Classic-Craft Mahogany Fiberglass Door with striking Acadia leaded glass in the door and sidelights. The exterior is going to be trimmed with Fypon cellular PVC boards that resist wood rot and insects.

This video series is going to have no less than 12 videos! I'm going to show you from start to finish how to install a standard pre-hung door like a pro. After watching these videos, you'll have the confidence to tackle this project!

You'll be able to save hundreds and hundreds of dollars doing this job yourself. Heck, you could easily save over $1,000.00. That's the minimum amount of labor and profit a pro will charge you to come do this pretty easy job.

You *must* open next week's newsletter immediately to get access to the project. Why? There are only 100 of the Early-Bird Specials in this project. The project will ONLY be live on Kickstarter for TEN DAYS.

This project also features the first of many official AsktheBuilder.com Apprentice Certificates. More on that next week!

Fiber Cement Siding Installation Tips

DEAR TIM: My New Years resolution is to install new lap siding on my home. I've narrowed it down to fiber cement siding because of its durability and good looks. However, I'm stumped as to how to install it. It seems like it's so brittle that it would crack if you try to nail it. What's the easiest way to cut it? How do you nail it? What other secret tips can you share about installing fiber cement siding? Amy S., Niagara Falls, ON Canada

DEAR AMY: I sure understand why you're attracted to fiber cement siding. It has so many positive qualities, I don't know where to begin. Many people are unaware that it's been around for well over one-hundred years.

In many older cities and towns around the USA and Canada, I can show you homes that were built in the early 1900's that still have the original fiber cement siding on them. The best part is that it looks like the day it was installed!

This handsome siding is not wood. It’s made primarily with Portland cement with tiny wood fibers as a binder. Photo Credit: Tim Carter

The original fiber cement siding was made a little differently than today's products. Years ago the fibers used in the siding were asbestos. When you combine asbestos with Portland cement, you create a product that's virtually indestructible. It won't burn, it's insect proof, water will not harm it, and it's basically thin sheets of rock. We all know how long-lasting rock is!

But as you point out, rock - and fiber cement siding, is somewhat brittle. The original fiber cement siding was more brittle than the products you buy today. If you purchase 12-foot lengths of fiber cement siding and hold it flat in your hands, you'll quickly discover it acts much like a piece of wet spaghetti. It bends easily. However, you can crack it if you're not careful.

The first thing you need to do before you install this magical siding is to take a few minutes and read thoroughly the written installation instructions produced by the manufacturer. By doing this and following their instructions, you ensure that you'll not void any warranty that comes with the product. That's very important.

Be sure to wear all of the safety gear, including approved dust masks, that the manufacturer recommends. The dust that's created when cutting fiber cement siding contains silica. Silica is not a good thing to get into your lungs.

I've cut thousands of feet of fiber cement siding using an older electric miter saw outfitted with a carbide blade. You can use an abrasive blade made for cutting masonry, but I find that creates even more dust.

The silica dust will significantly shorten the life of the electric motor on any tool. You might want to go online to the classified ad websites and buy a decent used saw for this job. If it still works at the end of the job, you can resell it or give it away for free.

I suggest cutting the material outdoors so the dust dissipates. Set up the saw so that you're always upwind of the saw blade. You want the dust to blow away from you at all times. I've even set up a powerful fan to create wind on calm days.

Believe it or not, using proper siding nails as called for by the siding manufacturers, you can nail along the top of the siding without cracking it. You need to be at least 1-inch away from the edge. You'll discover nails at the top corners of the siding will need a pilot hole to prevent cracks. You can buy a small 1/16th-inch-diameter masonry bit that drills a perfect pilot hole.

One of the benefits of using fiber cement siding is blind nailing. The siding is so rigid that you can nail along the top edge of the siding for certain widths and the siding won't flap in the wind or curl. The nails are covered by the next piece of overlapping siding.

This is a huge advantage as you don't have to see any nails or you don't have to countersink and putty them. I love blind nailing siding. The only nails visible are those holding the last piece of siding at the top of the wall.

When you have to butt two pieces of siding together on a long wall, you absolutely must install a piece of flashing under the two pieces of siding. I usually cut a piece of 40-pound tin about 1.5 inches wide and a little longer than the pieces of siding are wide.

The metal strip is placed behind the two pieces of siding that are going to butt together. It overlaps the piece of siding below the butt joint, but stays slightly above the bottom of the two pieces that cover the metal. You don't want to see the bottom of the metal below the siding once it's installed.

Drive one nail at the top of the metal flashing after sliding it under the end of one of the pieces of siding so it stays in place. Don't be tempted to use tar paper for flashing as the heat of the sun can cause asphalt to drip from the felt paper causing ugly stains to appear.

You can watch videos about siding tips by simply typing "siding video" into the search engine at www.AsktheBuilder.com.

Column 968

Overhead Door Options Video

Overhead Door Options Transcript

Hi, I'm Tim Carter and I want to talk about the options that are available for overhead doors. Lets take a look at the one installed in my shed. This overhead door might look ordinary, but there are a few things that are interesting.

First, it might look a little smaller. Well, it is. This garage door is only six-feet wide. While that is not big enough for a car, it will work for a garden tractor, riding lawnmower or a motorcycle.

Secondly, look at the remote control that is installed on the outside of the door. This is a keypad remote that allows you to open the door from outside. Using this type of remote opener means you don't have to install any handles on the garage door itself. This makes for a very nice, clean look.

The door has a wood look to it but it is made of metal. It was painted at the factory and the paint should last 15 years or so. There are many colors available.

The next new feature is the computerized opener program. If you have a smart phone, you can download an application that allows you to control your garage door from wherever you are. You can open or close the door from inside your house or from 10,000 miles away.

The application shows you if the garage door is open or closed. Simply touch the screen and the door will open or close.

Why would you want to control your door when you aren't around? Here are a few examples. Let's say a trusted neighbor needs to borrow a tool. Boom, he calls you on your cell phone, and using your smart phone OR any computer, you can let him just in your garage, but NOT your house. Or let's say you're expecting a large delivery, but can't meet the driver. They call you when they arrive at your home, you open the door, and the package is safe and dry inside the garage. Or if you are forgetful, like I was 3 nights ago, instead of walking to the shed, I closed the door from the couch.

There are many options when it comes to overhead garage doors. I recommend that you go to a professional store that sells garage doors. An independent dealer will be able to explain all the options that are available for your project. I used Overhead Door Options here in Meredith, NH. It is a small business that sells and installs doors.

That is my final tip, if you have never installed an overhead door before, you might want to leave it to the professionals. The springs that open the door are extremely powerful. If you won't know what you are doing and install them wrong, you could get seriously hurt. So leave the installation to the pros.

This Garage Door Technology was shared with my readers in the January 2, 2013 AsktheBuilder Newsletter.