DEAR TIM: I need to build some custom stairs outdoors. I was thinking of using stone, but am open to other ideas. I was thinking of possibly using custom iron stairs, but I don’t know how to weld or fabricate them. As you can tell, I’m all over the map with respect to what I want. Can you give me a few suggestions about what it takes to build a custom staircase? What are the things I need to pay attention to and what should I avoid at all costs? Laura S. Locust Valley, NY
DEAR LAURA: Oh, I can sure relate to your confusion and befuddlement. There are so many materials that you can use to build outdoor stairs it can create quite a conundrum when it comes time to making a final decision.
I clearly remember the first set of custom stairs I built. It was at our second home, and I was still a grasshopper at the ripe age of 25. I happened to use paving brick as the material and each custom stair that led from the upper sidewalk to the lower patio was a different width side to side. The design was compliments of my wife Kathy who wanted to create custom spiral stairs, even though there were only four of them that curved to connect the two levels.
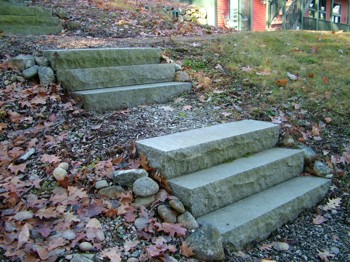
These custom stairs are made from individual pieces of granite. You can make stairs out of many materials. PHOTO CREDIT: Tim Carter
To help you decide what material will best work for you, I suggest to think down the road. How much maintenance do you want to do? If you choose wood or metal, you’ll have to take care of them over time. Granted, you can select a metal that doesn’t corrode or a special steel that develops a patina of rust, but these are probably way beyond your budget.
Natural stone, brick and even concrete are materials that should not require any maintenance in your lifetime other than a periodic cleaning to remove dirt, algae and possibly moss that can make the stair treads slippery and dangerous.
I’ve built outdoor stairs from many materials including brick, fieldstone, flagstone, wood and metal. I’m partial to any natural stone and brick as they seem to blend better with plants, bushes and trees. What’s more, they’re nearly maintenance free. I love the fact that I just have to clean them periodically, and not paint, stain or otherwise labor over them.
I can tell you that you only want to build the stairs once. This means you have to plan carefully making sure that your stairs connect seamlessly between the different levels in your yard. The mission-critical element is to ensure the stairs meet all local building codes with respect to the sizes of the treads and the risers. People trip and fall on steps everyday. Don’t underestimate the importance of making sure the stairs are code compliant. Contact your local building department for a copy of section of the building code that deals with stairs. You may be able to get this online for no cost if you hunt for it.
The code changes every few years, but I’ve discovered that the most comfortable combination of rise and run happens to be a rise of 7.5 inches and a run of 10 inches. This simply means that each tread on the stairs is 10-inches deep and the vertical distance between the top surface of each tread and the landing above or below is 7.5 inches.
If you decide to use thinner natural stone or brick, you usually apply these on top of a poured-concrete base. This means the concrete must be poured to mimic the finished profile of the stairs, but be sunk into the ground the thickness of the stone or brick covering plus the thickness of the mortar you will use to bond the stone or brick to the concrete. Be sure the concrete has a rough texture and you place reinforcing steel in the concrete so it doesn’t break apart over time.
If you decide to use solid slabs of natural stone, you just need to make sure they are the correct size so that when stacked one on top of another they create a rise and run that’s satisfies the building code. You’ll need lots of help with these as each piece of stone will weigh hundreds of pounds.
Avoid shortcuts in the planning process. Take your time and draw up what you plan to do. I urge you to do the math in your yard to make sure the stairs are going to work and that all the dimensions are correct.
Be sure that the treads of the stairs tilt downwards slightly so they drain water. This is very important if you live in a cold climate where a puddle might transform into a sheet of ice.
Any fill material placed behind the stairs should be gravel or a gravel-sand mix that drains well. Soil that holds water can be problematic in cold climates where frost heave can push large blocks of stone sideways.
Column 805