What's in This Issue?
Latest News
Deck Sealer Test
Sediment Clogging Faucets
Final Call on Gutter Guard Promotion
Annette Needs a Great Roofer
Washington DC Trip
Chain Saw Sharpening Test
Four-Pound Stain Solver Sale
I do product reviews frequently. Please read my Disclosure Policy to understand the relationship between me and the companies that make the products or offer the services I review.
Friendly Question Reminder!
If you have a question for me, don't hit the Reply button just yet. Go immediately to my web site and type in the keywords about your problem into my Search engine. The search box is at the top of every page of my web site. You could have your answer in seconds if you do this! Please pay attention to all links you see at my web site. The exact products and services you often need are right in front of you, and you might be ignoring them.
Latest News
I'll be bouncing back and forth between Cincinnati, OH and NH the next few months as we prepare to move Kathy and Kelly up here to NH. I'm pretty excited about that as you can imagine.
There are a few minor projects I'm working on here at the NH house to get it all spiffy for Kathy. We'll be doing lots of interior painting and the painting the exterior of the house as well.
My daughter Meghan is allergic to many things, and we recently tested the Harmony line of paint from Sherwin Williams. The odor in other paints really bothered her in the past, but she had no issues with this new Harmony interior paint. You may want to try it if paint fumes bother you or someone else in your home. Other brands that you may like surely have a similar low-odor paint. Check the labels.
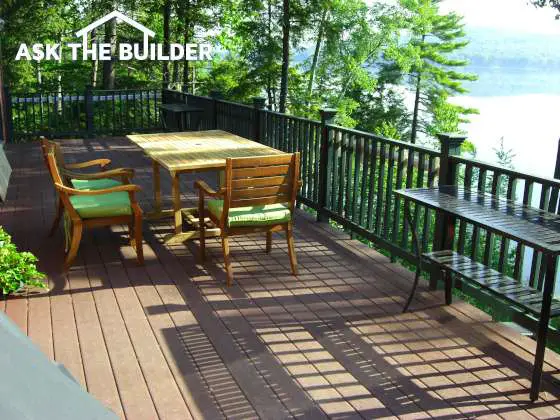
Deck Sealer Test
Today I'm starting a test of three deck sealers. When it warms up, I'll be cleaning two boards way out at the end of my dock with my Stain Solver oxygen bleach. Look below for a quick sale on the four-pound size. It's a long story.
Last year, I cleaned and sealed the dock, but the sealer product I used failed miserably. It still blocks water, but the clear sealant didn't block the damaging UV rays of the sun. The gorgeous cedar turned gray within months.
This sealer was made by a company whose products have always been superior, and this was the new nano-technology clear sealer. I wondered if I got a bad batch.
I called the company and talked last week with the head chemist. We agreed that I didn't do anything wrong, and that the best thing to do is a side-by-side test to see if the same thing happens again.
The chemist thought that UV light bouncing from the water could have been extreme and caused the failure. I don't see how that's possible as the UV light bounces off the water at the complimentary angle it is hitting the water. Thus it goes back up to the sky or anything else it hits. I can see the reflected UV rays hitting the underside of the dock, but not the top.
He also thought that the moisture content of the wood planks was higher because the wood is only 14 inches or so above the surface of the water. I was quick to point out that six months out of the year the dock boards are up on shore stacked so that they are dry and protected from the sun.
I'll tape a video while we apply the sealers so you can watch me test two clear products and one that has a pigment. We'll know in about three months how the sealers are doing. I'll report back with a follow-up video.
Sediment Clogging Faucets
This past week, I've received at least three emails from people who did a plumbing repair that caused them to have to turn off the water in the house.
When they turned the water back on, all of a sudden water is restricted or stops flowing out of certain faucets or fixtures.
Sediment in the pipes is broken loose when you turn on the water at the main valve. This sediment then clogs the small ports in faucet cartridges, the flow restrictors in shower heads and faucet aerators.
You can minimize these issues by SLOWLY turning the water back on making sure ALL hose bibs are open on the outside of your home. This way some or most of the sediment is ejected out of these faucets. This trick works most of the time. Remember, open the main valve VERY slowly to minimize the hard rush of water through your pipes.
Unscrew all faucet aerators before you run water out of the faucets. Flush the lines, then re-install the aerators.
FINAL CALL on Gutter Guard Promotion
Earlier this month, I talked about a special promotion available ONLY to you, because you're a newsletter subscriber. Yes, that's one of the benefits you get by reading these manifestos! :->>>
I started testing gutter-guard products well over ten years ago. It's well documented at my website. All you have to do is go there and watch the videos, read the columns and look at the photos. Use "gutter guard" as your keyword phrase in my Search Engine.
The bottom line is I finally found a few that only let water in the gutter. Many, many other types of gutter guards do let small organic debris into the gutter creating a layer of muck over time.
The manufacturer of the one I chose to put on my own home has been running a decent promotion for this month. It's about to end in TWO days! You need to go to their website and just register to show your name was on the list by the end of business tomorrow.
This company doesn't have dealers in every city. If you get that kind of message, call the Mastershield company, their number is on the website below, and ask them for other options available to you.
Here's the actual text the president of Mastershield sent to me about the promotion:
MasterShield is offering your readers a Manufacturer's Rebate of $1.00 per foot off the purchase price of an installed MasterShield Gutter Protection system during the month of April. If your newsletter readers fill out the form for a free estimate at our website, we'll immediately know this homeowner is one of your readers and that this special offer should apply.
That's a great deal, especially in these tough economic times. If you're looking for a gutter guard that works, I can tell you that nothing has gotten into my gutters the past three years except water.
Please be aware that I do get paid a small commission if you fill out the form at the Mastershield website AND they have a dealer in your city or town. I only do this type of arrangement for products I actually use and believe in.
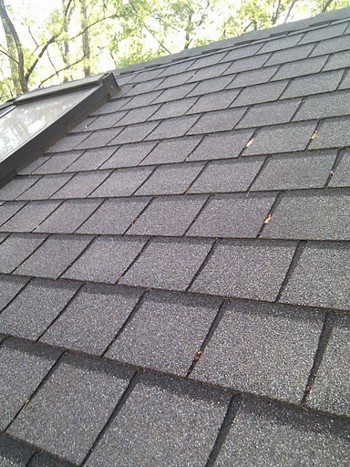
Annette Needs a Great Roofer
Annette Rodgers of Wappingers Falls, NY wrote to me yesterday:
I need new siding & a new roof on my home. Since my husband is deceased I have found that contractors tend to confuse and expect me to just follow their directions. My home is almost 30 yrs. old. But has good bones so to speak. How can I find an honest contractor that will strive to do the best in quality and price without going overboard or too cheap? Any help would be greatly appreciated.
Had Annette been a subscriber two months ago, she would have been aware of the Roofing Checklist I developed over 15 years ago that shows you how to find the pro roofer in your city or town.
The bottom line is that pros can be found in just about every town, you just have to go to where they buy their materials. For example, here in New Hampshire, I just discovered an amazing lumber yard / home-improvement center in Bristol, NH. It's R.P. Williams & Sons.
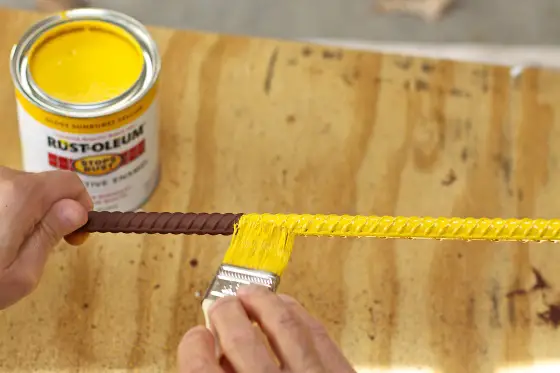
I was in there three days ago buying some 1/2-inch steel rebar. While I was in the store no less than four contractors stopped in to buy material. I was only there for 10 minutes! Imagine how many are there in a day.
If you talk with the manager or owner of the business, they know the best contractors. You just have to know the questions to ask. I cover all that in my checklists for every project.
Washington DC Trip
I'll be in Washington DC on June 14th and 15th as part of a initiative to help Congress discover more about how advertising really works on the Internet. I'll have a small opportunity to get together then if you live near or in DC. Contact me ASAP if you want to get together.
But I have a huge favor to ask. I'll be driving there from Cincinnati on my way back to NH. I'll have my Super Duty Ford F-250 4x4 towing a 6x10 utility trailer. Suffice it to say the total length is about 37 feet!
For obvious reasons, I can't park downtown where I'll be staying. Can I rent your driveway if you live close to the subway line? I figure I'll park in the burbs and take the subway into town for the two days, then come back and get the truck and trailer.
Suggestions, comments????
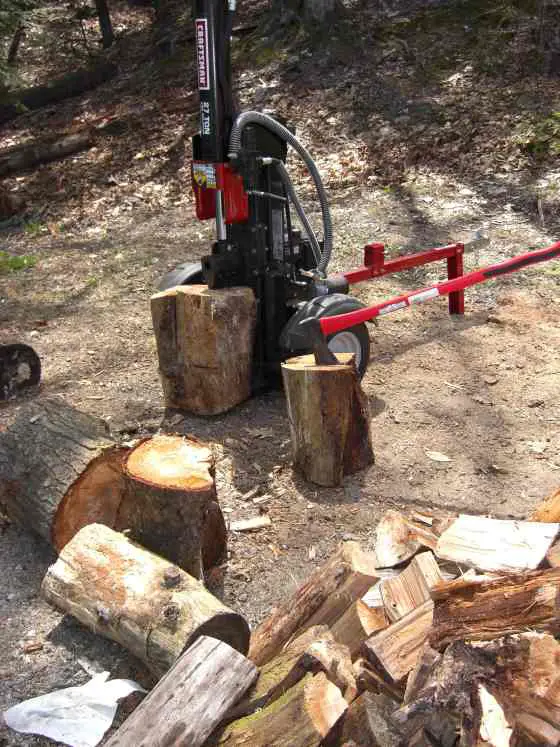
Chain Saw Sharpening Test
Today I expect to take delivery of a fantastic tool that sharpens chain-saw blades. If you do it by hand, you invariably change the pitch of the teeth causing the saw to cut in a curve. This causes the blade to bind.
Anyway, watch for that review SOON!!
Four-Pound Stain Solver Sale
Three weeks ago, we had the annual Spring Stain Solver Sale. All sizes were on sale. Stain Solver, for the 1,800 new subscribers here since the last newsletter, is my oxygen bleach that cleans anything water washable, especially floor tile grout. Read what Jennifer from Locust Valley, NY sent me last week:
I wanted to let you know that your product is fabulous!! I have kitchen tile that has colored grout and other than mopping it has never been cleaned. I used your product and let it sit for 1 hour. I was amazed the stained, dirty grout looks brand new!!!! I will recommend it to everyone!!
The new distribution company I use (they do a FANTASTIC job!), got ready for that huge sale looking at the sales figures from last year. The biggest seller last year was the 4-pound size.
Not so this year! Because I offered a bigger discount the more you bought, the 4-pound size came in last place. We have *tons* of 4-pounders waiting for a new home! They are afraid in the dark warehouse at night. I need you to adopt one of these packages.
So I'm offering a 20-percent-off promotion starting today on just the 4-pound size. This offer ends Tuesday May 4, 2010 at midnight Pacific Time. I'll be sending out reminders about this sale, so don't freak out.
AsktheBuilder.com