Building A House

25 Things You Must Know If You're Building A House

Home building has many different tasks, elements, parts, etc. How many do you think it takes to build a house from start to finish? How many decisions do you think you need to make to ensure that your new home construction is as near to perfect as possible? Add all of these things together and you undoubtedly have thousands, if not tens of thousands, of things that combine together to create the warm, comfortable home you have envisioned for the past few months.

Unless you have been living under a rock, you surely have heard more than one horror story from your parents, relatives, friends, neighbors, co-workers, etc. about a problem or group of problems they might have had when they built their last home. If you hear enough of these stories, you might be inclined to avoid building a home.

I am here to tell you that building your own home is a job can go smoothly and the entire process can be one of very happy memories instead of bitterness. The key to having a pleasant building experience is identifying processes or materials that are hard-to-fix or expensive-to-fix when things go bad. Concentrate on those and you can avoid the major disappointments other people suffer when they base too many decisions on hope instead of sound facts.

Block Foundations

The house foundation is extremely important. If the foundation of a house is poorly built, long-term and expensive structural problems can haunt your new home. Many parts of the USA still use concrete block to build both full height walls as well as shorter foundations that create a crawl space.

The mortar that holds each block together has only a fraction of the strength that poured-in-place concrete or the actual concrete block. Add to this a typical concrete block is quite hollow.

With a little extra work and some expense you can install both horizontal welded-wire reinforcing steel into every other course of block and you can install vertical steel reinforcing steel rods up through the block from the footer to the last row. If you then fill the voids of the block with a mixture of pea-gravel concrete and / or coarse sand and cement mortar, you will have a concrete block foundation that will indeed stand the test of time.

Building Codes

Many homeowners have a false impression of the residential building codes. Many builders have disdain for it and the inspectors that enforce the code regulations. Understand that the building code is law. It can be an enormous asset to you because building code issues are black and white. Either something passes or fails the code.

But this is where people often get confused. They often think if a house is built to code it is indeed a high-quality home. That is not always true. Why? The building code is for the most part a set of minimum standards. In almost all areas of the code, the structure can be built better.

I feel it is a very good idea for a person to purchase a copy of the building code at the same time as the building permit is issued. The building department often sells copies of the code or can readily tell you where to get one. The sections of the code are very easy to read and understand. Consider it your play book and read the code making sure your builder is on the same page as you are!

Certified Products

How many times has a salesperson told you they were selling the best product? Perhaps they were, but how were you to know? There are going to be many products in your new home, flooring, roofing, windows, doors, perhaps siding, the list goes on and on.

Some manufacturers who make different home building products recognize the importance of getting an impartial second opinion. In fact, certain groups of manufacturers and associations set up strict specifications for products that, if met, tell you for sure you are getting a quality product.

Many windows, doors, siding, even kitchen cabinets can carry certification labeling that help you make sound decisions. For example, the American Architectural Manufacturers Association (AAMA) has a stringent set of guidelines that if met, tell you the windows in your home are some of the best. Companies that meet these criteria get to apply a special AAMA label to their products. Ask about independent certification each time you talk with a salesperson.

Change Orders

Change orders are written instructions that tell the builder you have switched gears. They are to be avoided like the Black Plague. A change order or series of them can wreak havoc on your budget and they can slow or completely halt the construction progress of your new home.

If you have the misfortune of working with a builder that is not honest and fair, a change order opens up a window for him to extract vast sums of extra money from you. Asking for a price of extra work or work to be changed when there is no competition, puts you at an enormous disadvantage.

Before the contract is signed to build your new home, make all of your decisions about what products you are using. When you are in the bidding phases of your new home, request that each builder state the hourly charge for the different craftspeople who would work on the job, including unskilled labor. Make the bidders quote what percentage of overhead and profit is added to the labor and material prices in any future change orders. This data may help you decide who really has the best overall package for you.

Communicating with the Builder

Once you have selected a builder with fine homebuilding skills, it is time to get really serious. Yes, you are happy and excited, but you are talking about a large sum of money. At every meeting, take written notes. Digital voice recorders are very inexpensive and allow you to capture the entire meeting. Save the recording and make a written transcript of the meeting to circulate back to all who attended. Board meetings, public meetings, clubs, PTAs, etc. all do this and the meeting minutes are verified as accurate by the parties who participated.

Why is this important? If your builder makes a verbal promise that is not in the written specifications or plans, your digital notes and the follow-up summary that he is asked to sign, helps ascertain just what was said at the meeting. This extra work on your part puts in writing all of the important spoken words. Without the signed summary, an argument or disagreement can easily degrade into a he said she said confrontation.

Once again, you only need to summarize in writing the things in the meeting that are important to you. You do not need a complete written word-for-word transcript of each and every meeting.

Cost Overruns

Very few people have unlimited funds to build a new home. I have seen houses go over-budget by tens of thousands of dollars. What many people forget is the construction loan and permanent home financing is already in place. It can be difficult if not impossible to borrow additional money. The cost overrun has to come from another source such as your savings account or a cash advance on a credit card. This type of financial stress needs to be avoided at all costs.

You can avoid cost overruns easily. The first step is to eliminate all allowances from your plans, specifications and contracts. Take the time now to select each and every item that will be in your new home. This process forces the bidding contractors to tell you the final and exact cost of your home. Using this method, there will be no surprises that turn into financial headaches.

Home Improvement

Are there things in your current home that drive you crazy? Maybe it is a dimly lit narrow hallway? Perhaps it is a lack of storage space on your first floor. Take some time and you might generate a list of 50 things that you do not like about your existing home. Let's not make the same mistakes in your new home! This is the time to incorporate those home improvement ideas.

Pocket doors are often underused today. They are very practical and high-quality, pocket door hardware ensures the doors never rub nor fall off the track. A window seat makes a great place to sit and enjoy a view. Incorporate doors in your window set plans for hidden storage under them.

If you plan to have a laundry room near your garage entrance, be sure the washer and dryer are placed so that you do not have to walk across piles of dirty laundry on the floor to bring in the groceries.

Don't overlook your patio and deck plans. All too often these spaces are too small to accommodate enough patio furniture for a party of six to sit, sip some wine and waste the night away.

Driveway Problems

You may not give a second thought to the driveway at your new home. This is an item that is not easy to change, but has a profound impact on your everyday life and that of your visitors. Many driveways are too narrow, even ones that are two cars wide.

Think about the typical parking stall at the mall lot. Those lanes are often only 9 feet or ten feet wide. Imagine for a moment if wet grass was on the other side of the painted line instead of blacktop! Make sure you allow a minimum of 11 feet of space for each lane width of a driveway.

Would you like a very unique nearly maintenance-free paving material? If you are lucky, your builder may be able to install a tar and chips driveway. You could end up with a brown driveway like mine that puts all of my visitors heads on a swivel. To dress up your driveway even more, think about a nice edging of granite cobblestone or a local fieldstone.

Electrical Must-Haves

I am quite sure you will discuss your electrical outlets and switch locations with your builder or planner and some of these are minimum electrical code requirements. But there are new products that can minimize electrical fire hazards called arc-fault circuit breakers. These are required in some rooms of your home, but it might be a good idea to install them in many of the circuits.

If you like to install holiday lighting around your home, now is the time to install plenty of outdoor outlets that are controlled by interior switches. If you work with power tools outside of your garage, then make sure one or two outlets are just outside of your garage.

Consider using 12 gauge wiring to minimize voltage drop on circuits that extend the greatest distance from the electrical panel or that will be used with tools and appliances that draw lots of current.

Extra Height Foundations

A tremendous amount of homes are built that have basements. Basements are some of the best and least costly space you can create in a new home. The trouble is, all too often the basement walls are too low.

The typical poured concrete foundation height in many areas is 7 feet 10 inches as the concrete forms are eight feet tall. By the time you pour the basement floor, the distance between the floor is just 7 feet 7.5 inches. If there is a center beam in the middle of the basement, a tall person has to duck to clear it!

You have but one chance to cost-effectively add height to your basement walls. Your builder can add another 18 inches of height with little effort. In certain instances you can create this extra height by building short walls on top of the foundation. Ask your builder to offer you several options.

Garage Plans

Many garages, I see in the average home, are far too small. When you see them empty as you walk through the model homes, they look enormous. But by the time you put your car, SUV, lawn equipment, garbage cans, sports equipment, etc., you barely have a place to move.

If at all possible, try to design your home so the garage has a ceiling height of 12 or even 13 feet. I realize this seems impossible or out of proportion, but this height allows you to create a loft that extends over the hoods of the cars. If you are less than 6 feet tall, you can walk around the loft without hitting your head.

Be sure there is at least 4 feet of space between the edge of the garage door opening and an interior wall of the garage. This will allow plenty of room to store things along the wall and still allow you to comfortably open a car door once in the garage.

Consider your garage doors also. Do you want one garage door or separate doors for each car? Garage door openers have special features such as vacation settings and motion detection for interior lighting.

Be sure to plan for a central vacuum system now and plan to have the actual central vacuum power unit in the garage so that all noise is outside of the living area. It is also easy to empty the dirt directly into the garbage cans.

Grade Around The House

I can't begin to tell you how many homes I see that are built too deeply into the ground. The soil around the house is nearly flat. It is no wonder the yards are like swamps after a heavy rain or that basements leak. What's more, these houses rarely, if ever, meet the minimum building code requirements with respect to the slope of the soil around the house foundation.

In many respects, a house can't have too much slope away from its foundation. I prefer to set a foundation such that the top of the foundation is about 18 inches higher than any point within 10 feet of the foundation.

This allows me to keep six inches of foundation exposed and create a generous slope of 12 inches of fall in the first twelve feet of run away from the foundation.

HVAC Sizing

The heating and air conditioning system in your new house is very important. It creates and maintains a comfortable and artificial environment within the walls of your home when the outdoor weather is within seasonal average limitations. To simply that, your central air conditioning unit is supposed to keep all rooms of your house cool so long as the outside high temperature is at or just slightly above the average high temperature.

To keep all rooms comfortable, the heating and cooling contractor has to do a heat gain and a heat loss calculation. This tells them how much heat or cooling to pipe into each room and it also tells them the overall size of the heating and cooling equipment.

These heat loss and heat gain calculations are so precise that two identical homes on the same street might need different sized heating and cooling equipment! Why? The one house that has the most glass surface facing west will need a larger air conditioner.

Lot Selection

Before you build a house, you need a lot. The differences between lots can be a varied as faces in a crowd. You need to make sure your lot fits your lifestyle. If you love to relax on a patio after work, then maybe it is a good idea to have a lot where your patio is on the east side of your home so you don't cook in the hot sunshine. But if you like watching sunsets, then perhaps your patio needs to face west.

Often there is extensive grading done when a subdivision is built. Was your lot a ravine that now has 15 feet of fill dirt under it? You can determine this by looking at before and after topographic maps.

Consider avoiding lots that are located at the bottom of hills or are in low valleys. These lots may become inundated with water in periods of heavy rainfall.

Panhandle lots can be troublesome as your backyard might be tucked right up against the front yard of another house. Privacy can become a real issue.

Home Inspection

Issues about the level of quality of both the labor and products used in new homes is something you need to know about before a problem arises. You may not possess the knowledge and skill to make determinations as to what is acceptable and what is not.

It may be in your best interests to meet with a certified home inspector before you sign a contract to build a new home. Discuss with the home inspector the top problem areas, and ask the inspector if he can assist you with writing up some basic specifications and visit the new home to check on the quality as the home is built. These basic specifications will probably be based on his home inspection checklist.

Include the written specifications in your bidding documents and in the final contract between you and the builder. Also include the language in the contract that permits the inspector to make periodic visits as the construction progresses.

Photographs And Videos

As your new home is built, visit it often. Take numerous home videos and photos of the work in progress. Take photos of all walls and of all the new things that happened since you last visited. Closeup photos are very important.

Photographs of things such as flashings that will be covered by brick or stone, air and water infiltration barrier tears or seams that are not taped, holes in wall sheathing, etc. are very important to document.

Photographs of all of the structural elements that will get covered with drywall are very helpful. They can help remind you of what might be involved at a later date should you decide to move a wall or enlarge an opening.

These photos might also be worth their weight in gold should you become entangled in a legal dispute with your builder. Photos do not lie and you may have 20 or more photos that clearly define building code violations. Videos will allow you to photograph the construction and make comments while you are taping.

House Plans

If I was allowed to give you just one piece of advice to help make you homebuilding experience wonderful, it would be this: the home plans, blueprints and specifications are the single most-important part of the entire process.

Each and every item you want in your new home should be clearly called out. I don't mean simply mention that doors and windows get trimmed out. I want you to show the exact molding, name it, its model number and draw a side profile so the trim carpenter knows he is installing the right thing.

I want plans that call out each and every faucet, every lighting fixture, each exact model number of an appliance, etc. I want a table in the plans called a Room Finish Schedule that tells the builder and all subcontractors how the floors walls and ceiling in each room and hallway will be finished.

Important rooms such as kitchens, bathrooms, and studies should have interior elevations drawn showing the location of each fixture and finish on the walls. Nothing should be left to question. Your builder should be able to use the plans to build a perfect house without having to ask you or the architect a single question.

Plumbing System Secrets

Indoor plumbing is magnificent and it is even better when it work flawlessly and quietly. Imagine having hot water instantly at each faucet. In many homes, this is possible with a simple gravity hot water recirculation loop.

The annoying noise caused by water hammer can be eliminated if your plumber installs 3/4 inch piping to all fixture groups. This piping method also ensures abundant water flow if water is being used at multiple locations at the same time within the house.

Modern cast iron drain piping will keep noise from rushing water inside the pipes instead of broadcasting that someone just flushed a toilet upstairs. Cast iron is much denser than plastic piping and is very easy to install.

Now is the time to plan for water softeners. If you think you might want one in the future, make sure the outside hose bibs are fed by one large plumbing line that originates before the water softener. But do install one hose bib near the garage that is soft water. If you rinse your car with soft water after washing it, water spots do not develop!

Quality Control

Quality is a moving target. It is perhaps the most subjective part of the entire home building process. The level of quality you might find to be perfectly acceptable can be repulsive to another person.

The best way to solve quality issues when building a new home is to create a standard to which the quality of work in your home will be compared. For example, if you are buying a home based upon a model you walk through and you love the fit and finish of the trim, how the cabinet doors fit, the smoothness of the drywall, etc, then make that exact model home the standard the builder must hit.

Place language in the contract that specifically talks about visual examples that the builder and his subcontractors can easily see. You must be specific about each and every item that is of concern to you. If this means talking about the finish on the concrete walks and drives, then spell it out.

Roofing

The last thing you need at your new home is a roof leak. Most homeowners fail to realize that a vast majority of leaks do not happen within the vast field of roof shingles or tiles, but where the roof touches up against something that is not the roof.

Flashings are transitional roofing materials that are used at these locations. When designed and installed properly, they make waterproof connections between skylights and your roof, plumbing roof vents and the roof, side walls that project above roofs, etc.

Flashings can be made from a variety of materials such as tin, copper, galvanized metal, aluminum, lead and even sheets of rubber. It is important that flashings be designed so they require little or no care over the life of the actual roofing material. Soldered tin or copper can last 50 or more years. Don't rely on caulk as a flashing component as normal caulk may only last 10 or so years in the harsh environment up on your roof.

Sound And Noise Control

Many people are disappointed once they move into their new home when they begin to hear noise transmitted throughout the house. Perhaps it is the sound of music from a child's bedroom. Or maybe a person is trying to sleep and noise from a tv across the house bounces down a hallway.

There are very important steps that need to be taken as a house is built if you want to control sound and noise. It is nearly impossible to lower noise transmission once a house is built.

Stopping air leaks is very important. Sound travels through air and if rooms can be sealed so that no air leaks under walls, around doors, through heating ducts, etc., then sound can't make it from one location to another.

Solid core doors, thicker drywall, sound-control batts in walls and cork underlayment under flooring all help to minimize sound movement from one space to another.

Trusses - Storage Opportunities

Visit a normal new subdivision and you might see any number of houses being framed. My guess is that you will readily recognize the standard roof trusses that have angled pieces of lumber that create several V's within the truss.

Old houses had attics because the roof were framed differently. Imagine if your builder told you that he could install trusses that created a vast attic space under your roof? Wouldn't it be nice to have the option of finishing that space at a later date?

Think of all of the wasted space above the average garage. Your builder can order special affordable trusses that create a lowered storage area that is open but only has maybe five feet of head room. This roof truss design allows you to create wide-open spaces that are completely covered in flooring. There is no danger of you falling through the ceiling below.

Vapor Barrier

Surely you have heard of vapor barriers. Barriers stop things. Well, even the highest quality sheet plastic goods that can be purchased will not stop all water vapor. But the sad truth is that the vapor retarder, or vapor barrier, your builder may choose to use, is an inferior one.

There is a vast difference in quality among vapor retarders and this is an item that is virtually impossible to change once drywall is applied to a wall or a basement concrete slab is installed.

Be sure your builder installs a vapor retarder in all required locations that meets the newer ASTM Standard E 1745. Installing this vapor retarder is your guarantee of stopping the most water vapor possible and that is very important, to say the least.

Water Infiltration

Take apart an older home and you will almost always see tar paper under wood siding or under shingles. This very basic building material is still available although newer high-tech underlayments are now available.

These materials are extremely important as they capture water that gets past the primary weather barrier on both walls and roofs of a home. It is imperative that you place these hidden water barriers on all walls and on the roof of your new home.

It is even more important to make sure they are installed correctly, so take a few minutes to read the simple installation instructions. Make sure your builder understands that you want water to stay outside of your new home.

Waterproofing Foundations

If you are lucky enough to get a basement with your new home, make sure it stays dry. This can happen if your builder waterproofs your foundation instead of damproofing it. Damproofing is an inexpensive coating of hot liquid asphalt. It does a great job of stopping water vapor that passes through concrete or concrete block.

But damproofing will not bridge cracks that might develop in your foundation. Waterproofing can and does do this and does it for many years. My own home has a waterproofed foundation and it has never had one drop of water come in through a crack nor has water leaked between the floor and wall intersection.

This is also a task that is nearly impossible to do once your home is built. The time to waterproof is before the soil is backfilled against your home's foundation.

Follow these guidelines and you will build that new home with little, or no, problems. Getting everything in the house plans will ensure everyone is on the same page during the entire home construction.
Woodpecker Damage

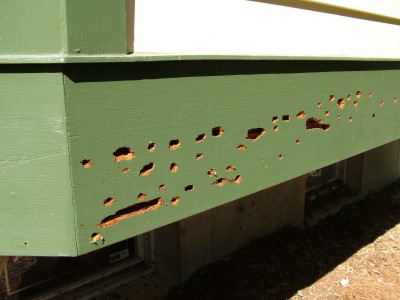
DEAR TIM: I have woodpecker damage at my home. The pesky woodpecker drilled any number of large holes into the wood. I noticed earlier in the season that carpenter bees had been hanging around this part of my home. What can I do to stop this from happening again, and how do I repair the holes? Do I have to install a new piece of wood trim? Elisabeth G., Omaha, NE

DEAR ELISABETH: Welcome to the woodpecker damage club. There are many old members, and plenty of new members each year. I was a victim just like you this year. In fact, your description of events is nearly identical to mine. A woodpecker did significant damage to a redwood trim board on my own home while filling itself with some tasty carpenter-bee larvae.

Although I am not an ornithologist, I know enough to realize that woodpeckers have evolved to take advantage of a food source other birds seem to ignore. Some insects love to live on or in wood, such as live or dead trees, fence posts, house siding or trim, basically anything that an insect can use to make a home. The insects themselves are very likely finding food of their own on or in the wood.

A woodpecker found some tasty carpenter bee larvae in this redwood trim board. An epoxy putty product will easily repair the damaged wood. PHOTO CREDIT: Tim Carter

A woodpecker found some tasty carpenter bee larvae in this redwood trim board. An epoxy putty product will easily repair the damaged wood. PHOTO CREDIT: Tim Carter

In my case and probably yours, the carpenter bees built nests deep inside the wood trim. At my home, those crafty carpenter bees tunneled up and sideways into 1-inch-thick redwood to make a secure nest for their offspring. Well, they thought it was secure. The carpenter bees were attracted to the underside and back edge of my redwood trim board because I had not painted it. Carpenter bees usually do not like to drill into painted wood, preferring instead to drill into natural or stained wood.

The amazing thing is how the woodpecker knew the insects were beneath the surface of the painted redwood. There were absolutely no visible signs that the tunnels were in the wood.

Repelling woodpeckers is not an easy task. Many experts agree that you have to discover the pecking activity early and try to scare the birds away. But keep in mind that their survival mechanism is strong as they are either creating noise (drumming) to attract a mate or outline a territory, looking for food, or possibly building a nest. These three functions are critical to their survival, so they will not give into a mere human with too much ease.

You can try to use bright fluttering metal strips, outlines of predatory birds, loud noises and even hardware cloth to protect your home, but all of these require vast amounts of effort and are never guaranteed to work. If you are thinking of killing the birds, you better think twice. It may be illegal to do so in your state.

One thing that has had some limited success is to erect sacrificial wood in other parts of your yard. Create some small decorative structure made from unpainted redwood and cedar that will attract insects, carpenter bees, etc. Then let the woodpeckers have their way with this thing instead of your home. You may even plant an old log that looks like a dead tree to attract insects to it.

In my case, I will not have to replace the damaged redwood trim board, even though there are many holes and open channels in the wood. My guess is that you will also be able to repair your wood trim.

I intend to fix my damage using a light-weight structural adhesive epoxy putty. These affordable products are made for repairing large gaps in wood. They bond permanently and as the epoxy cures, it does not shrink. Once the epoxy hardens, it can be sanded, carved, planed or nailed into just like the original wood. This product is perfect to repair both flat wood or trim moldings that have a shape. The epoxy putty dries a light color, but it can be painted once it is cured.

Thousands of people have contacted me about woodpecker damage and what can be done to make the birds go away. The first thing one has to do is get rid of any food sources that are attracting the birds. A pest-control company is one place to start. Many of these professionals have great weapons that work.

Give serious thought to making a sacrificial structure. This methodology is used to protect water heaters, natural gas lines and buried metal from corrosion. Sacrificial anodes corrode instead of the metal you want to preserve. I am quite sure it has a great chance of working with woodpeckers. Keep in mind that woodpeckers like to be up in the air, so create a habitat that mimics what they usually fly to as they eat or look for food. Place the sacrificial structure at least eight or ten feet in the air, and possibly beneath a shade tree.

Column 695

Sample Checklist Questions

Sample Checklist Questions


Below is a random selection of questions from the New Home Construction Checklist. These questions are representative of the type of question in the other Checklists. Most are simple yes / no questions so you know immediately what is being offered. Some questions have spaces for the contractor to explain his answer. This keeps everyone on the same page.

These Checklist will save you time, money and aggravation when you are doing your home improvement project. Select from over 30 different bid sheets, covering everything from waterproofing a basement to building a new home. There is a Checklist to match your next project.


Will you install all products and materials according to the manufacturer's specifications?

[ ] Yes   [ ] No
If the house has a basement or below grade rooms, will the foundation be waterproofed in lieu of the standard asphaltic dampproofing?

[ ] Yes   [ ] No
Does the electrician intend to extend separate or ‘home run’ Category 5  copper communications cable to all bedrooms, dens, family rooms, etc. for planned and future telecommunications equipment?

[ ] Yes   [ ] No
Does your quotation include a programmable thermostat?

[ ] Yes   [ ] No
What is the length of the roofing material warranty?

___ Years
Will utility trenches that pass beneath sidewalks, driveways, and parking aprons be backfilled with solid granular material which will eliminate future settling?

[ ] Yes   [ ] No
Will ceramic floor tile be installed on top of a 3/4 inch wood sub floor and one half inch cement board?

[ ] Yes   [ ] No
Steel reinforcing bars can increase concrete tensile strength 100 times or more. This prevents cracks from enlarging or offsetting. Will the exterior concrete slabs contain inexpensive #4 steel bars 24 inches on center in both directions?

[ ] Yes   [ ] No
If the answer is “No” to the above two questions, just how do you intend to prevent water infiltration into the house?


A 40 circuit primary breaker panel can often be installed for just a few extra dollars. This allows plenty of extra circuit spaces for future electric needs. Does the electrician plan to install a 40 circuit panel?

[ ] Yes   [ ] No


Air Conditioning Checklist

AIR CONDITIONING INSTALLATION / REPLACEMENT CONTRACTOR HIRING GUIDE & CHECKLIST

! Instant Download Document !
! 100% Money-Back Guarantee !

Order Safely 24 Hours a Day ONLINE
Customer Support Available: M-F 9:00 a.m. - 2:00 p.m. ET

You will be hot under the collar if your new or replacement AC system does not work well! Time for some air conditioning troubleshooting 101 ... This Contractor Hiring Guide & Checklist asks tough questions that will make loser contractors sweat, while you stay cool as a cucumber.

My Air Conditioning Installation / Replacement Checklist costs just $7.00.

My Contractor Hiring Guide & Checklist can and will save you heartache and lots of money.

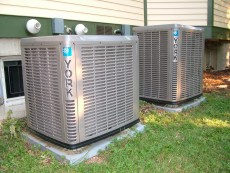
Air Conditioning units

! DELIVERED INSTANTLY !
HOW WOULD YOU LIKE?

  • Extremely helpful list of questions to ask contractors
  • Instant Download as an attached Word & Excel Format file

My Air Conditioning Installation / Replacement

Contractor Hiring Guide & Checklist

costs just $7.00.

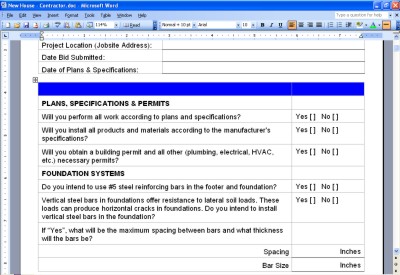
Contractor's Document  It is delivered to you the instant your credit is approved in the common PDF file formats. This Checklist consists of a document that provides you with instructions and tips for using and getting the most from the Checklists. Certain pages of the document are set up so you can just print them and forward them to the Contractors bidding on your project. Each contractor fills out their copy and returns the file to you. (Sample screen shot on the left of the contractor's copy.) The file consists of a series of questions pertaining to the project and a place for a line by line bid breakdown.

Gas Fireplaces

DEAR TIM: What can you tell me about gas fireplaces? Is it better to have a gas fireplace or a traditional wood-burning fireplace? Should I consider a ventless gas fireplace? If you say to burn gas, I am really interested in efficient gas fireplaces so I can turn my fuel dollars into heat in the house instead of going up the chimney. John McG., Buffalo, NY

DEAR JOHN: Gas fireplaces are very popular, and they keep getting better each year as manufacturers make improvements. Modern gas fireplaces are not only very efficient, but they are extremely realistic. Certain models are so well engineered, it takes a trained eye to realize gas is burning instead of wood.

Your final decision on which type of fireplace to buy or build needs to be well thought out. The first thing I would want to know is if the fireplace is purely decorative, or will it ever function as a heating source for your home. If the fireplace is decorative, then you have a much easier set of decisions to make.

But let me tell you a story that might influence your choice. Just after I moved into my current home, we had an unusual mid-fall snowstorm. The trees were still full of leaves, and the wet snow clung to the them like flies to flypaper. The weight of the snow cracked the branches and thousands of power lines around the city were pulled to the ground. The utility crews were overwhelmed with work.

This is a real wood-burning fireplace but the current fuel source is natural gas. It can be converted back to wood burning in less than five minutes. PHOTO CREDIT: Tim Carter

This is a real wood-burning fireplace but the current fuel source is natural gas. It can be converted back to wood burning in less than five minutes. PHOTO CREDIT: Tim Carter

The power at my home was not restored for three and a half days. The first night my family thought it was a fun experience, but that laughter quickly went away as the power did not come back. The storm ushered in a wave of cold air that made the temperature drop inside my home. Fortunately, I had two fireplaces and plenty of wood to temper the inside air and keep the water pipes from freezing.

Yes, a portable generator would have allowed me to run my natural gas furnace. But I didn't have one, the stores quickly ran out and all of the tool rental shops had empty shelves. But because I had a fireplace that burned wood, I was able to survive. That storm taught me several valuable lessons.

Since that time, I remodeled one of the fireplaces. I kept it as a wood-burning fireplace, but I piped the firebox with natural gas. I currently have a gas fireplace with a set of realistic gas logs. With the flick of a switch, I have a warm, realistic instant fire.

But if for some reason I lose my natural gas supply, I can remove the log set, cap the natural gas line and be burning wood in a matter of minutes. This flexibility gives me enormous peace of mind. If you can find a gas fireplace that allows you to do a similar approved fuel-source switchover, give it serious consideration.

If you decide to purchase a ventless gas fireplace, be aware of a potentially harmful side effect. When you burn natural gas or liquified natural gas, water vapor is a byproduct. This is the vapor you often see streaming from chimneys on cold winter days. While seemingly harmless, this water vapor can and will condense on cool surfaces. If the vapor barriers in your walls are not good and/or your attic ventilation is poor, you can have serious condensation issues that can lead to mold or wood rot.

As for fuel efficiency, you should be able to obtain information from the gas fireplace manufacturers about rated fuel efficiencies. If you buy a quality gas fireplace that has the highest efficiency rating, you will be doing your pocketbook and the planet a big favor. Be sure you get the efficiency rating in writing. It is not a wise thing to trust verbal promises made by a salesperson.

Gas fireplaces can be installed very quickly. Traditional masonry fireplaces are almost always more expensive. But remember to weigh flexibility against cost. Direct-vent gas fireplaces offer fantastic placement opportunities as they can be placed in unusual places within a home. The exhaust gases from the direct-vent fireplaces can exit a wall instead of the roof of a home.

Be sure a qualified contractor installs your gas fireplace. Insist on a building permit, and try to be present when the building inspector looks at the work. Take as many photographs as possible during all phases of the installation. These photos may help you diagnose a problem at some later date.

Column 694

Light Bulbs

DEAR TIM: Light bulbs in my home are burning out more quickly than ever. After a few days, a new bulb will not work. Are new light bulbs not high quality any longer? When I go to buy new bulbs it is very confusing. There are so many choices, I don't know what energy-saving light bulbs to buy. Is there a real difference between all of the light bulbs I see at the stores? Diane T., Bellevue, WA

DEAR DIANE: I am convinced hundreds of thousands of light bulbs are buried alive in landfills and/or broken at recycling facilities. There is not a doubt in my mind the bulbs you think are bad are still actually good. They have failed because someone screwed them in too tightly into the socket.

If you look at the base of a traditional light bulb, you will see a droplet of solder. This solder connects to one end of the filament inside the bulb. The other end of the filament connects to the aluminum threads at the base of the bulb.

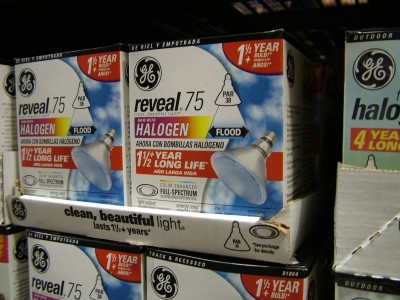
You can see why it might be easy to get confused when buying light bulbs. There are many different sizes, shapes and types of light bulbs. PHOTO CREDIT: Tim Carter

You can see why it might be easy to get confused when buying light bulbs. There are many different sizes, shapes and types of light bulbs. PHOTO CREDIT: Tim Carter

Inside the socket of the light fixture, you will see a brass tab. When the light fixture is new, this tab is bent upwards at about a 20-degree angle. You may have noticed in the past that as you screw in a new light bulb and the light is turned on, the light bulb comes on before the bulb is tight in the socket. This happens because the brass tab makes contact with the droplet of solder.

But some people twist light bulbs into sockets far too tightly. After doing this several times, the brass tab flattens at the bottom of the socket. The droplet of solder is not always consistent from the factory, and if there is the slightest air gap between the solder and the brass tab, electrical arcing occurs between the base of the bulb and the brass tab when the light switch is turned on.

As long as this tiny arc is present the light bulb will work. But the arcing can and does erode the solder. Once the gap between the solder and the brass tab gets too big, the electrical arc can't make the jump. As soon as this happens, the bulb acts as if it has burned out, when in fact, it is still good. If you were to remove the bulb, turn off the light and power to the circuit and use a needle-nose pliers to slowly pull the brass tab up at the 20-degree angle, you would discover the bulb would once again work as soon as you turned the power and switch back on, and reinserted the bulb into the socket.

I understand your confusion about purchasing light bulbs. There are so many choices. But the good news is that newer light bulbs have different technology that not only uses far less electricity, some light bulbs make you and all of the things in your house look fantastic.

One of the most interesting products are halogen light bulbs. These bulbs produce a vibrant white light that is created when the filament burns in the presence of halogen gas that is inside the bulb. These bulbs make colors look crisper, and the bulbs stay at nearly full brightness for their entire life.

If you want energy-saving light bulbs, then pay close attention to the fluorescent light bulbs at the retail store. You can buy small compact fluorescent bulbs that will use 75 percent less energy of a traditional light bulb. For example, if you now use a 100-watt regular light bulb, purchase a fluorescent light bulb that is rated right around 25 watts. Believe it or not, it will produce the same amount of light as the old-style light bulb.

You can also buy full-spectrum light bulbs that filter out the yellow light produced when the filament burns. This happens as the light passes through the glass of the light bulb. The rare-earth element neodymium is fused into the glass and acts as a highly effective yellow-light blocker. Because no yellow light escapes from the light bulb, colors of all the things in your home are crisper and vibrant. Reds will be redder, and skin tones will be more alive. My wife and I use all three of these new light bulbs in our home, and love how they make things look different, especially our lower electric bill!

Many people do not realize that the color of clothes, carpets, painted walls, paintings, any fabric, cabinets, countertops, etc. is directly affected by the lighting source. Professionals know this as color temperature and something called color rendition. Different light bulbs create light that is more heavily weighted towards a part of the color spectrum.

Some traditional light bulbs make things look more yellow, while others might produce a more bluish cast. You must be very careful when selecting products at stores. It is not uncommon for people to be disappointed once something is seen under different light at a house instead of inside a store. Always try to select colors under the exact same light you use at home.

Author's Comment:

I was fortunate enough to get feedback about this column from people who have additional knowledge about the topic. Read these comments:

    "Read your article concerning light bulbs burning out prior to the expected life of bulb. As a former electric utility worker, I have experienced many customer complaints concerning this issue, usually in concert with TV picture malfunction (video tube type). These symptoms can be indicative of abnormally high service voltages. (Higher than the nominal 120-140v service.)

This dangerous condition may be caused by a loose connection(s) with the neutral conductor(s). Some years ago, use of aluminum conductors, without proper connections (usually aluminum to aluminum, or aluminum to copper), caused voltage problems both inside structures and with outside service connections. This situation can be a highly hazardous condition where substantial heat is eventually produced by poor and deteriorating electrical connection(s).

Where the above symptoms are present, a simple voltage test at appropriate points in the service panel, meter connections and or main service connection location can determine or eliminate these concerns. A phone call to the local electricity distribution company can usually bring satisfactory answers."

Jim Dushaw
Ashburn, VA


"Dear Tim,

Regarding your article that appeared in the October 7, 2007 issue of the Toledo Blade. You gave some very helpful advice to your readers regarding the longevity of incandescent lamps (and how to actually use them). Good for you.

At the end of the article, however, you suggested that readers use compact fluorescent lamps in lieu of incandescent.
 
The first concern I have is that your audience will go out and buy the screw-in type fluorescents that are readily available at Home Depot and Lowe's. Typically, these lamps are fitted with "mechanical" ballasts, usually the least expensive and lowest quality devices the manufacturer can purchase. Unfortunately, these ballasts also maximize Radio Frequency Interference (RFI). In our environment, this RFI may create problems with computers, radios, televisions, cellular telephones and the other electronic gadgetry that is so common in our households.

The alternative is to use fluorescent lamps with "electronic" ballasts. There is a cost involved here, too. In general, these lamps will not fit into screw-in luminaries: they have pin-type connections.

So the consumer is left with the choice of electronic noise or added expense.
 
While I am certainly no fan of incandescent lamps (typically 750 hours of life expectancy versus 15,000 or more from a fluorescent, and energy consumption increases of 66% or more for the same visual light output), I believe the consumer should understand the choices he/she is making.

And, at last, a simple quibble. Your article says the fluorescent lamps put out more light energy than the incandescent. That is not true: what is true is that the fluorescent light is in the visible range, so is much more useful to us. The great majority (80% or more) of the radiation of an incandescent lamp is in the infrared range, which we perceive as heat -- they worked great in our children's Easy Bake Oven.

Thanks for your columns."

David S. Kelly
Retired Chief of Lighting Systems Design
National Steel and Shipbuilding Company
San Diego, CA


      "Yesterday's article in the

Washington Post

      was very good, but would have been better if you had revealed the Dirty Secret in Federally-Mandated, Incandescent-Lamp-Life tests. This has been confirmed in a conversation with an ex-executive of G.E.

Federal "1,000 Hour Incandescent" tests are achieved by testing the lamps on a very heavy, marble bench so that all building vibrations are damped out. The test is also continuous -- no "Off - On" cycles which stress the filament due to changed-heat expansion & contraction.

In the home, significant vibration is everywhere: Cleaners hitting tables and bases, and most importantly, fumbling with the switch at the base of the lamp.

Long ago, manufacturers figured out how to sabotage in-home life. Simply remove three of the five traditional, filament supports. Since tungsten grows brittle with heat, the filament sways and breaks -- often in a few hundred hours.

The source mentioned above now markets all types of bulbs to building contractors and a few of us civilians. He thinks the only honestly constructed bulbs may be those Sylvania bulbs that are manufactured in Germany.

Sincerely,"

David L. Lee
Bachelor of Electrical Engineering, the Ohio State University
60 years Experience in Telecommunications Engineering & Marketing

Column 693

Kitchen Design

DEAR TIM: I need some help with the kitchen design for my home. I am pretty sure I know what I want, but kitchen designs are as varied as faces in a crowd. How will I know what is the best design for this kitchen remodel job? What is the best way to approach a fresh kitchen design project? Sheila B., Hardeeville, SC

DEAR SHEILA: Kitchen design is very important, but it is sometimes confused with kitchen planning. Both planning and design are critical, and ignoring one while concentrating on the other can lead to a disaster and heartbreak. Let's make sure we are on the same page with respect to what you need.

Kitchen design, in my opinion, speaks to the overall look of the kitchen once it is completed. A designer can use different materials, cabinets, finishes, lighting, etc. to achieve a sleek, modern look and feel or a kitchen that was transported in a time machine from a quaint Irish cottage. There are an infinite amount of kitchen designs you can have.

This kitchen design was a collaborative effort. My wife had significant input from beginning to end throughout the entire design process. PHOTO CREDIT: Tim Carter

This kitchen design was a collaborative effort. My wife had significant input from beginning to end throughout the entire design process. PHOTO CREDIT: Tim Carter

Kitchen planning, in my opinion, tends to pay more attention to the functionality of the space. When you plan a kitchen, you are thinking about the placement of the sink, appliances, types of cabinets and the layout of the cabinets and countertops. The best analogy I can think of is kitchen planning is like the structural steel of a skyscraper and kitchen design is the outside appearance of that same skyscraper.

There is no simple answer to your main question. I feel you can ask 100 top kitchen designers what they would do with your new kitchen, and you will likely end up with 100 different designs some of them being similar, but no way identical. My suggestion is for you to start to immerse yourself in research where you look at hundreds of different designs and see which few really put your head on a swivel.

Your research will undoubtedly take you across the vast tundra of the Internet, into numerous kitchen cabinet showrooms and possibly design centers built by large remodeling contractors who specialize in kitchen remodeling. I also suggest you start looking at any number of excellent kitchen design books and magazines that have hundreds of gorgeous color photos of kitchens large and small, expensive and affordable. If you really want to be on the cutting edge, look at kitchen designs done in European countries. European kitchen designers often produce stunning results in small spaces.

Be sure to look beyond just cabinets and countertops. Every surface in the kitchen is a design element. The backsplash space between the countertops and underside of the wall cabinets, floor, ceiling, doors, wall spaces above and around cabinets, etc. all should contribute to the overall design theme.

For example, if you are on a tight budget, you may decide to paint your existing floor and incorporate a design of some type into the paint. Painted floors hold up very well when they are coated with high-quality clear urethane. Don't forget lighting as it is a very important design element. Unfortunately, lighting is often overlooked in many kitchen designs that I see.

I urge you to consider interviewing several professional kitchen designers. They may be able to offer you great advice about how to maximize your design dollars. The fee you spend for a kitchen designer may be paid for from dollars you might otherwise waste on rookie design mistakes.

Not all professional kitchen designers are made equal. Some have years of professional and industry training mixed with years of field experience. Others may have little or no training in the field. Before you sign any contract for design fees, make sure you investigate the qualifications of the person you are going to hire.

At a bare minimum ask to see the last 20 kitchen design projects they have worked on. Try to determine if the designer has experience working with the look and feel you have decided you like. Ask the designer what kind of training and classes they have taken. Probe to see if they have any type of certification from industry associations. Some certifications require many hours of training.

Column 691

Toilet Flapper Valve Video

Toilet Flapper Valve

While filming a video on roof flashing, Tim receives a cell phone call from Paul. Since the video shooting is already interrupted, Tim assists Paul with his plumbing problem.

Paul's toilet is leaking or running all the time. Until recently, Paul's toilet would fill the tank and everything was fine. Now after filling, the water is running all the time. To examine the problem, Tim asks Paul to take the lid off the toilet tank. Be sure to place the toilet tank lid flat on the floor, do not lean it against the wall. A little nudge and it will slide down, hit the floor and crack in half.

Looking down into the tank on the left side, there should be an arm with a chain attached to it. In the center of the tank, there is a metal tube that comes up above the water line. Off to the left, there is either a mechanism with a ball float or a cylinder type shut-off valve.

Tim wants Paul to reach down into the water to the end of the chain. However, Paul has some concerns about putting his hand in the water tank. Tim assures him that the water in the toilet bowl tank is clean water. There is no problem placing your hand in this water. As a matter of fact, this water can be used for brushing your teeth, washing your face and shaving on those days with the water is turned off in the house. This is the same water that comes out of your faucets.

After some convincing, Paul reaches down into the tank and pulls up on the end of the chain. This raises the toilet flapper valve and allows the water to flow out of the tank. If the chain is released, the flapper valve will fall back down and stop the water flow.

The flapper valve can be getting hung up on something so it does not fall back into place or it is worn out. In either case, the water will continue to flow out of the toilet. If the flapper does fall back into place, then it is probably worn out. Head off to the store and purchase a replacement flapper valve. Be sure to get a replacement that has the flapper valve and the seat. The package will also include a putty ring so you can seal the seat. Many of these replacements have a timer cup on the flapper valve. This holds the flap open long enough to get a good flush.

To install the replacement valve, shut off the water source to the toilet. Usually located just underneath the toilet. Then flush the toilet to remove the water from the tank. Sponge out the remaining water from the tank. Install the replacement flapper valve by following the directions on the package. In most cases, this will stop the running toilet problem.

This is an easy, do-it-yourself repair. No plumber needed this time.

Utility Truck Beds Video

Many years ago, Tim decided to use a special truck bed for his work truck. Regular pick up trucks just did not do the job. Utility truck beds allow you to carry lots of tools to your project site. There are secure, waterproof storage compartments on the outside of the truck body.

The inside of the utility truck body will accommodate 4 ft. x 8 ft. sheets of plywood, drywall or OSB. And still has storage areas on the sides.

Utility truck beds come with or without roofs. Roofs allow materials and large tools to remain dry and secure. Traditional pick up truck beds are open to the elements and to those who would steal your tools and/or materials. With a traditional truck bed, you have to remove all your tools when you go to pick up materials. If you do not remove them, the tools will get crushed by the sheets of plywood or drywall.

Utility truck beds have secure tool compartments with adjustable shelves. These can be set up to accommodate your particular needs. Storage boxes that fit across the bed of your pick up are good, but they do not offer the flexibility and access that utility bodies do. Check them out the next time you are in the market for a new work truck.

Gravity Furnaces

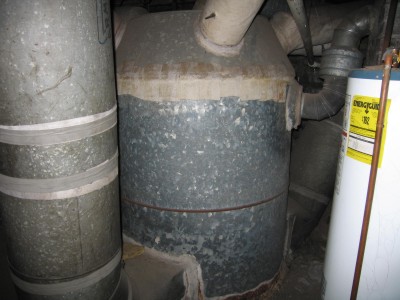
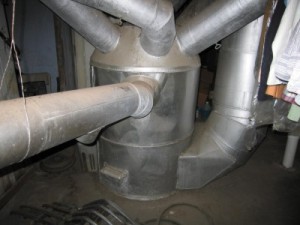
DEAR TIM: We are looking to buy an older house that has a very unusual furnace. The home inspector calls it a gravity furnace, but I think it looks more like an octopus with these large pipes that protrude out like tentacles from the top of the large, round furnace. There is also some white coarse paper wrapped around the pipes, and a 1-inch thick piece of white cardboard on top of the gravity furnace. Is this a good furnace, or should we negotiate for a new one? Stephanie T., Pittsburgh, PA

DEAR STEPHANIE: Gravity furnaces are a nearly extinct species. They date back to the late 1800's and early 1900's. The large, round furnaces were almost always designed to burn coal, however many came from the factory equipped to burn wood, oil or natural gas. In fact, it was very common to see these furnaces converted from one fuel source to another. The first house my wife and I owned had a coal gravity furnace that had been switched over to natural gas at some point. As best as I could figure, this furnace was originally installed in the early 1920's. It was still working perfectly in 1975 when I turned it on.

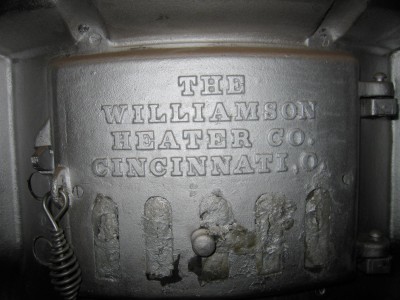
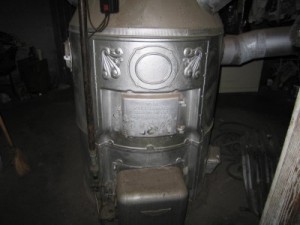
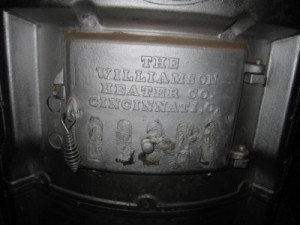
This ancient gravity furnace is still in perfect working order. It wastes enormous amounts of energy, but it still heats the home! The large cast-iron door is where coal would be fed into the furnace. PHOTO CREDIT: Tony White

This ancient gravity furnace is still in perfect working order. It wastes enormous amounts of energy, but it still heats the home! The large cast-iron door is where coal would be fed into the furnace. PHOTO CREDIT: Tony White

The furnaces worked by gravity. The most basic ones only had a few moving parts, and those were usually the doors you opened to insert fuel or remove ashes or cinders. As the furnaces got hot, they heated the air around the core of the furnace's combustion chamber. This air floated up through the large pipes into the house. Gravity pulled down the heavier cold air into the base of the furnace. A slow-motion conveyor belt of air constantly flowed through the furnace as long as fuel was burning inside and residual heat remained in the metal parts after the fuel was exhausted.

The heating ducts where the warm air floated up into the rooms were often installed in the wrong locations. My guess is you might find register covers on inside rooms near the central core of the house. Modern forced-air heating/cooling technology has supply ducts and registers located on exterior walls of homes. This placement allows the conditioned air to wash across the wall surface that is either cold in the winter or hot in the summer.

Modern return air ducts should be located in each room on the wall opposite the exterior wall. This allows the conditioned air to be pulled across the room providing even heating or cooling.

The cold air usually entered the furnace through a giant duct often found in the floor or at the bas of a flight of steps that led to the second floor. The gravity furnaces themselves were often located in the basement of a home which helped supply them with cooler air. The basement location also aided the loading of wood or coal through chutes that were at grade level outdoors. Gravity would make it easier to get the fuel down into the storage area near the furnace.

These gravity furnaces were horribly inefficient. I do not have access to actual numbers, but my guess would be that 50 percent or more of the heat generated by the burning fuel went up the chimney. Compare that to today's super-efficient furnaces that often extract 95 percent of the heat from fuel, and you can see why it might be a great idea for you to replace the large gravity beast, even if it still works.

The white wrapping around the pipes is almost certainly asbestos. It was commonly used as an insulator and fireproofing material on gravity furnaces. It is a very dangerous and toxic material. The fibers in the asbestos are known carcinogens. The thick, white cardboard product is probably pure asbestos. It is acting as a shield that keeps the intense heat of the burning fuel inside the furnace. Do not touch or disturb this cardboard or the wrapping around the pipes.

If you decide to purchase this home, I would recommend that you negotiate the removal of the furnace, the proper installation of new ductwork and expert removal of the asbestos by a certified asbestos remediation company. Do not underestimate the seriousness of the asbestos issue. Be sure your realtor includes language in your written offer that ensures a certified asbestos removal company will get rid of the toxic material.

That off-white wrap on the top of the furnace and the pipes is asbestos! It used to be applied damp much like the old plaster-of-Paris casts on broken arms and legs. If you see white wrapping like this on your ducts do NOT disturb it. PHOTO CREDIT: Tony White

That off-white wrap on the top of the furnace and the pipes is asbestos! It used to be applied damp much like the old plaster-of-Paris casts on broken arms and legs. If you see white wrapping like this on your ducts do NOT disturb it. PHOTO CREDIT: Tony White

 Keep in mind that just removing the old gravity furnace is not enough. The ductwork within the walls is almost certainly oversized for each room, and it is in the wrong location. If you want your home to be comfortable, you will need to have new ductwork extended to each room and similar return-air ducts installed to get air from each room back to the furnace. The giant return air duct on the first floor needs to be abandoned, and the floor patched if that is where it is located.

Asbestos facts and removal information can be found at the Environmental Protection Agency's Web site: http://www.epa.gov/asbestos/ . I urge you to read all of the information there and become highly educated about this topic.

There are ways to encapsulate the asbestos, and some companies may advise you about this. However since the furnace is so inefficient, the asbestos has to go out with the furnace. You need to make sure little or no asbestos is released into the air or on other surfaces in your home.

Talk to your realtor about making an offer to buy contingent upon getting several estimates for a new furnace, ductwork and the removal of the asbestos. Be sure the language indicates the purchase price will be reduced by an amount that allows you to hire professionals to do all of the work.

I want to give a huge thanks to Tony White for taking these photos. Tony is an appraiser in Cincinnati, OH and owns White Appraisal, Inc.


Author's Notes:

John Podolinsky, who works for the State of Montana in their DEQ/WUTMB/Asbestos Control Program, was kind enough to contact me after this column ran in the Great Falls Tribune:

"I enjoyed your article in the Great Falls Tribune newspaper on Saturday, September 15, 2007, on gravity furnaces and asbestos!!

It was a pleasure to read such an informative article on both subjects. Fortunately, I do not heat my house with a gravity furnace, but I do deal with asbestos on a daily basis.

In my line of business (asbestos regulatory), I witness much asbestos non-compliance based on ignorance. Your article will hopefully educate!

If you plan to provide additional asbestos information to your audience, especially those who live in Montana, feel free to refer to our website below or me.

Thanks again and keep up the great work,"

John Podolinsky
State of Montana
DEQ/WUTMB/Asbestos Control Program
1520 East 6th Avenue
P.O. Box 200901
Helena, MT 59620-0901
www.deq.mt.gov/Asbestos/index.asp

Column 689