Aluminum Screen Enclosure Manufacturers

Aluminum Screened Enclosure Manufacturers

The following is a listing of manufacturers of storm and screen enclosures. You will undoubtedly find that most of these companies have a local distributor in your town. If not, check your Yellow Pages under "Screens".

Pay particular attention to how these companies intend to connect the structure to your house. Ask about the strength of the roof. Most companies offer a low slope flat roof. If you live in an area of heavy snow, collapse is a possibility.

Be sure the company includes a building permit in the cost of the deal. Make sure they obtain the permit before the job starts.

  • AAA Aluminum Products Ltd.

  • Admiral Sunroom Corporation
  • Americana Building Products

  • Armaclad

  • Artistic Enclosures, Inc.
  • Cardiff Industries, Inc.
  • Carolina Solar Structures
  • Craft-Bilt Manufacturing Company
  • Dura-Bilt

  • Four Seasons Sunrooms

  • Gorell Windows & Doors
  • Hartford Conservatories
  • Harvey Industries
  • Joyce Manufacturing Company
  • Mason Corporation
  • Metals USA Building Products
  • Patio Enclosures, Inc.

  • Screen Tight

  • Sunbilt Solar Products
  • Sundance Supply
  • Sunporch Structures
  • Thermal Industries, Inc.
  • Thermal-Gard, Inc.
  • Vixen Hill Cedar Products

Column B136

Basement & Unfinished Space – Finishing / Construction Tips

Construction Tips for Unfinished Spaces

Uneven Concrete Floors

Some people with basements have floors that slope steeply for drainage purposes. There are two ways to deal with this: pour a thin concrete overlay (see Bulletin 379 - Concrete Overlays Installation), or build a wood floor over the concrete. The wood floor system can be tough. You need to determine the highest point in the floor system and work backwards from there. I always use a transit to establish this high point and then translate that point to the side walls. I then install CCA treated lumber 2x4s around the perimeter of the room. The wide face of the 2x4 touches the floor. This allows you to stretch mason's string tightly between the members to get a smooth plane out in the rest of the floor. You install the rest of the treated 2x4s with shims beneath them for support. Place the shims at 16 inch centers. I then stretch a high quality vapor barrier (see Bulletin 109 - High Performance Vapor Barriers) on top of the 2x4's before installing the subfloor plywood.

Be sure to provide access to any floor drains! These drains will need to stay functional in case of basement flooding. Also, you will periodically have to pour water in them to prevent sewer gas from building up.

Walls - Build in Place or Tilt Up

The walls for this project can be build in one of several ways. If you choose to build them in place, you install the bottom plate first, then the top plate, then fill in the wall studs. I like to use 2 x4's for the walls. This provides plenty of space for insulation, wiring, full depth electrical boxes, and plumbing pipes. Furring strips limit the amount of insulation you can install. They also limit your ability to easily wire a space.

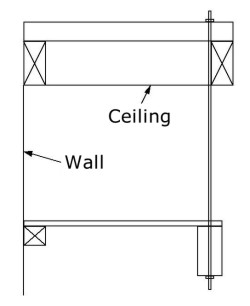
Don't assume that foundation walls are straight and plumb. They are usually not! Check to see if the walls lean in or out. They can do both on the same wall! I hold my walls away from the masonry walls at least one half inch. I don't like to see untreated lumber touch masonry. This also gives you room to account for crowned studs and masonry wall movement.

If your walls are to be attached directly to concrete floors, this can be done without expensive anchors. Use a hammer drill with a 1/4 inch bit. Drill through the wall plate and into the concrete about 2 inches. Then take two 16d sinker nails and nail them into the hole in the plate at the same time side by side. If you use a 20 oz. hammer and hit them straight, they will go in readily. It is virtually impossible to pull the nails out! Just anchor the bottom plate every 4 to 6 feet.

The top plate position is determined by dropping a plumb bob to the edge of the bottom plate. Transfer the bottom plate location to the joists above or to blocking pieces should the ceiling joists run parallel with the wall. Cut and install the top plate. Fill in the studs at 16 inch centers.

If you decide to build the walls on the floor and tilt them up, make sure they are 3/4 inch less in height than the space they are to fill. If you build them full height they will get stuck as you tilt! Use blocking at the top to fill the gap once in position.

Always try to line up wall studs with floor joists above! This will make it easier to run plumbing pipes and heating ducts.

Mechanical Systems HVAC, Plumbing, Electric

HVAC: This work goes first. Ductwork is cumbersome. Think of plumbing at the same time. Basement spaces usually require minimal heating and cooling unless you space has a walk out wall(s) which is totally exposed to the elements. Remember, locate supply ducts near outside walls. Install return air ducts on interior walls away from the supply ducts. The idea is to 'draw' air across the room.

Plumbing: Now is the time to upgrade plumbing to other parts of the house. It will be messy to do it 2 years from now! PVC drain stacks will be noisy. If these are present in your existing space they will need to be wrapped with insulation to minimize sound transmission. Cold water lines may need to be insulated if you have had problems in the past with condensation. Condensation can drip onto your new ceiling.

Electric: All electric work has to be done per the National Electric Code. If you don't know how to do this, get an electrician who does! People die every week in the USA from electrical related house fires. Calculate loads to make sure you have enough circuits! Remember a 14 gauge wire is only rated for 15 amps or 1,800 watts. A 12 gauge wire can handle 2,400 watts or 20 amps. Think.... if you put in 10 recessed ceiling lights each with a 75 watt bulb, you have already taken up nearly half the capacity of a single 15 amp circuit! Appliances, hot glue guns for hobby rooms, etc. all take their toll on circuitry. Make a list of what you intend to have and calculate the loads from this list.

Insulation / Vapor Barriers

Insulation is a must. If you chose 2x4 walls, you will be able to install batt insulation. You can use unfaced insulation if you installed the vapor barrier already. If not, you may want to use foil faced insulation. The foil facing should be visible from the room side.

Drywall / Paneling / Artificial Stone .......

Wall surfaces are next. Choose the one which will give you the most flexibility. For me it is drywall. It can always be the base for a future material such as paneling or artificial stone.

Ceilings - Think of the Future .......!

If you have ever tried to fish a wire in a basement that had a finish plaster ceiling, I know what type of ceiling you would install! Before you rule out acoustical tile as being "too commercial", you had better go look at some. There is a wide variety of styles, grid, etc. You can also mix and match ceilings. Create a tray or soffit perimeter around the room. Fill the center with acoustical tile. This way you can access a huge area of the ceiling. This will come in handy in the future - trust me on this one.

Flooring - Think Floods .....

My inlaws have a finished basement. It has flooded at least 5 times in the past 10 years. After the second wall to wall carpet was thrown away, they finally switched to area rugs. Vinyl tile has come a long way. Colors and patterns are attractive. Give it a serious look. Beware of hardwood flooring in basements. The Hardwood Associations CAUTION against its use below grade in even historically dry basements. Don't tempt fate. Mother Nature always bats last.

Finishing Materials - Options

Rough Construction Materials

Want perfectly straight walls? If so, steel studs may be your cup of tea. You can insert 6 inch high pieces of 2x4 in them at top and bottom to secure baseboard and crown moldings. This allows you to use nails for your trim instead of screws.

If you are worried about wet floors for some reason, you can buy treated plywood! Most people don't realize this. It is perfect if you are concerned about insect infestation as well.

Thinking about using 2x3 walls for some situations? Well, if doors or plumbing lines are in these walls you may have problems. Remember, standard door jambs are milled thinking that you will use 2x4s with 1/2 inch drywall on each side.

Are you worried about sound? If so, think cast iron for plumbing drainage stacks. Vent pipes can be PVC. Seal all holes and void spaces that go to other rooms or floors. These are conduits for noise transmission. If you decide to drywall the entire ceiling in your new room, you can install a fiberboard first and then the drywall. This will do a decent job of soundproofing.

Electrical and Communications Wiring

Now is the time to think ahead for the future. Not only should you think of this new space, but other rooms in your house as well. Does this new space cut off the rest of the house from the main electrical panel or telephone or cable TV termination points? If so, add wiring now to other points within the house or attic for future use. Or, at the very least, install several conduits through which wires can be added at a later date.

Never install telephone or cable TV wires in the same holes or in line with 120 volt electric lines. Power going through the high voltage lines can sometimes create an interference in the low voltage lines. Always run low voltage wiring AFTER high voltage wiring. The high voltage wire can withstand more abuse than low voltage wiring. Don't forget about security or alarm system wiring. Drill separate holes!

Fire Sprinklers - Sounds Crazy but ...

Now is the time to install a fire sprinkler head or two in the new room. There are fancy pop down heads that fit flush with the ceiling until activated by rising temperatures.

Hobby or Craft Work Stations

Do you have room to create a hobby or craft space? If so, the wall outlets should be 42 inches off the floor. Create a space to sit at the counter top with a bar stool by leaving out a cabinet or two along the wall. I plan to do that in my basement remodel. Use standard stock wall cabinets above the countertop to store supplies.

Unique Wall Finish

Want to create a unique look? How about finishing off one wall with artificial stone? You can do an entire room and create a medieval castle hall! Let your imagination run wild. If the room is to be for children, why not install fiberboard covered with fabric? It can be a giant bulletin board using colored push pins. Use this same wall treatment if you have a dartboard planned.

Create walls that are art galleries for your children's school pictures and projects. This will add color to the space. The walls will change monthly as more drawings are brought home.

Column B152

Basement – Finishing / RemodelingTips

Some of my earliest remodeling jobs were basement finishes. Here in the Midwest, basements are very common. People finish them at a later date as families grow or space requirements change. For example, I am currently writing this bulletin in my basement office! Two years ago, this space was a dim basement area. It was transformed with a minimal amount of effort. If you have a basement or other unfinished space, you might be able to tackle this project.

Code Problems

Guess what? That basement of yours may not be 'legal' once finished. Many building codes place ceiling height, egress, waterproofing, etc. restrictions on basements. If you intend to secure a building permit for your project, you had better spend some time researching the local code in your area. You may find a surprise or two.

Waterproofing is a good example. Here in Cincinnati, you can build a home and not waterproof the exterior of the basement walls. Damproofing (sprayed liquid asphalt) will suffice. But, if you want to finish the basement a year after you move in, you must waterproof the walls! Fortunately there is a brush on cementitious compound which will meet the code. What happens if you wait until after your walls are up in your basement before you find this out? See why an afternoon at the building department might be worthwhile.

Plan for Future Needs

I know someone who once finished his basement. He was a true weekend warrior who lived on the lunatic fringe. Well, he had a full sized freezer in the basement. He left the freezer in an unfinished portion of the basement. The doorway he used to access this room was a standard 30 inch wide door. Too bad the freezer was 34 inches wide....

Think about furnaces, hot water heaters, desks, sofas, etc. You may have to install a 3 foot or a 2 foot 10 inch door to make movement between spaces possible. Planning ahead is everything.

Lighting - A Critical Issue

Basement or attic spaces often require special lighting solutions. Windows are often small or non-existent. If you can include a combination of indirect and direct lighting you should be in good shape. Some ceiling designs will allow you to install hidden fluorescent lighting which bounces off a drywall soffit or trayed ceiling. Use fixtures with electronic ballasts to save energy and money. You can also purchase light bulbs which produce more natural skin tones. Don't use the old standby cool or warm white bulbs.

Plan your lighting for special purpose areas such as billiard, ping pong or other game tables. A dart board setup may require a single track light that directs a beam of light to the board and not a glare in the eye of the dart thrower. All these subtle touches are what distinguish an average remodel job from one that is exquisite. Take the time and raise the bar of excellence on your job! Your friends, neighbors, and relatives will compliment you, trust me!

Built-ins, Bookcases, & Bars

Did you know you can order some standard kitchen cabinets unfinished? Install some quickly assembled shelves on top, paint, and you might have a great storage/bookcase area. With recessed lighting above, the look will be dramatic. The countertop for this area can be a modern plastic laminate that resembles leather, granite, or marble. Order the top without a backslash and build the shelves right on top of the counter.

Some people like to include a wet bar in their finished basement. I have done it no less than 50 times. These areas often require special planning to fully optimize the limited space.

Free standing bar walls often need to be secured to the cabinets beneath to eliminate wobble. To obtain a perfect bar height and design, you should take a tape measure with you to your favorite hangout. See what bar height and width is most comfortable. Don't simply guess. It could end up a disaster.

Try to plan for a mid-sized sink if possible. Those cute little 10 inch by 10 inch bar sinks are only good to fill a glass of water! Certain sink manufacturers make a mid-sized single bowl sink that works very well for bar applications. Standard double bowl kitchen sinks often overpower a basement bar. Visit a kitchen cabinet showroom for additional ideas.

Column B152

Room Additions

Room Additions

They come in all sorts of shapes and sizes. In fact, they are much like people. Room additions can be plain and simple or exceptionally extravagant. I have built small room additions - less than 80 square feet and I have built ones that came close to 2,400 square feet. I'm sure you have seen a variety of room additions yourself. They are as different as snowflakes.

A Huge Undertaking

Constructing a room addition is really the same thing as building a small house. The only problem is that it is much harder. The connection details are tough. Working around people and finished surfaces requires extra care. Dust and utility (electric - plumbing) interruptions must be kept to a minimum. There are many things you have to consider with room additions that never are an issue when you build a new home from scratch. Basically, room additions are a pain in the you-know-what.

The Right Height

One of the most crucial aspects of room additions is making sure the floors meet. I can't tell you how many room additions I have visited where the floors do not line up. There is a hump or a dip. The mistake can usually be traced to a failure of not calculating the foundation height from the point where the "break-through" or "connection" will be. All too often, the contractor will calculate the floor height at a corner or some other obscure point.

The trick is to cut a hole through the side of the existing house exactly where the archway or doorway will be that connects the two rooms. Cut a hole and remove all the exterior wall materials until you can actually see the subfloor or finished floor material inside the house. From here you can then calculate where your top of foundation will be. I always draw a picture and back calculate down to the top of the new foundation.

For example, I determine the thickness of my new finished flooring, the thickness of the subflooring, the floor joist height, the treated lumber foundation sill thickness, and the 1/8 inch for the foam sill sealer! It all adds up.

Wall Heights and Roofs

Do you want the roof line, overhang, gutter board, soffits etc. to match perfectly on the outside? It takes some work for this to happen. For these elements to match, you need to take apart the exterior of upper wall treatments to "see" where the actual finished wall ends and the bottom of the rafters begin.

To make a roof line up you must determine the existing roof pitch, the heel height of the rafters as they pass over the outer edge of the rough building line frame, and the rough overhang depth. It is important to keep in mind the exterior wall treatment of the room addition. If you are not going to match the addition to the existing house, then you must treat the exterior finished walls as the same material. Confused yet? See, I told you building room additions was not for the fainthearted!

Crawl Space Ventilation

A large majority of room additions have crawl spaces. To eliminate moisture problems and dampness, you need to cover the soil in the crawl space with a high performance vapor barrier. I have discussed these in a past column and Builder Bulletin. The clear 6 mil poly you were thinking of using is not high performance! Visit my website for this information.

Heating and Cooling

Are you thinking of simply extending your heating and cooling system into the room addition? Think again! If your original furnace and air conditioner were sized accurately for the original house, I doubt they will provide enough "conditioned" air for the new addition. If you are adding several hundred feet of new floor area, you can count on a significant upgrade of your heating and cooling system. You don't believe me? Then make sure the heating and air conditioning person does a new heat gain and heat loss calculation!

Room additions are a lot of work. Don't underestimate the complexity of this job!

Related Articles:  DIY Room Addition in 7 Weeks, Room Addition Task Timing, Room Addition

Column B220

Room Additions – Construction Task Timing

Estimated Time To Complete Specific Tasks

The following is a listing of many planning and construction aspects that are involved in the construction of a typical room addition. If you plan to tackle a room addition project you will be involved in virtually all of the following tasks in one way or another.

I've taken the liberty to group some tasks together and others are broken down into sub groups. There are actually hundreds of individual "things" that have to be done.

Average Times

I researched my past records and averaged the times. Not all room additions are alike. The times shown below are for a 400 square foot single story addition with moderate access.

CLICK HERE to get FREE & FAST BIDS from local contractors who build room additions.

This means materials have to be hand carried from the front of the house to the rear. The below estimations also include a close approximation of the man/woman hours it may take to complete the listed task.

First Timers

If you plan to do things for the first time, be sure to add additional time. Your room addition project may not include some of the listed tasks. If it doesn't, be sure to substitute things that may take the place of a listed task. You will be surprised how time seems to disappear each day.

The numbers also include the amount of time it takes to estimate, order, pickup, transport, and unload the necessary materials. This running time can be enormous.

CLICK HERE to get FREE & FAST BIDS from local contractors who build room additions.

Estimated Time To Complete Specific Tasks


Planning - All Aspects
80 Hours
Building Permit
6 Hours
Survey/Stakeout
8 Hours
Site Clearing
12 Hours
Excavation
24 Hours
Footings/Foundations
40 Hours
Footing Drain Tile & 1" Gravel Cover
8 Hours
Downspout Drainage System
12 Hours
Termite Control
4 Hours
Structural Steel
6 Hours
Rough Grading
14 Hours
Excess Dirt Off-site Removal
12 Hours
Gravel
12 Hours
Interior Concrete Slabs
16 Hours
Demolition
40 Hours
Asbestos Removal
12 Hours
Lead Abatement
12 Hours
Rough Carpentry
80 Hours
Backhoe Work
12 Hours
Roofing
20 Hours
Heating/Ventilating/Air Conditioning
40 Hours
Plumbing
40 Hours
Electric
36 Hours
Phone/Computer/Cable TV Wiring
12 Hours
Security/Fire Alarm Wiring
8 Hours
Insulation
12 Hours
Drywall/Plastering
40 Hours
Windows
16 Hours
Exterior Doors
8 Hours
Exterior Carpentry
24 Hours
Masonry (Brickwork, Stonework, etc.)
36 Hours
Stucco
40 Hours
Vinyl Siding/Trim
24 Hours
Gutters/Downspouts
12 Hours
Exterior Painting/Staining
24 Hours
Exterior Sidewalks/Patios
24 Hours
Interior Trim
24 Hours
Interior Doors
12 Hours
Built-in Cabinetry
16 Hours
Interior Painting
50 Hours
Wall Coverings
16 Hours
Hardwood Flooring
32 Hours
Carpeting
16 Hours
Linoleum/Vinyl Tile
10 Hours
Ceramic Tile
24 Hours
Kitchen Cabinets
24 Hours
Bath Cabinets
4 Hours
Kitchen Counter Tops
4 Hours
Bath Counter Tops
2 Hours
Laundry Room Cabinets & Tops
6 Hours
Appliances
8 Hours
Plumbing Fixtures/Fans
12 Hours
Lighting Fixtures/Fans
12 Hours
Mirrors
6 Hours
Hardware
10 Hours
Miscellaneous Fixtures
8 Hours
Specialty Shelving
6 Hours
Miscellaneous Allowance Items
12 Hours
Garage Doors & Openers
12 Hours
Driveway Apron (cleaning)
8 Hours
Driveway (restoration from trucks)
16 Hours
Final Grading
8 Hours
Landscaping
12 Hours
Debris Removal/Dumpster Fees
30 Hours
Construction Utilities
8 Hours
Final Cleaning
12 Hours
Weather Delays
24 Hours
Mistakes/Problems
32 Hours
Mistakes/Problems
32 Hours
Tool Rental
12 Hours
Phone Ordering
16 Hours

Thinking Time

Don't forget to include "thinking" time. What is this? This is when you will stop all work and scratch your head wondering if you are doing something right.

It happens on all jobs. Sometimes it may take an hour or two to determine the best way to solve a problem. This isn't wasted time, just "thought" time!

CLICK HERE to get FREE & FAST BIDS from local contractors who build room additions.

Related Articles:  DIY Room Addition in 7 Weeks, Room Additions, Room Addition

Column B220

Clog Free Vent Pipes

Clog Free Vent Pipes

Dear Tim: We have a bizarre problem that nobody understands. They pump the sewers in our street with some contraption called a VAC. Each time they do this I get water bubbling out of my toilets and a terrible sewer smell. Nobody including public works can explain why this is happening.

The only toilet not affected is one in the basement that is on its own pump. The worst toilet is on my first floor. They advised me to put Saran wrap on my toilets. The suction is so great it pulls the Saran off the toilet. If you can shed light on this problem I will be forever grateful. The house was built in 1927 and the bathrooms have all been updated. Thank you. Laura, New Jersey

Dear Laura: I know exactly what is happening. The vent pipes for your plumbing system that extend through the roof are clogged or almost completely clogged. Another possible answer is any number of fixtures in your house are not vented properly.

When that vacuum truck is sucking out debris from the sewer line, any sewer tap between the vacuum and the sewer clog is subject to enormous suction forces. If the plumbing vent pipe is wide open, it can supply the needed air to satisfy the vacuum truck. But if your vent pipes are clogged or are not letting in enough air, the vacuum suctions out the water from the traps in all or several fixtures. Once this happens, the water seal is broken and sewer gas can enter the house.

Place a garden hose up in the vent pipes of your roof and turn the hoses on. Have someone help you inspect the inside of the house for leaks as the water is running. Vent pipe joints can leak in rare instances and it is possible for a vent pipe to crack. If the vent pipe is in good working order, the hose water will run forever without overflowing on the roof and there will be NO LEAKS indoors.

Author's Note: We've received other emails with similar problems or questions. Here's one from Brian R. of Dearborn Heights, MI, regarding a clogged vent pipe.

"Bathroom sink drains really slow. Pipes are clear. Professional snaked. All types of cleaners. This sink will just not drain properly. I hear gurgles in the pipes when the shower is on or draining so I am thinking its a vent problem. How do I know if it is a vent problem and if not, how do I figure out what the problem is?"

Column QA

Watch this video to see how Tim SOLVED a problem in minutes!

Bath Remodeling

Can you imagine what life was like just 100 years ago? There were still many houses that didn't have real indoor plumbing and most definitely multiple bathrooms. I know this for a fact because I purchased a 10 unit apartment building just 15 years ago that still had hallway toilets shared by two apartments!

If you do research about plumbing and plumbers, you will quickly find out that approximately 100 to 125 years ago plumbers were considered as knowledgeable and revered as medical doctors. Plumbers were responsible for maintaining public health by minimizing the spread of disease. They achieved this by implementing innovative changes in how people got clean drinking water and disposed of both grey and black waste water. Bathrooms were part of this radical change in how people lived. To say the very least, bathrooms are very much taken for granted in today's world. If you are fortunate and have a very elderly relative, ask them what it was like when they were a kid!

Tight Schedules

I have remodeled many a bathroom in my day. It is a stressful job for all involved. If the family doesn't have alternative bathroom facilities in the house, you often have to create temporary ones, even if that means a Portolet in the driveway! Creating a temporary shower in a garage or basement is easy. It is the toilet that causes problems.

I have turned a bathroom around in as little as five days This was a total gut job and it took every bit of skill and planning to make the job happen that fast. I am sure it can be done faster, but much of the work I did myself with one helper. Heck, I have seen entire homes built in a day, so I am sure a group of real pros can do a bathroom from start to finish in 12 hours or less!

Paying a Pro

If you are going to have your bathroom remodeled, you might want to pay attention to how the contractor gets paid. One of the biggest problems I see, based upon stories told to me by folks like you, is that people tend to pay the contractor in advance for work yet to be performed.

Read the following language I have extracted from one of my handy Checklist products. See if it doesn't make sense to you:

"Excessive advance or periodic payments before or during the work is completed often put a homeowner at risk. The homeowner basically becomes a lender. This is especially true if the job does not require any special or custom ordered materials at the beginning of the job. A fair payment schedule is one that allows the homeowner to pay only for labor and material that has been completed in a satisfactory manner. Periodic payments can occur every three to four days for small jobs or each week or month for large jobs. On large jobs, the amount of money paid out at any given time should not exceed the total sum of the items listed in the above cost breakdown plus a proportionate amount of contractors overhead and profit for completed in-place work. A homeowner should not have to pay full price for work that is unsatisfactory or incomplete. Do you agree with this philosophy? Yes _____ No ____ If "Yes", please complete the Payment Schedule below:"

I think you get the point. Protect yourself by making sure you always have enough money to finish the job in case the contractor disappears.

Permitted Payments

Some jobs do require some advance payments. Perhaps your bathroom job will have custom-ordered cabinets, tops, plumbing fixtures, tile, marble, granite, etc. It is unfair for the remodeler to advance his own money to pay for these materials or to pay for the required good faith payment the fabricators request. If you feel uncomfortable giving the money to the contractor, ask if you can make the check a two party check or even pay the fabricator directly. If you need to do this, it is a danger signal - meaning the bridge of trust between you and the contractor is not yet complete. Trust is important in every relationship, especially building and remodeling!

Column B287

Bathrooms – 25 Construction Tips

25 Must-Do Bathroom Construction Tips

1. Plans - If you are fortunate and are in the design phase of building or remodeling, consider making your bathroom a little bigger. You would be surprised what an extra foot in width and length will do for you.

2. Framing - Bathrooms need studs at weird places. And they also need studs to be out of the way of critical elements. Place double studs at the centerline of a shower door frame or track. Place the CENTER of a wall stud cavity at the centerline of the tub and shower faucet. Frame recessed medicine cabinets at the right height.

3. Blocking - Don't throw scrap framing material away. You can use it to create solid fastening locations for towel bars, toilet paper holders and grab bars in bath and shower areas.

4. Quiet Piping - If your bathroom is going to be on a second floor, consider using quiet cast iron drain pipes. Plastic drain lines are very noisy. Save the plastic for the vent lines.

5. Water Flow - Do you want a high volume of water to flow from all fixtures? Make sure that you extend 3/4 inch diameter hot and cold piping to the bathroom and branch off this size pipe with 1/2 inch lines to serve each feature.

6. Hot Water NOW! - Tired of waiting for hot water? Install a hot water recirculating loop. If this is a major remodel or a new house, it is simple. See my website for this past column and bulletin!

7. Ventilation - Bathroom fans need to be sized to the room. Make sure you buy a powerful fan and use solid metal exhaust piping, NOT flexible plastic pipe!

8. Skylights - If you can work one in do it. Make sure it has a ventilation flap you can open to minimize condensation or get hot moist air to flow outdoors. Buy the most expensive soft coat Low-E glass you can for this unit.

9. Electric - If this is a remodel job, by all means extend a new 20 amp circuit to the bathroom for a new GFCI receptacle. Hair dryers, electric curlers, etc. need power and lots of it.

10. Indirect Lighting - Think out of the box if you want dramatic lighting in your bathroom.

11. Cement Board - Forget about using water resistant drywall behind tile. If you want the tile to stay up forever, you must use cement board.

12. Vapor Barriers - Vapor barriers in the walls of a bathroom are a must. Be sure you install at least 4 mil plastic.

13. Steam - Now is the time to consider a steam generation unit. They must be installed right!

14. Sound - Some people get up before others. Insulate the walls of the bathroom with sound batts to minimize noise transmission to other parts of the house.

15. Access - Old houses often had access panels for tubs. Try to do the same so you can get to all of the tub plumbing.

16. Toilet Space - Create a space at least 36 inches wide for your toilet. Who wants to bump elbows into cabinets and walls?

17. Shower Shelves - If you are doing tile in your shower, you can get nice marble corner or end wall shelves for shampoo and other body care products.

18. Multiple Shower Heads - On more than one occasion, I have installed multiple faucets or shower heads in bathrooms. The big faucet companies have expensive faucets and body washing systems if you just won the lottery.

19. Heated Towel Bars - Need I say more?

20. Heated Tile Floors - You can buy electric mats that are installed under ceramic floors to keep them warm.

21. Tall People - Most vanities are short. Consider installing kitchen sized cabinets to prevent stooping.

22. Laundry Chute - Now is the time to do it, if you can make it work.

23. Heat Lamp - For those of you who want to be cozy after a shower.

24. Storage - Install a wall cabinet over the toilet!

25. Mirrors - They make small rooms seem big.

Column B287

Save Energy Costs – Radiant Barrier Foil Chips & Tips

Cash is king when it comes to saving money on your utility bills. Once you make an improvement that lowers your energy usage, compare it to making a deposit in your savings account. Over time, the amount of money can be significant if you choose to do the right improvements.

Fluctuations in Price

Real savings start to happen when energy costs begin to soar. Remember that energy costs are closely tied to supply and demand. Abnormal weather can cause demand to soar. A refinery explosion or fire can limit supply. All sorts of things can easily affect the price of energy.

Save Big with Big Changes

If you want to save big money, you need to do several big things around your home or lots of little things that add up to a big savings. Replacing a 35 year old furnace with a newer 90+ percent furnace is a big thing. If you live where you use lots of air conditioning, you can save big if you install a 14 or 16 SEER air conditioner in place of your 15 or 20 year old 6 or 8 SEER unit.

On the contrary, if you were to just install two compact fluorescent light bulbs, you probably will see no savings on your electric bill. But change out all of your bulbs and you will see a difference.

Attic insulation upgrades are always a money saver. Sealing large air leaks is also very helpful. If your heating/cooling ducts are in an attic space, inspect them to see if any pipes are disconnected, joints are leaking air, or the insulation around the pipes is minimal. You want this ductwork to be insulated and sealed so that your heating and cooling dollars end up inside your home instead of inside your attic space.

The Radiant Chips

Last year, an Arizona company installed small foil chips in my attic. I can tell you they work. We have had a mild winter but I can feel that the second floor of my home is warmer and the furnace does not seem to come on as frequently as it used to. I have not yet done a comparison of my utility bills. It is very complicated to do because you actually have to compare the number of heating degree days compared to last year. To do this, you need data from the National Weather Service Office in your area. It is free data, but it takes time to get it all together and study it. You just can't look at the fuel bills! If this winter is more mild than last year, AND the cost of natural gas is exactly the same, then you can see why without any changes the fuel bills should/would be lower. But fuel costs vary, temperatures vary, people might change the thermostat! All of these things need to be calculated to do a fair comparison.

The Radiant Chip Company

The company I worked with was Horizon Energy Systems, Inc. It is owned by a fellow named Brad Lindsay. You can go to his website and get all sorts of data on the radiant chips.

Radiant technology is not new. But, the chip concept is indeed revolutionary. Large sheet radiant products have been around for a long time. But, the manufacturers don't like you to know that once they become covered with dust, they lose lots of their effectiveness. Brad's radiant chips solve this problem. His machine broadcasts 6 or 7 layers of chips in the average attic. The upper layer of chips will get dust covered but the layers below still work. Talk to Brad about them.


Click here to watch a video on radiant barrier insulation.

Column B396

Garage Storage Solutions

Garage Storage Solutions
Shelf Building Tips

Just about every garage I go into is in some state of disarray, especially mine right now. My biggest problem is that I still have way too much construction leftovers in my garage from past jobs. I just can't seem to part with those leftover pieces of pipe, wood trim, and other goodies.... Whenever I get frustrated and throw things out, I usually develop a need for the discarded item within 168 hours....it never fails.

Wasted Space

Stop and think. The average garage is usually the largest room (aside from a basement) in any house. Builders neglect these rooms. Often they build the house and do nothing in the garage except maybe drywall it for firecode purposes. Rarely does a builder install a single shelf or 2x4 cleat to hang even a single rake or shovel. Homeowners move in and pile all of their "garage stuff" alongside the walls. The only storage space is the simple horizontal floor area alongside and in front of the cars.

Garage storage solutions begin by multiplying this "horizontal" space by a factor of 4 or more. This can be done in any number of ways. You can often purchase simple metal shelving units that you assemble. Or, you can choose to construct your own custom shelves from wood. If you decide to use a prefabricated metal unit, ALWAYS attach it near the top to the wall. This will prevent it from toppling over and hurting you, a loved one, or your automobiles.

Building New / Remodeling?

If you are fortunate to be building a new home with an attached garage or are remodeling an existing garage, you have a unique opportunity. All too often, standard garages are built too small. To obtain maximum storage space, a garage with a 16 foot wide door should have at least 5 feet available on either side of the garage door. This means the garage should have an interior side-to-side dimension of at least 26 feet. 28 feet would be even better if you can afford it. The front to back dimension is critical as well. If you have a long sport utility vehicle or a pick-up truck, you need a front-to-back interior dimension of at least 25 feet. Pickup trucks eat up 16 feet of space. If you leave just 1 foot between the garage door and the back bumper, you have 8 feet left to build your storage setup. This is plenty of space as you will end up with about 4 to 5 feet of space between the front bumper and the storage unit. Of course, if you have smaller vehicles, you get bonus space!

Want a really cool idea if you are building a new garage? Make sure the garage ceiling height is 13 feet or slightly greater. If you do this, you can actually build a loft over part of your cars! As long as you are 6 foot tall or less, you will be able to walk under and on top of the loft without hitting your head. You can actually pick up tremendous amounts of storage space with this idea. I guarantee you that my next garage will have a 14 foot high interior ceiling!

Don't Waste Space

Dead air space above stored objects is a waste. As you plan your storage shelves, try to segregate articles that are of similar height. For example, if you store paint cans, car motor oil, garden chemicals, etc. determine the height of the tallest bottle/can. Then allow just 1.5 inches above the tallest object for dead air space. Be sure to account for the thickness of the next shelf or you will end up with only an inch or less of dead space.

Moving Bins - Casters

A very handy idea for storage below waist level is to construct bins or boxes with no fronts that can readily move. You can do this by attaching simple casters to the bottom of these open boxes. When you need an article you can roll out the box rather then get on your hands and knees to retrieve the object. Be sure that the front or the back casters swivel so you can easily direct the bin back to its place.

Remember Erector Sets?

I have a certain amount of my existing shelves built using angle iron that have holes punched at regular intervals. This angle iron measures about 1 and 1/4 inches per leg. The holes are large enough for 3/8 inch bolts. You can use these angle irons to construct your own custom metal shelving. Plywood serves as an excellent shelving material between the standards. The angle irons remind me of the erector set toys I played with as a child. This angle iron can usually be found at electrical supply houses. It is very heavy duty and can only be cut with a hacksaw or a metal abrasive blade. However, for those who want rigid metal systems, I would give it a serious look.

Kitchen Cabinets

Some of the best storage compartments may be available for free! Do you know someone who is discarding older kitchen cabinets? If so, grab them up. The base cabinets can be modified to use as an excellent base for a workbench. Drawer base cabinets are ideal to store gloves, instruction manuals, rope, or other miscellaneous small items.

Wall cabinets, with their 12 inch standard depth, are ideal for storage along the side walls of a garage. You can often place these on a wall and have adequate room to walk along side a car without hitting your head on the cabinet.

Cabinets with doors make a great place to store balls or other sports equipment. Simply place a 4 inch high board across the front of each shelf to keep the balls from rolling onto the ground. A fresh coat of paint will make the exterior of the cabinets look new. Plus, you can store objects on top of the cabinets as well. Secure them to the walls with 3 inch screws.

Wall Shelf Illustration


The illustration to the left depicts just one way to create a shelf where head room and walking room beneath the shelf is critical. This is the case in most garages. You need to be able to walk freely under the shelf. Shelf brackets or outer support legs can't be allowed to get in the way. In this example you can see the ceiling joists (marked with X's) on the top side of the finished garage ceiling. A 2x4 block crosses over the joists to accept the 1/4 inch threaded rod. Nuts and washers are provided at each end to hold the shelf in place. They also allow you to easily level the shelf. The shelf itself consists of a 16 inch (or whatever you choose) wide piece of 1/2 or 5/8 inch plywood. A 2x2 cleat is fastened with screws against the wall at each wall stud location. A 2x3 on edge is used at the front edge of the shelf. This keeps the shelf from bowing under loads. The threaded rod simply passes through the middle of the 2x3 at approximately 4 or 6 foot centers.


Typical Garage Storage Layout Plan


Here is the most basic plan for a typical two car garage. The depth of the storage/workbench setup on the back wall should be a minimum of 24 inches. This allows you to extract 16 lineal feet of countertop or shelving from a standard 4 x 8 foot piece of plywood. The open shelves area to the left of the workbench can be for tall items such as fishing rods or other long objects. Shovels, rakes, brooms and other long handled yard tools can be stored attached to the side walls of the garage under the tall shelves. Ladders can be hung from the ceiling using those very cool bicycle hooks. Install the hooks directly into a ceiling joist or roof truss. Hang the ladders parallel to the storage unit/workbench just in front of the cars. Install extra lighting in the ceiling area very close to the front of the workbench and shelves. If you use fluorescent lights and live in a colder climate, you must get a special fixture so the bulbs are bright.

Column B160