Many people dread installing anything on concrete or concrete block walls. The same is sometimes true for drywall. Drywall is weak and failures are common, while concrete and concrete block can be difficult to drill. There seems to be no happy medium.
Anchors & Friction Fit
Just about every concrete anchor or anchoring system you choose works by employing friction. The object you are anchoring responds to the force of gravity - it wants to fall off the wall or get to a lower state of energy. The anchor works against this force.
The strength of the resistive force has many variables. Among them are the length of the anchor, the diameter of the anchor, its shape, the strength of the material in which the anchor is embedded, etc. You can see it is fairly complicated.
The size of an anchor is very important. The larger the shaft size of an anchor, the greater the amount of surface area of metal that anchor possesses. It can be significant! Take a 1/4 inch anchor as compared to a 1/2 inch anchor. The surface area of the 1/2 inch anchor available to grab is 100 percent greater than the 1/4 inch anchor.
A Multitude of Choices
There are tons of choices when it comes to anchors. You can use the old fashion lead shields, plastic tap in anchors, split bolts (a fat tipped blunt nail), stud anchors, sleeve anchors, concrete screws, etc.
Large cities have specialty stores that sell these high performance anchors. You can find some of these at high quality hardware stores, but your best selection will be at an anchor store. I recommend that you obtain a copy of the Business to Business Yellow Pages from your local phone company. This is THE book! You will almost always find these specialty companies under the FASTENERS heading.
Anchoring Tips - Methods
The ultimate strength of the anchor you install depends as much on the anchor you choose as it does the material in which you place the anchor. The concrete, concrete block, brick, mortar, wood, drywall, etc. must be sound for the anchor to perform at its highest design level.
What's more, it is important where the anchor is placed. If you place an anchor too close to an edge, the anchor can actually split the concrete, block or brick. I know, it has happened to me! The fastener manufacturers can provide you with excellent literature which tells you how close to an edge a particular anchor can be placed.
Corrosion
How long do you want that anchor to last? What kind of weather/ environment is the anchor exposed to? These are important questions, especially if the anchor is exposed to water, salt, sea water, etc. If the anchor fails because of rust, you could have a major problem. Often anchors are available in stainless steel versions that cost just a little more, but save you immense headaches in the future.
Dust Removal in Concrete
If you plan to anchor something in concrete, be sure to remove the dust from the holes you drill. Dust in the hole can actually act as a lubricant to a degree. It can interfere with the friction fit intended by the manufacturer. You can purchase a bulb type blower that has a nozzle. Squeezing the bulb directs a blast of air into the hole. You can also use a straw, but BE CAREFUL! Dust will immediately get into your face and eyes. Wear goggles or close your eyes while blowing into the straw.
In a Pinch?
Guess what really works well? Believe it or not, two 16 penny common sinker nails driven simultaneously into a 1/4 inch hole! I have used this technique for years to attach wall plates to concrete floors. You simply put the wall in place, drill right through the wood plate with a 6 inch long 1/4 inch hammer drill bit and into the concrete. Be sure that the bit penetrates two inches into the concrete.
You pull the drill out and hammer two 16d nails side by side into the hole. The nails bite ferociously into the concrete. Often it is impossible to extract them. It is an effective, inexpensive way to attach wood to concrete. Be sure to use a 20 oz. hammer when installing the nails!
Column B145


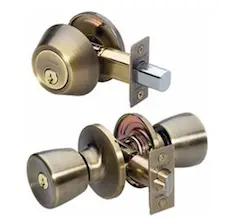 Locksets are used by each of us virtually everyday. They are one of those items that we constantly take for granted. Locksets provide us with convenience, privacy and security. However, many people do not realize that there is a wide range in features, quality, durability and function with respect to locksets. I believe this is due in part to the fact that we are exposed to locksets as children. They are those shiny knobs that are on every door. What could possibly be so difficult about locksets? Plenty!